Overview
This document overviews the sales document entry screen. It covers the creation and entering of quotes, orders, and invoices.
Note: Refer to the SalesPad Returns document for information on creating returns.
Finding and Opening an Existing Sales Document
Existing documents can be found and opened from the customer card on the sales documents tab (which displays sales documents for the open customer over a selected timeframe), or the open sales documents section on the customer card header.
Existing sales documents can also be opened from the sales document search module:
Select document types to search and enter any search criteria (or search with no criteria to display all sales documents in the system). Once search criteria is entered, click Search (or hit Enter).
If Match Beginning is selected under Search Options, the search results grid will only show results starting with the entered search criteria. If Match Beginning is not selected, the grid will display results that have search criteria in any part of the word.
Users can further filter results using the filter line (refer to: SalesPad Grids – Filtering and Customizing).
Click on a sales document number to open the document.
Printing/Faxing/Emailing from the Sales Document Search Screen
Users can print, email, or fax one or more highlighted sales documents on the search results grid using the Email and Fax buttons. Make sure the Selected Documents Only box is checked and use Ctrl+Click or Shift+Click to select multiple documents. Leave Selected Documents Only unchecked to print, fax, or email all documents in the search results grid.
Note: Multiple documents for the same customer can be printed as a single print job or emailed/faxed together using the “Print as Single Job” and “Email as Single Job” settings in the settings module. For more details, refer to SalesPad’s Emailing and Printing as a Single Job document.
- Highlight the documents to be printed (unless printing all) and then click Print.
- A pop-up box will appear, confirming that you want to print the specified number of documents.

- Click Yes. The print sales document report screen will appear, where print options and available reports can be selected.
- Select the appropriate report(s) to print
- Select an option (i.e. Preview, Print To, Quick Print) from the buttons at the bottom. Preview/options will appear upon selection.
Note: Because this module has the ability to print multiple documents from one screen, security specified by document in the Print Reports section will be ignored. The security-sub setting Bulk Reports will take priority.
Note: You must have valid email server setup to use this function.
If the customer’s Don’t Email box is checked (viewable from customer search), an email will not actually be sent. Before you click the Email button, make sure the shipping email or billing email is populated for the associated customer(s). If they are, go to step 1. If they are not, you can update them from each sales document, on the Addresses tab:
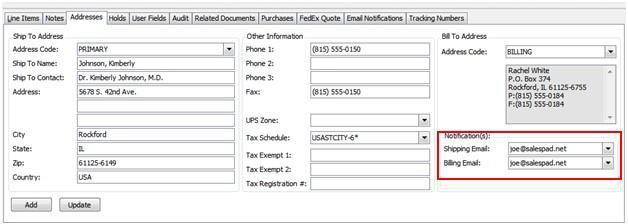
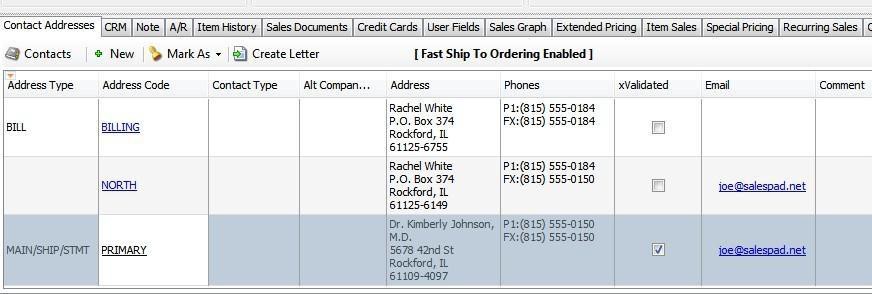
Or, to automatically populate the email values for new sales documents, you can fill them out on the customer card:
The sales document will pull the customer ship address email into the sales document shipping email and the customer bill address email into the sales document billing email. This will only automatically populate for new sales documents. All preexisting sales documents must be manually updated. The SalesPad settings Use Billing Email From Customer and Use Shipping Email From Customer will cause the email notifications fields on the sales document to be updated automatically.
Once email addresses are populated, you can email documents.
- Highlight the documents to be emailed and click Email. The following screen will appear:
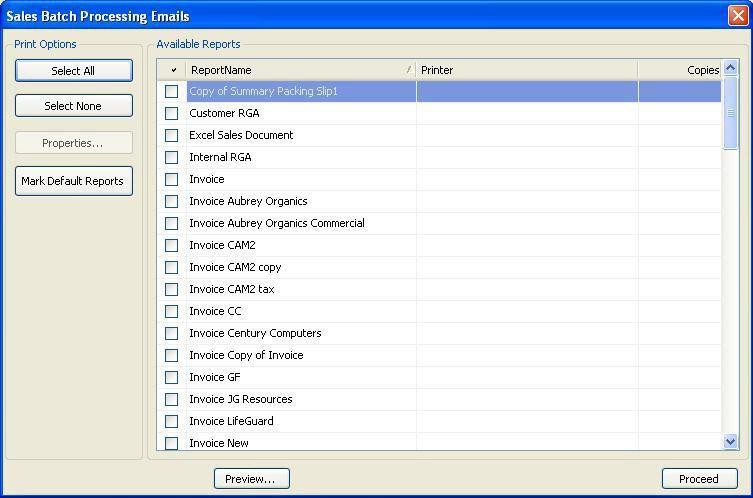
- Select the related report(s) you wish to email and click Proceed. The send bulk email screen will appear:
Note: If more than one document was selected, the preview will show only the template and not a populated version of the document.
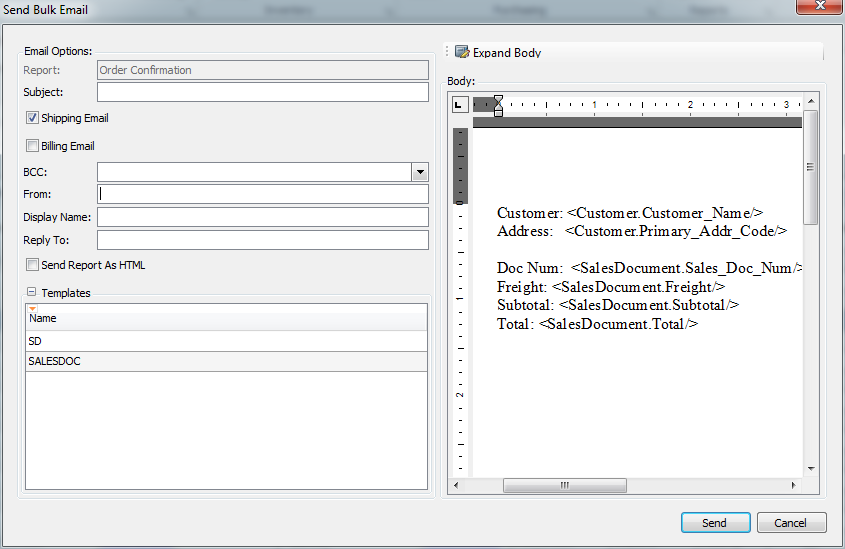
- Select whether to send to the shipping email or the billing email (from the customer card contact card) and fill in the other email options.
- Select a template for the email. A personal message can be added to the body.
- Click Send. The document(s) will be sent and a confirmation window will appear, which can be printed or closed.
Fax
Note: You must have valid email server setup to use this function. If the customer’s Don’t Fax box is checked (viewable from customer search), a fax will not be sent.
Note: Before you click the Fax button, make sure that the fax number field is populated for the associated customer(s). If they are, go to step 1. If they are not, you can update them from each sales document, on the addresses tab Fax field. To automatically populate these values for new sales documents, you can fill them out on the Customer Card > Contact Addresses > Fax field. This will only automatically populate for new sales documents. All preexisting sales documents must be manually updated.
- Click the Fax button. The same screen appears as does for sales batch processing emails.
- Select the related report(s) you wish to fax and click Proceed. The send fax screen will appear:
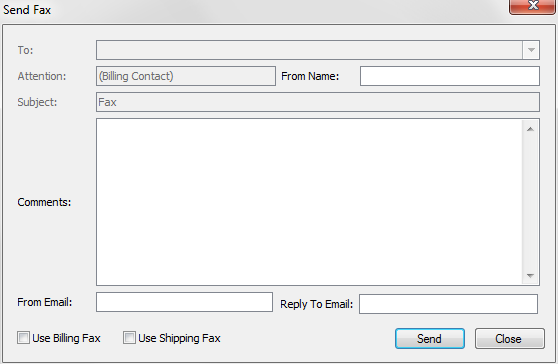
- Fill in the necessary fields and select whether to send to the billing fax, shipping fax, or both (based on the contact address codes on the customer card).
- Click Send. The document(s) will be faxed and a confirmation window will appear, which can be printed or closed.
Creating a New Sales Document
Sales Documents are created from the customer card. To create a sales document, open the customer’s customer card (refer to the Customer Card document for more information).
If the Fast Ship To Ordering setting is enabled, the following message will appear on the contact addresses tab:

Highlight a contact from the contact addresses tab and it will be used as the shipping address on the new sales document. If the setting is not enabled, the customer address with address type set to SHIP will otherwise automatically be selected as the shipping address on new orders created from that customer card when Fast Ship to Ordering is disabled.
To create a sales document for a customer, select the document type from the customer card header. For example, click STDORD ORDER to create a standard order, or click the dropdown arrow and select DISTRIBUTION ORDER to create a distribution order for the customer:

A sales document of the selected type will open in a new tab.
Note: Order types are set up in Dynamics GP, and each order type can be configured to have a separate workflow (refer to the SalesPad Workflow document for more information).
The Sales Document Entry Screen
The following instructions apply mainly to documents which are not read-only. A read-only document will display a yellow banner across the top with a message indicating that it is read-only (refer to: Why is my document Read-Only?).
Sales Document Header

Note: A discount % field displays in the totals area, supporting trade discount.
Note: The Allocate button can be used to allocate all blocked items on a sales document at the same time, if there is stock to allocate. See this documentation for more information.
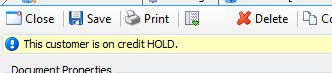
Customer Credit Hold Warning – If enabled, and a customer is on hold (applied on the customer card), users will see this warning at the top of the screen (see also: Sales Document Holds;Disable Creation of New Documents for Customers on Hold):
Header Buttons
Close
Closes the current sales document. Users may be prompted to save any unsaved changes.
Save
Saves changes on the document.
Opens the print dialog, where users can print, email, fax, or simply preview a printable report of the document (refer to: How do I email/fax/print a sales document?;Emailing and Email Templates).
Note: Sales Document Entry > Print Allowed must be set to True in the Security Editor.
Actions dropdown menu ( )
)
Here, users can access plugins to perform additional functions on the sales document, such as splitting a document or viewing profitability. There is also an actions dropdown on the line items tab for item-level functions. Use of each plugin is covered under separate documentation; search for the title of the action you would like to read more about here (see also: Configuring Actions to add action buttons directly to the header).
Delete
Deletes the current sales document, or cancels (voids) it if it has already been saved (see “Canceling a Sales Document” section at the end of this document).
Copy
Creates a copy of the current sales document (refer to: Copying a Sales Document).
Allocate
Available on order and invoice document types only; clicking this button allocates all items on the sales document, updating the item inventory status in the inventory lookup and inventory analysis modules. No confirmation will appear after allocation, but the document will be saved, and quantity available will update on the line items tab* (see page 10). Allocating items reserves them in inventory, but does not specify bin, lot, or serial number (found in Security: Sales Document Entry > Allocate Button Enabled).
Unallocate
Clicking this button will reverse allocation on separate fulfillment type documents and as a result cause the allocated qty to go to zero and set the backorder qty to match the qty ordered. The Unallocate button has no effect on standard fulfillment type documents (found in “Security: Sales Document Entry” > “UnAllocate Button Enabled”).
Dynamics GP
Opens the sales document from within Dynamics GP if Dynamics GP is open.
Note: Close SalesPad GP while opening a document in Dynamics GP.
Transfer
When the document is ready to be transferred to the next queue (or quote to order, order to invoice) click the button on the top right of the screen. The name of this button (i.e. Release, Transfer) can be customized by order type in Workflow setup (refer to: Workflow). For more on transferring an order to an invoice, refer to the “Transferring an Order to an Invoice” section at the end of this document.
Properties
The sales document header displays several fields for document properties and details, the current shipping address, as well as order totals on the right. Above the totals, an order hint displays total gross margin dollars and gross margin percent for the sales document, allowing users to see the impact on those properties when entering or negotiating prices:

While first creating a document, fill out the necessary information on the document header under Document Properties and Additional Properties.
Note: In version 4 and higher, the sales document header is fully customizable for each order type (refer to: Customizing Layouts).
Document #
Depending on security settings, users can enter a document number or it will be auto-filled here.
Note: The next Document # used when auto filling is provided by the counter found in GP Sales Order Processing Setup. A unique starting Document # may be selected for each Document Type ID.
Whse
Select a warehouse to ship from. If Customer Default Warehouse Enabled is enabled in settings, a default warehouse will be chosen. The Whse value on a new sales document created from the customer card will default to the Whse value assigned to the Ship to address being used on the sales document. Like-wise each line item then added to the sales document will default to the same Whse value. If a different Whse value is later chosen for the sales document header Whse field, the user will be prompted as to whether they would like that value to roll down to all existing sales lines. If the Ship to address on the order is also later changed and just happens to be assigned to a different Whse value, the user will be asked if they would like that Whse value to replace the sales document default Whse value, which will then also roll down to all existing sales lines.
Currency
With the sales document properties sub-setting Can Change Currency set to True, the default currency is shown on a customer’s customer card, but on a sales document users can select an alternate currency, which cannot be changed after the document is saved.
Ship Complete
Check this box if the order should ship complete and not be split for backordered items, separate warehouse locations, etc. (refer to: Splitting a Sales Document).
Batch
Displays the document’s current batch/queue (refer to: Editable/Read Only Queues).
Holds
Any holds placed on a document will display under Additional Properties (refer to: Sales Document Holds).
Discounts
Any discount amount applied on the document appears here (refer to: Custom/Special Pricing;CustomerDiscounts).
Freight
Total for freight and shipping appears here (refer to: Calculating Freight;FedEx Freight Quote).
Payment
Total payments applied to the document appear here. Payments can be applied on document types other than quote (refer to: Cash and Check Payments;Credit Card Payments with CardControl;Gift Certificates).
See also: Setting up Notes Tabs on Sales Documents
Line Items
See also: Grouping Sales Line Items.

Items are entered on the line items tab. Like all grids in SalesPad, the line items grid is fully customizable and can be arranged to suit the needs of each individual user (refer to: Customizing Grids).
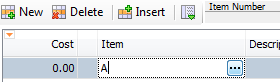
To enter a new item, click New and enter the item number under the item column. Users can also search for an item number by clicking the ellipsis (…) on a selected line item field, which will open inventory lookup (Sales Inventory Lookup must be enabled in the security editor).
Inventory lookup will also open when an unrecognized or partial item number is entered and the user tabs off the line or hits Enter. However, if the Default Items to Non Inventory setting is set to True, the unrecognized item number will be added as a non-inventory item and inventory lookup will not open.
Selecting an item in inventory lookup and clicking OK will return the user to the sales document with the selected item added. Use Ctrl+Shift to select and add multiple items to the sales document.
Note: If an item being searched for does not appear in the search results, it may be because there is no available quantity in inventory. The item may be discontinued in Dynamics GP.
Hit Enter to continue adding additional items, and Save when finished.
Note: With proper configuration, item notes may pop up during line item entry (refer to: Item Note Plugin).
*After line items are entered, details about the selected line item, including quantity available and on hand, will appear on the line item tab’s header:

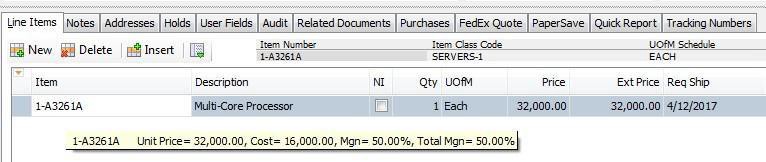
Note: If Show Line Item Hint is set to True under Sales Document Line Items in the security editor, item information such as price, cost, and percent margin will display when users hover over a line item:
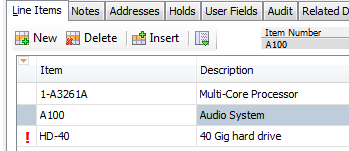
If an item is likely to back order, an exclamation point appears next to the line:
After saving the document, text on the backordered line item will turn red:

With proper security, a Purchase button will also appear on the header after a document with backordered items is saved:
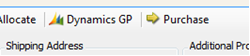
Note: The security option to allow the purchase button to appear on sales document header when saved with either a backordered item or drop ship item is Choose Purchase Plan.
Users can create a PO directly from the sales document to purchase the backordered item (refer to: Creating/Opening Purchase Orders). Additionally, users can check if the backordered item is available in another warehouse using the Availability plugin, or split the document to ship the backordered item(s) separately.
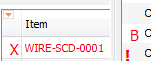
Note: Similar to backordered items, blocked items will appear on the sales line with a red B or X, depending on the version of SalesPad (refer to: Blocked Items):
Check the box under the DS column to order as a dropship item (shipped directly from vendor to the customer requested destination which is the Ship To address on the sales order).
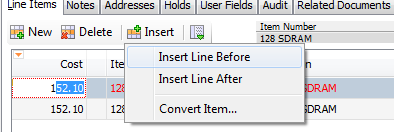
If you need to add a line item between other line items, highlight the item that the new one should appear before or after and use the Insert button to insert an additional item:
Use the Delete button to delete a selected line item.
If an item’s quantity should be more than 1, enter a new quantity under the Qty column. Users can also change other line item details such as UOfM, price (price each – under the Price column; total price with quantity more than 1 appears under Ext Price), and even modify the description, on the line items grid.
Note: If the default price of an item is changed and security is set, the custom pricing popup will appear (refer to: Custom/Special Pricing).
Note: A box checked under the NI column means the line item has been added as a non-inventory item (refer to: Converting a NonInventory Item to Inventory).
Under the Comment column, users can enter or paste a comment about a line item (such as a special customer request or handling note) directly on the line, or click the ellipsis (...) on the field to open the line comment window:
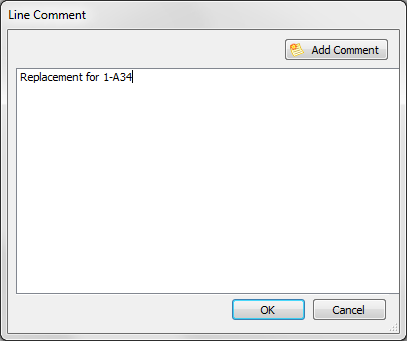
Click Add Comment to select a pre-filled comment from the Dynamics GP comment file (refer to: Setting up Pre-Saved Comments). Click OK to add the comment.
Note: SalesPad allows the configuration of items for more detailed order entry. Adding such items on the sales document entry screen may pop up additional screens. For instructions on configuration and use, refer to the following documents: Item Sales Options,Item Configuration, and Matrix Items.
Note: The total price of all line items on the document will also appear at the bottom of the line items tab.
Additional Tabs
Additional tabs may be covered more thoroughly in other documentation, which can be searched for here.
Notes Tab
Users can enter two types of notes on the notes tab. Customer comments are typically formatted as header or footer notes on various sales documents. Internal notes are entered on the right side of the notes tab (Allow Note Modification must be set to True in the settings module to edit existing internal notes). Customer comments will appear on printed reports (packing slips, order confirmations, etc.) while internal notes will not (refer to: Reports).
With proper security, notes and comments can be freely added, or click Add Comment or Add Note to access popup screens (Add Sales Document Comment must be enabled in the security editor):
Pre-saved comments (added in GP – refer to: Setting Up Pre-Saved Comments) can be selected from the comments popup. Time-stamped notes can be added from the notes pop-up. Click OK to return to the sales document entry screen.
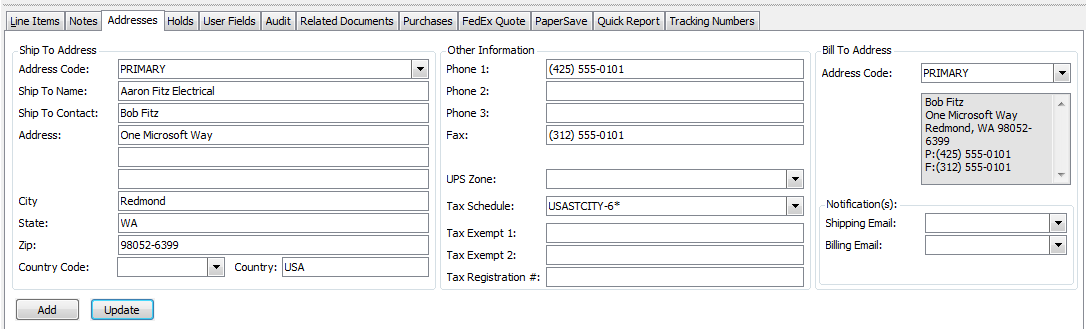
Addresses
Ship to and bill to addresses, as well as other information such as phone/fax numbers, UPS zone, and tax information, are visible from the addresses tab and can be modified with proper security. Users can select the appropriate ship to and bill to address for the sales document. Users can also add new ship to addresses or update existing addresses using the buttons at the bottom of the addresses tab.
The Add button will pop up the New Contact address form with the current detail already added in and a blank Address Code. The user only needs to key in a new Address Code and then Save to create a new customer contact address record for that customer. The Update button allows editing and updating an existing contact address from a sales order without having to go back to the customer card. The user also has the option of simply changing any information on the Ship To address on the sales order without adding or updating the normal Ship To address.
Holds
The holds tab lists any holds on the document, whether or not the hold has been deleted, the user who entered the hold, and when it was last updated. With proper security, users can add or remove holds. SalesPad Workflow rules may also be used to set or assign process holds based on document characteristics (refer to: Sales Document Holds).
User Fields
The user fields tab displays all user defined fields created on the sales document business object, which can include the ability to add links, pictures, attachments, or any other information pertinent to the sales document (refer to: User DefinedFields).
Audit
The audit tab logs changes to the sales document. Once a sales document is saved, a document number is assigned and an audit record is written to the audit tab (refer to: Audit Tabs in SalesPad).

Related Documents Tab
Any documents created as a result of splitting a sales document will appear on the related documents tab. Document properties and line item details are displayed for each document:
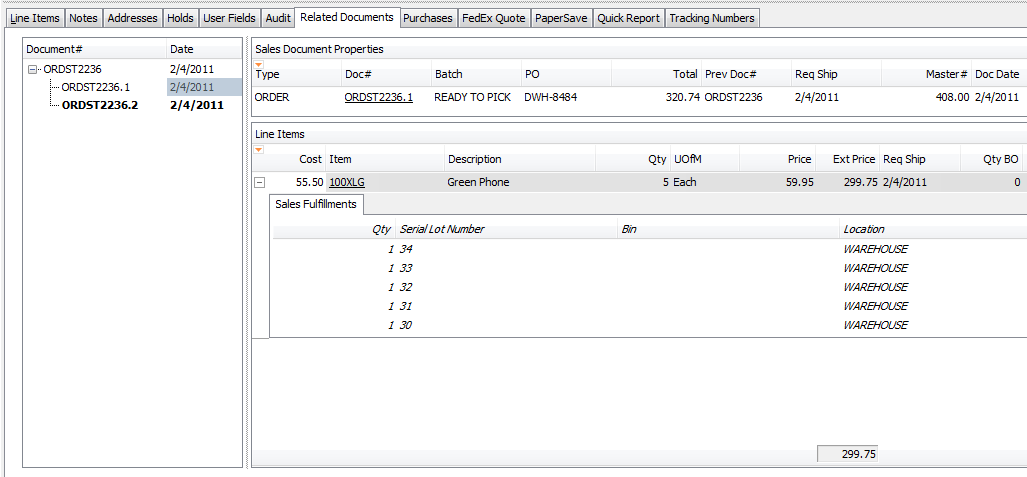
Open any related document by clicking the hyperlink in the Doc # column.
Note: The related documents tab uses the Dynamics GP master number to show the relationship between quotes, orders, invoices, and returns. By selecting a document number in the left hand column you will see that sale documents properties in the upper right hand corner and the doc# is a hyperlink allowing the document to be opened for viewing. In the lower right hand portion of the screen line item information is present which includes sales line fulfillment information.
Expanded: When a document can only be a source of Historical, Open, or Void. The original order ORDST2236 as seen in our example is now set to Historical, Read Only. It contains all the original lines on the order and serves well as the document to be used for sales reports that might need to look at sales order historical data. The dot orders ORDST2236.1 and ORDST2236.2 are 2 orders created by splitting th
SalesPad Support
Comments