Overview
The Inventory Lookup module allows users to search for items by any part of the item number or item description as well as to view and maintain item properties such as price levels, item notes, and reorder point. With vendor search updates in version 4.0.1169 and later, an item can be searched by its inventory item number/description or the vendor item number/description.
Security Editor
To allow access to all tabs and features in Inventory Lookup, follow the steps below in Modules > Security Editor (refer to the SalesPad Security Settings and SalesPad Settings Guide documentation for more information):
Inventory Lookup
- Filter to and select Inventory Lookup (to enable the Inventory Lookup module) and Sales Inventory Lookup (to enable the inventory lookup popup screen on a sales document or item configuration maintenance). Check the box to enable the module(s):
- To allow users to search items listed in an alternate or third party catalog list, set Can Access Alternate Item Catalog to True on both security settings
Note: This sub-setting is only available under sales inventory lookup in versions after 4.0.1169; earlier versions automatically allow access to alternate/third party items in sales inventory lookup, but not inventory lookup). - In versions 4.0.1169 and later, you can set Can Access Vendor Catalog to True (on both security settings) to enable searching for vendor items.
- In versions 4.0.987 and later, you can set Can Create Items to True (on both security settings) to enable the New Item button and allow users to add new items.
Note: This feature is available in versions 4.0.930 and later, but prior to version 4.0.987, the Can Create Items sub-setting is not available and adding new items is accessible to all users. - Can Export Grid allows a user to export the grid to a Microsoft Excel file. Defaults to False.
- Can Print Grid allows a user to print the grid. Defaults to False.
- Show Cost shows the cost of the item. Defaults to False.
- Custom Items Search Tabs lists all of the custom item search tabs in the Inventory Lookup screen (if available). Default to an empty string.
- Default Inventory Search Tab selects the search tab that gets focused when Inventory Lookup is loaded. If no tab is selected, the last one will get the focus. Defaults to an empty string.

Item Inventory
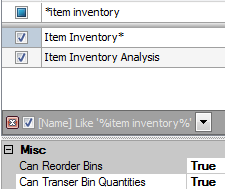
Filter to and select Item Inventory. Check the box to enable this tab.
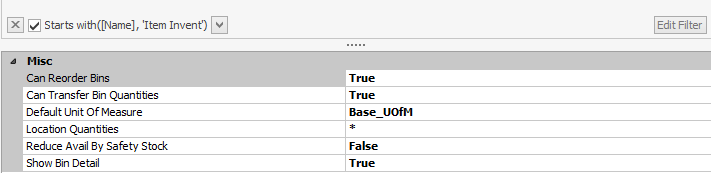
- To allow users to reorder bins, set Can Reorder Bins to True.
- To allow users to transfer quantity from one bin to another, set Can Transfer Bin Quantities to True.
- Default Unit of Measure sets the default Unit of Measure that the inventory levels will be displayed in. Defaults to Base_UofM
- Location Quantities lets warehouses that are not specified have their quantity columns set to 0 on the Grid. Applies to Onhand, Allocated, Backordered, Onorder, Available, Fixed_Order_Qty, Order_Point_Qty, Order_Up_To_Qty. Set to * for all. Defaults to *
- Reduce Avail By Safety Stock is a security that if set to True, the available quantity will be reduced by the safety stock for that warehouse.
- Show Bin Detail shows the bin detail per site record. Defaults to True.
- To allow users to access the inventory allocations screen from within the Item Inventory tab, filter to and check the box for Inventory Allocations.
Item Properties
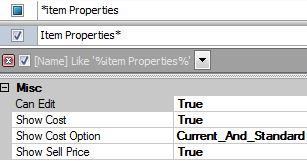
- Filter to and select Item Properties. Check the box to enable this tab.
- To allow users to edit item properties, set Can Edit to True.
- To allow users to see item cost on the Item Properties tab, set Show Cost to True.
- Select an option for displaying cost on the Item Properties tab with Show Cost Option. Select from None, Current, Standard, and Current_And_Standard.
- To allow users to see the selling price of an item, set Show Sell Price to True.
Item Sales
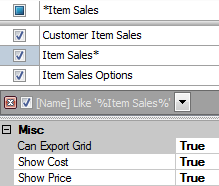
- Filter to and select Item Sales. Check the box to enable this tab.
- To allow users to export item sales grid results, set Can Export Grid to True.
- To allow users to see item cost on the Item Sales tab, set Show Cost to True.
- To allow users to see the selling price of an item on the Item Sales tab, set Show Price to True.
Item Purchases
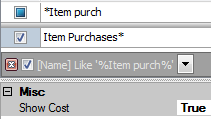
- Filter to and select Item Purchases. Check the box to enable this tab.
- To allow users to see item cost on the Item Purchases tab, set Show Cost to True.
Item Notes
- Filter to select Item Notes. Check the box to enable this tab.
- Append Date Time To Notes adds a date/time stamp to notes added with the add note button. Defaults to False.
- To allow users to add notes to items, set Can Add Note to True.
- To allow users to edit any part of the item note, set Can Edit Entire Note to True.
- To allow users to view purchasing notes (entered in purchasing advisor), set Can View Purchasing Notes to True.


Item Serial/Lot Numbers
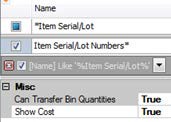
- Filter to and select Item Serial/Lot Numbers. Check the box to enable this tab.
- To allow users to transfer quantity from one bin to another, set Can Transfer Bin Quantities to True.
- To allow users to see item cost on the “Item Serial/Lot Numbers” tab, set Show Cost to True.
Item Analysis
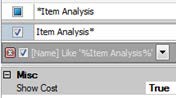
- Filter to and select Item Analysis. Check the box to enable this tab.
- To allow users to see item cost on the Item Analysis tab, set Show Cost to True.
Item Quick Report
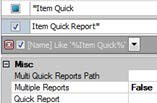
- Filter to and select Item Quick Report. Check the box to enable this tab.
- If you will have multiple quick reports, enter the full path of the quick reports folder next to Multi Quick Reports Path.
- To allow for the use of multiple quick reports, set Multiple Reports to True.
- If you will have a single quick report, enter the name and path of the quick report next to Quick Report.
Item Inventory Analysis
1. Filter to and select Item Inventory Analysis. Check the box to enable this tab.
Item Serial Attributes
- Filter to and select Item Serial Attributes. Check the box to enable this tab.
- To allow users to edit Item Serial Attributes, set Can Edit to True.

Item Sales Options
1. Filter to and select Item Sales Options. Check the box to enable this tab.
Item User Fields
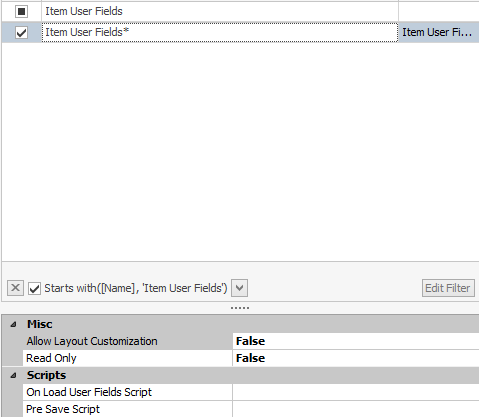
- Filter to and select Item User Fields. Check the box to enable this tab.
- Allow Layout Customization disables/enables access to Layout Customization. Defaults to False.
- To make item user fields read-only, set Read Only to True.
- On Load User Fields Script allows a C# script to execute when loading the Item User Fields. Defaults to an empty string.
- Pre Save Script allows a C# script that executes before the user defined field is saved. Defaults to an empty string.
Item Substitutes
1. Filter to and select Item Substitutes. Check the box to enable this tab.
Inventory Matrix View
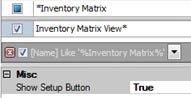
- Filter to and select Inventory Matrix View. Check the box to enable this tab.
- To enable the Setup button that allows users to launch the Item Matrix Setup window, set Show Setup Button to True.
- Filter to and select Item Kit Components (versions 4.0.660+). Check the box to enable this tab.
Settings
Inventory Lookup
Follow the steps below in Modules > Settings.
- Filter to Inventory Lookup.

- To include alternate items in searches by default on the Inventory Lookup module, set Search Alternate Items to True (the check box on the inventory lookup screen will default to checked).
- To include vendor items in searches by default (version 4.0.1169 and later), set Search Vendor Items to True (the check box on the inventory lookup screen will default to checked).
Sales Document Inventory Lookup
- Customer Item Description Field points to the field that the Customer Item Description will be written to. This item has no default value.
- Customer Item Num Field points to the field that the Customer Item Number will be written too. This item has no default value.
Usage
Searching Inventory
The inventory lookup screen is available via Modules > Inventory Lookup, but can also be accessed in the following ways:
- From a sales document or purchase order – Create a new line item and click the ellipsis (…) (select an item number to add it to the document).*
- From Special Pricing Maintenance – Double-click any line item or click any item number hyperlink.
- From Counter Sales – Click the ellipsis (…) under Sales Entry (select an item number to add it to the document).*
- From Item Configuration Maintenance – Click the Item Lookup button when adding a new item (select an item number to add it to the Item # list for configuration).*
On the inventory lookup screen, enter any search criteria and click Search or hit Enter. Results will be displayed in the grid below. Notice that items in Dynamics GP are displayed in the Inventory Items tab, alternate/third party items are displayed in the Alternate Items tab, and, in versions 4.0.1169 and later, vendor items are displayed in the Vendor Items tab (with proper security):
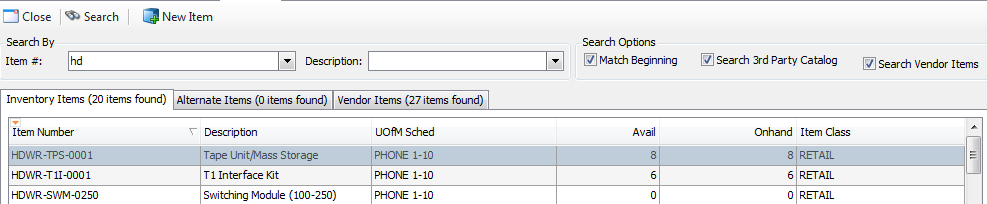
Note: If an item you are searching for does not appear in the search results, it may be because the item is discontinued in Dynamics GP and has no On Hand quantity. Items that are discontinued but still have on hand quantity will show up in inventory lookup, even if the item does not have a Quantity Available.
Note: To include alternate items in search results, make sure Search Alternate Items is checked. Make sure Search Vendor Items is checked to include vendor items in search results. Alternate items are added through Import Manager (refer to: Alternate Item Import Manager documentation) and vendor items are added through “Item Maintenance” (refer to: Item Maintenance documentation).
Note: If “Match Beginning” is checked, search results will only include items that start with any entered criteria; if Match Beginning is not checked, search results will include items that contain entered criteria anywhere in the item number or description.
*When Inventory Lookup is accessed from these screens (denoted with an asterisk above), there are a few additional options:
- Add as Sample – Check this box (on the bottom left corner of the inventory lookup screen) to add the selected item to the sales document or PO without a price (as a free item). The item will appear as shown, with a note under the “Comment” column, indicating that the item is a sample item:
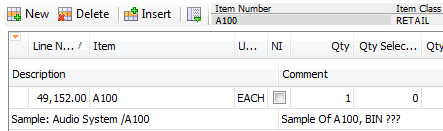
Note: Checking the Add as Sample box will have no effect when the item is added to Item Configuration Maintenance.
-
Search Previously Purchased – If this “Search Options” box is checked, search results will only display:
- On a PO – Items previously purchased from the current vendor.
- On a sales document – Items previously sold to the current customer.
- On Item Configuration Maintenance – All purchased items.
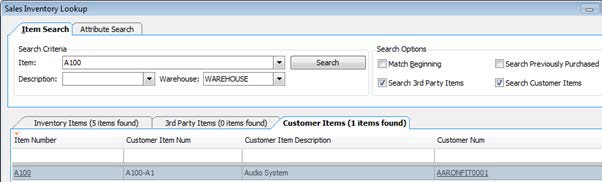
- Search Customer Items – If this Search Options box is checked, the Customer Items tab will be visible, and search results will include any Customer Items in this tab. A Customer Item is an alias or alternate item number for a standard inventory item, set up in Dynamics GP under Customer Item Maintenance. (This tab can be set to only display the current customer’s items, vs. all customer items; refer to: Customer Items).
In this example, customer Aaron Fitz Electrical uses the customer item number A100-A1 for the standard item A100:
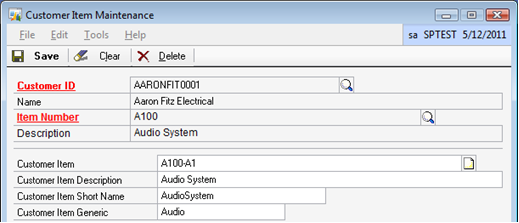
The item will appear as below in an item search:
Adding New Items
(See also: Item Maintenance)
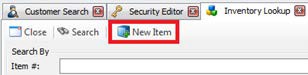
In approximately versions 4.0.930 and later, users can add new items to the inventory from within inventory lookup using the New Item button:
Note: Before version 4.0.987, security does not exist to disable access to the New Item button. In versions 4.0.987 and later, security must be enabled to see the New Item button.
Note: The New Item button is available in the Inventory Lookup module, but not in the other screens from which inventory lookup can be accessed.
- Click the New Item button to open the item maintenance screen.
- Fill in all necessary info on each tab of this screen (or use Copy From Item to copy the information from an existing item).
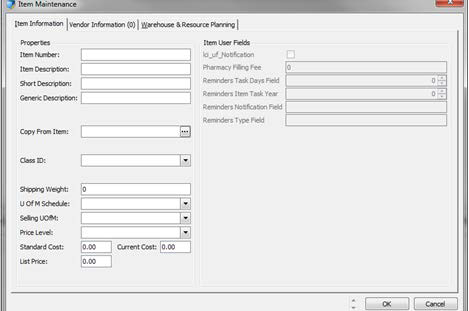
Note: Typing in an existing item will pull the item’s existing information on the screen where it can be edited. This will not duplicate the item number.
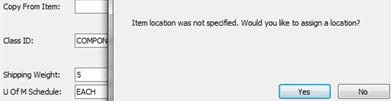
Note: SalesPad will prompt users to enter all the required information, including warehouse/location, but will not require users to select a warehouse/location for the item. If the user does not select a warehouse/location from the “Warehouse & Resource Planning” tab, the item will be created and appear in Dynamics GP, but will not appear in SalesPad during search.
Inventory Lookup Tabs
Below the search results grid are several tabs. Select an item to view related item information in each tab (detailed below).
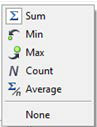
Note: Calculated Fields – Many columns in the inventory tabs will contain a Calculated Field at the bottom, which can display a specified total calculation (Quantity, etc.) of the column. To calculate, right-click on a calculated field and select Sum, Min, Max, Count, or Average.
Item Inventory
The Item Inventory tab displays by warehouse, on hand, allocated, backordered, on order, and available inventory for the selected item, with totals at the bottom. With proper security, the right-hand grid displays bin locations and quantities of the selected item for each warehouse.
Note: Multibin must be enabled in Dynamics GP:
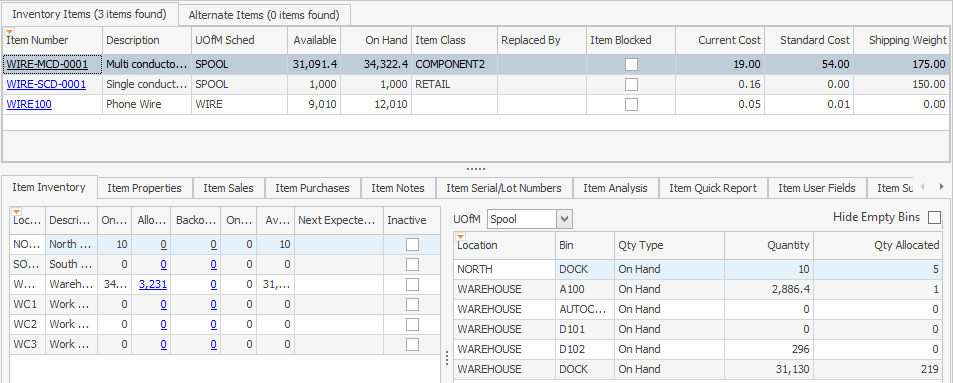
You can change the actual inventory levels based on the Unit of Measure selected. See the example of Spool & Foot.

Example Spool & Foot
Spool:

Foot:

The Unit of Measure will convert based on what you have selected. In this case, the Spool converted to Foot displays dramatically different numbers based on what UofM is selected.
Reorder bins or transfer bin quantities from this grid by right-clicking on a row and selecting Bin Transfer or Send To End of FIFO List.
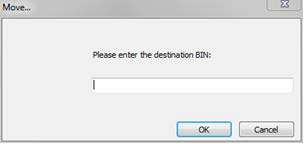
With Bin Transfer, enter the destination bin and click OK to make the transfer:
Note: You cannot transfer quantities from bins with allocated quantities. In versions 4.1 and later, users can select the quantity to transfer.
Click on a number in the Allocated column to open the Inventory Allocations screen:
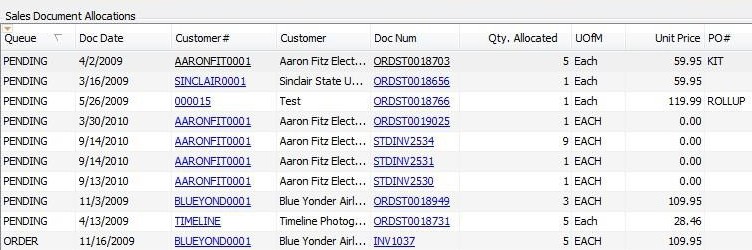
This screen will display information on any individual documents where the selected item is allocated, including the quantity allocated. Click on the Customer # to open the customer card, or the Doc Num to open the document.
Qty. Allocated is made up of Inventory Adjustments, Inventory Transfers, Vendor Returns, and Sales Documents. When you click the Qty. Allocated link, SalesPad will only show SOP documents in the window. To see all documents, you’ll need to go to GP.
Item Properties
The Item Properties tab displays basic information, quantities, and pricing for the selected item.
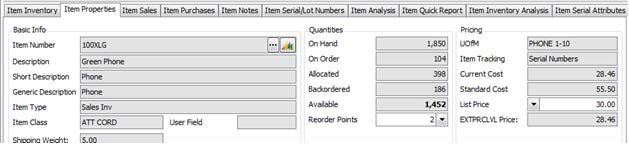
Click the ellipsis (...)next to the item number (proper security required) to open the item maintenance screen to edit item information (refer to the SalesPad Item Maintenance documentation for more information). Click the GP logo next to the ellipsis (...) to open the item card in GP (GP must be running).
Open the Reorder Points dropdown to display a list of reorder points by warehouse. Click the “List Price” drop-down to display prices by price level.
Item Sales
The Item Sales tab displays all sales documents containing the selected item for a given time period. To change the view, set the number of months and select document types to display and click Refresh. Check the Group by Doc Type box to organize the results by document type.
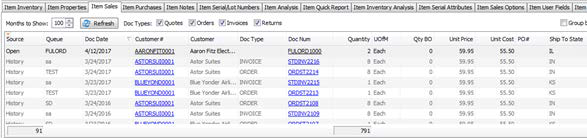
Click a document number to open a document, or a customer number to open a customer card.
Item Purchases
The Item Purchases tab displays all purchase orders containing the selected item. Set the number of months and click Refresh to change the view.
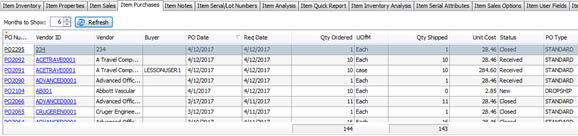
Click a PO number to open a PO, or a vendor ID to open a Vendor Card.
Item Notes
The Item Notes tab displays notes about the selected item.
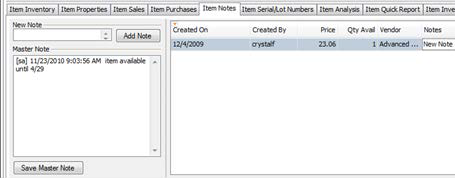
Notes on the left (Master Notes) can be added or deleted on this tab. To add a note, either enter the note under New Note and click Add Note (adds with a date/time stamp), or type directly into the Master Note field and click Save Master Note. Purchasing notes entered in Purchasing Advisor (Modules > Purchasing) display on the right by date/user and include item information.
Note: Notes created here can be viewed from a sales document using the Item Note plugin on a sales document. Refer to SalesPad’s Item Note document for more information.
Item Serial/Lot Numbers
The Item Serial/Lot Numbers tab displays all serial/lot numbers and locations for the selected item. It also displays which documents the serial/lots are connected to (if any).
Note: In version 4.0 and higher, you can click a serial number to open its equipment properties (refer to Equipment Management documentation for more information).

Item Analysis
The Item Analysis tab displays a graph and report of item sales over a selected time period.
Note: You must be running the SQL Job sppUpdateDW.
Enter a start date, end date, break by value, and plot option and click Refresh to change the graph/report. You can also change the graph’s appearance as explained below with the Value Labels, Stagger Axis Labels, and Rotate Axis Labels check boxes. The report grid displays quantity, price, cost, and margin grand totals by break point (quarter, week, etc). Click Print or Export to print or export the graph and report.
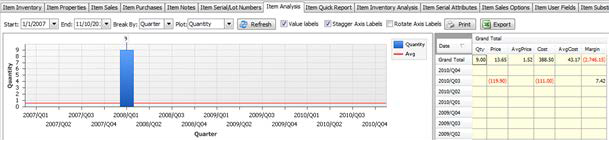
Value Labels – Show/hide numerical values of each column.
Stagger Axis Labels – Change layout of labels on the screen.
Rotate Axis Labels – Toggle between horizontal and vertical layout.
Note: Clicking Print opens a popup window displaying a preview of the graph with options to add or modify a header or footer, add watermarks, change colors, send as email, change document type, etc.
Item Quick Report
The Item Quick Report tab displays the quick report(s) set up in Modules > Security Editor (refer to the Quick Reports, Security Settings, or Settings Guide for more information on any of those topics.)
Note: When quick reports have been added, the name of the tab changes from Item Quick Report to the title of the quick report (single) or Item Quick Reports (multiple).

Item Inventory Analysis
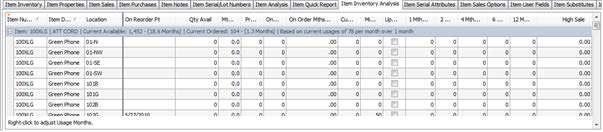
The Item Inventory Analysis tab displays information by warehouse about sales, purchases, and averages for the selected item. To change the number of months displayed, right-click on the grid and make a selection.
Item Kit Components
In later versions of SalesPad (approximately 4.0.660+) you can view kit components on the Item Kit Components tab, when a package/kit item is selected (refer to the Packages and Retail+ documentation for more information on package/kit items). Details of the kit that can be viewed include item number and description, kit number, component U of M, total weight, and availability.

Item Serial Attributes
The Item Serial Attributes tab displays available serial numbers for the selected item, and any additional serial attributes, stored within a SalesPad custom table, specific to the item.

Item Sales Options
The Item Sales Options tab displays options and option details that have been set up for the selected item. New options can be set up here (refer to the Item Sales Option documentation for more information).

Item User Fields
The Item User Fields tab displays any user defined fields that have been set up on the item master object. With proper security, these fields may be editable (refer to the User Defined Fields document for more information on UDF setup.)

Item Substitutes
The Item Substitutes tab displays any substitute items set up in GP for the selected item.

Inventory Matrix View
The Inventory Matrix View tab displays any matrix created for the selected item. With proper security, you can create a new matrix on the item by clicking the Matrix Setup button.

Note: This tab will only link to a matrix if the matrix is created here with the Matrix Setup button, or if a matrix created in Matrix Class Maintenance (Modules > Matrix Class Maintenance) has the name of the item number (refer to the Matrix Items documentation for more information).
SalesPad Support
Comments