Overview
Item Attribute Classes are used to supplement the Inventory Lookup capability by allowing users to search for items meeting a specified set of criteria (from an imported table, configured in the Item Attribute Class Editor). Selected item(s) can then be added to a sales document.
In versions 4.0.1655 and later, Item Attributes are searchable from both Inventory Lookup and Sales Inventory Lookup (when Inventory Lookup is accessed from a sales line). Prior to version 4.0.1655, Item Attributes are only searchable from Sales Inventory Lookup.
Setup
ITEM ATTRIBUTES TABLE
Note: The Item Attributes function was designed to bring outside data into item searching in SalesPad. This is a very tailored setup and will be slightly different for everyone.
First, identify where your attribute data is located. For example, the following table, _ItemAttribute:
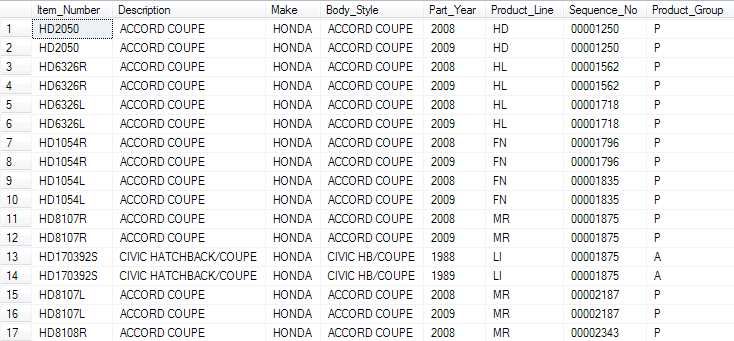
Your attribute table is used to craft a custom view that combines with SalesPad requirements. SalesPad only requires the Item Number column in the attribute table as it is needed for actually adding the item to the order:
Define the view with the following SQL script example:
Create VIEW [dbo].[spcvAttributeItem] as
select
ia.Item_Number
, [Description] = isnull(im.Item_Description, ia.[Description])
, [Make]
, Body_Style
, Part_Year
, Product_Line
, Sequence_No
, Product_Group
, Avail_Qty=invs.Avail
, Onhand_Qty=invs.Onhand
from _ItemAttribute as ia with (nolock)
left join spvItemMaster as im with (nolock) on im.Item_Number=ia.Item_Number
left join spvInventorySearch as invs with (NOLOCK) on invs.Item_Number=ia.Item_Number
ITEM ATTRIBUTE CLASS EDITOR
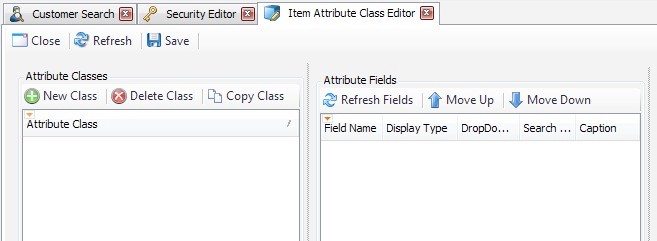
After defining the view, add the columns into the system using the Item Attribute Class Editor. This module is used to set up and configure the Item Attribute Classes.
Go to Modules >Inventory > Item Attribute Class Editor. Click the New Class button on the left to create a new class. The Attribute Fields grid will automatically be filled based on columns from the database/SQL view “spcvItemAttribute”
Name the class in the new field (Example: VEHICLE ACCESSORIES, ENGINE, CAR AUDIO). Select the appropriate options for each field (see Attribute Field Options)*. Click Save, and repeat for new classes as needed.
Note: You can reorder sequences by highlighting a Field Name to be moved and using the Move Up or Move Down buttons.
*Attribute Field Options
Attribute Fields have the following options:
Display Type determines how fields appear on the Attribute Search screen:
- Dropdown and Table: column will be displayed as a dropdown in the search area and in the results grid
- Dropdown: column will be displayed only as a dropdown in the search area
- Table: column will be displayed only in the results grid
- Hidden: column won't show in the search area or the results grid
DropDown Type determines the behavior of the fields in the search area, as well as in the table:
- Static: dropdown will always appear in the search area (and/or in the table)
- Dynamic: dropdown will appear only if the field contains searchable values (at least one field must be type of Static in order to start)
- NA: Not Available (field is not a dropdown/column table)
Static
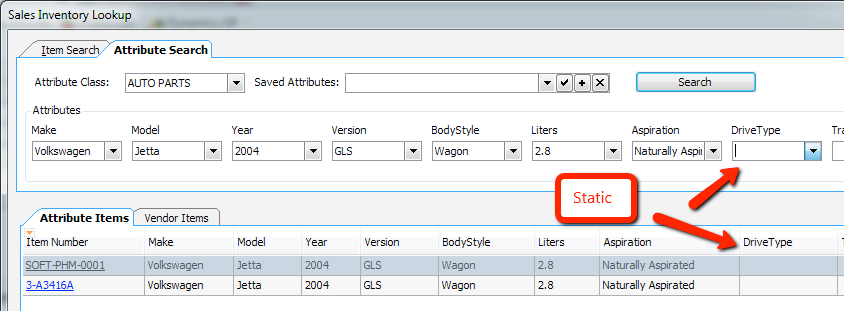
DriveType appears even if there is no value for the field, based on the selection of attributes. In this example DriveType has no values.
Dynamic
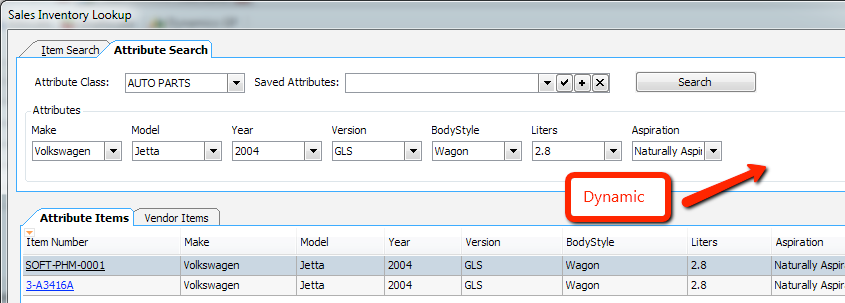
In this case, DriveType does not appear, since the field does not return any value.
Search Type determines the lookup behavior of dropdowns:
- Unconditional: each dropdown will pull all possible values from the field
- Conditional: each dropdown will pull all possible values from the field, based on the selection of the other fields
- Filtered: each dropdown will pull all possible values from the fields to its left
- NA: Not Available (field is not a dropdown)
Unconditional:
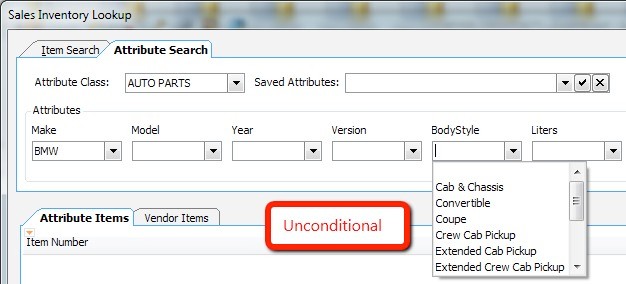
BodyStyle shows every possible value for that field.
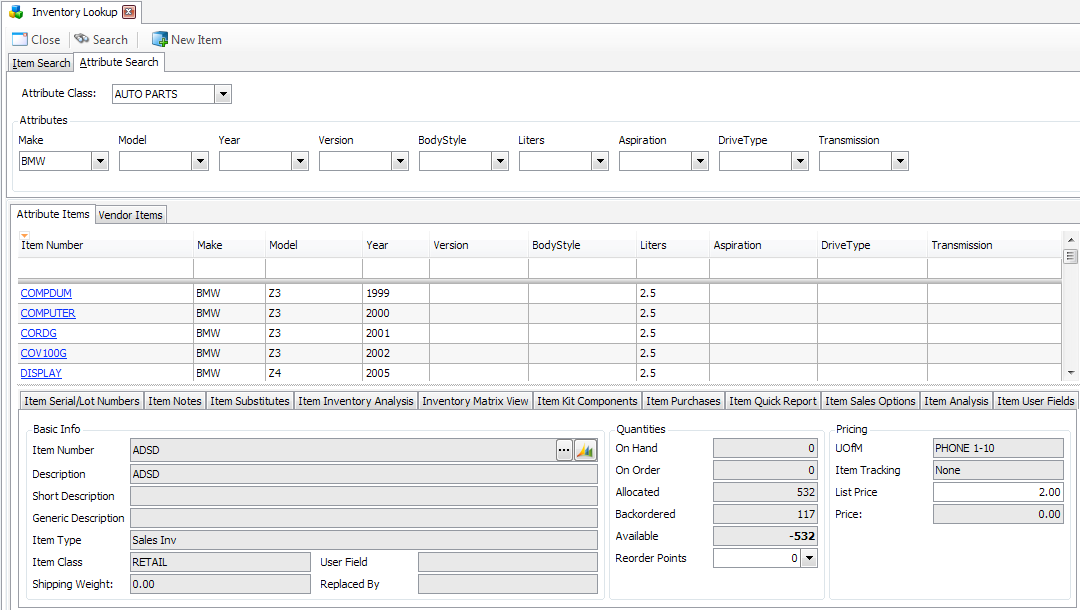
Conditional
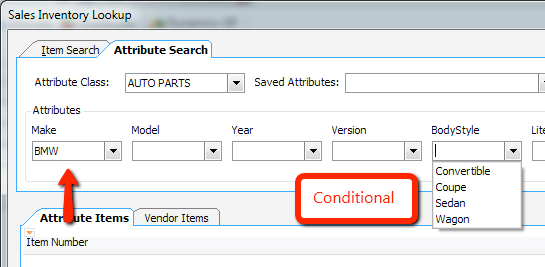
BodyStyle shows only values available under the conditions set from the selection (in this case, only values that belong to Make BMW).
Filtered
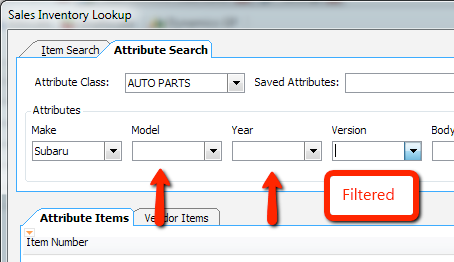
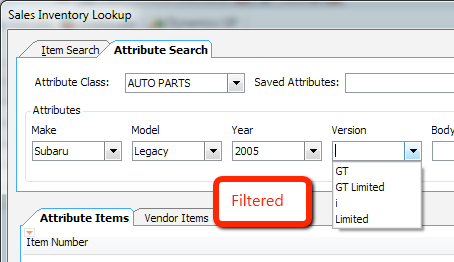
The principle is similar to Conditional, but Filtered requires a selection on each field on the left.
Inventory Lookup – Attributes Search
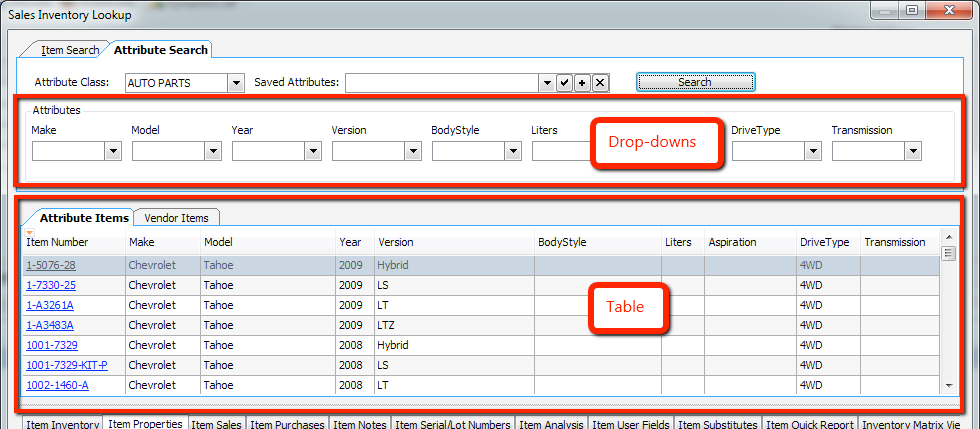
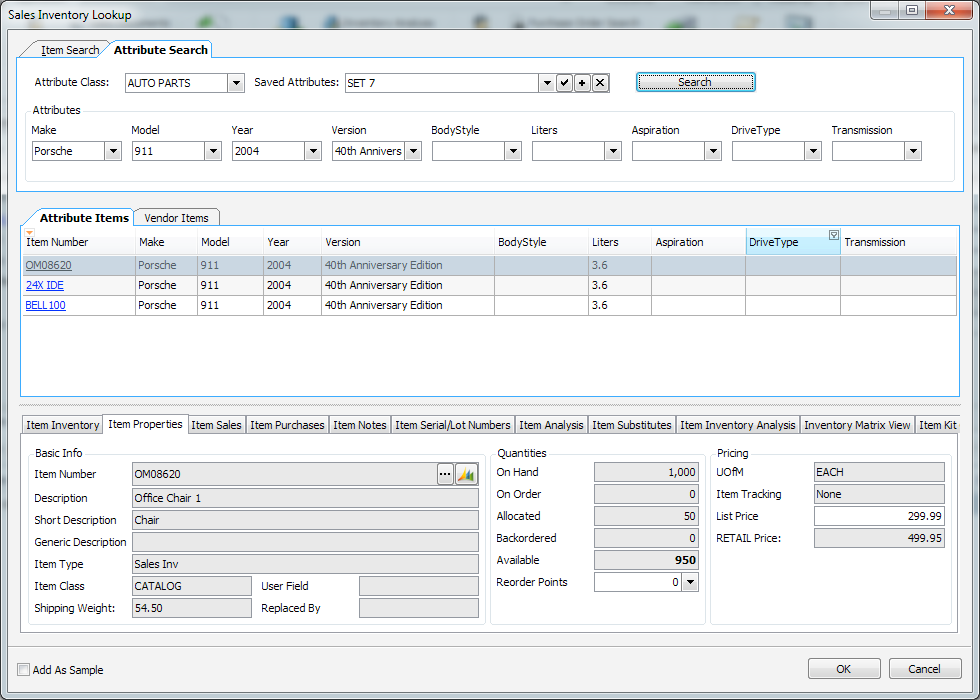
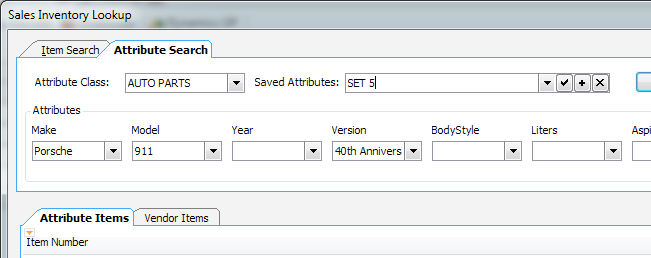
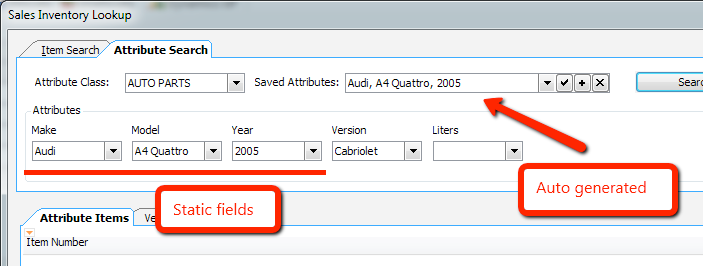
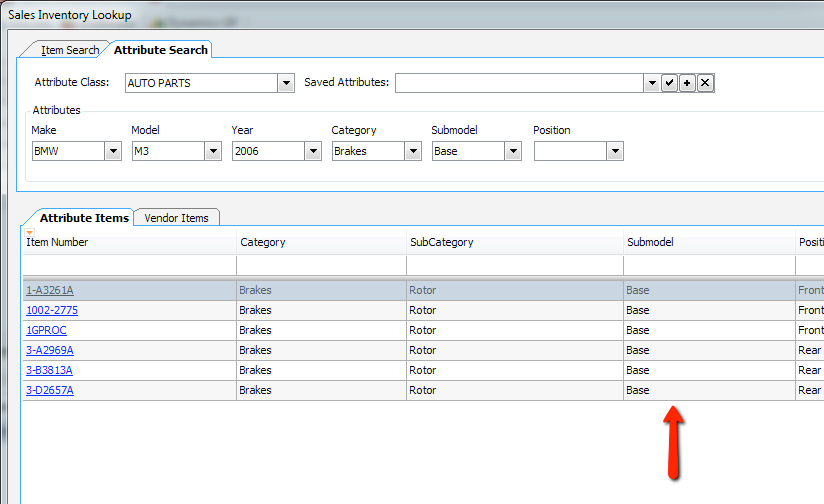
Open the Inventory Lookup or Sales Inventory Lookup screen and click the Attribute Search tab (will only be visible if item attributes have been set up):
Select an Attribute class from the dropdown list on the top right. Fields will display in the Attributes box based on the class setup. Select Attributes from the dropdown lists and click Search. Results will appear in the Attribute Items grid directly below the search options (the more attributes you specify, the smaller the list should be). Select an item or items from the list to be added to the sales document. (Only applies if using Sales Inventory Lookup from a sales document.)
Note: If the Item Number is not in the item master, it will be added as a non-inventory item
Click OK to return to the sales document
SAVED ATTRIBUTES
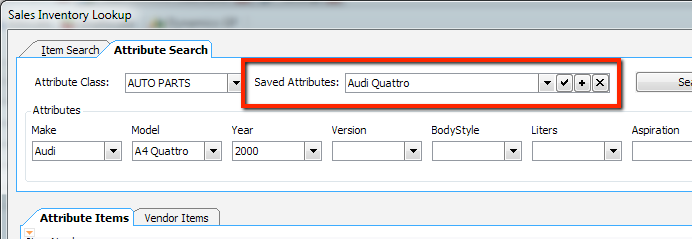
When using Attribute Search from Sales Inventory Lookup, users can save the set of attributes for the current customer.
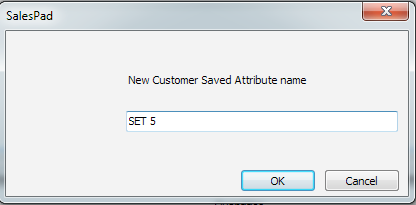
To add a new set of attributes, click the Add (  ) button. An input box will prompt for a name for the saved attribute:
To save the current set of attributes click the Save ( ) button. This will update the values for the Saved Attributes selected.
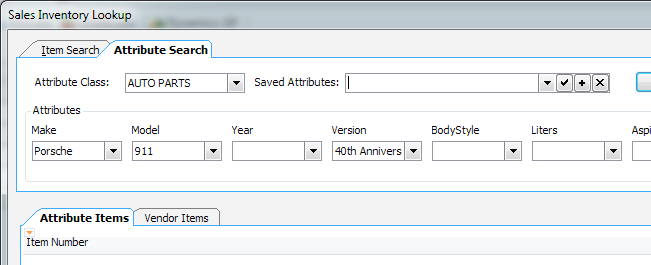
Click the Delete (  ) button to remove a set of attributes. Note that, when you delete a Saved Attribute, the set of values does not get cleared.
Attribute Search Settings
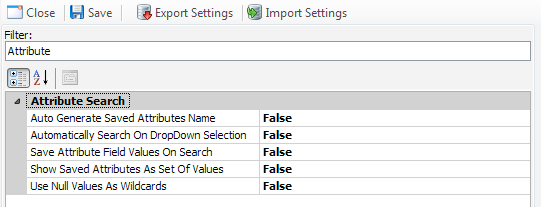
- Auto Generate Saved Attributes Name: if set to True, it will automatically generate the name of the set of attributes on save. The name will be composed of all the values of the Static fields, separated by comma.
Note: Auto-naming requires that all Static dropdowns contain a value.
- Automatically Search On DropDown Selection: the Search is triggered each time an attribute value is changed (instead of clicking the Search button).
Note: Auto-search requires that all Static dropdowns contain a value. - Save Attribute Field Values On Search: the set of attributes is saved automatically on search.
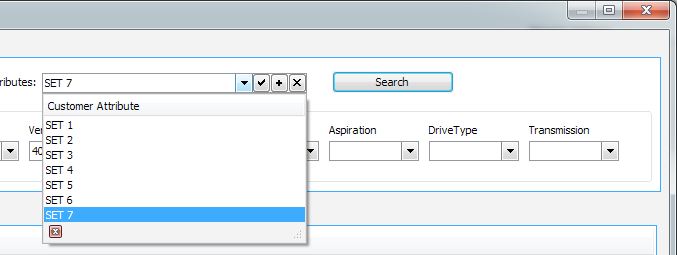
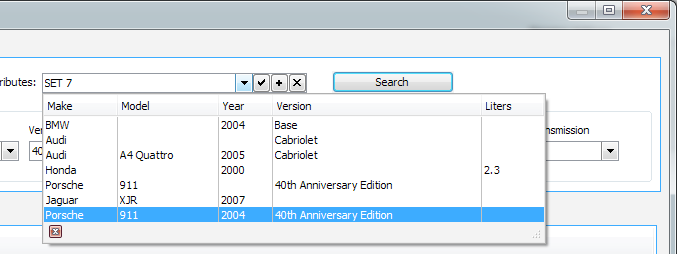
- Show Saved Attributes A Set Of Values: if set to True, the Saved Attributes dropdown will show the list of values (instead of the list of set names)
Set to False: list of names:
Set to True: list of values:
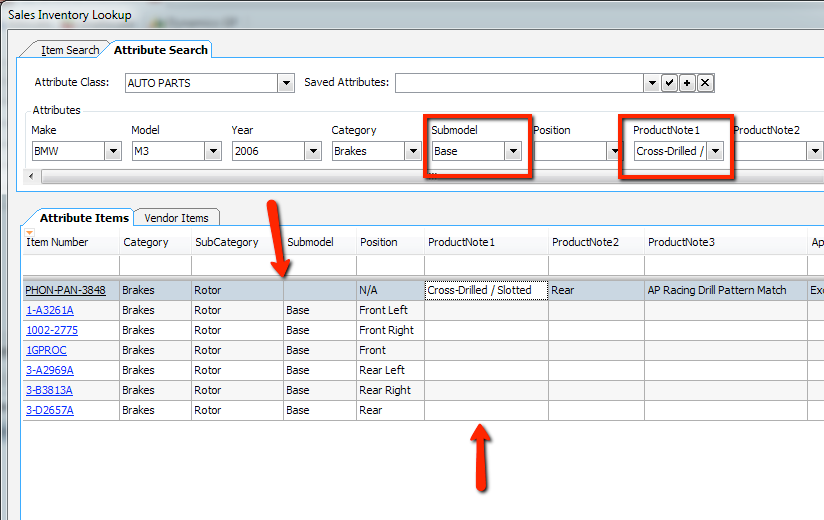
- Use Null Values As Wildcards: this option allows user to treat NULL values as wildcard, determining different searching behaviors.
Set to True: in this example, filtering by Submodel and ProductNote1 includes NULL values in the result table:
Set to False: in this example, filtering by Submodel returns only values that are not NULL:
Customer Card Saved Attributes Tab
On the customer card, users can create and manage one or more sets of attributes within the Saved Attributes tab using the Add Attribute, Delete Attribute, and Copy Attribute buttons:

A selection in the Default column determines which customer attribute set is loaded when opening Sales Inventory Lookup (one default customer attribute set per class).
Attributes listed here will appear in the Saved Attributes dropdown on the Sales Inventory Lookup screen.
Security
Item Attribute Class Editor must be enabled in the Security Editor (Modules > Security) to edit item attributes. Find the setting in the security grid and make sure it is checked.
Customer Saved Attributes must be enabled in order to use the Saved Attributes tab on the Customer Card (4.0.1655+ versions only).
Save any changes.
Note: You must log out and log back in for security changes to take effect.
SalesPad Support
Comments