Overview
The Item Maintenance screen, which can be accessed from a sales document or from Inventory Lookup, allows users to create new items and modify the information for existing items.
Creating a New Item
FROM INVENTORY LOOKUP
Open Inventory Lookup and click New Item. The Item Maintenance screen appears. Skip to the Item Maintenance section of this document to continue.
FROM A SALES DOCUMENT
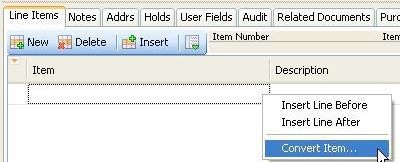
Open a sales document and click New on the Line Items tab. Right-click on the new line and select Convert Item.
Note: You can also right-click on an existing item in the document and click Convert Item to edit its information.
The Item Maintenance screen appears. Continue to the Item Maintenance Section below.
Item Maintenance
Enter the new item information on the Item Information tab (see the SalesPad User Defined Fields document for information on adding Item User Fields).
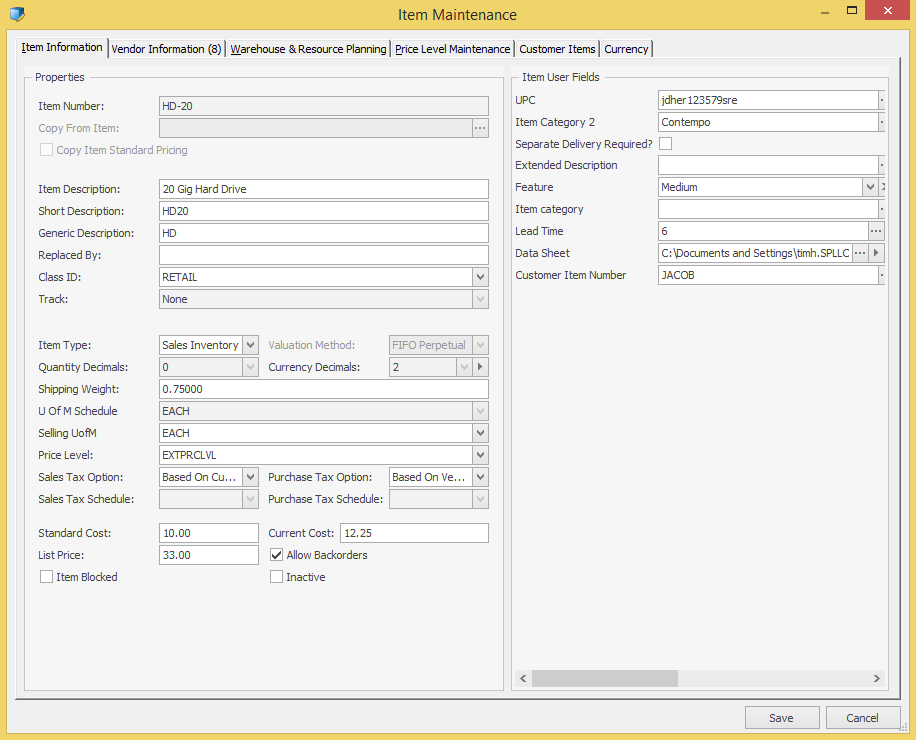
Note: Use the Copy From Item field to enter an existing item number from which to copy item information. You can also use the ellipsis (…) to open a new Inventory Lookup to find an item for copying. This field will be accessible for new items only.
If the item is a vendor item, select the Vendor Information tab and click New. Select the Vendor ID for the item vendor and specify Vendor Item Number.

To assign custom item numbers to each customer for this item, select the Customer Items tab and click New. Select the Item Number and Customer Number, then assign a Customer Item Number.
Enter the applicable order quantities and select the Warehouse & Resource Planning tab. Assign the item to a warehouse or warehouses by clicking the check boxes.

Click the appropriate fields to select a vendor, enter quantity and order point, and select ordering rules. When finished, click OK.
You will be prompted to update the unit price with the list price defined for that item. Select Yes or No. You will then return to the sales document. The new item will now be in the SalesPad Item database.
EDITING AN EXISTING ITEM
To edit an existing item in SalesPad, access the Item Maintenance screen from a sales document or from Inventory Lookup.
From a sales document
Open a sales document and click New on the Line Items tab. Enter the item number of the item you wish to edit, then right-click on the line item and click Convert Item.
From Inventory Lookup
You can either use the New Item button and enter the item number to make changes to existing item information, or, in older versions, navigate to Modules > Inventory Lookup, perform an inventory search, and select the item you wish to work with. In the bottom portion of the SalesPad window, select the Item Properties tab. Click the ellipsis (…) button to the right of the Item Number field. The Item Maintenance screen appears.
Make any needed changes on the Item Maintenance screen and click OK to update.
Note: In versions 4.1 and later, users can also edit the vendor number for a vendor item on the Vendor Information screen.
Note: In version 4.0 and later, all vendor information is editable from the Item Maintenance screen.
Security
Item Maintenance must be enabled in the Security Editor to enable the Item Maintenance screen. To edit items, Item Properties must be enabled, and Can Edit must be set to True.
To add items from Inventory Lookup, Inventory Lookup must be enabled and Can Create Items must be set to True (versions 4.0.987 and higher only).
Settings
Allow UOM Changes must be set to True to allow unit of measure changes in Item Maintenance (required for adding new items).
SalesPad Support
Comments