Overview
The following SalesPad headers and tabs can be customized, allowing for easier access to the information needed for each document type, customer class, etc., and allows for important user defined fields to be visible on the header in addition to on the User Fields tab:
- Sales Document Entry Screen header (by document type) Addresses tab
- User Fields tab
- Customer Card header (by customer class OR customer address type) Notes tab
- User Fields tab Equipment tab
- Vendor Card header (by vendor class)
- Notes tab User Fields tab
- Purchase Order Entry Screen header
- Addresses tab User Fields tab
- Counter Sales (Refer to SalesPad’s Counter Sales Document)
All SalesPad Grids and columns can also be customized.
Note: Customizations made to the User Fields tab using Customize Layout are only saved for the current machine. To change User Fields tab layout for all users, use the Layout Editor in the User Field Editor (Refer to: SalesPad’s User Defined Fields document).
Usage
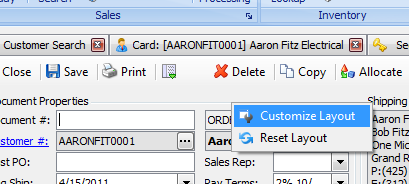
Right-click on empty space in the top portion of a sales document, customer card, vendor card, or PO and select Customize Layout:
The Customization window appears:
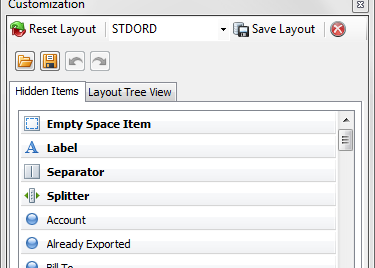
If you are customizing a sales document or customer card, first select the document type or customer class you would like to change from the drop-down.
Drag items from the window’s Hidden Items tab onto the desired location on the sales document screen. You can add any listed user defined field, or add labels*, separators, and empty space to the header space.
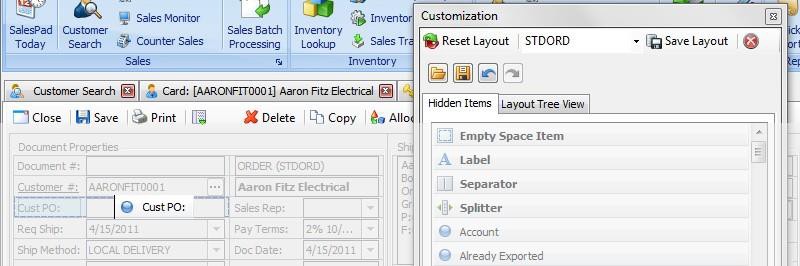
You can also rearrange the layout by dragging fields to different locations or dragging them off the header to remove them. From the Layout Tree View tab, you can drag and drop to reorder items on the tree view (only within an item’s current level), or select an item and click Delete on the keyboard to hide it.
On some screens, you can right-click and select Reset Layout to reset any changes.
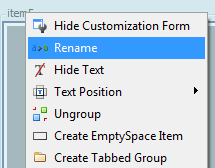
To name a label, right-click on it and select Rename:
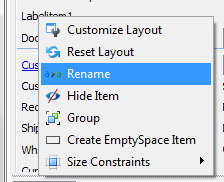
The default name will highlight and you can type in the desired name. Hit Enter to apply the name. Right-click on any field to hide, group*, or change it. Each field will have different applicable options.
When finished making changes, click Save Layout (only available on some screens- otherwise, close the window and save your changes from the screen). Click the red X to close the window. You can repeat the process for additional document types/customer classes.
Note: The Save icon on the Customization window saves the custom layout to a file. Saved custom layouts can be imported by opening the file from the Folder icon.
Note: Completing a database update may clear the customizations made to the views. You must reapply changes to the views after any SalesPad database updates. Saving customized layouts to files, for easy reapplication, is recommended.
ADVANCED LAYOUT DESIGN – PLACING USER FIELDS INTO GROUPS AND TABS
Creating a Group:
- Highlight the fields that you want to group (Shift+click to select more than one field)
- Right-click and select Group. The selected fields will be grouped with a default name
- Right-click on the name and click Rename
- Enter the new name for the Group
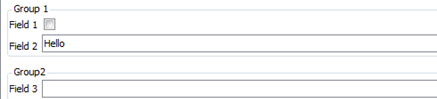
Note: When saved, standard groups appear on the screen in separate squares:
Creating Tabs:
- Right-click on a created group and select Create Tabbed Group
 Note: You can save single or separated tabs — they will look like tabs, but will be “flat”:
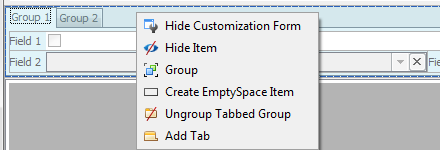
- To create true tabs that can be viewed alternately, the next step is to highlight the entire group by right-clicking the area next to the group/tab name (not on the tab) and select Add Tab
- Right-click on the new tab and select Rename to rename the tab
- Select the new tab and drag and drop to add fields or move them into the new tab
- Repeat these steps for additional tabs. Remember to save your changes before closing the card or document.
Notes: To move fields from one tab to another, drag and drop them onto the Customization window to remove them from the first tab, then open the second tab, and drag and drop the field onto the second tab. You can right-click a group and select Ungroup or Ungroup Tabbed Group to remove the grouping.
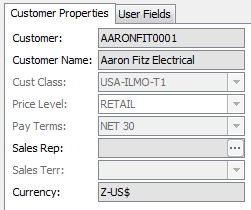
Tabs Example – Adding a User Fields tab next to Customer Properties on a Customer Card Header
- On the customer card, right-click on Customer Properties and select Create Tabbed Group
- Right-click in the space next to the newly created Customer Properties tab and select Add Tab
- Right-click on the new tab and select Rename
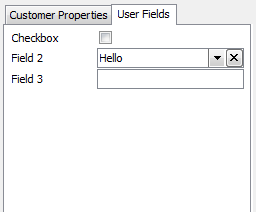
- Rename the tab “User Fields”
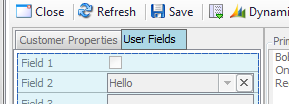
- Drag and drop user fields from the Customization window to the new User Fields tab and arrange as desired. You can even rename the fields differently for this location. The result will look like this:
SalesPad Support
Comments
mspencer@chesapeakesystems.com
Do users have to be logged out in order to modify the layout? I'm simply trying to modify some spacing (make a field wider) and had no problems in our TEST enviroment, but changes made to the LIVE enviroment can't be saved. The value I updated simply reverts back to the previous setting.