Catch Weights
Most commonly used in food service, using catch weights adds the ability to stock inventory by one unit of measure (case/each) and sell to the customer by another (weight). For example, a company can stock food items by the case, and pull the items out of inventory by the case, and using catch weights, can easily sell the items by the pound.
The below example will illustrate the use of catch weights:
- Adding catch weight items to your inventory
- Generating a vendor purchase order to purchase a catch weight item
- Receiving the catch weight item
- Adding a catch weight item to a sales order document
Before we walk through the process, the following settings must be configured in the Settings module (filter to “catch” to find all quickly):
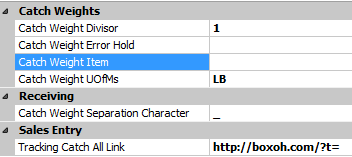
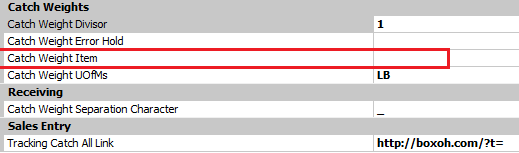
Catch Weight Divisor - If needed, enter a divisor for the weight. So, in the above example 12345_321 with a Catch Weight Divisor of 100, the actual weight will be 3.21 lbs. or kg. (In this example we have a divisor of 1, so we just need to add the actual weight. For example IMP-PARM_2.15 = Parmesan Cheese weighs 2.15.5 lbs.)
Catch Weight Error Hold (Optional) - Specify a process hold to apply to a document if there is an error when processing catch weight items.
Catch Weight Item - Specify a Dynamics GP item number to use for the catch weight line, or leave blank to use a non- inventory item. Or if you wanted to track the cost of goods sold for a specific item, you can add that item number here to track back all the variable costs. However, the item would still be unable to be tracked as an inventory item.
Catch Weight UOfMs - Set the sell by unit of measure for catch weight, LBS or KG or both (LBS;KG).
Catch Weight Separation Character (under Receiving) - Specify the character or characters used to separate the lot number and weights when committing the catch weights. For example, use “_” as a separation character, and the number will appear as 12345_321, with 12345 being the lot number and 321 being the weight.
Note: The user must log out of SalesPad and then back in for settings changes to take place.
Security settings
Turn off Auto Assign Lot Number for the Receiving module in SalesPad.

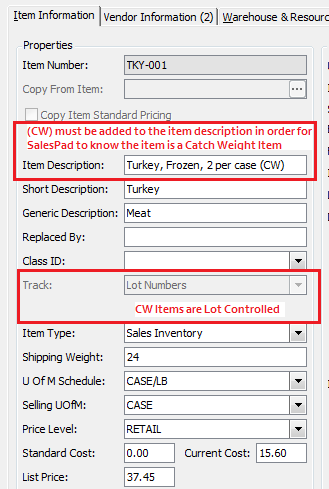
Step 1 – Adding Catch Weight Item to your Inventory
The following items have been created in the item master as catch weight items (adding (CW) to the item tells SalesPad that this is a catch weight item). Catch weight items are lot controlled.
- Turkey, Frozen, 2 per case (CW)
- Imported Parmesan Cheese, 2 per case (CW)
Step 2 – Generate PO to order the Catch Weight Specific Goods from Vendor
- Add CW items.
- Choose Location.
- Click Save.

SalesPad will track the lot numbers for the catch weight item.

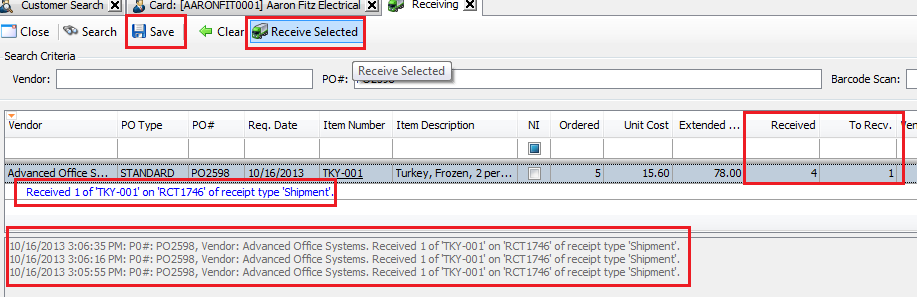
Step 3 - Receiving Window in SalesPad to Receive the CW items
Open the Receiving window in SalesPad. Search for PO2598; items on that PO will be displayed on the grid. Enter quantity to receive and serial/lot(s).
To add the weight for serial/lot(s), use “_” as a separation character to separate the item from what the weight of that item is.
- For the cheese, IMP-PARM, we are receiving both of the cheese at a weight of 2.15 lbs (they arrived weighing the same) therefore we need to enter: IMP-PARM_2.15.
- For the turkey, TKY-001, all 5 had varying weights, therefore we need to enter received quantities 5 times with the varying weights.
- TKY-001_8.5, TKY-001_9.6, TKY_001_7.2, TKY-001_5.0 (So the weights received are in lbs. and are 8.5 lbs., 9.6 lbs., 7.2 lbs., etc.)
Do this for each item in the case until all items have been received.

Once you enter the quantity and serial/lot information, click Save, then click Receive Selected.
A blue line with receipt details will appear below the line items you have received. A summary of receipts is listed at the bottom on this window.
If receiving multiple lines that have the same weight, users have an option to make this process quicker by right clicking in the grid to receive multiple lines that are being received in the same location, bin, etc.
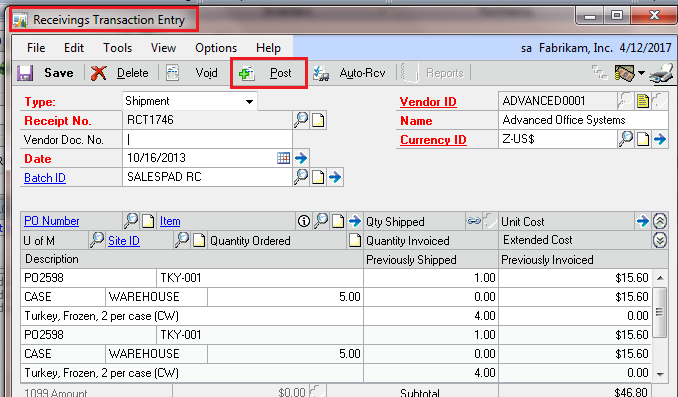
Step 5 – Post Receipt of goods in GP
Step 6 – Generate Sales document
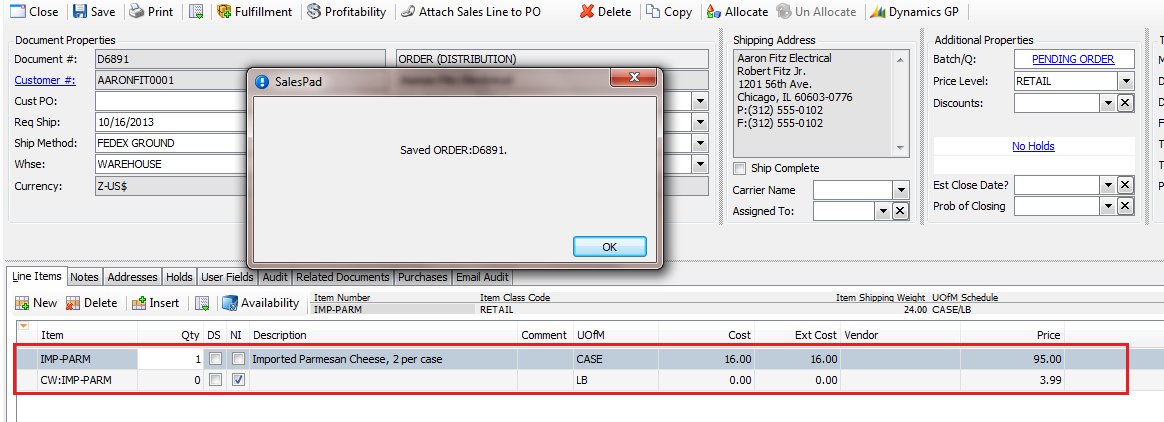
Add catch weight items to the sales order and note how two lines are automatically generated.
- IMP-PARM is the inventory item which was received in into inventory as a case.
- CW:IMP-PARM is the catch weight item which allows users to sell the inventory item in another unit (still sold as a case, but broken down by UOM which can be used to track back the cost of goods sold).
Click Save after all line items have been added to the sales order.
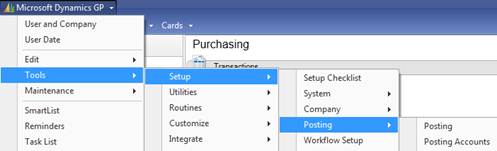
CW:IMP-PARM is a non-inventory item, therefore there is no way to track this item. There is also no item card for it, and therefore no way account for this item other than what you set up for that item in GP under Tools > Setup > Posting > Posting Accounts.
You can specify a COGS specific to each catch weight item if you set up the item in the Setting > Catch Weight > Catch Weight Item. Variable costs tracked back to the item through this option still have no inventory tracking.
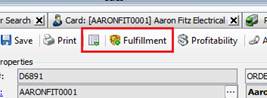
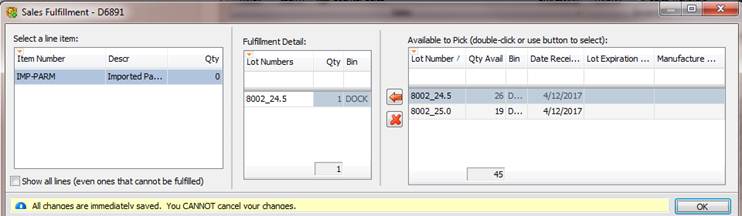
Step 7 – Sales Fulfillment Plug In
Click Fulfillment from either the dropdown action button on the sales order or from the sales document header. The Sales Fulfillment screen allows users to select items from serial/lot numbers and bins to fulfill orders.
After selecting the items, click OK.
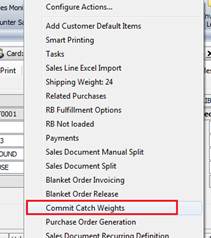
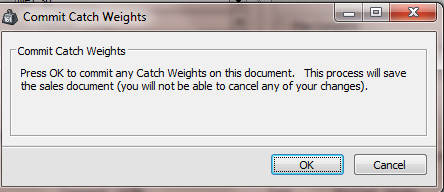
Step 8 – Commit Catch Weights
From the Action dropdown menu, or from your sales document header, choose Commit Catch Weights.
We recommend not to commit catch weights until the order is ready to be invoiced, or commit catch weights after an order has been invoiced, because once the Commit Catch Weights application has been applied, order quantities cannot be changed, nor can additional line items that contain catch weights be added. So, if a user wants to make a change to an order that has catch weights, a new order will need to be generated, which is easy to do with the copy function.
Below is an example of how the line items are changed after running the Commit Catch Weight plugin on a sales order.
The Commit Catch Weights plugin took the weight of the item and multiplied the weight by the price per pound to get the extended price. So, in the example below, qty 1 case of turkey was equivalent to e24.5 lbs. of turkey selling at $3.99 per pound.

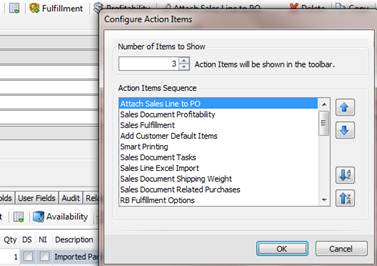
There is an option to configure sales document header actions so that Commit Catch Weights and Fulfillment are available without clicking the Actions dropdown.
SalesPad Support
Comments