IMPORTANT: UPS has deprecated access key authentication in favor of an OAuth 2.0 security model and REST API. Beginning June 3, 2024, access keys will no longer be supported for authentication to any UPS APIs. For updated configuration information, please refer to this guide.
Overview
Connecting your UPS account to ShipCenter is a simple process, and once that's done, you can use ShipCenter to create and manage shipments for UPS.
Setting up your UPS account
Setting up your UPS account for use with SalesPad's ShipCenter requires just a few quick steps.
First, from the ShipCenter Setup tab, select Carriers, then select New, then UPS. The Carrier Editor - UPS screen will appear. Give the Carrier Profile a name, enter your company name, then enter your company's default Ship From address. Under UPS API Settings, set your Customer Classification, default Pickup Type, and default Label Size and Format preference. Your choice for Label Format will depend on the type of printer you'll be using to print your labels.
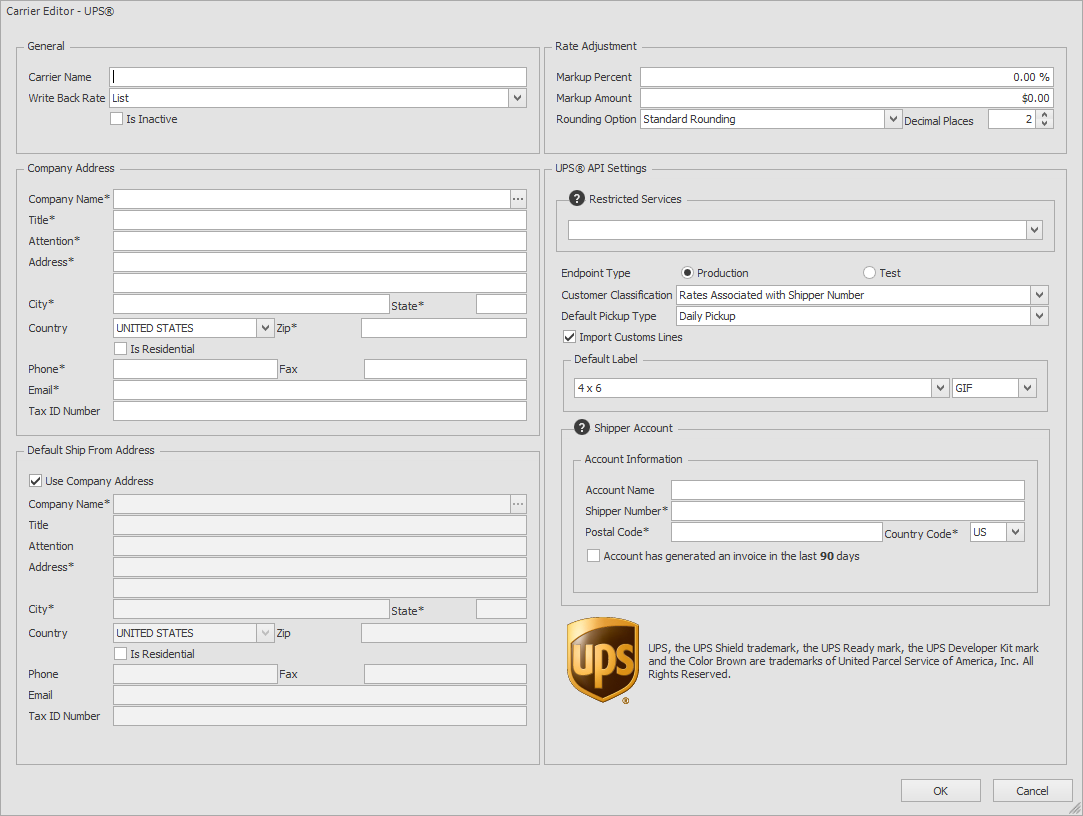
Next, you need to enter your UPS Shipping account information. First, open a new UPS shipper account on the UPS website, if you don't already have one. Use the Postal and Country Codes associated with your shipper number. If your account has generated an invoice in the last 90 days (US & Canada) or 45 days (all other countries), check that box and the enter the information from your most recent invoice.
Note: Account Invoice Authentication is performed as a security measure to ensure that only authorized customers can add accounts to profiles.
Make sure that you have the production endpoint selected before clicking OK. If you want to test shipping or rating functionality against the UPS test environment, you can switch the endpoint to Test after you've registered.
After clicking OK, when prompted, click the Yes button, then accept the UPS terms and conditions and wait for setup to complete. Clicking Cancel will return you to the setup screen, and clicking No will save your profile and close the Setup screen without finishing the process. You will not be able to get labels or rate quotes until setup is finished.
After your profile has been successfully registered with UPS, you can go back into your UPS profile and add additional Shipper accounts, or change the defaults. ShipCenter does not have the ability to remove a Shipper account once it has been added to your profile.
Once you've entered information into all required fields in the Carrier Editor - UPS window in ShipCenter, click OK to save your changes.
Shipping with UPS
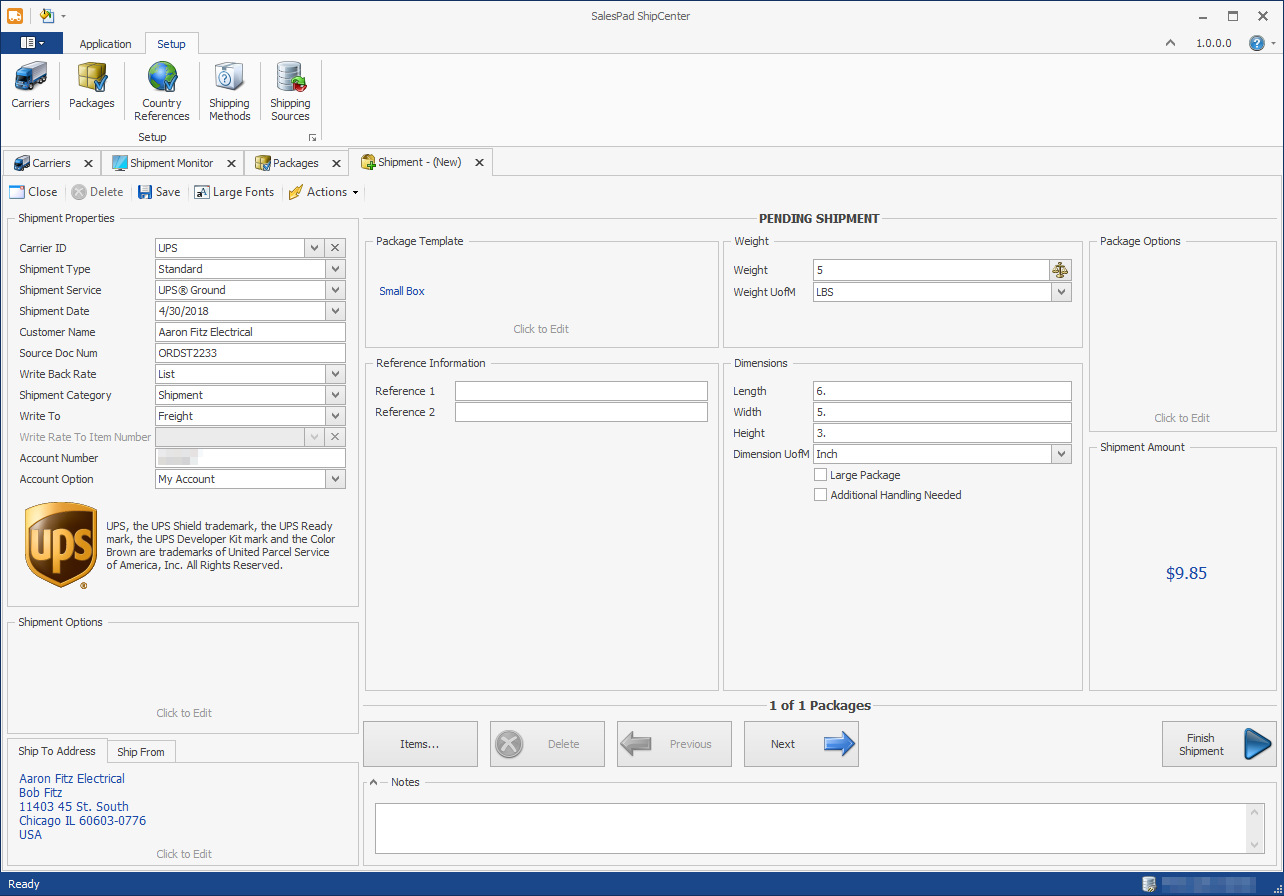
If your shipment was created from a sales document, the Ship To address in the lower left-hand corner of the Shipment tab should already be populated. If it is not, go ahead and fill in that information. Next, enter the shipment's package weights and dimensions in the Weight and Dimensions sections of the Shipment screen. Select your UPS Carrier profile from the Carrier ID dropdown in the upper left-hand corner, then the Shipment Service (i.e. UPS Ground) from the Shipment Service dropdown two fields below the Carrier ID.
Note: The Shipment Service dropdown will only contain services available for the current origin and destination of the shipment.
If required for your shipment, set any UPS options needed by selecting the Shipment Options (in the lower left-hand corner) or Package Options (in the upper right-hand corner) fields. Shipment and Package Options are further documented in the next few sections of this article.
Click Finish Shipment in the lower right-hand corner to send the shipment information to UPS and receive a shipping label.
Shipment Options
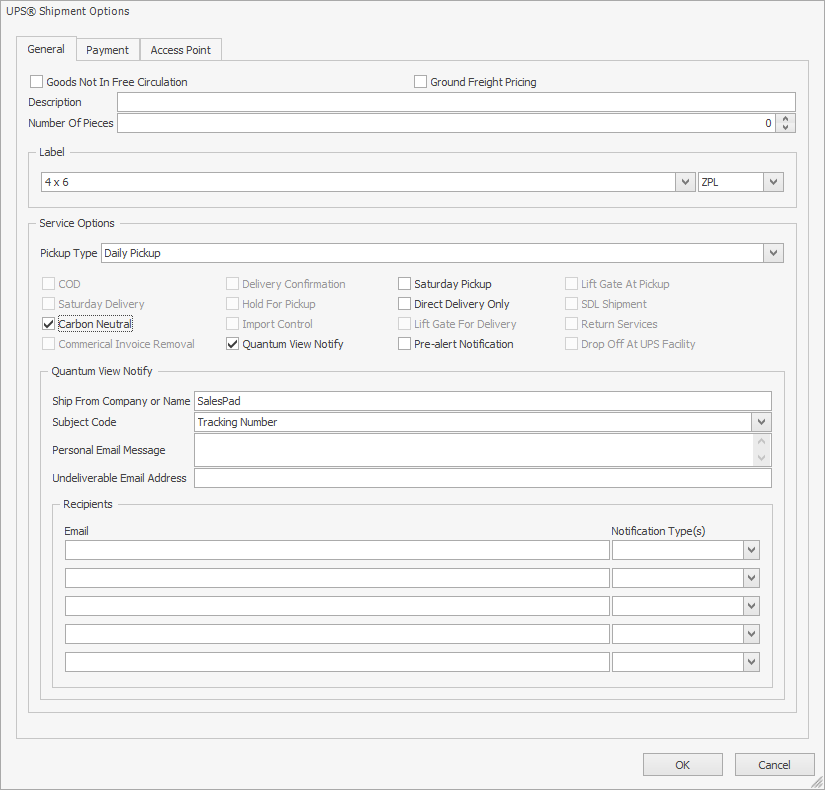
The UPS Shipment Options screen contains three tabs (four if shipping internationally): General, Payment, Access Point, and Customs.
General
The General tab is where you'll specify options such as Shipment Level COD, Quantum View Notifications, Saturday Delivery, etc. Some of these options will ask for additional information once selected. You can also change the Pickup Type and Lable Size/Format for this shipment if it differs from what you chose as the default when setting up your UPS profile.
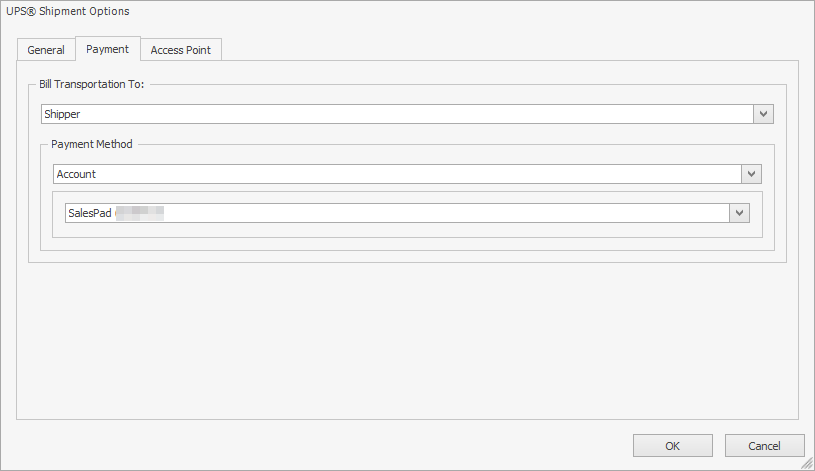
Payment
The Payment tab is where you can choose which Shipper account you want to be billed for this shipment. Additionally, you can opt to either enter your credit card information or bill the receiver or a third party for the shipment.
If your shipment will be charged duties and taxes, this tab is where you'll be able to choose who and how to bill for that as well.
Access Point
If the recipient of your shipment would like for it to be held for pickup at a UPS Access Point, check the box on the Access Point tab and enter the address for the Access Point.
For added security, provide the recipient with an authorization code to be used when picking up the shipment. Enter that code in the Package Release Code field.

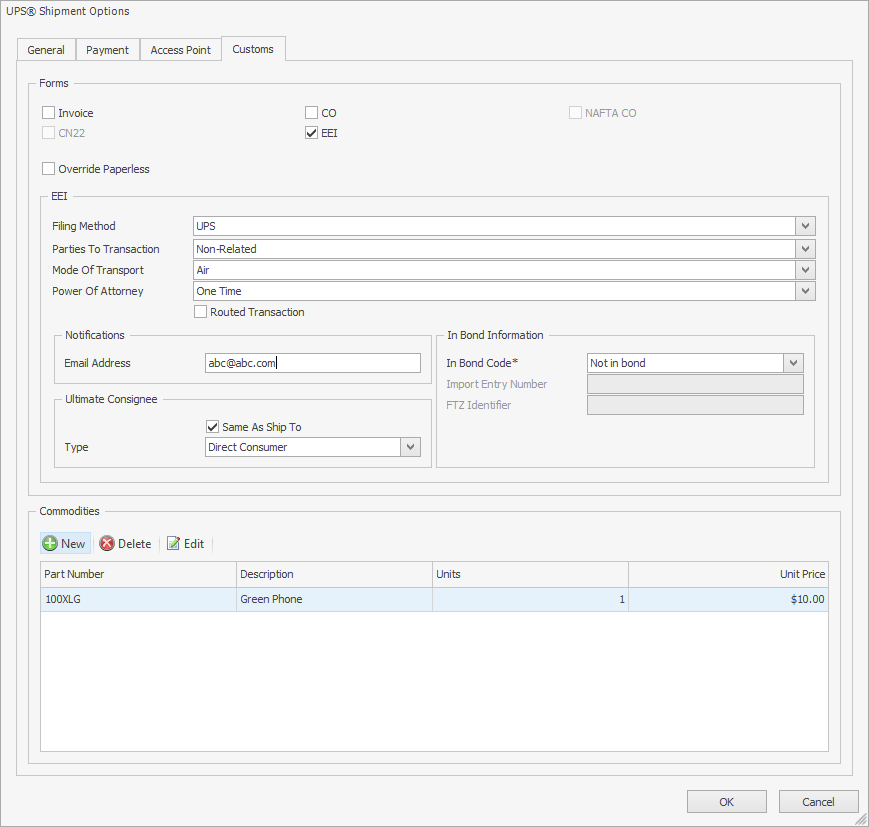
Customs
If shipping internationally, the Customs tab is where you'll enter information about what you're shipping, and also where you'll select the type of custom forms you would like UPS to produce for you. If you've enrolled in UPS Paperless Invoice, the forms you select here will be transmitted to the customs office for you.
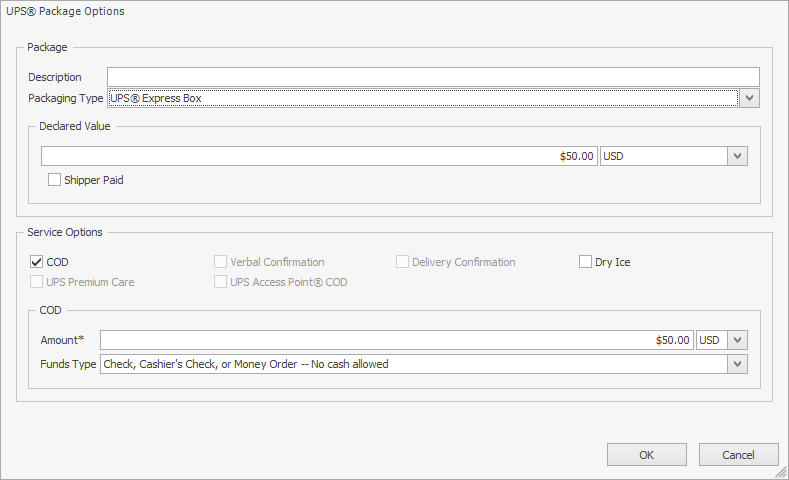
Package Options
The Package Options screen is where you can specify options such as Declared Value and COD for each individual package in your shipment.
SalesPad Support
Comments