Overview
SalesPad GP is a standalone application that integrates with and enhances Microsoft Dynamics GP. Its primary function is to provide a better, faster Sales and Customer Service interface for Dynamics GP. Moreover, a SalesPad user does not require an additional license of Dynamics GP. SalesPad can keep your Dynamics license count down and keep your non-financial users more than a password away from your confidential data.
SalesPad is a .NET form-based application. It provides a feature-rich experience by using best-in-class technology components and techniques to help users find and maintain customers, contacts, inventory, sales documents, and more. All the information is pulled from and saved to the Dynamics GP company database; there is no synchronization, duplicated data, or time-delayed access to data.
This Installation Guide is intended to provide a detailed set of instructions to install SalesPad. SalesPad must be installed on all client workstations using the application. A set of eConnect to SalesPad objects must be installed onto the database/GP Server. Please contact SalesPad LLC for the SalesPad client install program. After you have downloaded the client install program, you must run it on all the workstations that you want to install SalesPad. Before you can successfully use SalesPad, you must complete the installation on one workstation, including the database setup process.
SalesPad System Requirements
Required Hardware Components and Features
- Processor: Intel® Core™ i3-3xxx (or equivalent), AMD Athlon X2, AMD FX 6100Intel®
- Disk drive: Minimum 250mb free disk space to store program executables and data
- Memory: Minimum 2 GB of RAM
- Display: 1024x768 is the minimum resolution that SalesPad supports; we also suggest the use of a widescreen monitor
- Network Adapter: SalesPad requires a network connection to connect to the server running Microsoft Dynamics® GP
Terminal Server (Optional)
- Supports Windows Server, version 1709 (and up), Windows 2016, Windows 2012, Windows 2008 R2 SP1
- If you are running both Microsoft Dynamics GP and SalesPad together, we recommend a minimum of 2 GB of RAM per user
- Recommendation of no more than 15 users per terminal server depending on server hardware. Exceeding this number could impact application performance.
- For best results, consult your GP Partner’s technology expert or an IT professional experienced with setting up terminal servers
Required Software Components
- Operating System: Windows 7 SP1, 8, 10, or 11
- Other Software: Microsoft Dynamics® GP (GP2013, 2013 R2, GP2015, GP2016, GP2016 R2, GP2018, GP2018 R2, Dynamics GP October 2019 Release), Microsoft .NET Framework 4.5 or greater (SalesPad versions below 4.1 require 2.0 or greater)
Note: If .NET 4.7.2 is not already installed at the time of SalesPad 4.1+ installation, it will automatically be installed as part of the SalesPad installation process
For information on the minimum version of SalesPad required for a given GP build, please visit this documentation.
SQL Server Compatibility
- Microsoft SQL Server™ 2012
- Microsoft SQL Server™ 2014
- Microsoft SQL Server™ 2016
- Microsoft SQL Server™ 2017
- Microsoft SQL Server™ 2019
- Microsoft SQL Server™ 2022
Virtualized Environments:
Running SalesPad either as a published application or as part of your Virtual Desktop Infrastructure (VDI) is supported. Both SalesPad and Dynamics GP will place additional load onto your VDI servers, so please ensure that your infrastructure can support this.
Requirements to Complete Installation
- The current build of SalesPad to install (fill out the Upgrade Request Form to request it)
- Administrative privileges on the computer where you will be installing SalesPad
- The name of the SQL Server database to which you will create a SalesPad connection
- The System Administrator (sa) password for the SQL Server database to which you will create a SalesPad connection
- A completed install of Dynamics GP with the appropriate client registration keys entered
Install Instructions
Install Client Program
To begin SalesPad installation, open the installation file. The Setup Wizard will appear. Click Next.
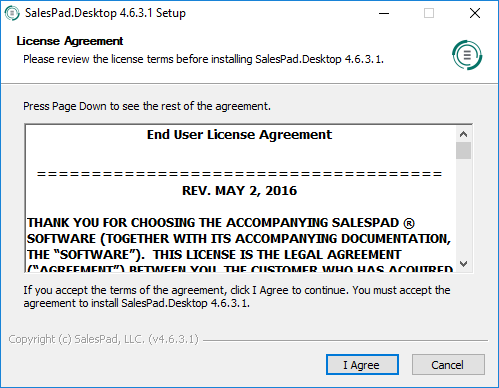
Read and accept the EULA (End User License Agreement) by clicking I Agree.
Select the desired (or default) folder to install to and click Next, then select the features of SalesPad to install and click Install.
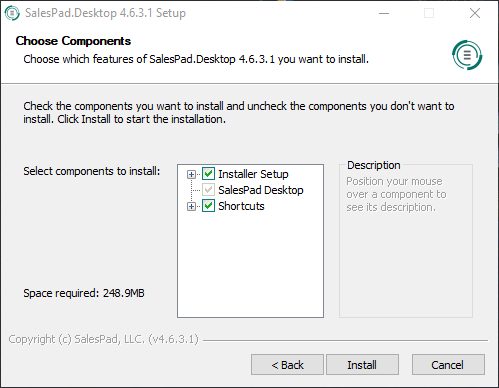
The program will begin installing. When setup is complete, click Finish.
Connecting for the First Time
Before you can begin using SalesPad with your Dynamics GP company, you must set up a connection to the company (on each workstation). Follow the instructions below.
Run SalesPad via the Start Menu icon or the desktop icon. Click the + in the Connect To: box to set up a new connection.
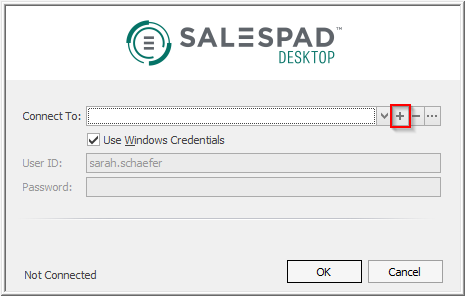
Create a Connection
Fill out the necessary information in the SQL Server Connection window.
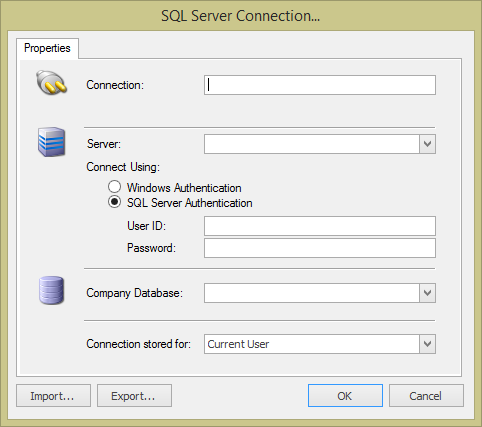
Name the connection, specify a server, the type of Authentication (and User ID and password if needed), and the name of the company database. Click OK to save the connection and return to the Login screen.
Note: Regardless of the method of authentication, the user must be a part of the DYNGRP group on your database. If you will be using the Windows Authentication method on the main login screen, the connection will be forced to Windows authentication and any User ID and Password specified here will be ignored.
Required min SQL user security
- DYNAMICS db: DYNGRP, public
- MASTER db: public
- tempdb: db_datareader, db_datawriter, public
- COMPANY db: db_datareader, db_datawriter, DYNGRP, public
- Note: If you are still getting error messages, enable db_datareader on DYNAMICS
Required min Windows user security
SalesPad needs the following permissions to run:
- SalesPad Install Folder - Read
- ProgramData and AppData Folders - Read/Write
- Registry - HKEY_CURRENT_USER\Software\SalesPad - Read/Write
Database Update
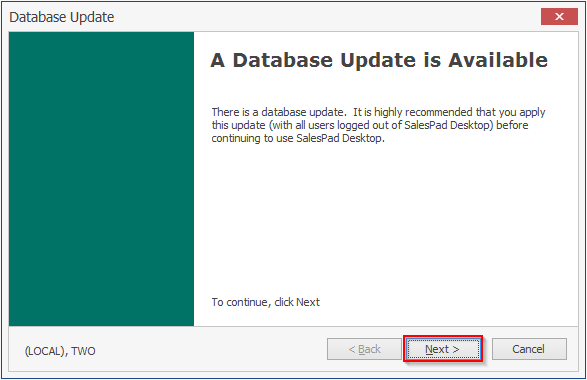
The very first time SalesPad is installed, a Database Update will also need to be installed. Click Next to start the installation.
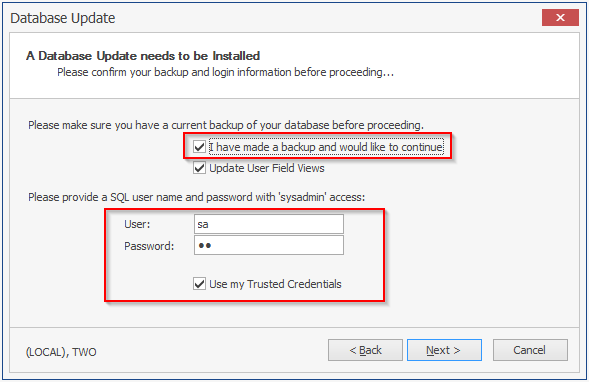
Confirm that you have made a backup of your data, then log in as the “sa” user using these credentials:
- User ID: sa
- Password: sa
The sa user is created by default and has access to the administrative functions in SalesPad.
Click Next. The database update will run. Click Next again once it's finished.
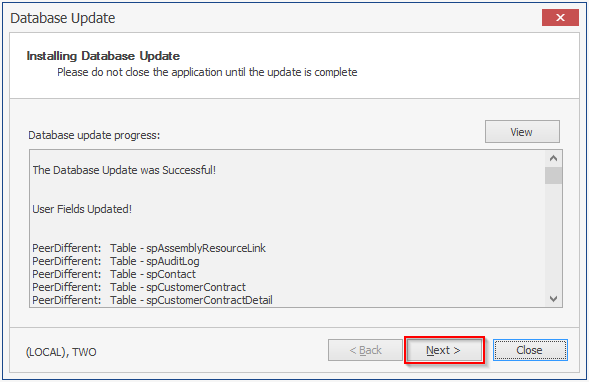
You will need to log back in to SalesPad Desktop once the database update has completed.
Security Setup
The first time SalesPad is installed after the Database Update, you will be prompted to select preconfigured role-based security groups to load.
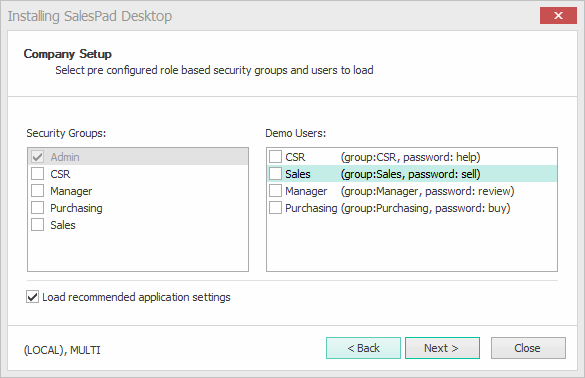
Be sure to take note of the passwords for any Demo Users selected.
Select the desired Security Groups and Demo Users to add and click Next. Once logged in, you will be able to make changes to the security configuration at any time.
The screen will indicate that the Database Update is complete.
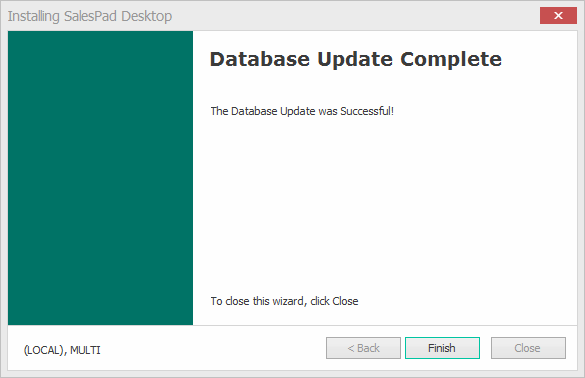
Click Finish to return to the login window. Enter the sa password and click OK.
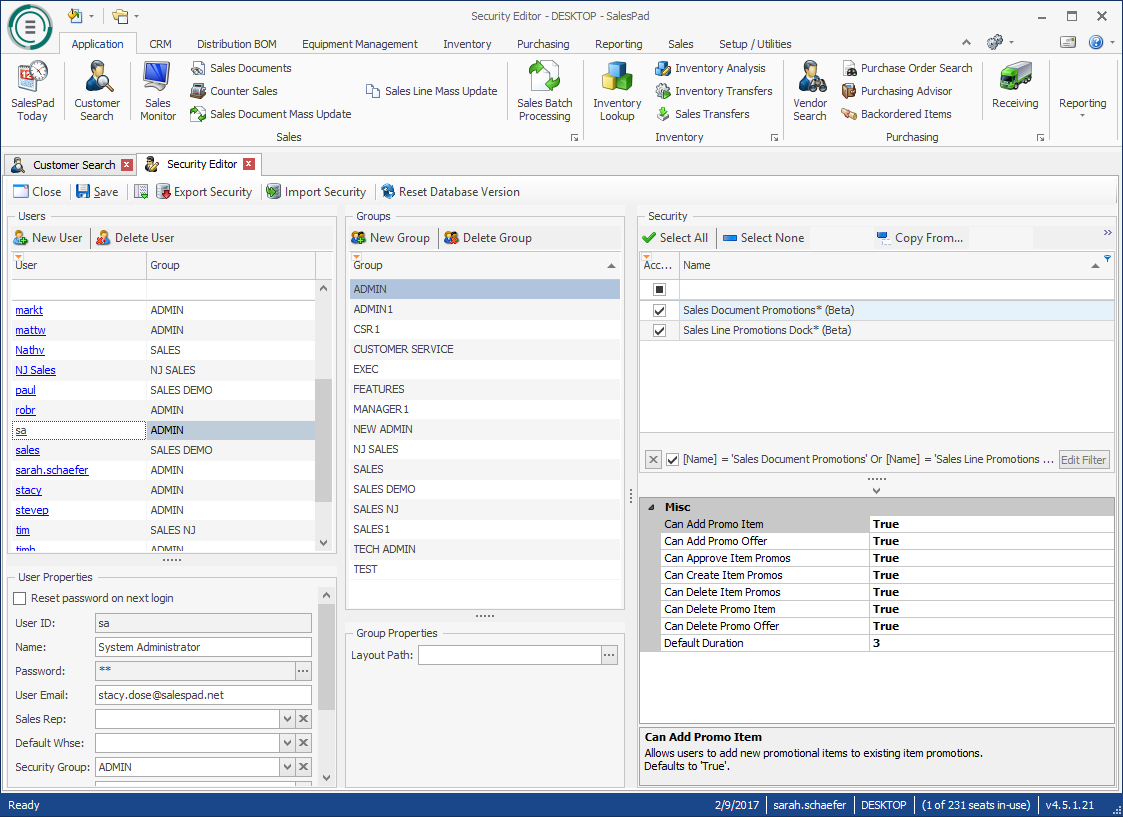
You can view the preset Security and make any changes to groups and their security settings in the Security Editor, accessible via Modules Menu > System > Security Editor or from the Navigation dropdown.
By default, the sa user will be part of the Admin group.
If you create a user with a Windows login name and do not enter a password, the user will be able to log in using Windows authentication by selecting Use Windows Credentials before logging in.
Refer to the SalesPad Security Settings guide for more information on adding or editing users and groups, and on the effects of enabling individual security settings.
Future Database Updates:
Note: The Database Update screen will automatically start whenever SalesPad detects that the database needs to be updated. It is crucial that you are logged in as a user that has the appropriate privileges on your database server; we recommend that you connect as the sa user when installing a database update.
The Database Update may take some time. You will have multiple opportunities to cancel the update process, but if you do not successfully update your database, you may experience problems while using SalesPad. When a database update is available, the following window will popup. Make a backup of your data and enter your sa username and password before proceeding.
Click Next to continue. The Database Update will begin analyzing database differences. The size of your database and the speed of your connection to the database will affect the length of the analysis process. Again, the size of your database and the speed of your connection to the database will affect the length of this process
Note: If the database process fails, review the error messages with your database administrator. If your database administrator cannot determine the problem, please contact our support team for further assistance.
SalesPad Support
Comments