Overview
SalesPad Sales Entry Quick Pick Module provides the user with a faster and more customizable way to add items to a Sales Document. It allows the user to set up a hierarchy of categories and their items, which is then displayed to the end- user in a Sales Document Plugin, allowing them to navigate the hierarchy and add items from any category at any point. Each SalesPad Security Group can set up its own hierarchy. Additionally, there are multiple security settings set up around the Sales Document Plugin which allow for a highly customized look and feel, providing a better user experience.
Usage
Sales Entry Quick Pick Maintenance (Modules > Sales > Sales Entry Quick Pick Maintenance):
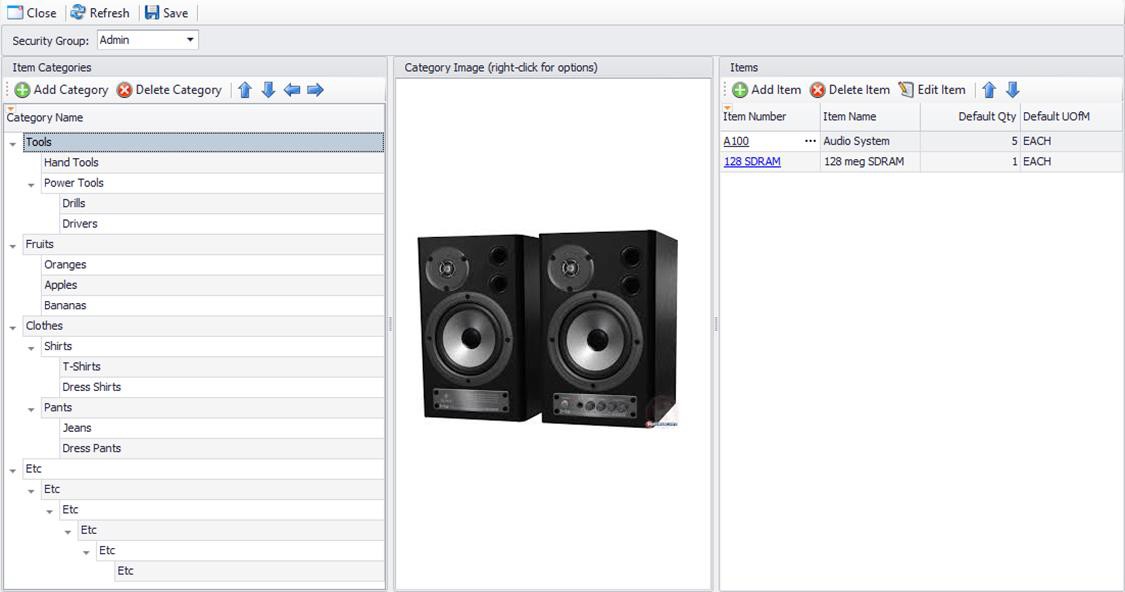
Security Group: Select any security group from this dropdown to view / edit its Quick Pick hierarchy.


Add Category: This button will add a new category underneath the currently selected category (or at the root level if none selected). A prompt will be presented for category name, however this can be changed later as needed.
Delete Category: This button will delete the currently selected category. If subcategories or items under that category exist, a prompt will be shown asking whether they should be deleted or simply moved up one level to the parent of the deleted category.
Arrows: The arrows can be used to change category order (categories and items will be shown in Quick Pick Entry in the same order they are in the maintenance screen), as well as move categories up to their parent level, or move them down a level to be a child of the category directly above the current (if one exists). All Items move with their categories.
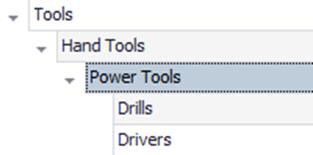
Examples (Power Tools being the selected category):
Up: Power Tools will be moved above Hand Tools in order (in the same level):

Down: No categories exist below Power Tools, so it will not be moved. (Had a category existed, Power Tools would have been moved below it in order (in the same level))
Left: Power Tools will be moved to its parent (Tools) level:

Right: Power Tools will be moved to be a child of the category above it (Hand Tools).
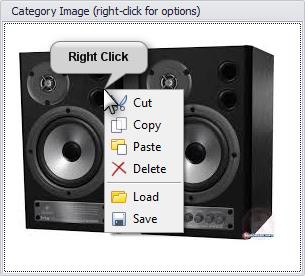
Category Image: This section allows a user to add images to category buttons. Double-click to bring up a file explorer, or right-click to bring up a context menu with a few more options. As with Item Images, these images will be resized (keeping aspect ratio) to take up the remaining button space after text.

Add Item:This button will add a row to the Items grid, and set focus on the Item Number for user input. Users can enter an Item Number, or use the ellipsis to bring up the Inventory Lookup. Once a valid Item Number has been entered, Item Name will be filled in, a Default Quantity of 1 and the Default Unit of Measure for that Item will be selected.
- Default Qty: A Default Quantity value can be set here. This is what the Item’s Quantity will show as on the item button in Quick Pick Entry (this can be changed on the fly right on the button), and the quantity of the item that will be added to the document:
- Default UOfM: A Default UOfM value can be set here. Items will be added in this Unit of Measure when the item button is selected in Quick Pick Entry.
Delete Item: This button will delete the currently selected item.
Edit Item: This button will bring up the currently selected item in the Item Master. (Users can also simply click on the Item Number hyperlink).
Quick Pick Entry (Sales Document Actions > Sales Entry Quick Pick):
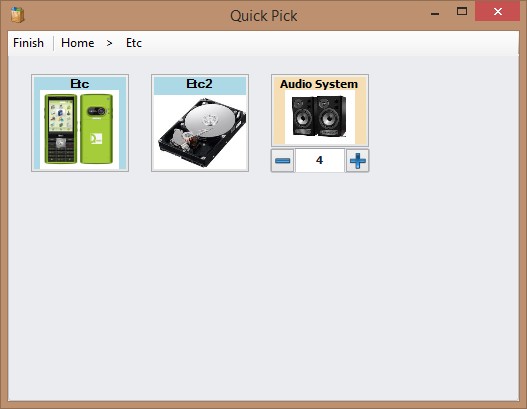
Category Buttons - Category Buttons will display the name of the category, and the category image if one exists. When selected, the screen will be refreshed with the subcategories and items belonging to that category.

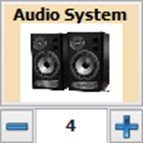
Item Buttons - Item Buttons consist of the text selected in Security Settings -> Quick Pick Entry -> Button Text, an image if the Item Master Image UDF is supplied, and Quantity. The Spin Buttons ( + / - ) can be used to increment or decrement the Default Quantity set in Quick Pick Maintenance, or a new quantity can be manually typed in.
When the button is selected, the Item will be added to the Sales Document in the Quantity specified on the button, and in the Unit Of Measure specified in Quick Pick Maintenance. Users can continue to add items; when finished, either select the “Finish” button on the top left, or simply close the form.
BreadCrumbs - As users dig down into the hierarchy, the breadcrumbs trail will show them the path they have taken. Users can click any of the Category names in the breadcrumb trail to bring them to that.

Settings, Security, and Setup
Sales Entry Quick Pick Maintenance -This security will enable the Maintenance Screen, which can be found under Modules -> Sales -> Quick Pick Maintenance
Sales Entry Quick Pick* - The checkbox will enable the Quick Pick Plugin, which can be found (when on a Sales Document) under Sales Document Actions -> Sales Entry Quick Pick
SalesPad Support
Comments