Overview
The Sales Document Packages tab is where cartons intended for shipping are created. It is a necessary step in creating shipping labels using SPS’s web service, and it is also required to accurately create an Advanced Ship Notice EDI document. With this module, users can set Shipping Header level information, create packages and set various package details such as weight, height and tracking number. They can also add items and quantity to the package which provides trading partners with package level information.
In this document, you will learn how to navigate the shipping header, create a new package, create and print labels, and how to create an advanced ship notice.
Table of Contents
Shipping Header

This section is for overall information about the shipment. Users are required to include a Bill of Lading number, Carrier Code, Carrier Pro Number (master tracking number for the shipment), shipping method, shipping weight, shipping date, delivery date and pack method. Currently, the only pack method supported is Pick and Pack (SOPI). Carrier Code is typically a 4 letter code used to identify road transport companies. The carrier company should be able to provide this code or it can be found on the internet.
Package / Package Items

To create a new package, click New, which will pop up another form where users can enter information.
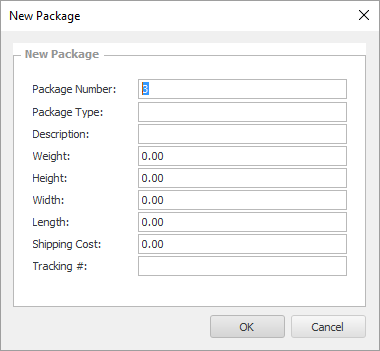
Here, users can easily add any package detail that is required, or they can click OK and edit the information from the row. Users can also delete and copy packages if necessary. If automatic SSCC creation is required, there are a couple settings that need to be filled out. Just go into settings and filter for “SSCC”. A GS Company Prefix is required along with a starting value.
Once a package has been created, Package Items are ready to be added. Simply click New on the Package Item side and a new form will open up.
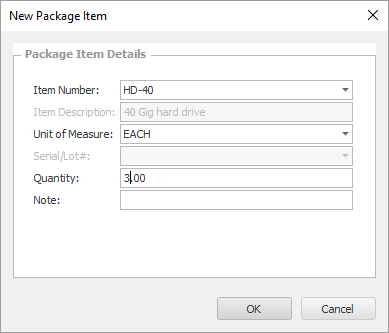
The Item Number field is populated with line items from the sales document. Select the item number that is being added to the package. This will automatically set the item description and the selling unit of measure. The Serial/Lot# field is populated with serial or lot tracked items that have been fulfilled to the document and will be editable if the item is a serial or lot tracked item. Enter in the quantity and any notes that are needed into the respective fields. Click OK. Once the form is closed, any item information can still be edited from the row.
Labels
Shipping Labels are designed to work with SPS’s Shipping Label web service and currently only work for companies that have been added to their service. A Label UID code for each company that shipping labels are generated for needs to be acquired from SPS. This value must be added in the Data Cross Reference screen on the trading partner’s row. After this, go into Settings, filter for “EDI SPS”, and enter in the label service URI along with a username and password. Lastly, make sure that in the Business Object Mapping screen, mapping has been created for “Shipping Label (Single Item)” and “Shipping Label (Mixed Items)”. Printing labels also requires a few settings to be filled in. Go into Settings and filter for “EDI Label” and fill in the label printer’s IP address, port and the label’s dimensions.
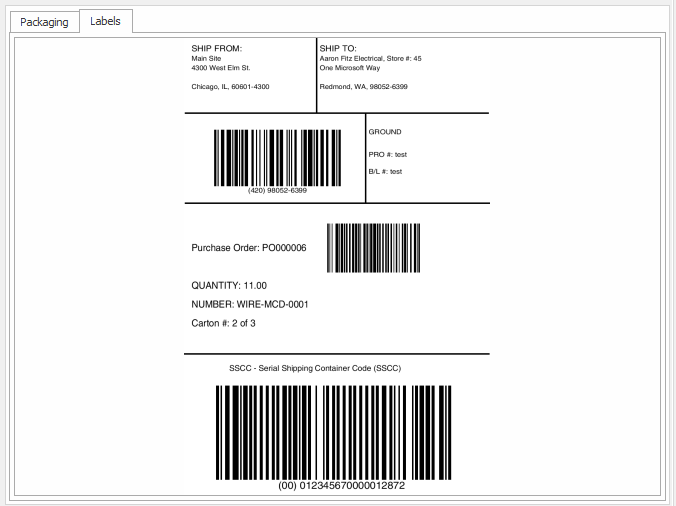
Once all the setup is completed, simply click the Get Labels button to generate shipping labels. These labels will appear as images in the label window and can easily be flipped through by selecting the < and > buttons. The example below is an Amazing Warehouse shipping label.
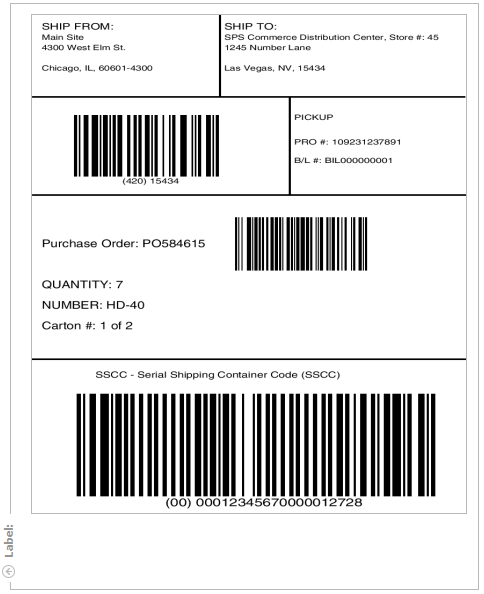
To print the labels, click Print Labels. Currently, all labels will be printed and users cannot select only a single label to print.
Advanced Ship Notice
ASN’s can quickly be created from the Package’s tab by clicking the Process ASN button. If for any reason the ASN needs to be reprocessed (possibly an issue with the ASN or something needed to be changed), just re-click the Process ASN button. This button is protected by security if you do not see it. This will regenerate the ASN with the same number and new information.
Consolidated Shipping
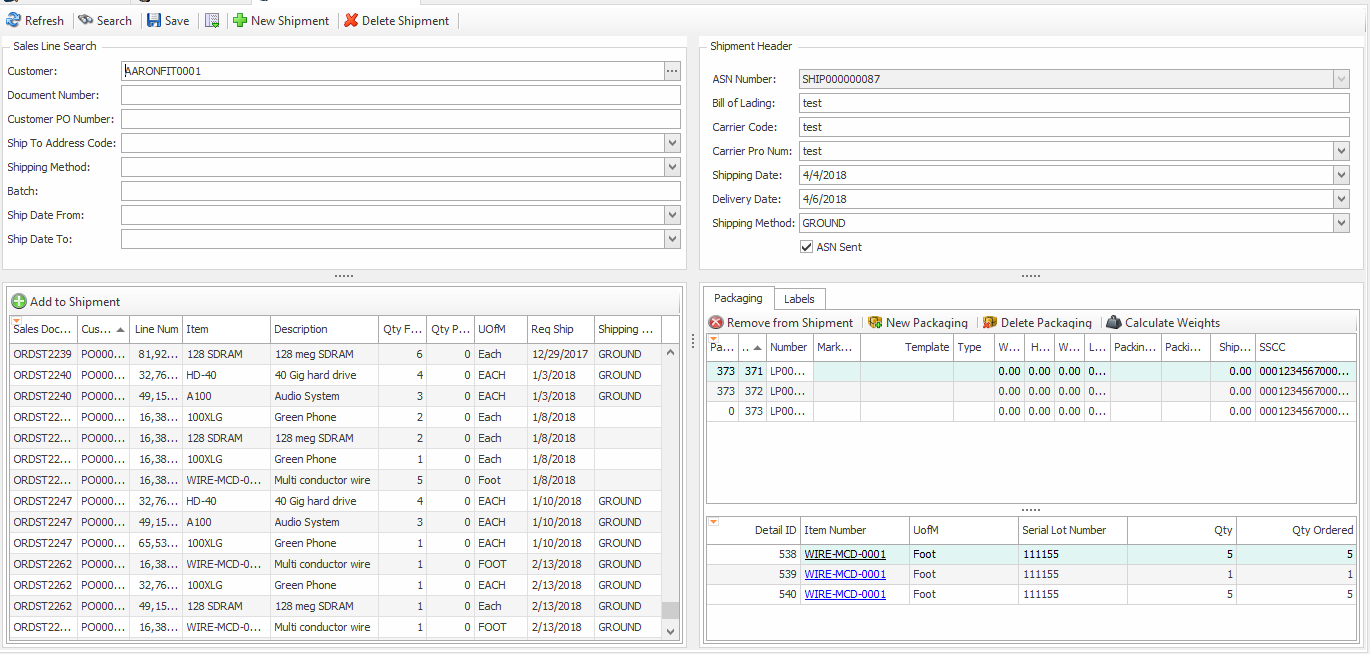
The Consolidated Shipments module is used to build out a single shipment for a customer containing items from multiple sales orders.
Usage
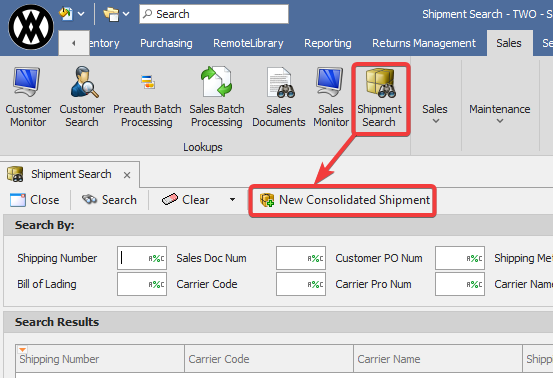
The Consolidated Shipments module is located in the Shipment Search screen, which can be found in the Sales module.
Sales Line Search
The left side of the Consolidated Shipments screen contains the Sales Line Search. Enter the search criteria in the fields at the top. Click the Search button, and the results will appear in the grid at the bottom of the screen. All sales lines that match the search criteria, are fulfilled, and are not packed will be displayed here.
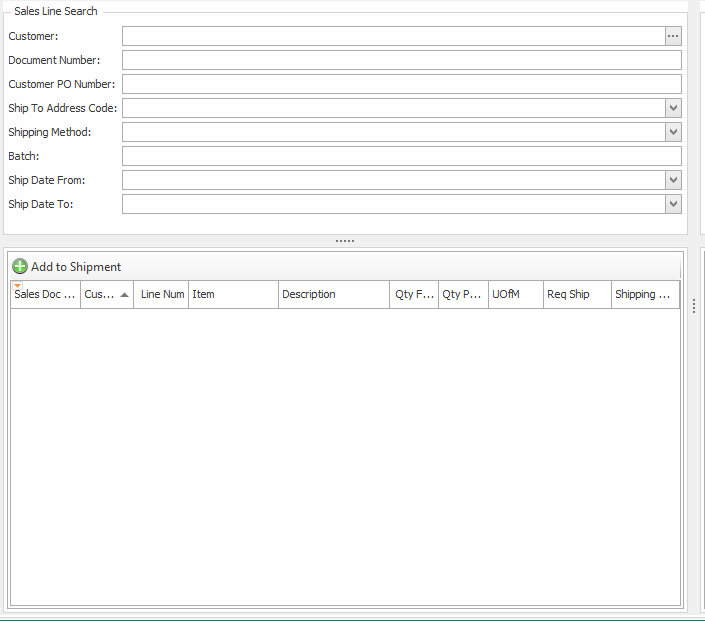
Add lines to the shipment by selecting them in the search results grid and then clicking the Add to Shipment button. To add multiple lines to the same package at once, hold Shift or Ctrl while clicking on the rows you want added.
Shipment
The right side of the Consolidated Shipments screen is where the shipment will be built out. Clicking the New Shipment button will automatically generate the next ASN number for the shipment. To load an existing shipmpent, specifiy an existing ASN number. The dropdown for the ASN Number field will contain shipments with a shipping date that has not occurred yet.
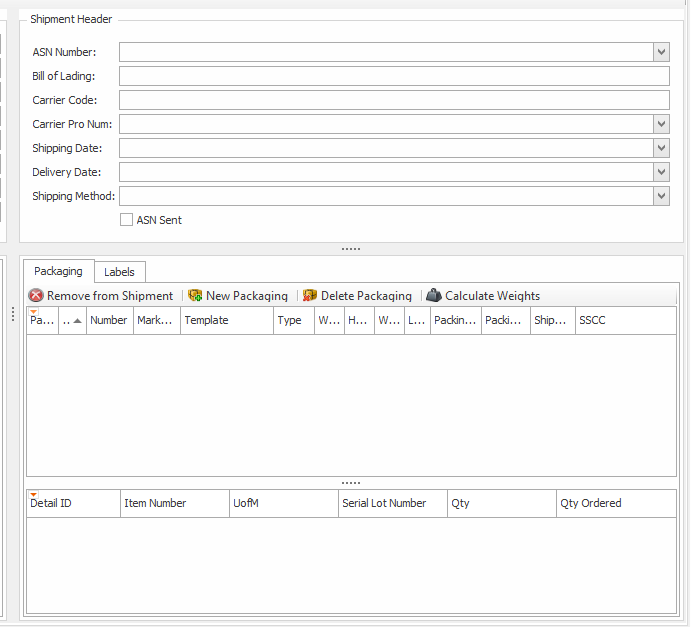
Create new packages with the New Packaging button. The SSCC number will be generated automatically, based on the settings, for each package created. Lines that are added to the package will appear in the bottom grid. To remove lines from the shipment, select them and click the Remove from Shipment button.
EDI Plugins
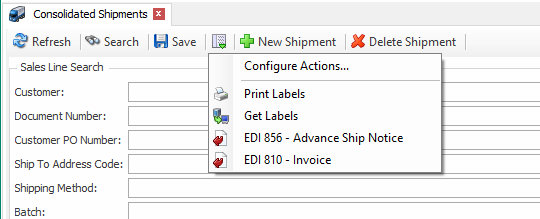
The Print Labels, Get Labels, EDI 856 - Advance Ship Notice, and EDI 810 - Invoice plugins require the EDI module to be installed.
You must also enable the following securites to use the EDI plugins.
Consolidated Shipments EDI Advance Ship Notice - Sends an 856 (ASN) file to the customer for the shipment.
Consolidated Shipments EDI Get Labels - Retrieves package labels from SPS in the ZPL (Zebra) format and then uses the Labelary API to convert that into a printable image.
Consolidated Shipments EDI Print Labels - Print package labels.
Consolidated Shipments EDI Invoice - Sends an 810 (Invoice) to the customer for each order on the shipment.f
In the Consolidated Shipments screen, these plugins are accessed from the Actions menu.
After running the Get Labels plugin, the labels for each package can be viewed in the Labels tab under the Shipment header of the Consolidated Shipments screen.
Security and Settings
Settings
SSCC GS Company Prefix - This is a 7-10 digit identifier, assigned by a third party.
Securities
Consolidated Shipments - Enables the Consolidated Shipments screen
Consolidated Shipments Search By Line - Enables the sales line item search results multiformlet.
Consolidated Shipments License Plates - Enables the shipment packaging multiformlet.
Consolidated Shipments Labels - Enables the shipment labels multiformlet. Currently, the only way to populate this with labels is to use the EDI Get Labels plugin.
SalesPad Support
Comments