Overview
RMA Entry is used to create new RMAs, edit RMAs, and view existing RMAs. RMAs are Return Merchandise Authorizations, which are warehouse returns that can be used with workflow in Dynamics GP. With RMA Entry, SalesPad can create RMAs, but it cannot utilize the workflow from Dynamics GP.
When creating an RMA, any RMA Type can be used (Credit, SVC, Replace, etc.) but the only Origin types allowed are None and Sales Invoice. Any RMA created in GP or SalesPad can be viewed in RMA Entry regardless of type or origin. In this document you will learn how to create, edit and view RMAs in RMA Entry. Any relevant securities or settings will be stated at the end of the document.
Note: RMA entry requires the Field Service Module in Dynamics GP, and the creation of Service Call Origin Type is not supported in SalesPad.
RMA Entry
RMAs require three header fields to be populated before a save can be committed: RMA Type, Customer Number, and Return Origin. SalesPad will populate the RMA Type with GP’s Default RMA Type and Origin will be populated with None. Each of these fields can be changed using the dropdown selections. Customer Number will need to be populated by the user.
Creating an RMA On-The-Fly (Return Origin is None)
Select a customer to create an on-the-fly RMA. This can be done by either typing in the Customer Number manually or clicking the ellipsis (…) and searching for the customer.

Change any other necessary header fields and leave Return Origin as None. To create a new line, click the New button.
This button only becomes available once a customer has been selected. Enter a Return Item Number. This can be done by either typing in the item number manually or clicking the ellipsis and searching for the item.

Then, enter a Quantity. If the item is a serial or lot tracked item, changing quantity will trigger the Serial / Lot selection screen. Fill out this screen, and then press OK. Please see the Serial / Lot section of this document for more information on this screen.
Note: This screen can be opened at any time be clicking the Serial / Lot button.
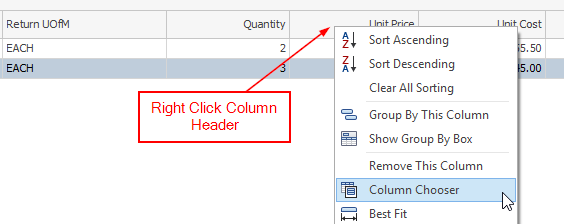
Any other fields that need editing should be edited now. If a column is not viewable, it can be chosen from the Column Chooser and added to the grid. Add any other lines as needed. If the RMA Type is Replacement or Cross, select the Customer Path button to fill out the replacement item information. Please see the Customer Path section of this document for more information. After filling out the customer path, press the Save button to save the document.

Note: SalesPad cannot receive or close RMAs. This process will need to be done in GP.
Creating an RMA from an Invoice
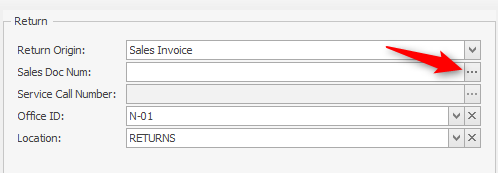
From RMA Entry, setting the Return Origin to Sales Invoice and clicking the ellipsis (…) in the Sales Doc Number field displays the Invoice Document Lookup screen.
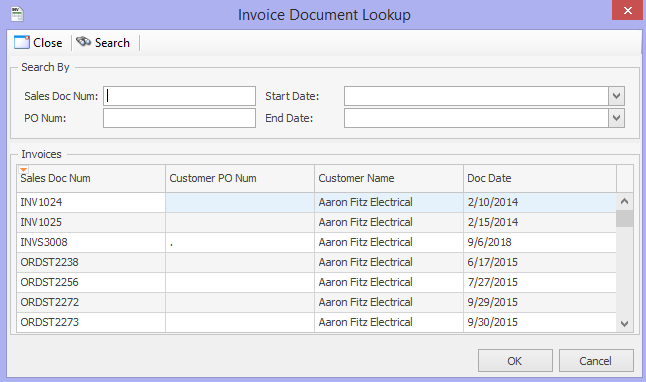
From Invoice Document Lookup, Historical Invoices are able to be searched and selected (shown below).
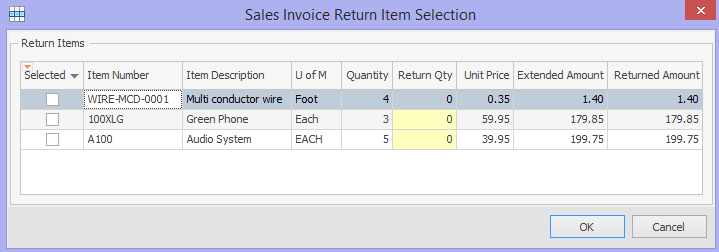
Once an invoice is selected, Item Return Quantities can be modified via the “Sales Invoice Return Item Selection” screen that will pop up (shown below).
Modifying the quantity of a serial tracked item will display the “Return Serial Entry” screen, where items to be returned may be selected (shown below).
Modifying the quantity of a Lot Tracked Item will display the Return Lot Entry Screen, where item quantities to be returned may be selected (shown below).
Clicking OK from Sales Invoice Return Item Selection will add all Selected Lines and return to the RMA Entry Screen.
Customer Path
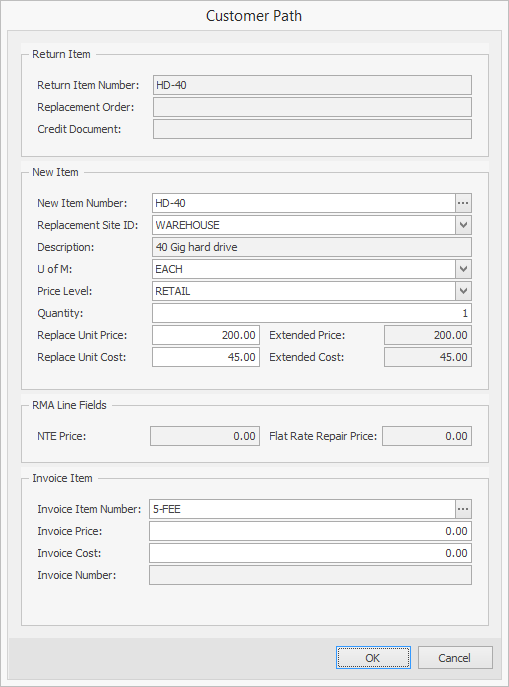
Customer Path is a button in the Line Items tool bar that functions much like GP’s button with the same name. If the RMA Type of the line is a Replace or Cross type, this screen is how the user can change the replacement item and its information.
Return Item
The Return Item section is read only and is mainly to give the user information on what line item they have selected, what the Replacement Order number is (if any) and what the Credit Document number is (if any).
New Item
The New Item section is editable for only Replace and Cross type RMA lines. The information here is automatically populated with the current item’s information because it assumes the replacement item will be the same as the returned item. If that is not the case, the user can change the replacement item. When the returned item is received in GP, a Replacement Order is created and this section of the screen becomes read only.
RMA Line Fields
The RMA Line Fields section is only for RMA lines that are not Replace or Cross type. Here the user can specify the NTE Price and the Flat Rate Repair Price. These fields are also editable from the main entry screen.
Invoice Item
The Invoice Item section is editable for all RMA Types. It is not necessary for RMAs to have the Invoice Item filled out. The Invoice Item Number is automatically populated with GP’s default invoice item. The user can select an Invoice Item Number from any item in inventory (although it is typically used for Fee type items) if they wish. Invoice Price and Invoice Cost are not brought in by the Invoice Item and must be populated by the user as well if necessary.
Serial / Lot
Serial / Lot is a button in the Line Items tool bar that functions much like GP’s button with the same name. The Return – Serial Entry form is where the user can select or enter serial or lot numbers for an item. If GP is setup as a multi-bin environment, then a bin number can be selected as well.
Note:Serial and lot numbers cannot be edited if the line is received but the screen will always be viewable for the user to review which serials / lots were chosen for the item.
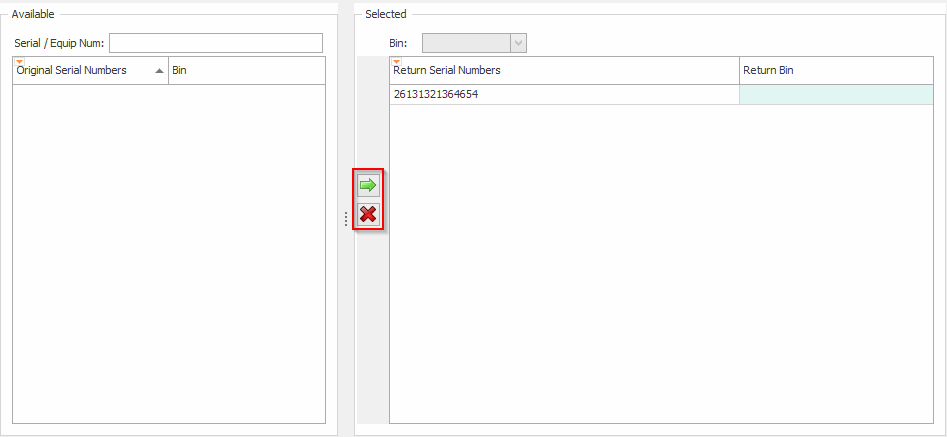
Serial Tracked Items
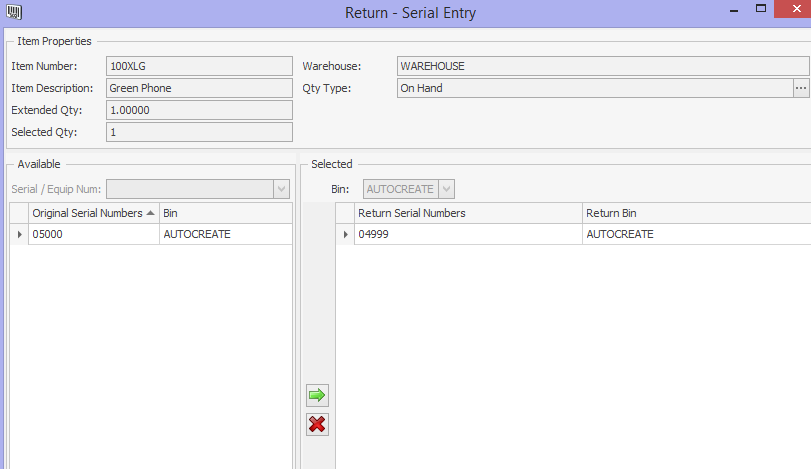
The Item Properties section is read-only and displays information for the user about the item. It also displays how many serial numbers need to be selected (Extended Qty) and how many have already been selected (Selected Qty).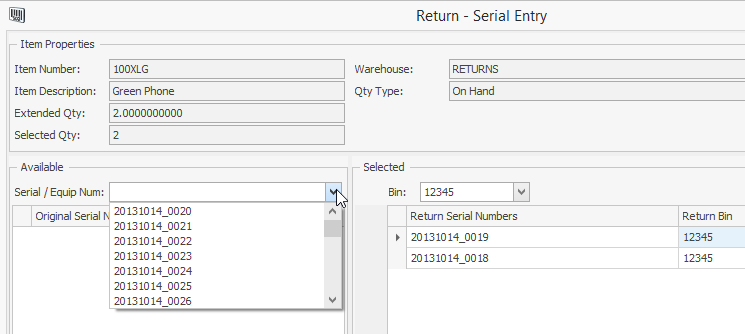
The Available section has a grid area that will either be blank (in the case of a ‘None’ origin type RMA) or be populated with a line item’s serial numbers if the line is linked to a historical sales document line item. Serial numbers in this grid are the user’s pool of available serial numbers. If the RMA has a ‘None’ origin type, the user can add serial numbers to this grid by manually typing in the Serial Number in the text box or choosing a serial number from the dropdown and pressing enter. The Bin text box in the Selected section is used to add a bin to this manual serial number. This text box is automatically populated with the warehouse’s default bin. The user can select a different bin from the dropdown or create their own bin. To add a serial number or numbers to the Selected grid, choose the serial number(s) and click the Green Arrow. The Selected section displays the selected serial numbers. To remove a serial number or numbers from this grid, choose the serial number(s) and click the Red X.
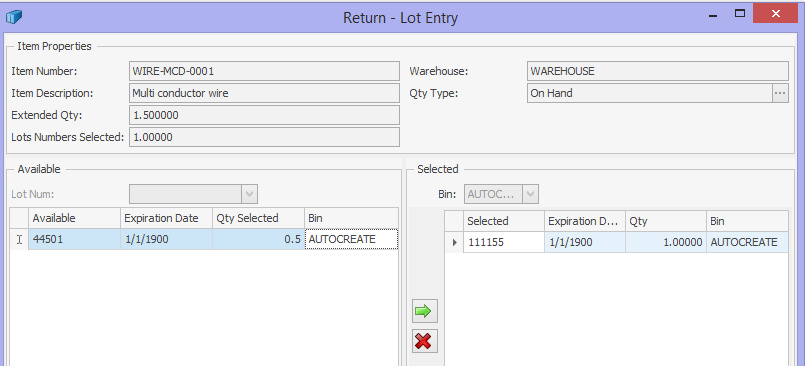
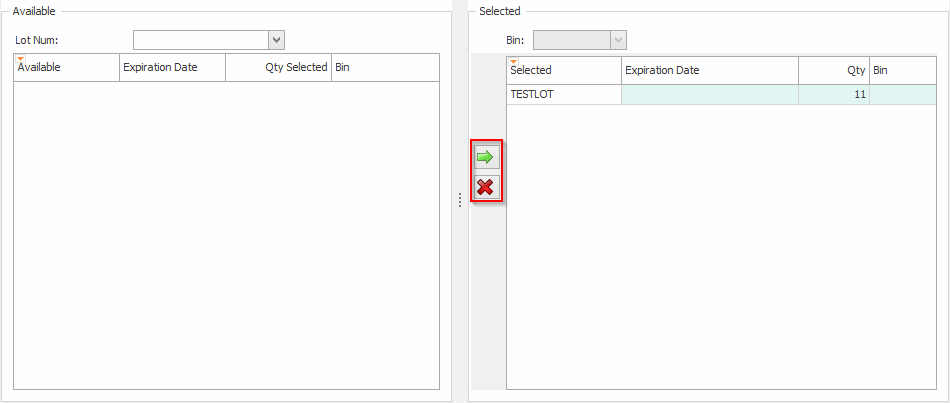
Lot Tracked Items
Lot Entry behaves similarly to the Serial Entry screen. There is an available section that will either be blank (In the case of a None origin type RMA) or be populated with available lots from the linked sales document line item. If the RMA has None as the origin type, then you can manually add lot numbers by typing it into the textbox and pressing Enter. Once a lot number has been added to the Available grid, Qty Selected, and Bin can be edited. Once you have decided which lot to use, select the lot in the Available grid and click the Green Arrow to send that lot number to the Selected grid. To remove a Lot Number from the Selected grid, select the Lot Number and click the Red X.
Settings and Security
Security
Print RMA Report* – Allows users to see and use the Print button in RMA Entry
RMA Entry* – Allows users into the RMA Entry module
RMA Line Items* – Allows users to see the Line Items on an RMA
RMA Notes – Allows users to see and add notes in RMA Entry
RMA Properties* – Allows users to see the Properties for an RMA
RMA Replacement Entry – Allows users to see and use the Customer Path action in the Sales Line action dropdown menu
RMA Serial/Lot – Allows users to see the Serial/Lot window to assign Serial numbers to the RMA document
RMA User Fields* – Allows users to see the User Fields tab on the RMA document
Note: Securities with an asterisk (such as Print RMA Report) have sub-securities that are listed in the middle section of the Security field. Sub-security descriptions appear in the bottom section of the field. Review and customize these as desired.
SalesPad Support
Comments