Overview
The SalesPad Receiving module provides a search function where vendor purchase lines can be viewed and marked received. Results display purchase orders and quantity of line items ordered and received. Users enter new quantities received and their locations to update inventory. Receiving transactions will automatically generate Purchase Receipts, which then must be posted manually in GP.
Security
Receiving must be enabled in Modules > Security Editor.
Additional security settings include:
Receiving Item User Fields - Enables or disables receiving item user fields.
Receiving Lot UDFs - Enables or disables receiving lot UDFs.
Receiving Serial Entry - Enables or disables receiving serial entries.
Note: You must log out and log back in for security changes to take effect.

New security sub-settings for 4.1:
Invalid Operation WAV Path - To play a sound when an error occurs, enter the WAV file path here.
Auto Save on Barcode scan - To automatically save after the necessary information is scanned from a barcode in the Barcode Scan field, set this to True.
Scan Parse Script - To execute a C# script when a user scans a barcode and tabs out of the Barcode Scan field, enter the script here. This script is necessary in order to allow barcode scanning to populate fields on the Receiving grid.
Settings
Follow the steps below in Modules > Settings to change default Lot/Serial number formats:
- Filter to receiving
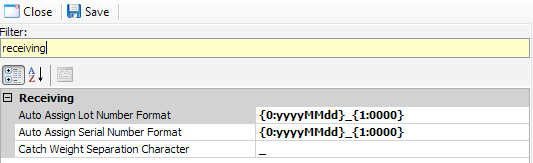
- Change the Auto Assign Lot/Serial Number formats to your desired layout
Usage
Access the Receiving search screen from Modules > Receiving.

To mark quantities as received and process receiving updates:
- Search by vendor and/or PO #, and sort/filter results as needed
- Fill out fields highlighted in yellow (not highlighted in versions 4.1 and later), including To Recv. (quantity received), Vendor Doc Num, Serial/Lot(s), Rcpt Site (location where received) and Bin
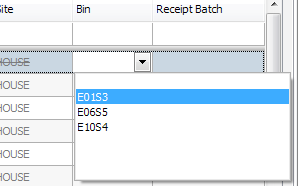
*The Bin field is a dropdown where you will select the Bin. In versions 4.1 and later, this field will filter to display only the available bins based on the Site for each line:
- Click Save to process receipts. Quantities will be updated in the system for all completely filled lines
The Receiving window will display information about each processed line. Lines include receipt numbers and any messages on lines that did not process correctly. This can also be viewed along the bottom of the screen in a compact format.
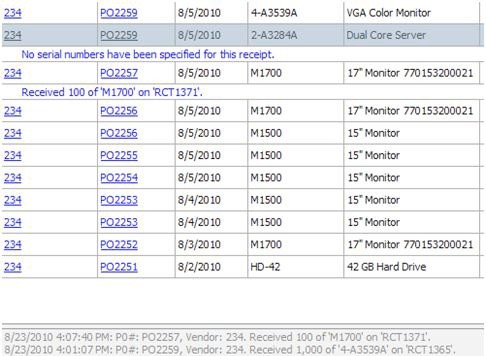
A separate receipt will be created for each unique Vendor Document ID and Purchase Order. If no document number is entered, all the lines selected for receiving will be placed on the same receipt.
*In version 4.1 and later, users can select multiple lines (Ctrl+Click or Shift+Click) on the screen in order to mass update the selected lines:
- With records displaying, select the lines to update.
Note: This process also works with a single line selected - Right-click on any of the selected lines. A small menu will pop up:

- Enter a Receipt Batch. This entry will appear under the Receipt Batch column on the grid, for all selected lines
- Click Save to save changes
*In version 4.1 and later, users can also scan a barcode to populate the required fields. A C# script must be entered in the Scan Parse Script security sub-setting, and can be used to populate all the needed information on the receiving screen from the scan. After entering search criteria, click within the Barcode Scan field, scan the barcode, and tab off the field. Action can vary depending on the script – contact your Account Manager to discuss your use case.
Note: To clear any changes made before saving, click the Clear ( ) button (The Clear button is new for version 4.1):
SalesPad Support
Comments