OVERVIEW
As of version 1.3.25.1, SalesPad Mobile supports Nodus PayFabric Version 3 (V3). PayFabric is a cloud based service which allows users to easily and securely process credit card transactions. SalesPad Mobile assists with this process and saves results of these transactions to your database, where they can be further viewed and edited in SalesPad Mobile, SalesPad Desktop, and Microsoft Dynamics GP.
EMV processing is a major feature of PayFabric V3. PayFabric can integrate with the PAX A920 SmartMobile terminal to allow customers to easily and securely pay with their credit or debit cards. Alternatively, payments can be entered manually through a web form.
This document is mostly applicable to PayFabric V2 as well. Some of the most notable differences are that V2 does not support EMV processing, and the PayFabric V2 website is laid out differently.
Navigation Menu
- Overview
- Set up and Connect PayFabric to SalesPad Mobile
- Map Credit Cards
- Set Up EMV Terminals
- Usage
- Customer PayFabric Wallets
- Settings
- Security
SET UP AND CONNECT PAYFABRIC TO SALESPAD MOBILE
Most of the integration setup happens within PayFabric when you set up your accounts, gateways (payment processors), and other things. SalesPad Mobile only sends transaction information to PayFabric; PayFabric conducts the transaction.
If you have questions regarding setup of your PayFabric account, wallets, and gateways, we recommend checking out PayFabric’s support page.
To connect your SalesPad Mobile and PayFabric accounts, first log into your PayFabric account using a web browser.
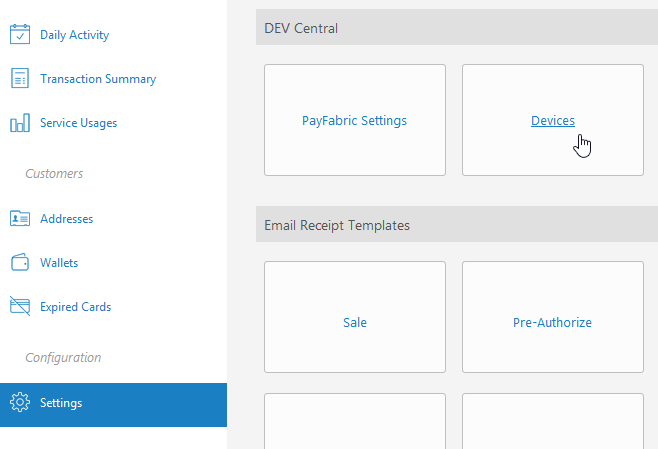
Once logged in, click Settings in the panel on the left-hand side of the screen. Then under DEV Central, click Devices.
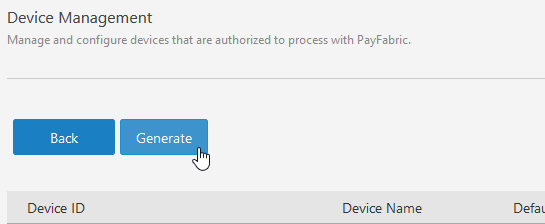
You will be redirected to the Device Management screen. Click Generate to create a new device, which will be used to connect to SalesPad Mobile.
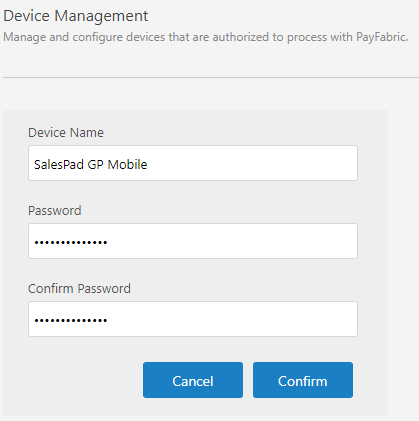
Enter a Device Name and Password. Remember the password used, as you will need to enter it into your SalesPad Mobile Server later. Click Confirm when finished.

Copy the Device ID, then go to SalesPad Mobile Server. Open the Settings module. Type “payfabric” into the search bar to show the relevant settings, then paste your Device ID into the Device Key setting input field.
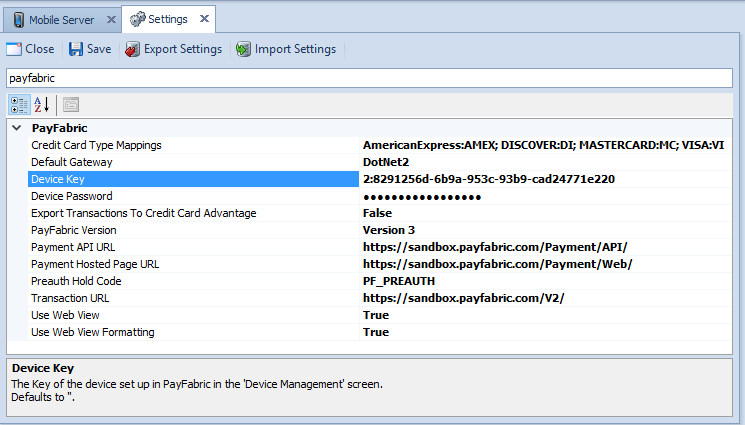
Next, in the Device Password setting, enter the password you set for your device in PayFabric.
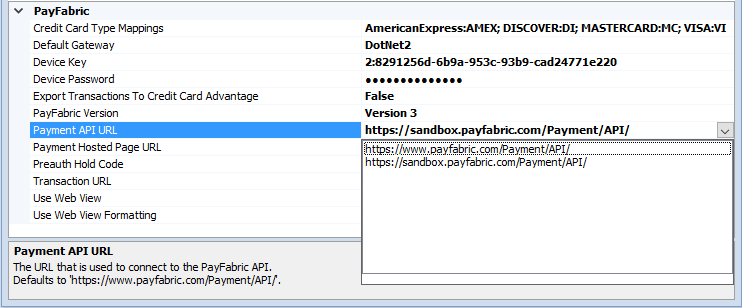
If you are using PayFabric V3, use the dropdown on the PayFabric Version setting to select Version 3. Additionally, check the Payment API URL and Payment Hosted Page URL settings to ensure that they are correct for the current setup of your PayFabric account. If your PayFabric account is in sandbox mode, then you will have to select the sandbox URLs from the dropdown. If your PayFabric account is live, then the default URLs which begin with “https://www” are correct.
If you are using PayFabric V2, check that the PayFabric Version setting is set to Version 2. Then select the correct PayFabric URL in the Transaction URL setting, since Version 2 uses that setting instead.
MAP CREDIT CARDS
You must set up credit cards in Microsoft Dynamics GP in order for SalesPad Mobile to be able to create, edit, and delete payments successfully. PayFabric will still run transactions, but SalesPad Mobile won’t be able to record them in Microsoft Dynamics GP unless you’ve first created the credit cards. These credit cards represent credit card types that you accept.
Open Credit Card Setup in Microsoft Dynamics GP to view and create credit cards. (Microsoft Dynamics GP > Tools > Setup > Company > Credit Cards)
For more help on creating a credit card in Microsoft Dynamics GP, consult your GP Partner or utilize the GP help menu system.
SalesPad Mobile Server’s PayFabric Credit Card Type Mappings setting will associate the credit card types in Microsoft Dynamics GP with those used by PayFabric. To check your PayFabric credit card type mappings, type “payfabric” into the search bar in the Settings module and find Credit Card Type Mappings.

The setting consists of mapping pairs, each separated by a semi-colon. Each pair contains the PayFabric credit card type on the left, followed by a colon, and then the corresponding Microsoft Dynamics GP Card Name on the right. If you already have credit cards set up in Microsoft Dynamics GP but your Card Names are not consistent with the default values in this setting, you can edit the values to the right of each colon to match an appropriate credit card in Microsoft Dynamics GP.
It is possible to have a credit card in Microsoft Dynamics GP that does not show up in SalesPad Mobile. In order for your GP card to appear in SalesPad, you must attach a note containing “/salespad” to the card (indicated by the little yellow note icon in the Credit Card Setup window).
SET UP EMV TERMINALS
Using an EMV terminal with PayFabric and SalesPad Mobile requires additional steps to setup. PAX A920 SmartMobile is currently supported.
SET UP IN PAYFABRIC
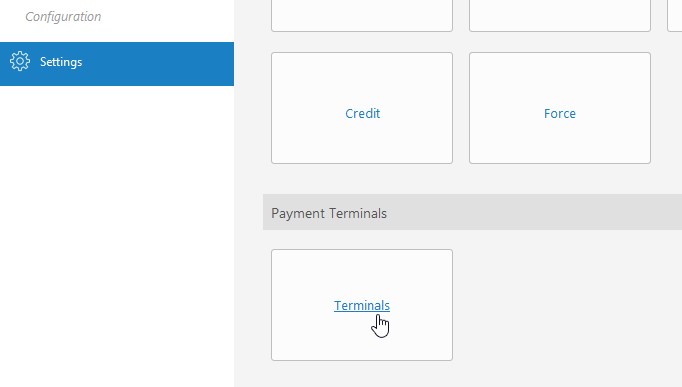
The EMV Terminal must be setup in PayFabric before SalesPad Mobile can use it. Log into your PayFabric account using a web browser. Once logged in, click Settings in the panel on the left-hand side of the screen. Then under Payment Terminals, click Terminals.
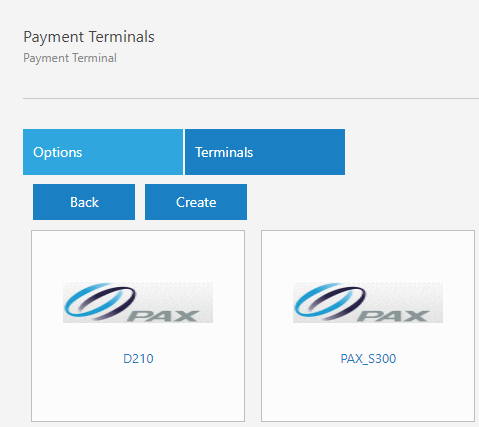
You will be redirected to the Payment Terminals screen. Click Terminals, then Create to add a new terminal.
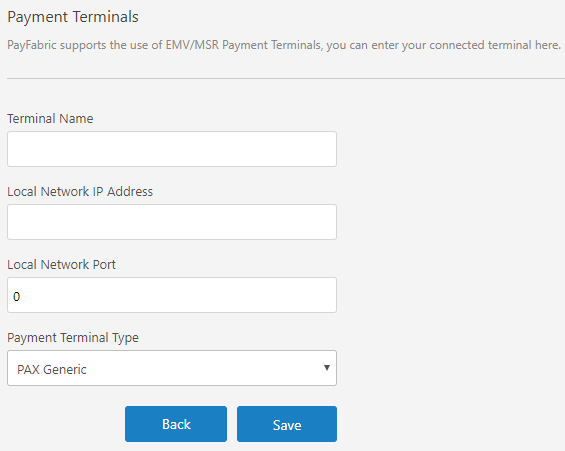
Enter a Terminal Name, the Local Network IP Address, and Local Network Port of the device and click Save when finished. In order for any device, including one running SalesPad Mobile, to communicate with an EMV terminal, both the device and the EMV terminal must be on the same local network.
Once all the terminals have been added, return to the Payment Terminal Options page by clicking Options.
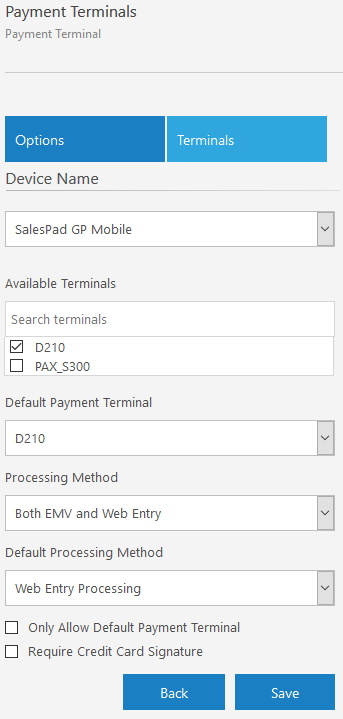
From here, select the device being used in SalesPad Mobile from the Device Name drop-down. Then check each of the terminals listed to make them available for the device. Select either “EMV Only” or “Both EMV and Web Entry” for Processing Method to allow the use of EMV entry. If “Both EMV and Web Entry” was selected, a Default Processing Method can be selected as well. Checking “Only Allow Default Payment Terminal” will prevent users from changing the selected terminal from the PayFabric web payment form. The default terminal is based on the Default Payment Terminal option and configuration within SalesPad Mobile Server’s Extended User Information module. Click Save to keep your changes.
OPTIONAL SETUP IN SALESPAD DESKTOP AND SALESPAD MOBILE SERVER
SalesPad Desktop is NOT required for EMV processing to work with SalesPad Mobile. However, using version 4.6.0.0 or higher of SalesPad Desktop allows you to specify a default EMV terminal for each user. This can save time since a terminal does not have to be selected each time, and if combined with the PayFabric setting “Only Allow Default Payment Terminal”, can prevent users from trying to use terminals that they cannot or should not use.
In SalesPad Desktop, go to the Store Setup module, which is located in the Setup/Utilities section.
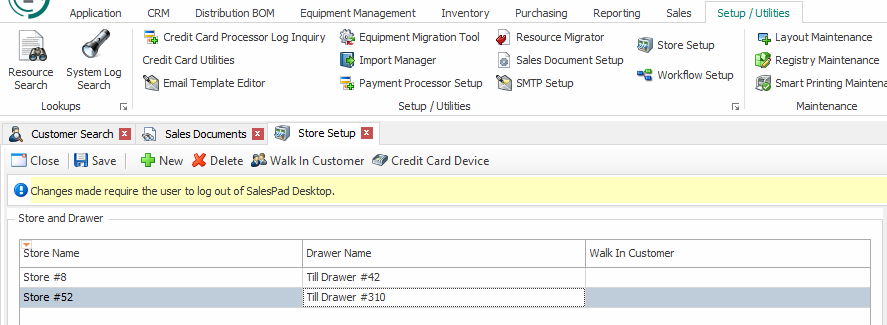
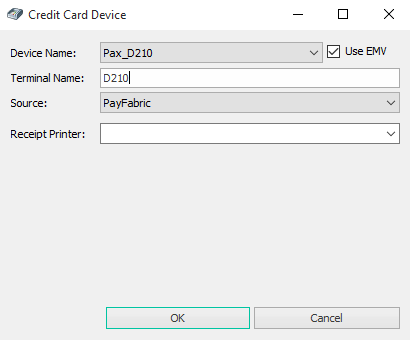
Once in Store Setup, either add a new store and drawer by clicking the New button or select an existing one. Next, click Credit Card Device to set up the device to associate with that drawer. First, set the Source to “PayFabric”. Then select the Device Name that matches the device model that you will be using. Lastly, enter the Terminal Name as it appears in PayFabric. To have the PayFabric transaction form default to the EMV mode, check Use EMV. Click OK to save the device details.
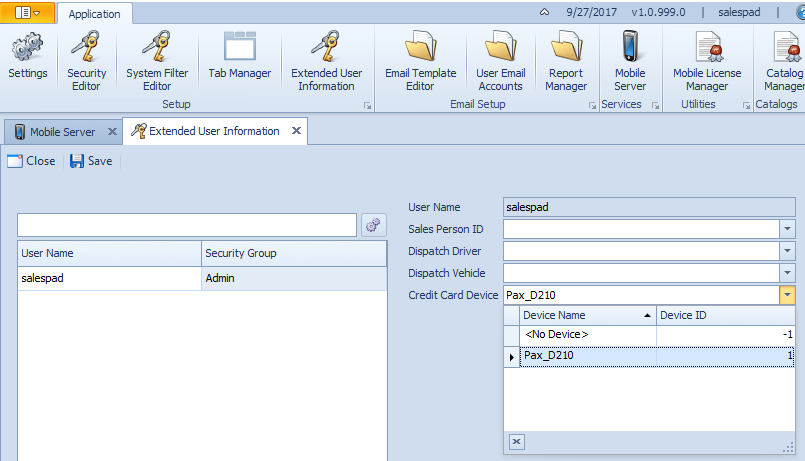
Once the EMV terminal is setup, it can be assigned to a mobile user in the SalesPad Mobile Server’s Extended User Information module. Select a user in the grid to the left, and select a terminal for that user on the right via the Credit Card Device dropdown. Click Save to keep your changes.
SET UP IN SALESPAD MOBILE DEVICES
In the past, devices which communicate with EMV terminals had to install a root certificate from Nodus. Nodus has made changes which make this step unnecessary if the EMV terminal's software is up-to-date. If updating your EMV terminal is not currently an option and you already have a root certificate from Nodus, each iOS and Android device that uses PayFabric EMV may need to install that certificate.
In both iOS and Android, the root certificate can be opened as an email attachment. Once opened, agree to install the certificate and follow the instructions.
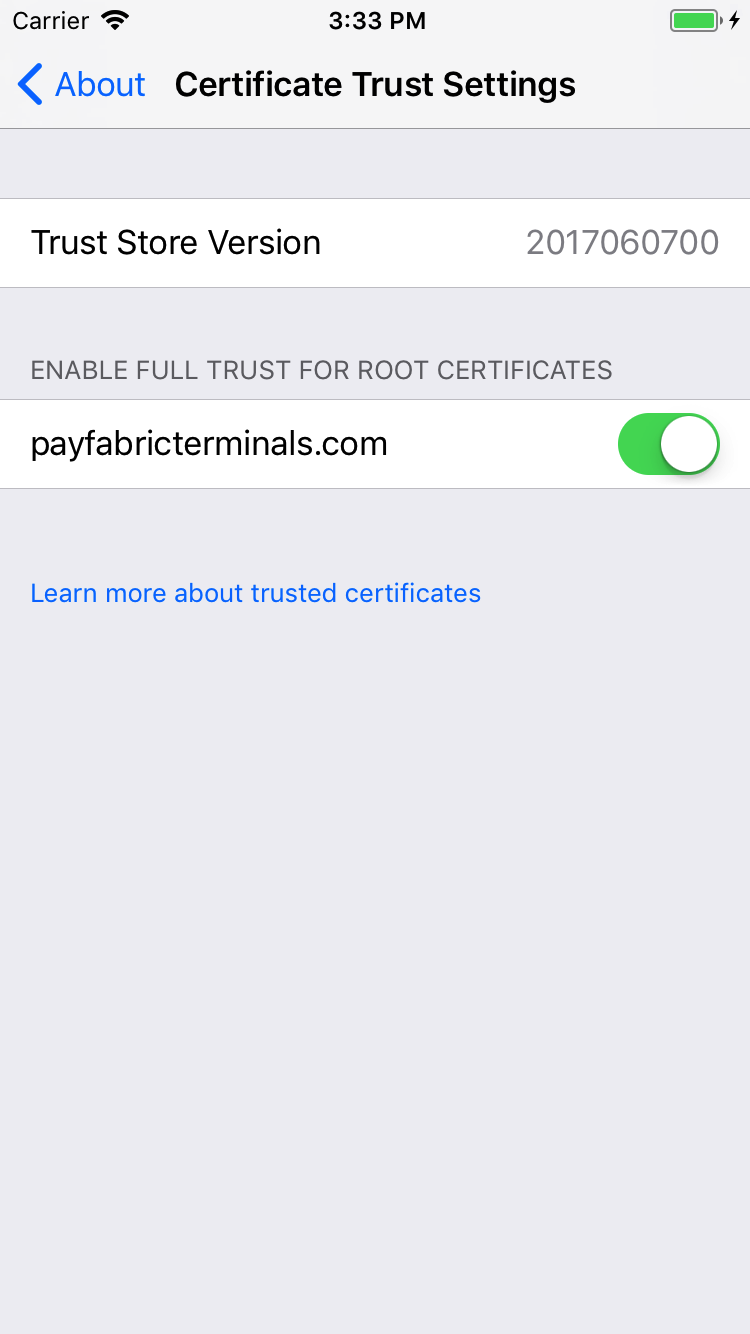
In iOS 10.3 and higher, the root certificate will not be enabled by default. To enable it, open the Settings app, select General, select About, and select Certificate Trust Settings. On this page, you should see the PayFabric root certificate.
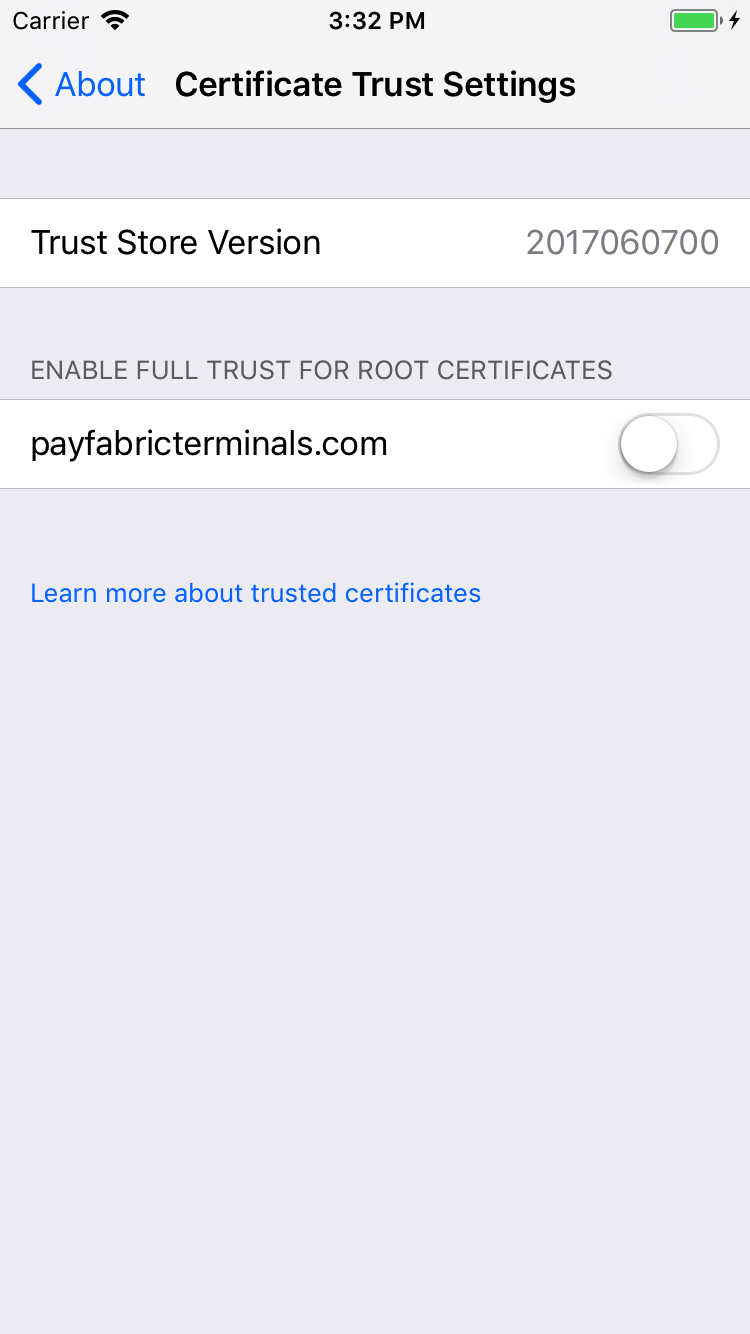
Touch the control on the right side of the PayFabric certificate’s row to enable it.
USAGE
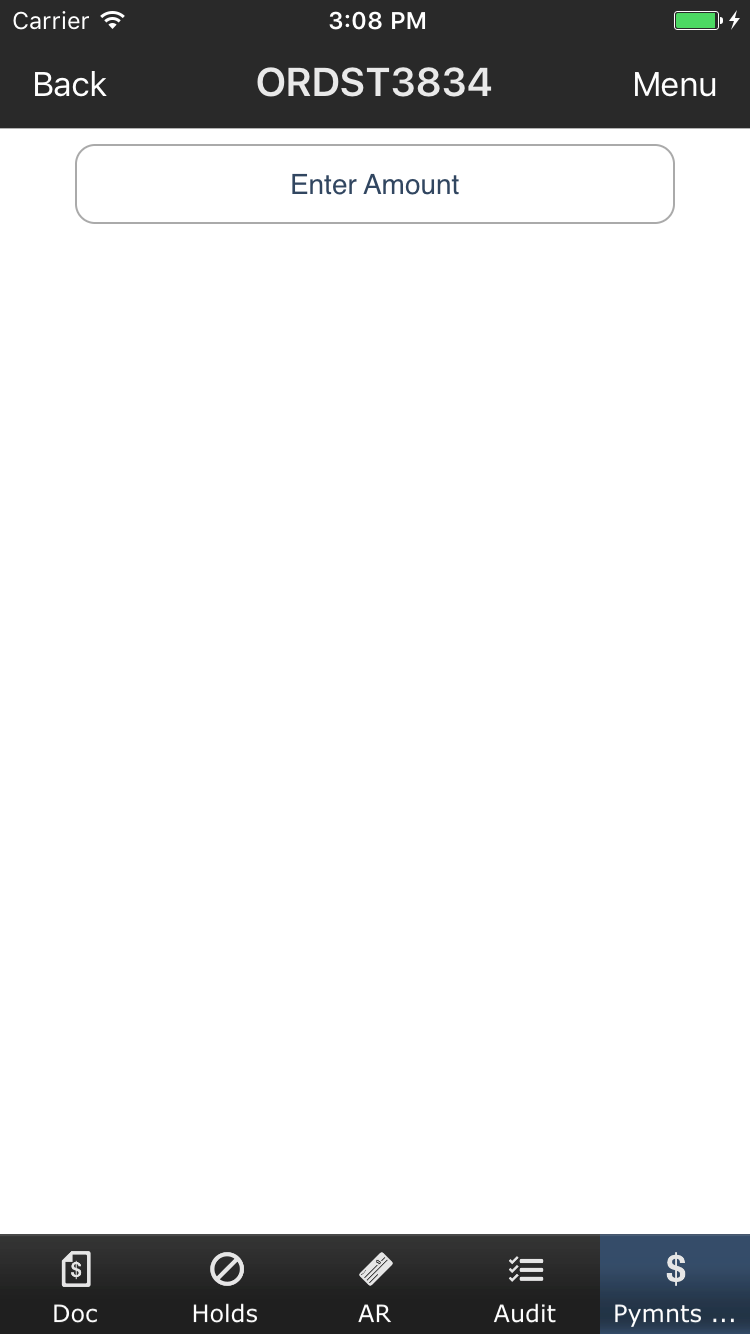
In order to enter a payment via PayFabric, first navigate to a sales document. From here, while not editing the document, you can enter payments in three different ways.
Go to the Payment tab and select the Enter Amount button.
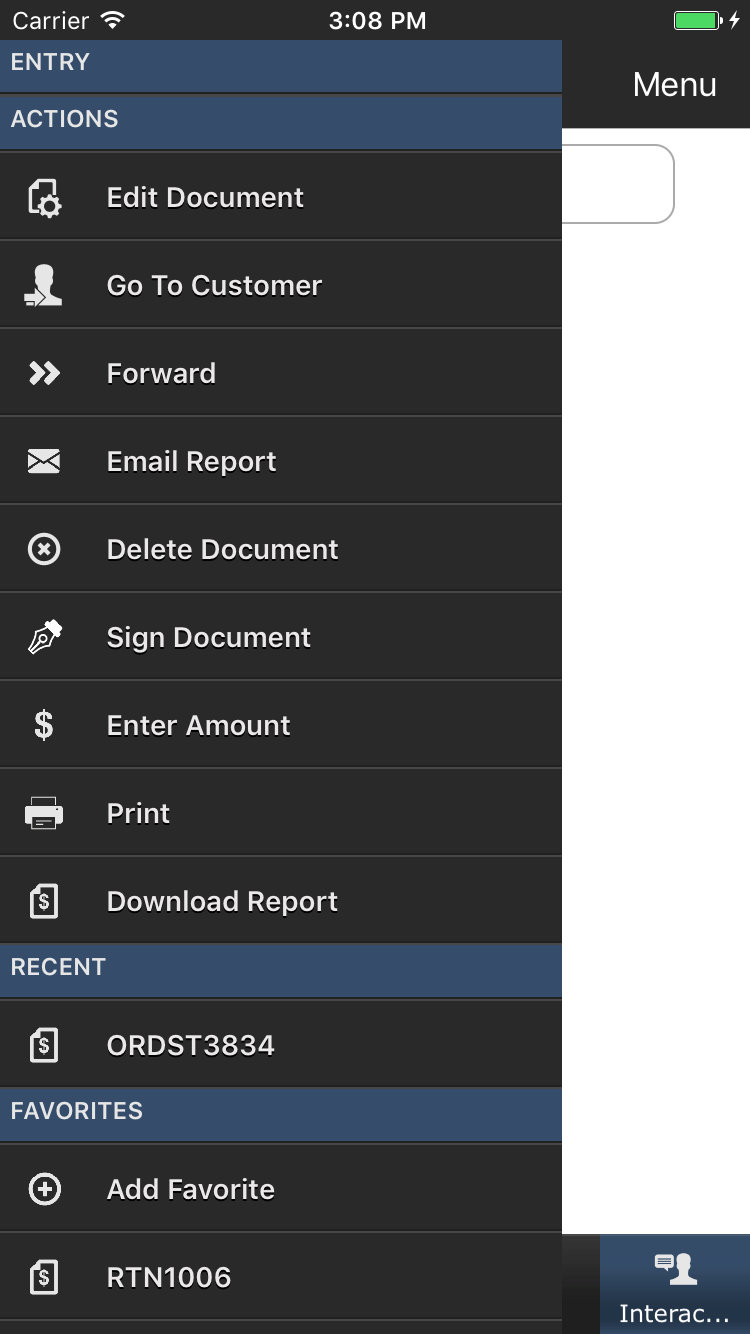
Select Enter Amount from the slide menu.
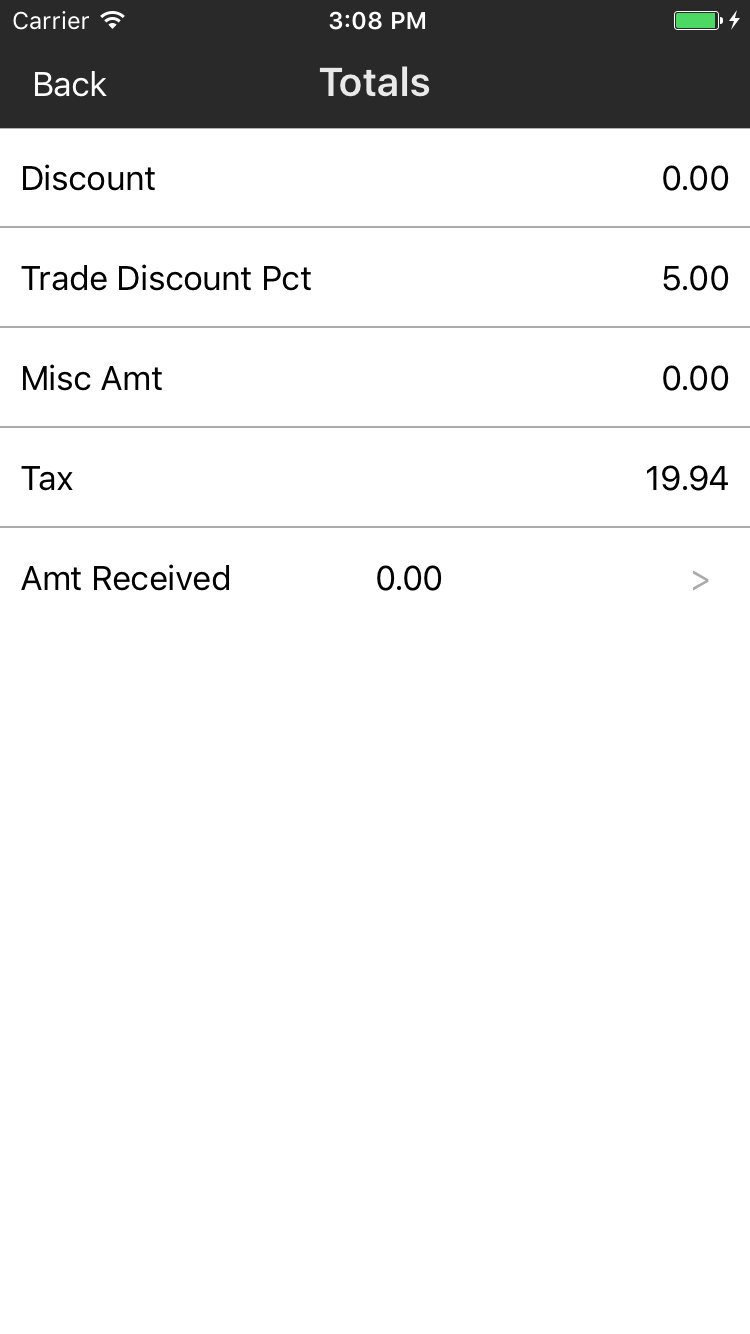
Select the Customer and Totals section at the top of the Doc tab to open the Totals page, then tap Amt Received.
On the first Payments Entry page, select Nodus PayFabric. If Nodus PayFabric is the only available payment method, this step is automatically skipped.

On the second Payments Entry page, select Authorization or Charge. If you select Charge, you will be asked to choose between Payment and Deposit as well if the sales document is an order.

SalesPad Mobile will then send various information to PayFabric for initializing a payment. The transaction amount defaults to the sales document’s remaining amount to be paid, and the PayFabric customer will always be the sales document’s customer.
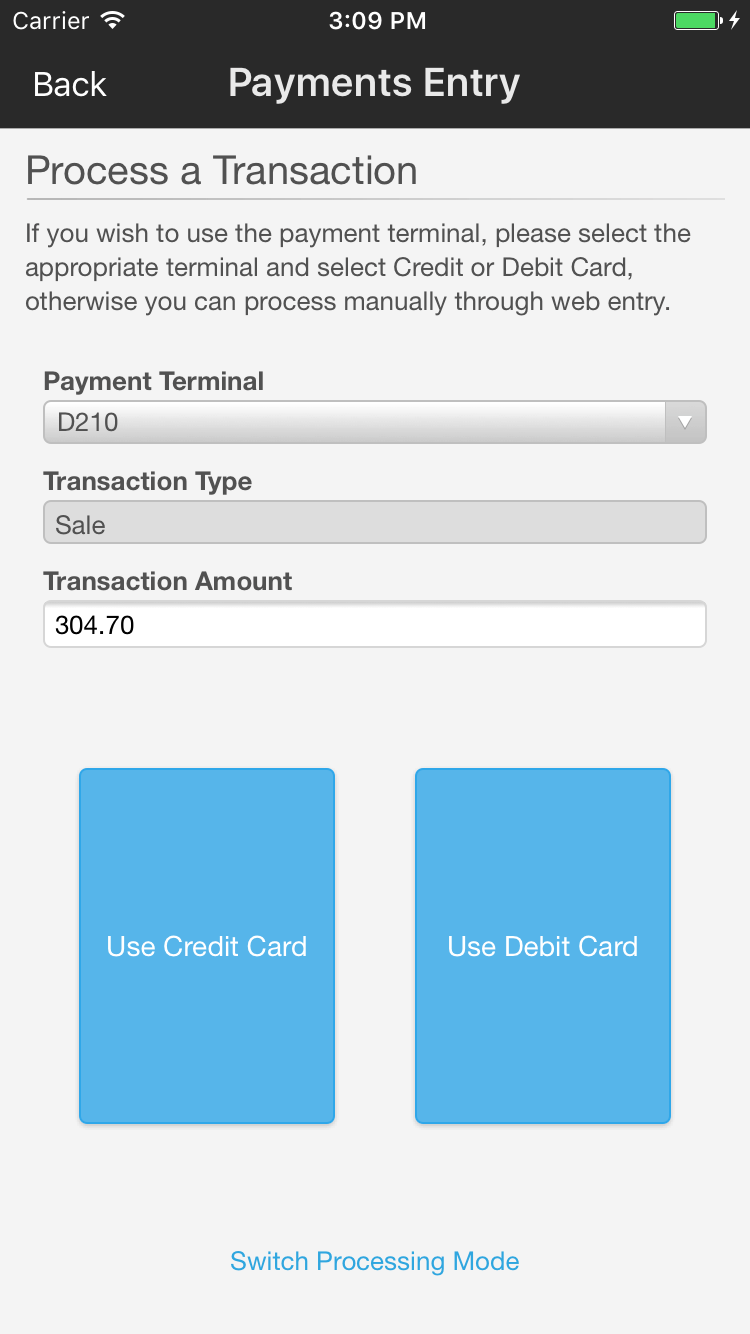
Once SalesPad Mobile and PayFabric initialize the payment, you will be brought to a PayFabric web page for finalizing the payment. The PayFabric web page has two different processing modes: EMV and Web Entry. The mode you start in, and whether or not you can switch between modes, depends on your PayFabric settings as well as your selected Credit Card Device in the mobile server’s Extended User Information module.
If you enter a payment via EMV, simply make any necessary changes to the transaction amount and then touch Use Credit Card or Use Debit Card. The selected EMV terminal will then handle communicating with the customer’s credit or debit card. Once the EMV terminal is done, SalesPad Mobile will notify you of the transaction’s success or failure.
If you enter a payment via web entry, you have to either manually enter payment information from a credit or debit card, or use a card which is already saved to PayFabric.
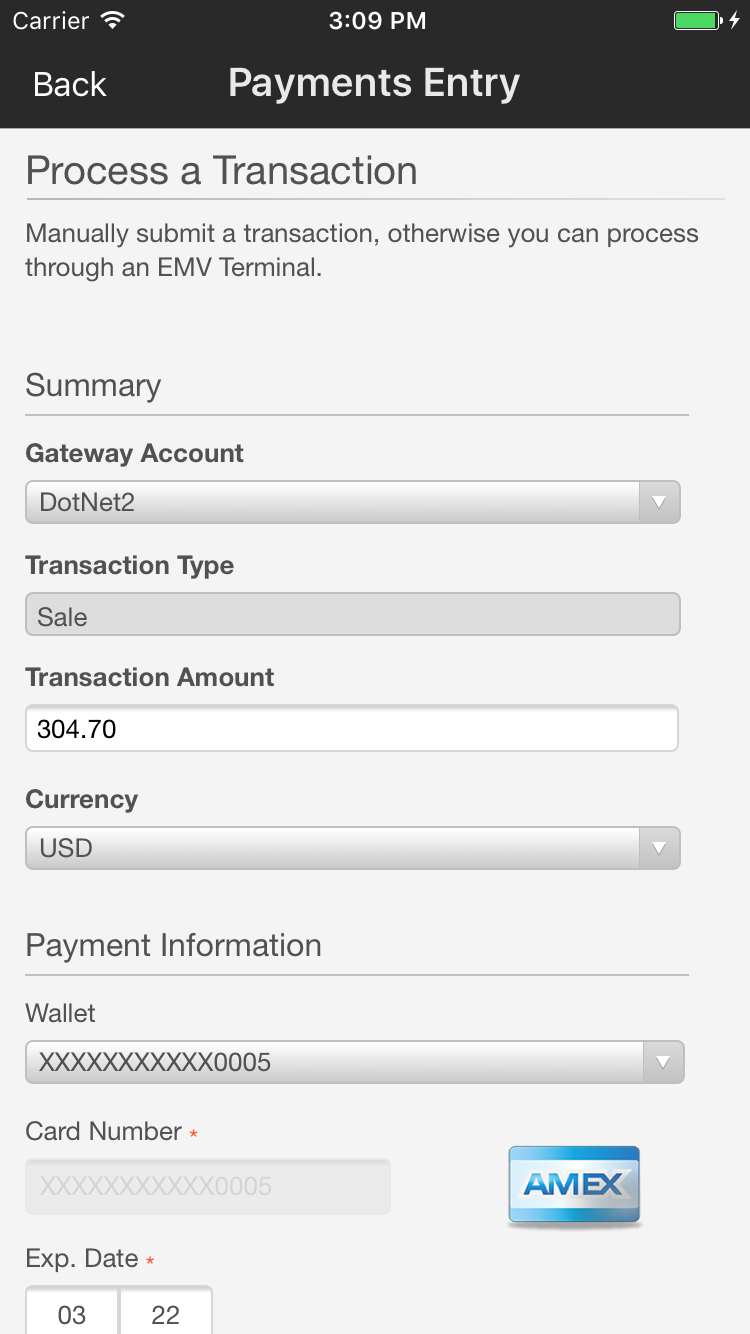
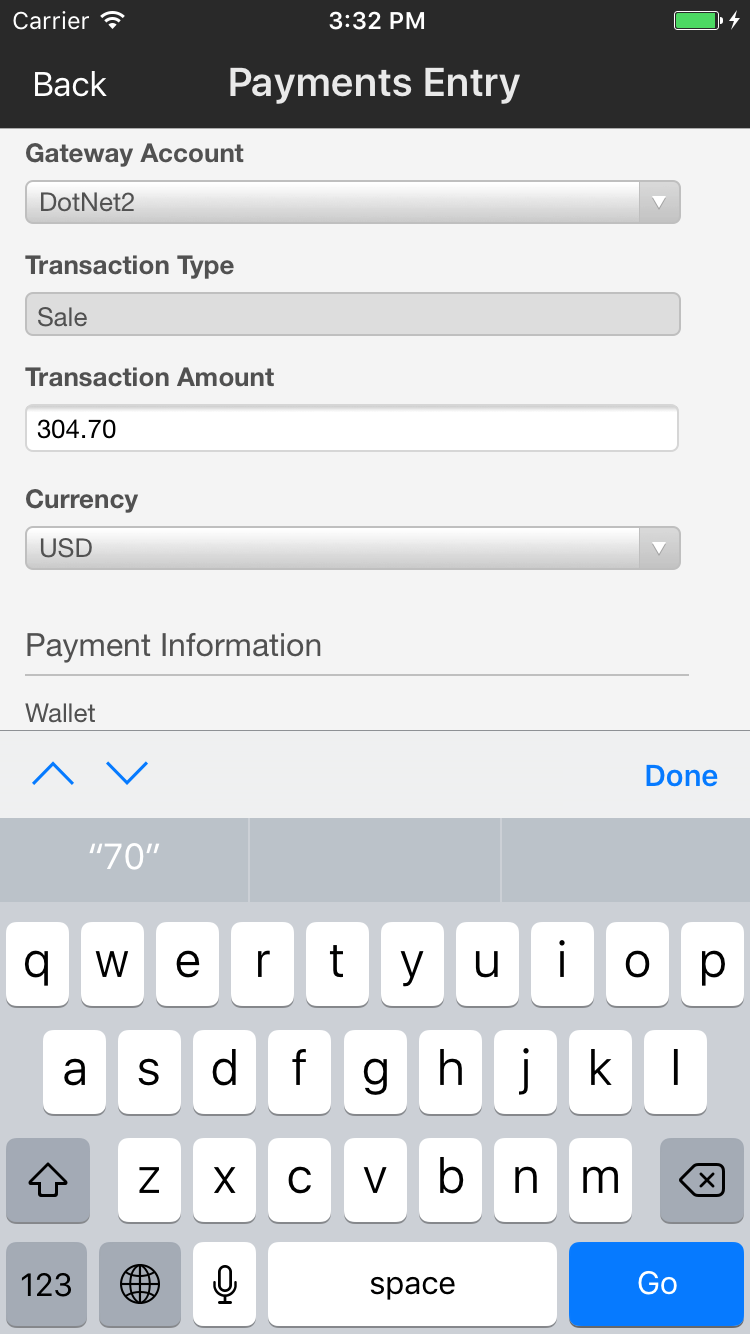
Once you have filled out all of the required information, you can submit the payment either by tapping the Process Transaction button near the bottom of the webpage, or by selecting a text field and pressing the bottom right button on the keyboard.
If your PayFabric settings allow, there will be a Switch Processing Mode button at the bottom of the webpage, which allows you to switch between EMV and web entry modes.
Once PayFabric approves a payment, SalesPad Mobile will try to save details of the transaction to your database. If there were any issues with saving, the app will mention them.
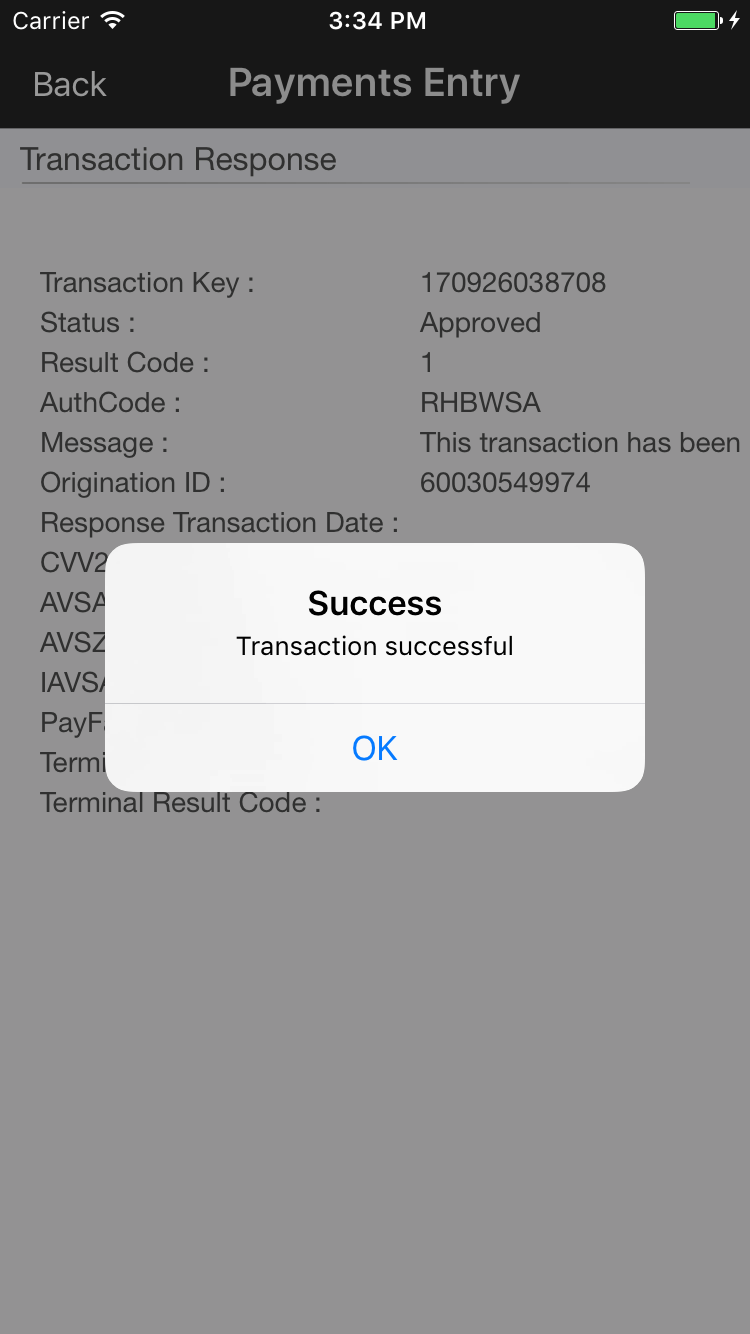
If PayFabric approved the transaction, it will appear in the list of payments on the Payments tab.
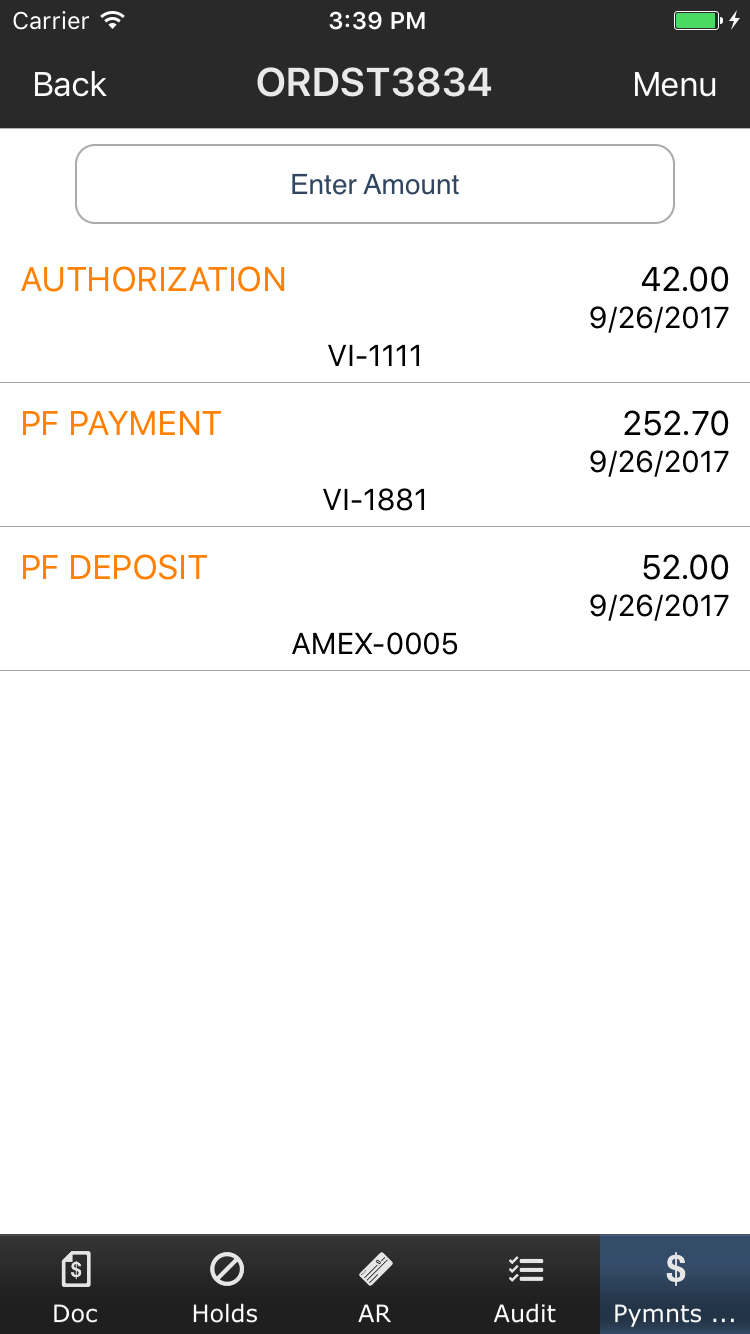
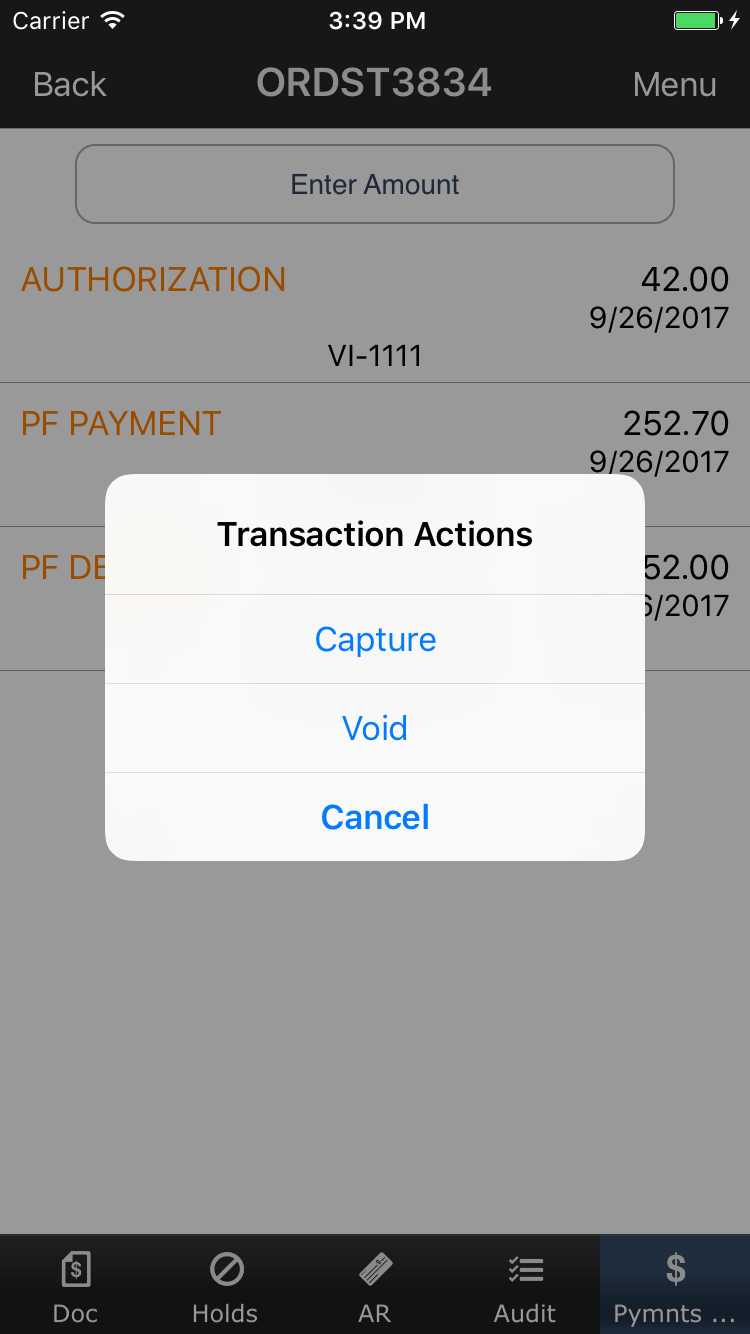
Selecting a PayFabric transaction from this list grants access to further actions. Authorizations can be captured or voided, while payments and deposits can be voided or credited. Note that voiding transactions may not work if the transaction has already settled, and crediting transactions may not work if the transaction has not yet settled. If you entered a transaction with an EMV terminal, then the transaction can only be captured, voided, or credited with assistance from the same terminal.
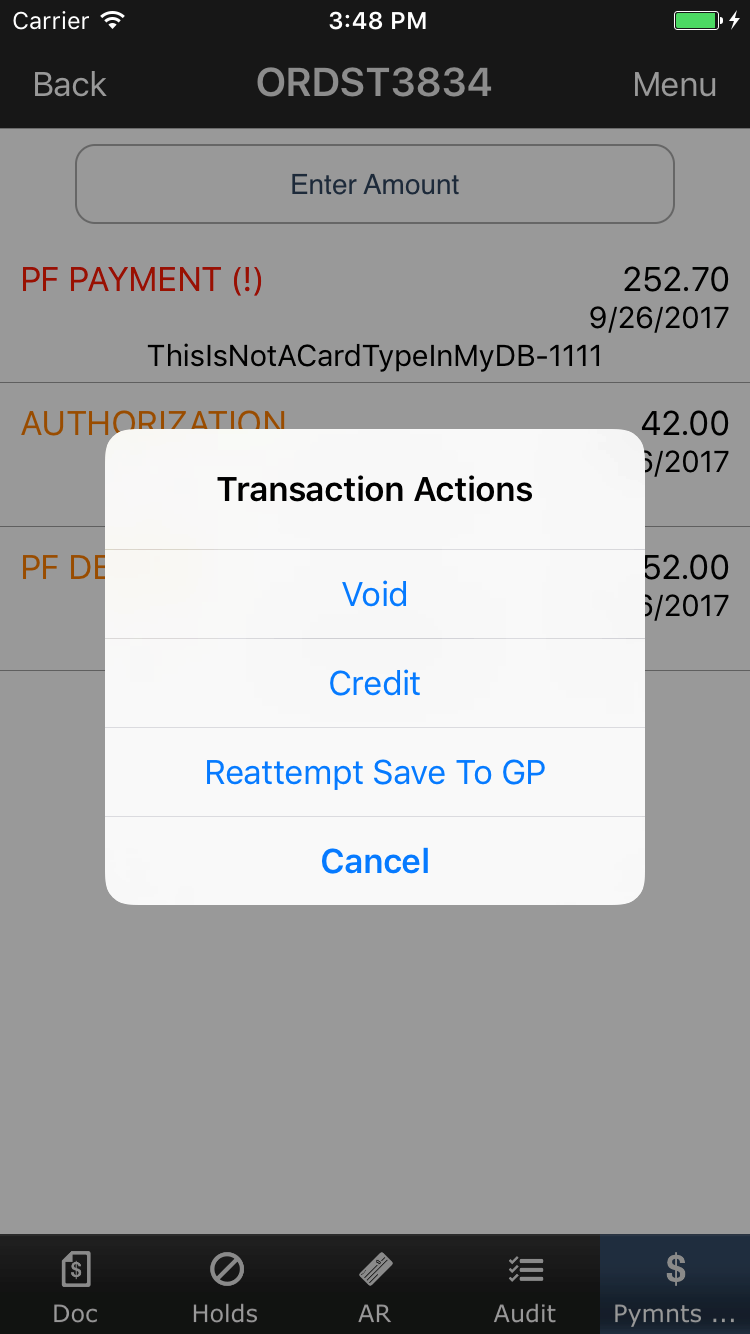
If a PayFabric payment or deposit successfully saved to SalesPad’s PayFabric transaction table, but failed to save to the main payments table, that transaction will appear with red text and an exclamation point.

Selecting that errored transaction will give an option to reattempt saving it. Selecting ‘Reattempt Save to GP’ will take you to a screen where you can change the card name if necessary and attempt saving the transaction again.

CUSTOMER PAYFABRIC WALLETS
As of version 1.3.26.1 of SalesPad Mobile, users can view, add, edit, and delete PayFabric Wallets in the Wallets tab on the Customer card.
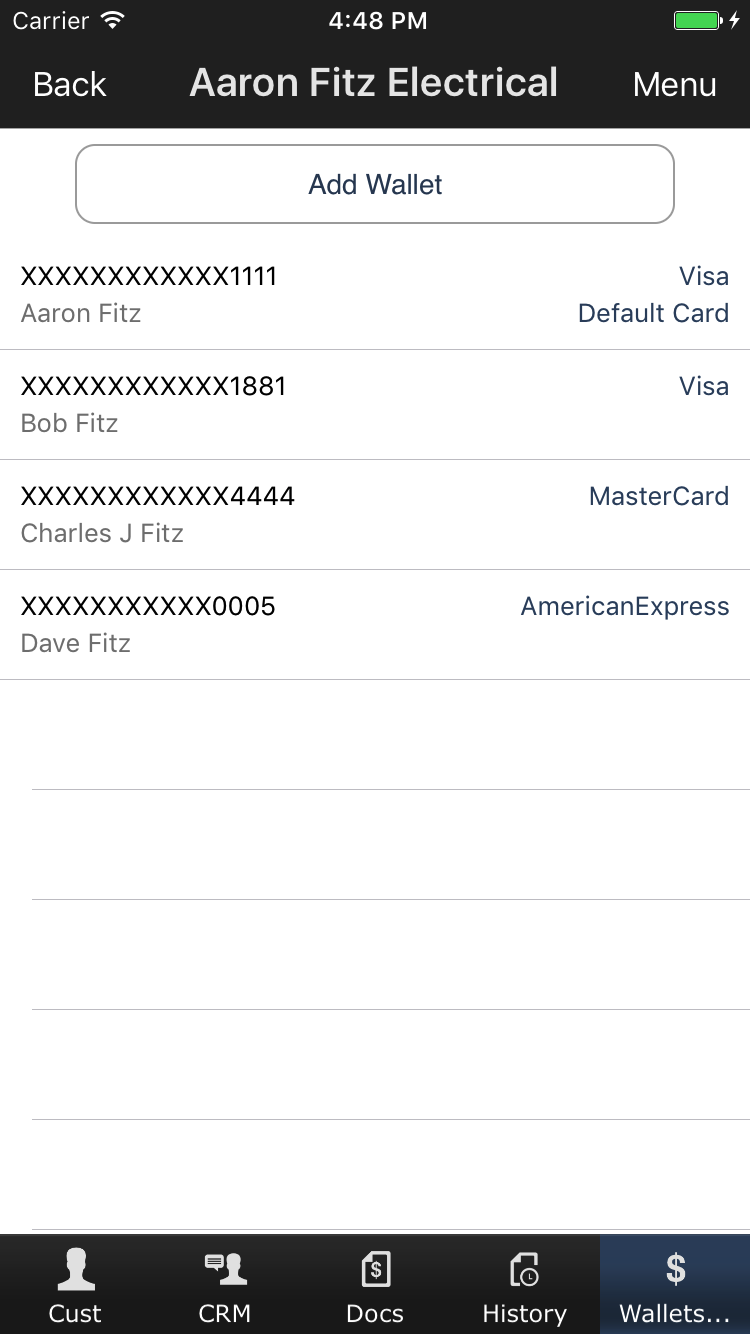
Tapping the Add Wallet button will open a web view for entering a customer credit card.
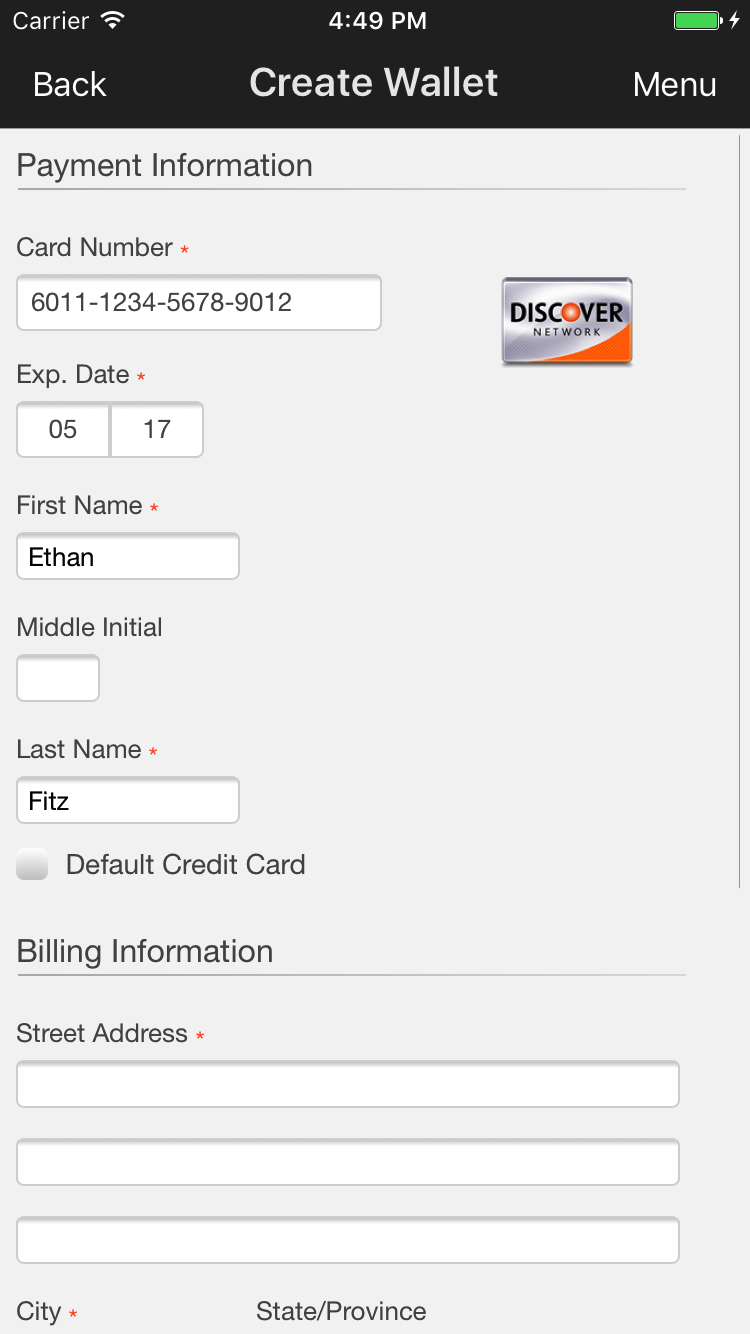
Enter the required information and tap the Save button at the bottom of the screen.
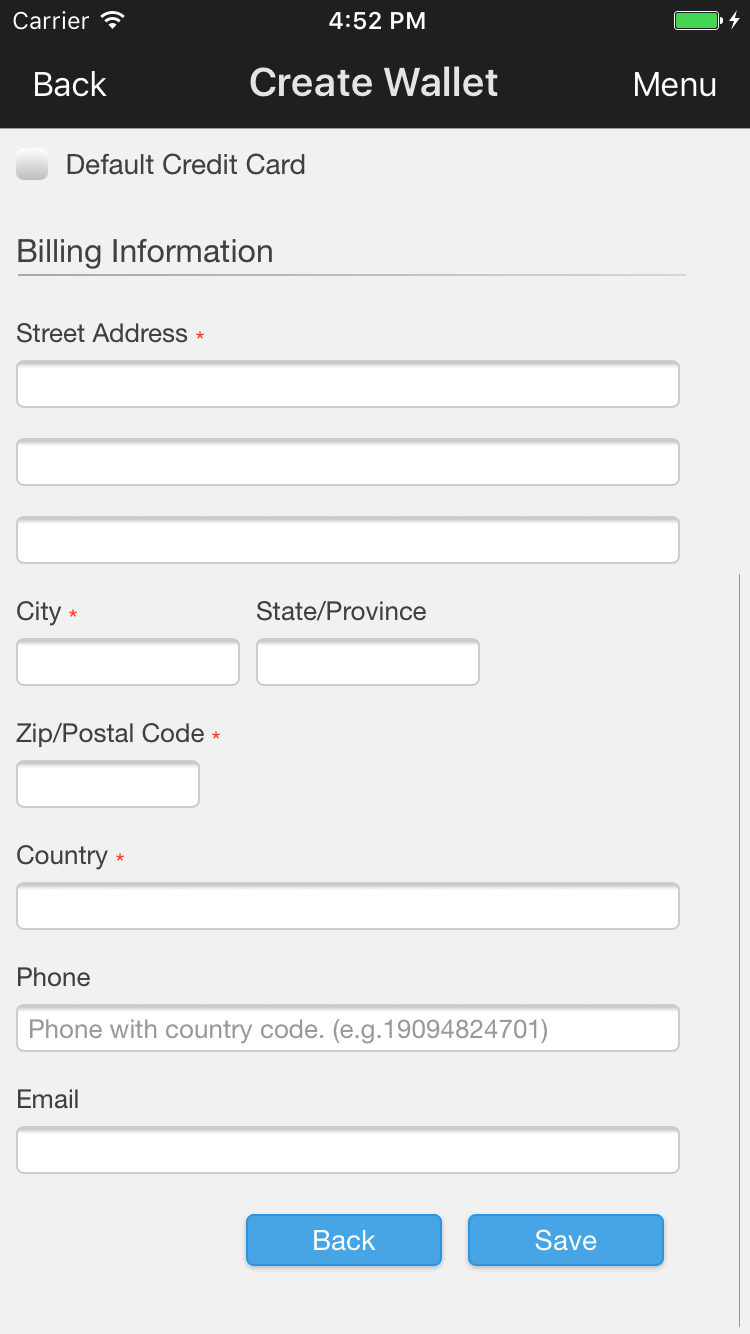
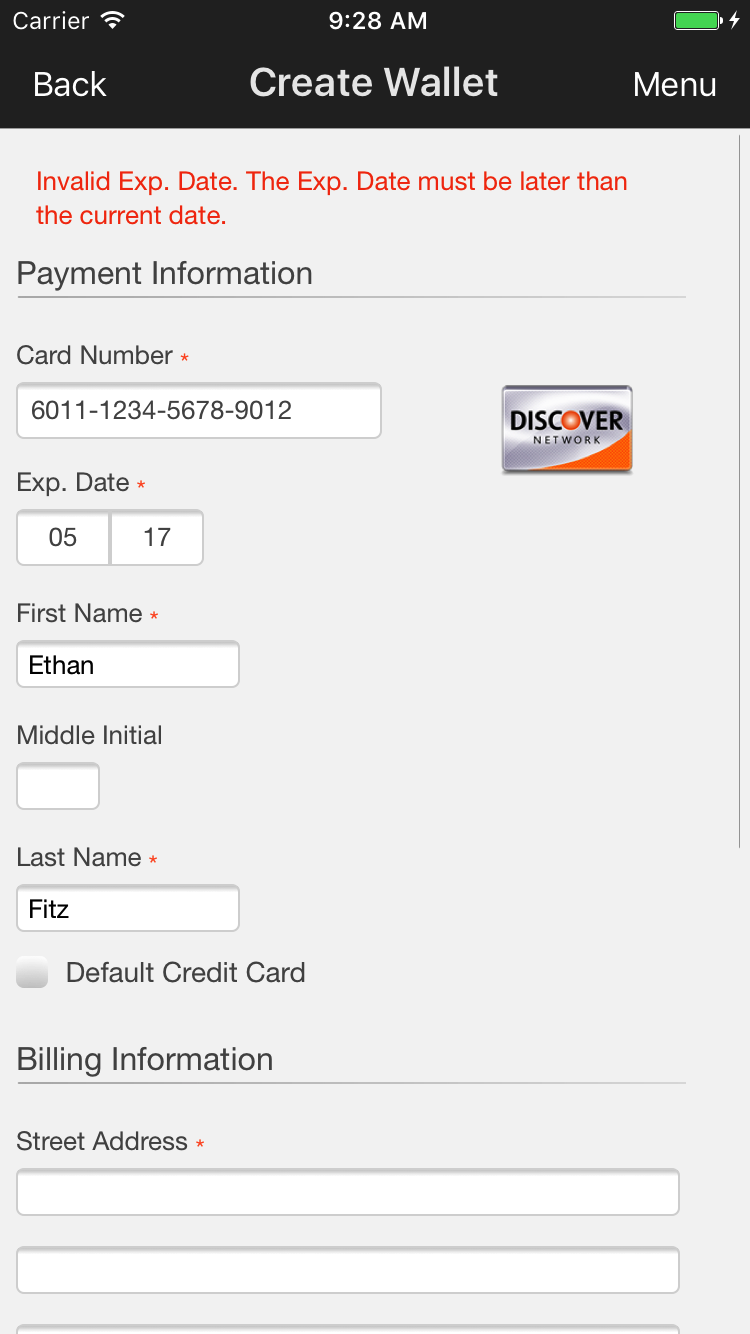
If there are any errors with saving the wallet, PayFabric will scroll to the top of the page and show them in red text. If creating the wallet is successful, you will be brought back to the list of wallets, which will contain the wallet you created once it finishes reloading.
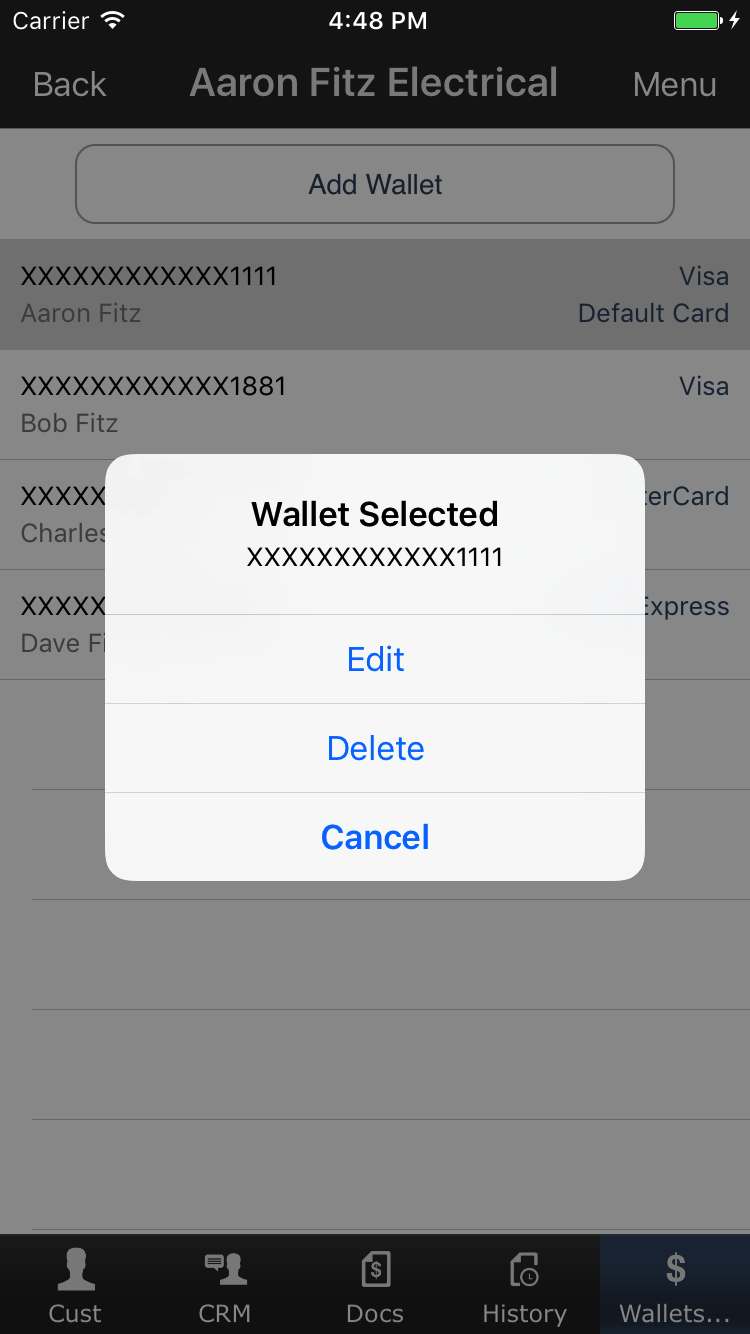
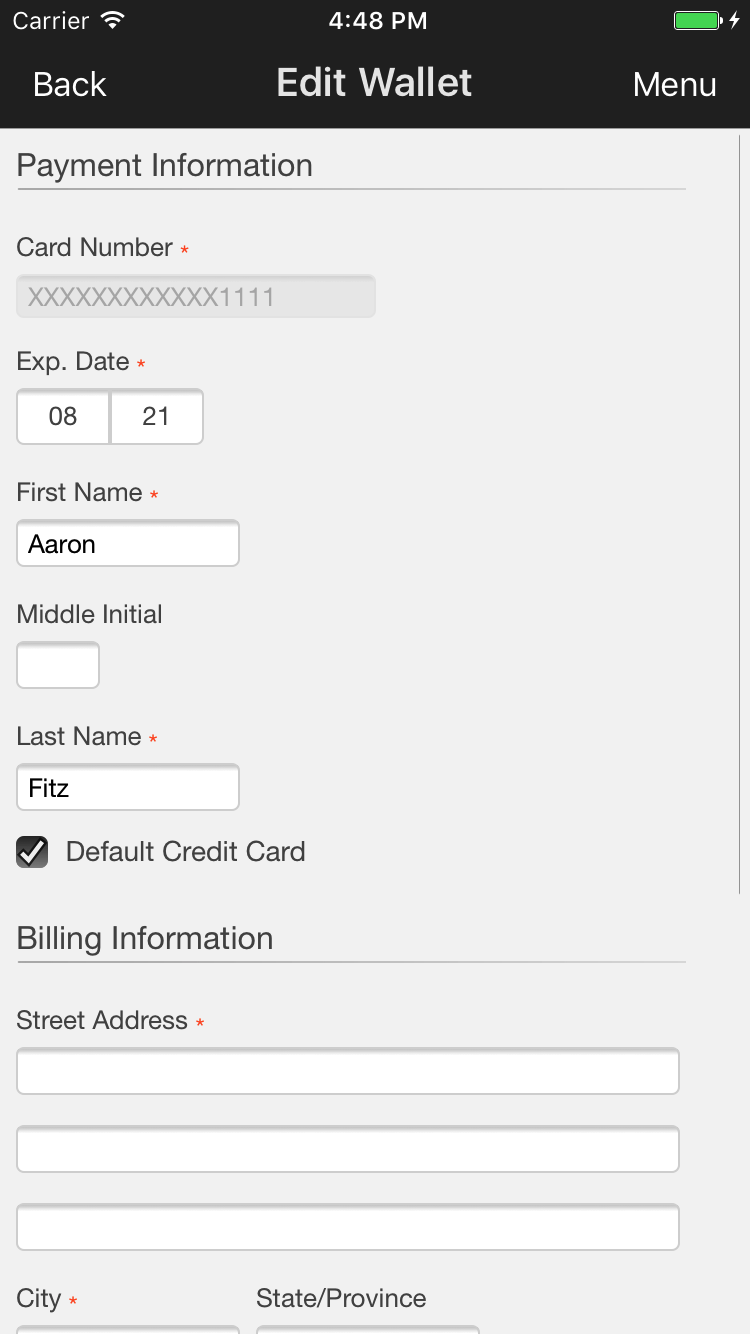
Selecting a wallet will open a prompt for editing or deleting that wallet. Editing a wallet works similarly to creating a wallet, with the primary difference being that the card number is masked and cannot be altered.
SETTINGS
In the Settings module of the SalesPad Mobile Server, there is a PayFabric section which contains several settings.

Credit Card Type Mappings – This setting maps PayFabric’s card types to those set up in Microsoft Dynamics GP. See the Map Credit Cards section for more details.
Default Gateway – This is the name of the payment processor set up in PayFabric in the Gateway Account section that will be used as the default gateway for PayFabric transactions in SalesPad Mobile.
Device Key – This is the key for the device set up in PayFabric in the Device Management screen.
Device Password – This is the password for the device set up in PayFabric in the Device Management screen.
Export Transactions To Credit Card Advantage – If this setting is enabled, SalesPad Mobile will write successful PayFabric transactions to Credit Card Advantage tables in GP, where they can be viewed, edited, and deleted with Credit Card Advantage.
PayFabric Version – The version of PayFabric. If set to Version 2 and the Transaction URL setting has a value, the Transaction URL setting will be used to process transactions. Otherwise the settings Payment API URL and Payment Hosted Page URL will be used.
Payment API URL – The URL that is used to connect to the PayFabric API. Use https://sandbox.payfabric.com/Payment/API/ for sandbox accounts, and https://www.payfabric.com/Payment/API/ for live accounts.
Payment Hosted Page URL – The URL that is used to connect to PayFabric hosted pages. Use https://sandbox.payfabric.com/Payment/Web/ for sandbox accounts, and https://www.payfabric.com/Payment/API/ for live accounts.
Preauth Hold Code – If this setting has a non-blank value, when a PayFabric authorization is entered, the server will create a hold named after this setting’s value. When capturing or voiding PayFabric authorizations, the server will delete that hold if the sales document has it.
Transaction URL – This setting is only used by PayFabric V2 accounts. It specifies the base URL for both the API and hosted pages. Use https://sandbox.payfabric.com/V2/ for sandbox accounts, and https://www.payfabric.com/V2/ for live accounts.
Use Web View – This setting determines whether PayFabric payment details are entered into PayFabric’s hosted web page, or into SalesPad Mobile UI. PayFabric still processes the transaction either way, but using PayFabric’s hosted page is more secure, and supports EMV processing. However, ID Tech Shuttles and Honeywell Captuvo Sleds are only supported if this setting is set to False. This setting defaults to True, which enables PayFabric’s hosted web page. Having this setting enabled is the recommended way of entering PayFabric payments, and is the method which this document describes. For more information on the other method, see the document “Old PayFabric Integration in SalesPad Mobile”.
Use Web View Formatting – If this setting is enabled, SalesPad Mobile will apply CSS to PayFabric’s hosted web pages to improve their appearance on mobile devices. However, one of PayFabric’s features is the ability for users to apply their own CSS to the hosted web pages, via Themes. If you have a Theme which you plan to use with SalesPad Mobile, then disabling this setting is recommended so that the default CSS does not interfere.
SECURITY
In the Security Editor module of the SalesPad Mobile Server, in the plugin Access Security, there is a Payments section.
Security settings in the Payments section which are relevant to PayFabric include:
Available Payment Methods on Invoices – This is a list of the available Payment Methods for users who are entering payments or transactions on invoices. To enable Nodus PayFabric transactions for invoices, select this setting, click the down arrow to the right of this setting, and check Nodus PayFabric.
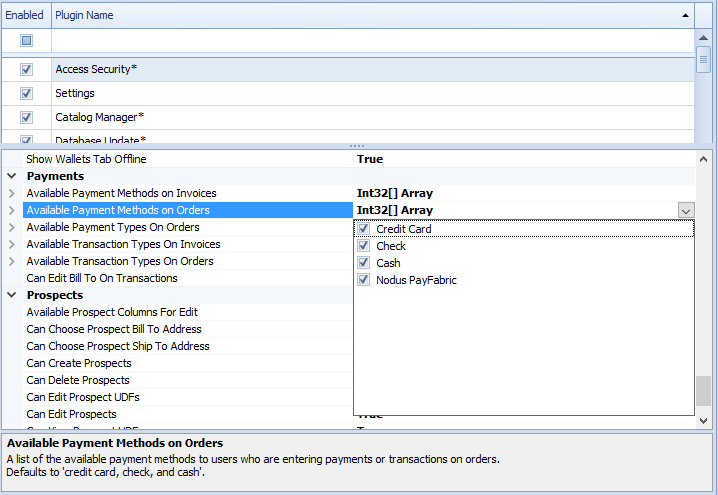
Available Payment Methods on Orders – This is a list of the available Payment Methods for users who are entering payments or transaction on orders. To enable Nodus PayFabric transactions for orders, select this setting, click the down arrow to the right of this setting, and check Nodus PayFabric.
Available Payment Types on Orders – This is a list of the available Payment Types for users who are entering transactions on orders. The two options are payment and deposit.
Available Transaction Types on Invoices – This is a list of the available Transaction Types for users who are entering transactions on invoices. At least one of Authorization or Charge must be enabled in order to enter a PayFabric transaction. The options Charge, Void, Capture, and Reattempt Save to GP affect if those options are available for transactions which PayFabric successfully processed.
Available Transaction Types on Orders – This is a list of the available Transaction Types for users who are entering transactions on orders. At least one of Authorization or Charge must be enabled in order to enter a PayFabric transaction. The options Charge, Void, Capture, and Reattempt Save to GP affect if those options are available for transactions which PayFabric successfully processed.
Additionally, there is a PayFabric section which is currently only used for the Customer card’s Wallets tab. This section has the following security settings:

Can Create Wallets - This setting allows a user to create Customer Wallets on the Customer card.
Can Delete Wallets - This setting allows a user to delete Customer Wallets on the Customer card.
Can Edit Wallets - This setting allows a user to edit Customer Wallets on the Customer card.
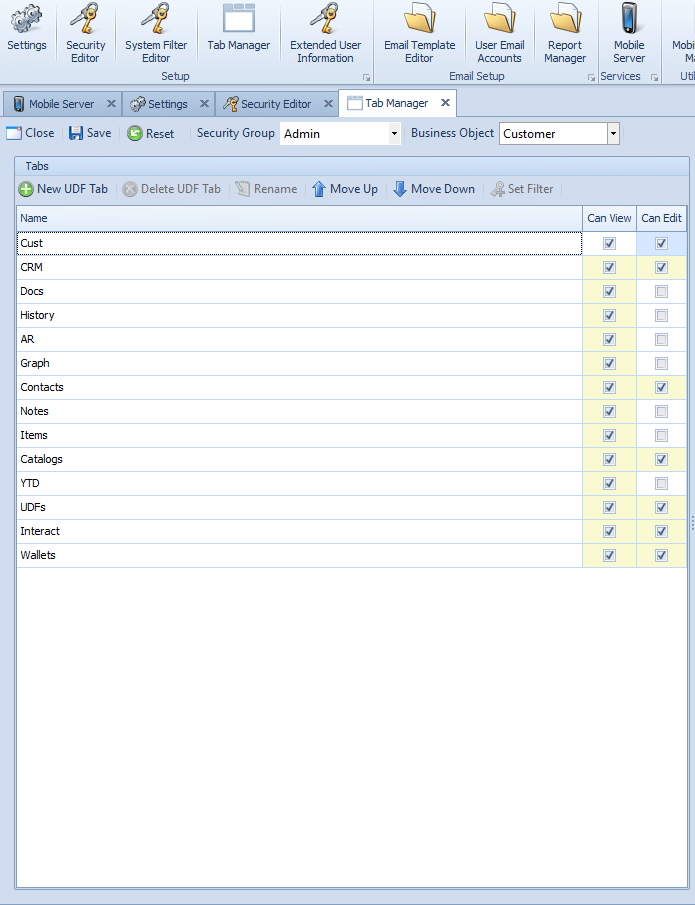
Can View Wallets - This setting allows a user to view Customer Wallets on the Customer card. In version 1.3.27.1 of the SalesPad Mobile Server, this security setting will be replaced with the Tab Manager module, where users can control the visibility of various tabs including the Wallets tab.
Show Wallets Tab Offline - If set to True, wallets can be viewed, created, edited, and deleted while the device is in offline mode, if other security settings are enabled. Wallet data is still loaded and saved live with Nodus PayFabric, so this setting is secure but requires Internet connectivity.
SalesPad Support
Comments