Overview
The Funnel module is a specialized sales document processing screen used to control the processing order of documents in a certain queue. Instead of users choosing which documents to process, the Funnel brings up documents one at a time in the order they are to be processed. The Funnel can be used as a “final check” before sending documents to the warehouse to be processed.
Security
In Modules > Security Editor:
- Find Funnel in the Security column and enable it by selecting the check box
- Set the sub-settings to allow processing Manual and Pre Auth payments, and editing line items
- To allow access to the Configuration screen from the Queue Setup button in the Funnel, enable Pick Ticket Processing Configuration
- Click Save
Note: You must log out of SalesPad and then back in for security changes to take place.
Settings
Configure the following settings in the Settings module before using the Funnel:
PICK TICKETS
Add Pick Ticket Printed Note - This setting is visible in the Funnel screen. If True, it will add a note to the current document in the Funnel when the pick ticket is printed. (Example: "Pick Ticket On: {DATE} {TIME} by {USER}")
Backorder Batch - Sets the batch that backorders will be sent to from the Pick Ticket Processing window.
Evaluate Rules When Pulling - If True, workflow rules will apply when pulling a document.
Freight Field Enabled - If True, enables the freight field from the Funnel.
Ship Methods - Sets shipping methods separated by semi-colons, that the Other Report (Report specified in the Funnel setup) should print.
Show COD Field - If True, a COD field linked to USRDEF03 will display for a sales document while in the Funnel.
Update Ship Date If Packing Slip Is Printed - If True, the ship date will be updated when the packing slip is printed from the Funnel.
SALES DOCUMENT SPLITTING
Split Document - If True, users will be prompted to split a document containing backordered items when it is processed in the Funnel.
Funnel Setup
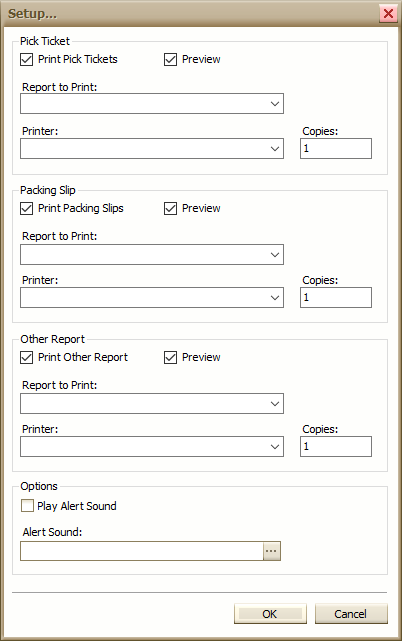
PRINT SETUP
In Modules > Funnel
- Click the Print Setup button
- In the window that appears, set the individual options for handling the printing jobs from the Funnel by selecting which reports to print, number of copies and which printer to use:
- Click OK
CONFIGURATIONS
- On the Funnel header, click Config: (or Queue Setup in later versions)
The Configuration window appears: - Click New to create a new Funnel configuration
- Enter a Configuration Name
- Enter the queue to use for the Ready Batch, Printing Batch, and Printed Batch
- Click OK
- After creating new configurations, close and reopen the Funnel
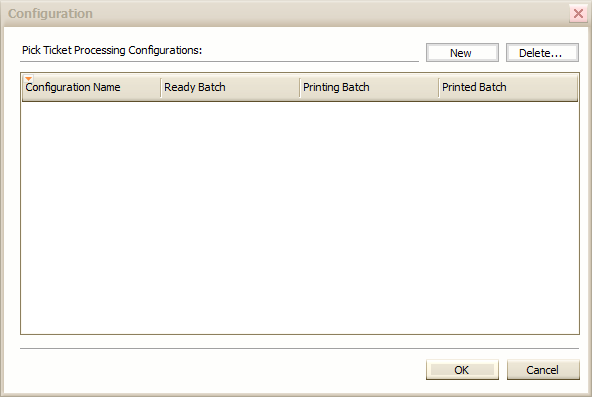
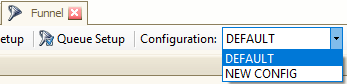
New configurations will now be available from in the “Config:” dropdown
Using the Funnel
In Modules > Funnel:
- Select the preferred configuration from the Config: dropdown
- To load a document, select either the "Ready Number" or the Get Next button from the header. To go to a specific document, click the Goto button and enter the document number
Ready Number, Get Next, and Goto buttons:

The fields on the Funnel screen will fill with document information, similar to the Sales Document Entry screen.
- Make any changes or additions needed
- Click the Process button on the top right of the screen to send the document to the next step of the workflow. The print preview will appear for the document report
Note: Clicking the Cancel button will unload the document and return it to the Funnel
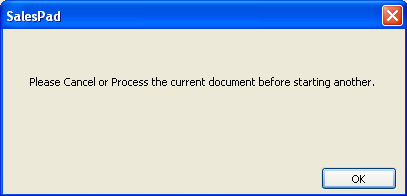
Note: If you click Get Next before canceling or processing the current document, the following message will appear:
Repeat the steps for additional sales documents
SalesPad Support
Comments