Overview
The Pick Ticket Printing module allows for batch printing of pick tickets for sales documents based on the documents’ current queue. Pick tickets will print using the custom Bulk Pick Ticket Report.
Usage
Follow the steps below in Sales > Pick Ticket Printing
- From the Queue dropdown, select the queue you wish to print tickets from.
- Enter a specific Warehouse where items are being pulled (optional).
- Under Quantity Limits, set the number of line items or total items a document may have (optional).
- After the criteria are set, click Refresh to load the list of items to process. The list will load in the Pick Ticket Information grid.
Note: Using the Auto Filter Row (click the orange triangle and select Auto Filter Row from the dropdown) will filter the data further, and only displayed items will be processed: - To have documents follow your workflow path to the next queue after printing, check the Forward Document to Next Queue After Printing box.
- Click the Process button to print pick tickets. All items that are not grayed out on the list will be processed.
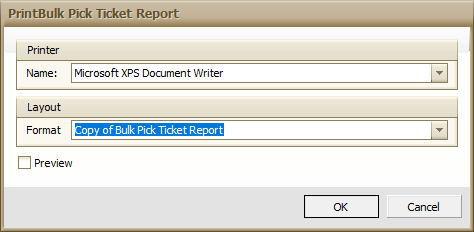
- Select a Printer and Layout from the screen that appears
- If you would like to preview before printing, check the Preview box
- Click OK. A preview will appear if selected, otherwise pick tickets will print to the selected Printer
Note: If you select Forward Document to Next Queue After Printing, and select Preview, the documents will still be processed and forwarded, even if only previewed but not printed.
Note: Pick tickets will not display the following:
- Dropshipped lines
- Lines with 0 quantity allocated
- Non inventoried lines
- Kit items
Security
Pick Ticket Printing - Allows users to open the Pick Ticket Printing Module.
Pick Ticket - Allows users to access and use the Pick Ticket Printed Report.
Bulk Pick Ticket Report - Allows users to access and use the Bulk Pick Ticket Printed Report.
Pick Ticket Processing Configuration - Allows users to configure a Pick Ticket Processing queue in the Funnel


SalesPad Support
Comments