Overview
Sales Batch Processing provides an interface to perform batch-level operations on multiple documents. From this module, users can forward documents in workflow, place payments on orders, and print, fax, or email documents and invoices. Sales Batch Processing is accessible in SalesPad from Modules > Sales Batch Processing.
Sales Batch Processing Screen:
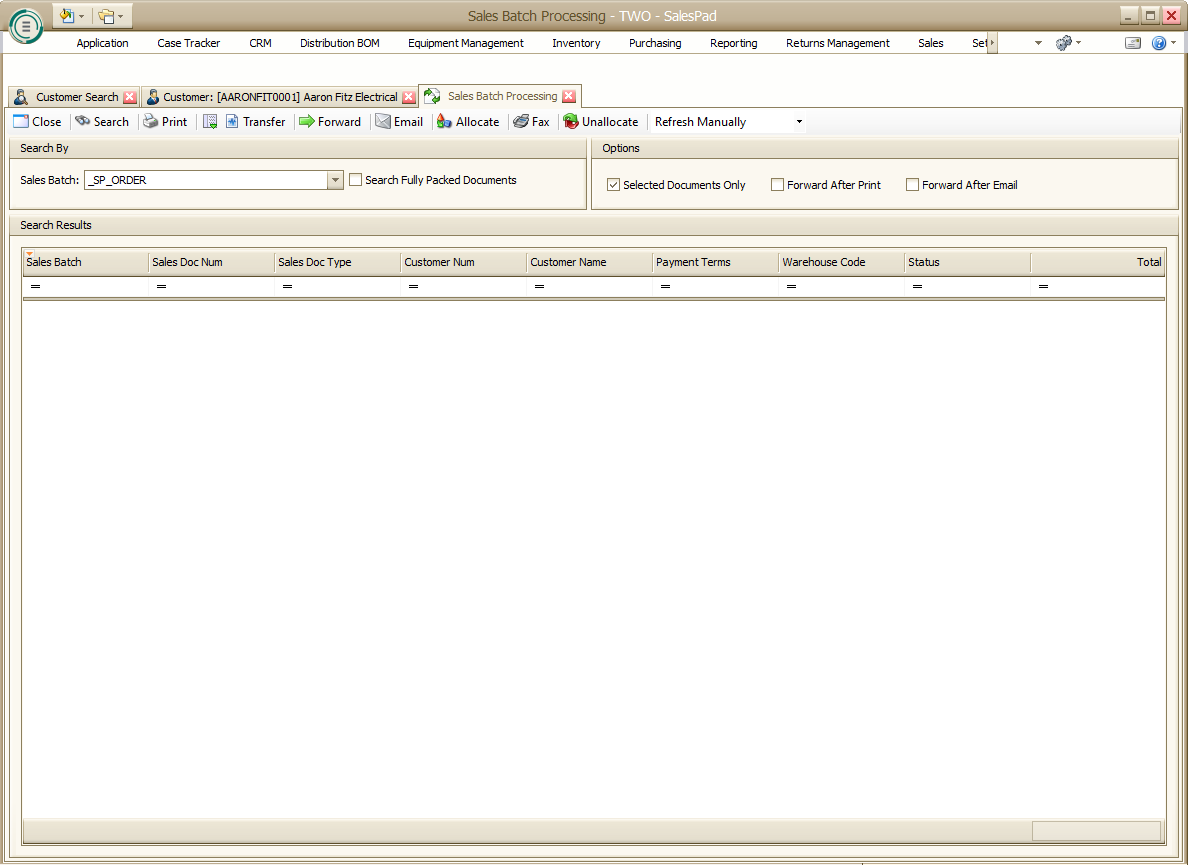
Check Boxes
Three check boxes appear in the Sales Batch Processing module:
Selected Documents Only: If checked, actions will affect only selected documents; if unchecked, actions will affect all documents in the Search Results grid.
Forward After Print: If checked, forwards the document(s) to the workflow-defined next queue after printing.
Forward After Email: If checked, forwards the document(s) to the next workflow-defined queue after emailing.
Header Buttons
The following buttons appear in the header of the Sales Batch Processing module:
Close
Clicking this button will close the Sales Batch Processing module.
Search
Clicking this button will search for all open documents in all batches, or search by any criteria typed into the Search By Sales Batch field. Results appear in the Search Results grid.
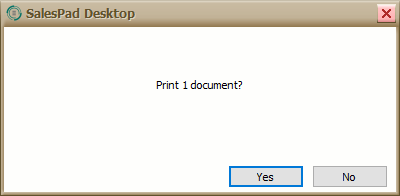
Clicking this button will start the process of printing selected documents (or all documents in the Search Results grid, if the Selected Documents Only box is left unchecked).
- In Sales Batch Processing, search for and select the document(s) you wish to print
- Click the Print button. A popup box will appear, confirming that you want to print the specified number of documents
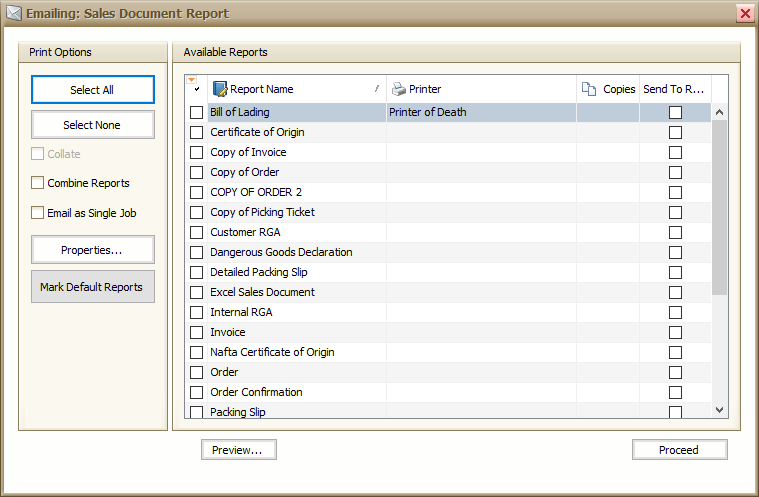
- Click Yes. The Print Sales Document Report box will appear, where print options and available reports can be selected
- Select the appropriate report(s) to print
- Select an option (Preview, Print To, Quick Print) from the buttons at the bottom. Preview/Options will appear upon selection
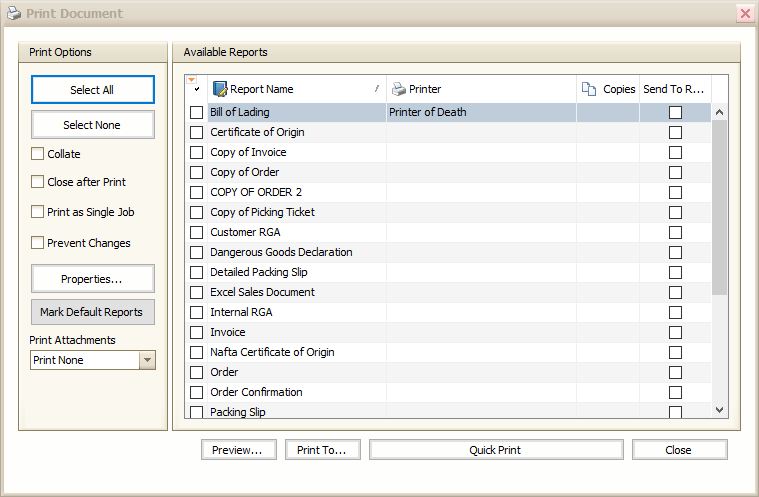
Note: Because this module has the ability to print multiple documents from one screen, security specified by document in the Print Reports section will be ignored.
Transfer to Invoice
Clicking this button will start the process of transferring selected documents (or all documents in the Search Results grid, if the Selected Documents Only box is left unchecked), to Invoice.
Note: When you transfer a document to an invoice in Sales Batch Processing, the workflow will skip the first step automatically, allowing it to auto run a rule.
Procedure
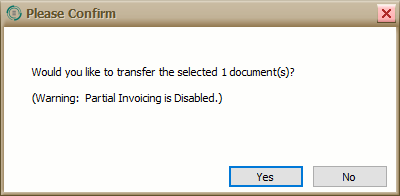
- Search for and select the document(s) you wish to transfer
- Click the Transfer to Invoice button. A popup box will appear, confirming that you want to transfer the specified number of documents to invoice
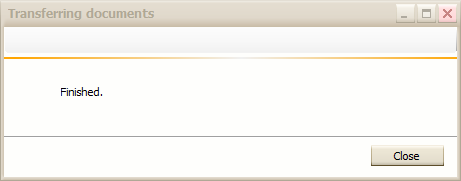
- Click Yes. The "Transferring Orders to Invoices" window appears, until all selected documents have been transferred. This may take some time.
If a document cannot be transferred, a screen with an explanatory message will appear after confirming the transfer (ex: unfulfilled items). This screen can be printed or closed. When documents have been successfully transferred, a confirmation message will appear. - Click Close. The Sales Batch Processing - Transfer to Invoice window will appear, listing any documents that were transferred
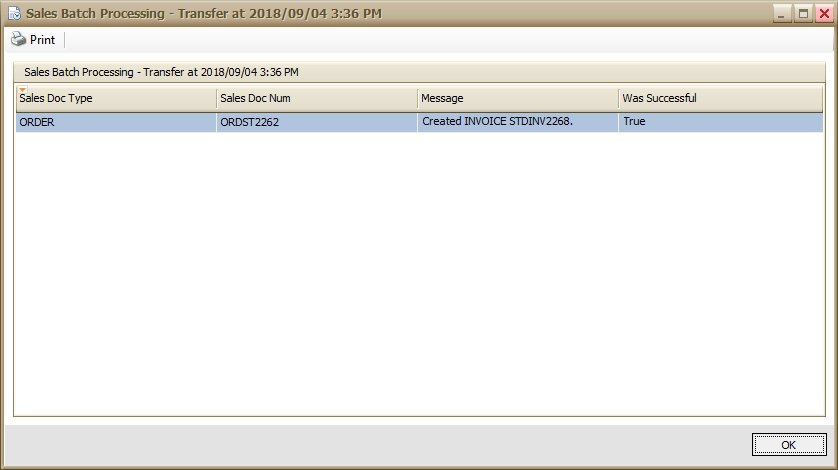
From here you can either print the confirmation or close the window.
Forward
Clicking this button will move selected documents (or all documents in the Search Results grid, if the Selected Documents Only box is left unchecked) to the next workflow-defined Queue. A confirmation log will appear, which can either be printed or closed.
Allocate
Clicking this button will allocate lines on selected documents (or all documents in the Search Results grid, if the Selected Documents Only box is left unchecked).
Procedure
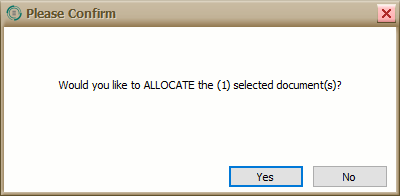
- Search for and select the document(s) you wish to allocate the lines for. A popup box will appear, confirming that you want to allocate the specified number of documents
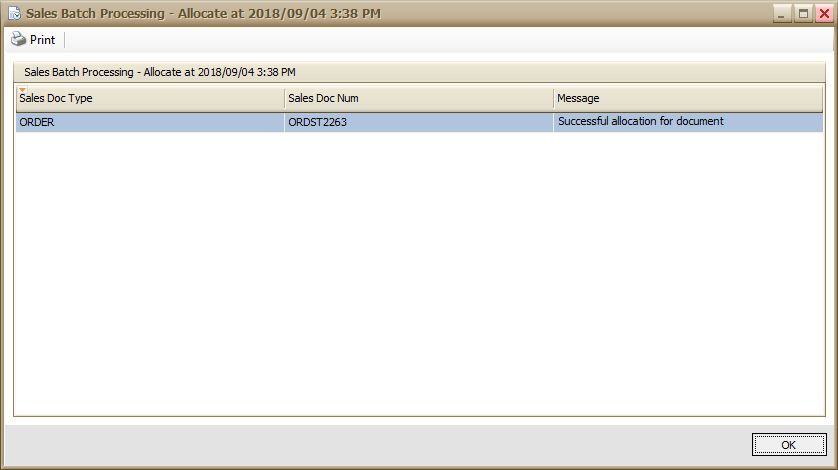
- Click Yes. The Allocating Sales Documents screen appears, until all selected documents have been allocated. This may take some time.
- When documents have been successfully allocated, a confirmation message will appear.
- Click Close. A confirmation log will appear that can either be printed or closed
Charge CC Payments
Clicking this button will charge the manual credit card payments on selected documents (or all documents in the Search Results grid, if the Selected Documents Only box is left unchecked). A confirmation log will appear that can be printed or closed.
Note: In versions 4.1 and later, the CardControl module will open to complete the credit card payment. With CardControl, users can capture pre-auths but not charge; in 4.0, users could charge but not capture pre-auths. Charging functionality will be added in the future. Please contact SalesPad Support for assistance with charging credit cards.
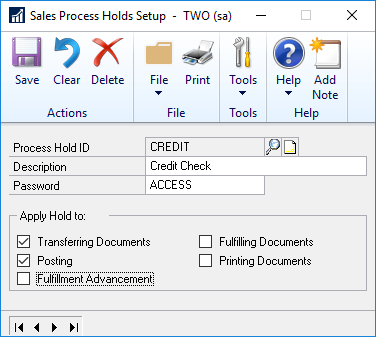
Note: To stop a document with a credit card pre-auth from being transferred or posted before payment is received, you must change the hold settings in Dynamics GP:
- Log in to Dynamics GP
- Open the Microsoft Dynamics GP dropdown Menu, and then go to Tools > Setup > Sales > Process Holds
- On the Sales Process Holds Setup window, select the Process Hold ID to change
- Select Transferring Documents and Posting to apply those holds
- Click Save
Clicking the Email button will start the process of emailing selected documents (or all documents in the Search Results grid, if the Selected Documents Only box is left unchecked). Note: You must have valid Email Server setup to use this function.
Note: You must have valid Email Server setup to use this function.
Note: The From email address used must match the global address pointed to by the company email server set up in the Sales Email Confirmation settings in SalesPad’s Settings module. (Refer to the SalesPad Knowledge Base article).
Note: Before you click the Email button, make sure that the email address field you plan to use is populated. If the customer’s “Dont Email” box is checked (viewable from Customer Search), an email will not actually be sent.
Procedure
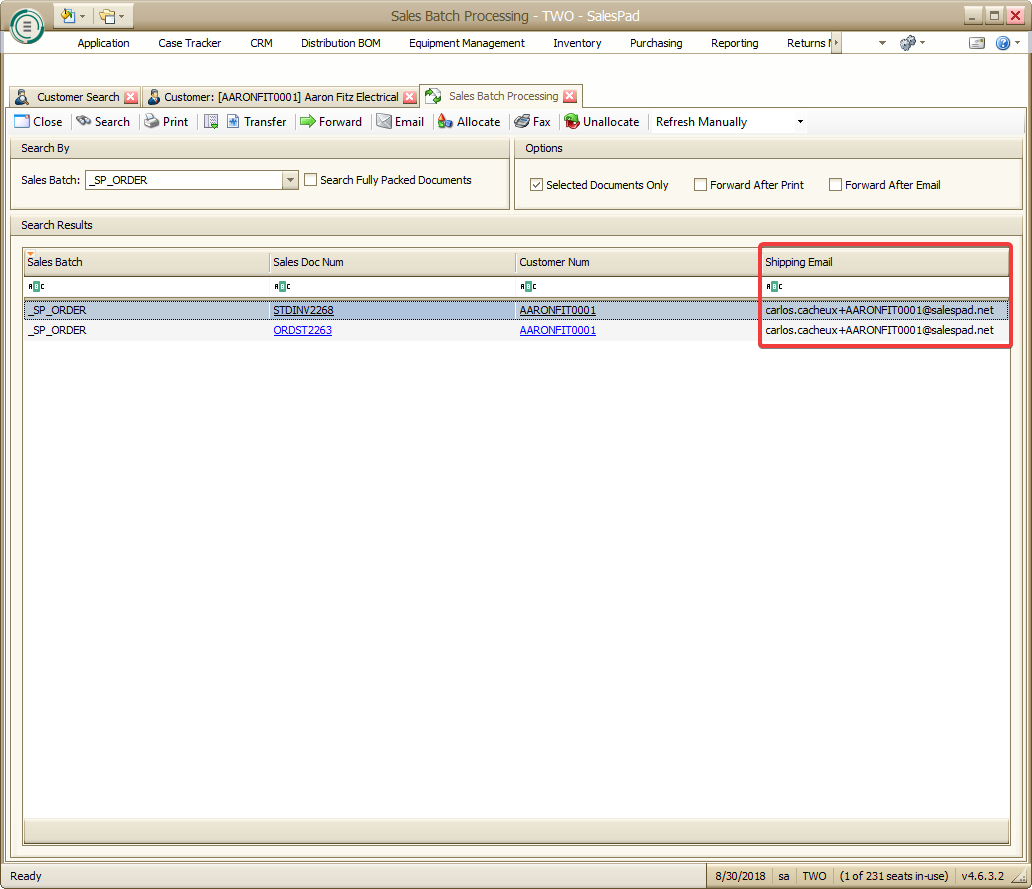
- Make sure the shipping email and/or billing email are already populated, as in the screen below (If you do not see the proper email columns populated in the Sales Batch Processing screen, it will not email properly.)
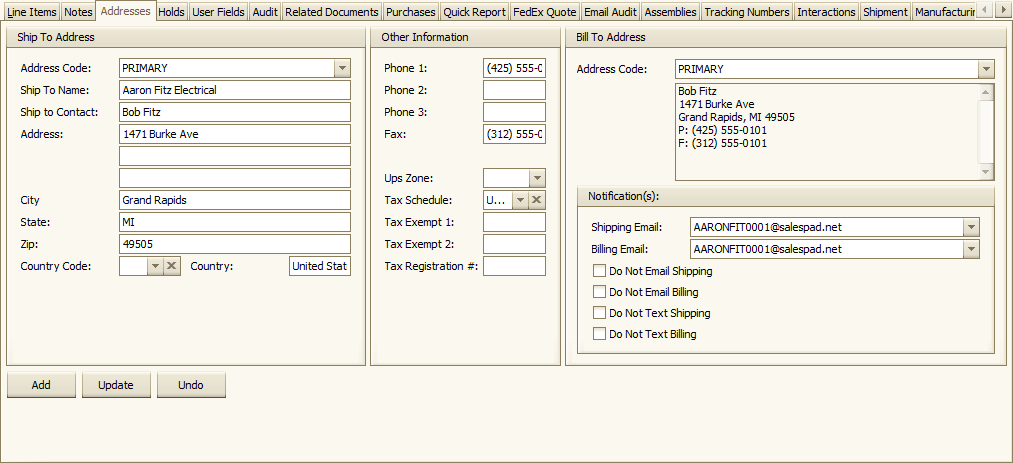
- If they are, proceed to step 5. If they are not, you can update them from each sales document, on the Addresses tab:
- After updating, save and close the document
- Refresh the information in Sales Batch Processing
Note: To automatically populate these values for new sales documents, you can fill them out on the Customer Card:The sales document will pull the customer Ship address email into the sales document shipping email and the customer Bill address email into the sales document billing email. This will only automatically populate for new sales documents. All preexisting sales documents must be manually updated.
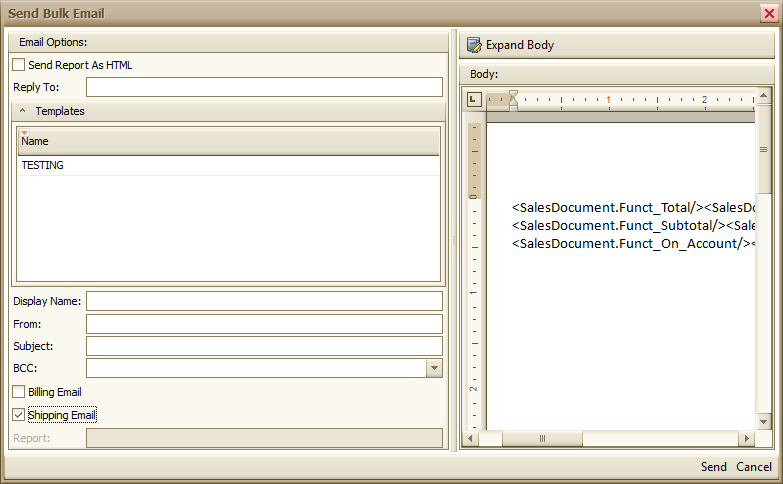
Once email addresses are populated, you can email documents in Sales Batch Processing. - Click the Email button. The Sales Batch Processing Emails screen will appear
- Select the related report(s) you wish to email and click Proceed. The Send Bulk Email screen will appear.
Note: In a batch mode, the preview will show only the template and not a populated version of the document - Select whether to send to the Shipping Email or the Billing Email (from the Customer Card Contact Card) and fill in the other Email Options
- Select a template for the email. A personal message can be added to the body
- Click Send. The document(s) will be sent and a confirmation window will appear, which can be printed or closed

Fax
Clicking this button will start the process of faxing selected documents (or all documents in the Search Results grid, if the Selected Documents Only box is left unchecked).
Note: You must have valid Email/Fax Server setup to use this function.
If you need an inexpensive web based fax service to integrate with SalesPad, please visit https://www.cavallo.com/Support/MetroFax.aspx
Note: Before you click the Fax button, make sure that the fax number field is populated. If the customer’s Don't Fax box is checked (viewable from Customer Search), a fax will not be sent.
Procedure
- Make sure the fax fields are populated
- If they are, proceed to step 5. If they are not, you can update them from each sales document, on the Addresses tab Fax field
- After updating, save and close the document
- Refresh the information in Sales Batch Processing
Note: To automatically populate these values for new sales documents, you can fill them out on the Customer Card > Contact Addresses > Fax field. This will only automatically populate for new sales documents. All preexisting sales documents must be manually updated.
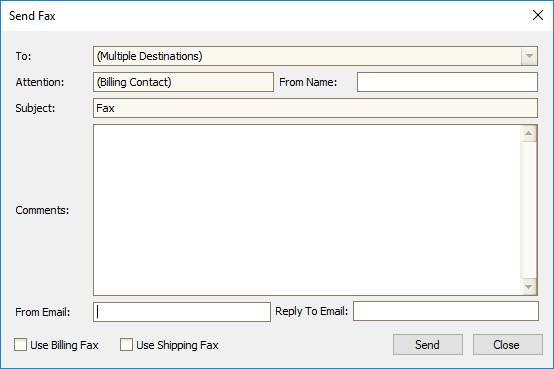
Once fax numbers are populated, you can fax documents in Sales Batch Processing. - Click the Fax button. The same screen appears as does for Sales Batch Processing Emails:
- Select the related report(s) you wish to fax and click Proceed. The Send Fax screen will appear
- Fill in the necessary fields and select whether to send to the Billing Fax, Shipping Fax, or both (based on the Contact Address codes on the Customer Card)
- Click Send. The document(s) will be faxed and a confirmation window will appear, which can be printed or closed
UNALLOCATE
This button is new for versions 4.1 and later and requires proper security. Clicking the Unallocate button will remove allocation of all lines on selected documents (or all documents in the Search Results grid, if the Selected Documents Only box is left unchecked).
Procedure:
- Search for and select the document(s) you wish to unallocate lines for. A pop-up box will appear, confirming that you want to unallocate the specified number of documents
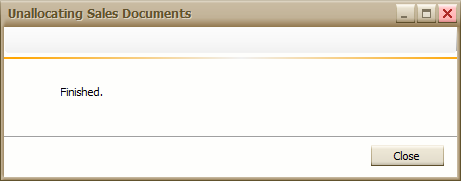
- Click Yes. The "Unallocating Sales Documents" screen appears, until all selected documents have been unallocated. This may take some time.
- When documents have been successfully unallocated, a confirmation message will appear:
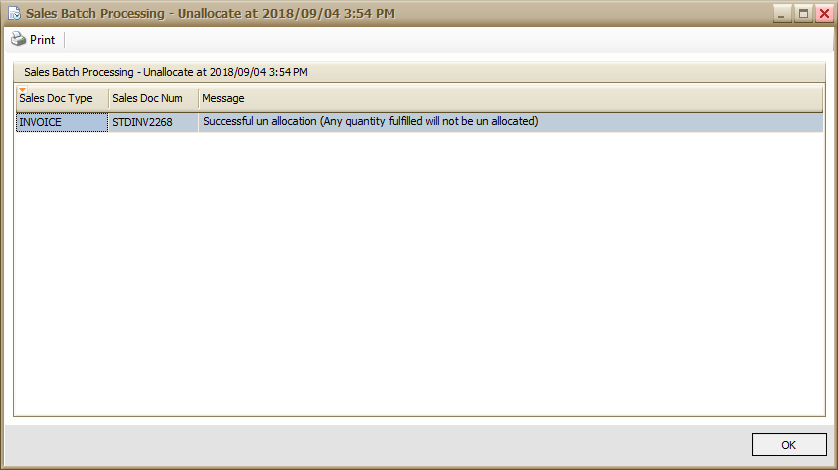
- Click Close. A confirmation log will appear that can either be printed or closed

Security
Sales Batch Processing* - Enables the Sales Batch Processing module for the Security Group
Settings
Invoice Date Source - Determines the date used for Invoices (Source_Document_Date, Today, Application_Date, Actual_Ship_Date)
Note: If Print as Single Job and Email as Single Job are both set to True, and documents are emailed or faxed in bulk, the email (one per customer) will be sent as a single email with a single attachment. If Print as Single Job is set to False, but Email as Single Job is set to True, the email will be sent as a single email, but with multiple attachments. For more details, refer to SalesPad’s Emailing and Printing as a Single Job document.
Historical Mode
There is a sub-security for Sales Batch processing for Enable Historical Mode. Introduced in version 5.2.15, this security will show only historical, not voided or open, documents in Sales Batch Processing so that they can trigger workflow plugins. Historical Mode will also only return Quotes, Orders and Invoices. Because this setting applies to all users in the user group of the Security Editor, it may be best to create a specific group to have this setting enabled so as not to affect other user groups.
To re-run plugins, you have to set up a “NEXT QUEUE” in Sales Document Workflow Setup for the queue(s) that documents are transferred or posted from, and add the desired plugin to that queue in the workflow setup. When the document is forwarded from Sales Batch Processing and Historical Mode is enabled, the document will trigger the plugin but not actually move the document to another queue. A blank message will be displayed in the results window after forwarding the document.
NOTE: Some plugins or functionalities may not work properly on historical documents. The Transfer, Allocate, Unallocate, and Capture CCAuth buttons are disabled and there is a banner that populates at the top of the screen to let users know that Historical Mode is enabled.

Standard functionality for Print, Email, and Forward apply. Search, custom Search, Search Options and Options all function the same as if Historical Mode were disabled.
SalesPad Support
Comments