Overview
Emailing in SalesPad Desktop is designed to be simple, intuitive, and powerful. This document will explain how to work with email within SalesPad Desktop itself; to learn more about the Microsoft Outlook email add-in for SalesPad Desktop, click here.
Navigation Menu
- Basics of Emailing in SalesPad Desktop
- Sending Email
- Document Email Indicator
- Emailing and Printing as a Single Job
- Emailing Attachments From the Sales Document
- Printing and Emailing PDF Attachments
- Setting On-Load Email Script
- Email Templates
-
EmailTo, EmailCC, and EmailBCC on Customer and Vendor Address Cards
Basics of Emailing in SalesPad Desktop
There are four email-related fields on the Contact card.
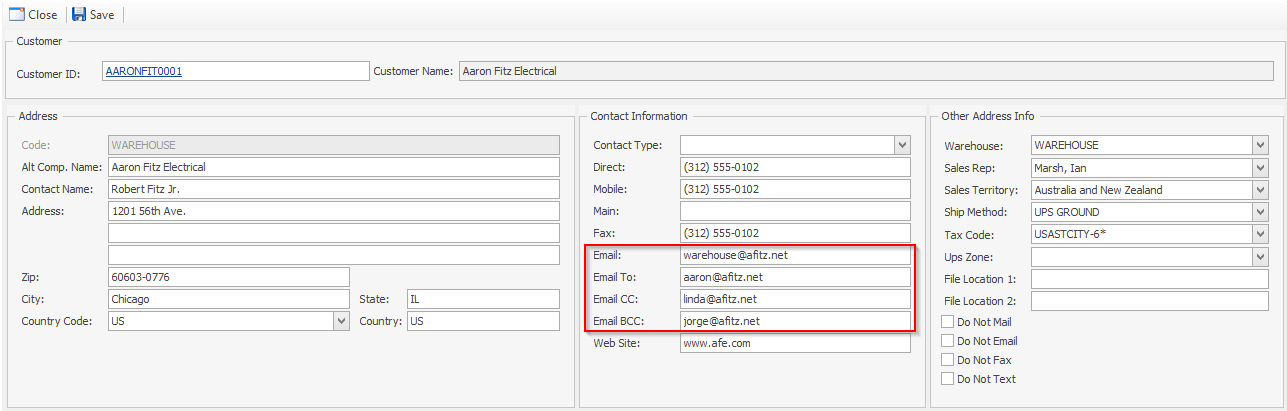
Only the Email field writes to a sales document automatically. The other fields are available via the email dropdown on the sales document.
Note: Updating the Email field does not update any sales documents created before the update. Changes to the Email field will only affect documents created after the change was made.
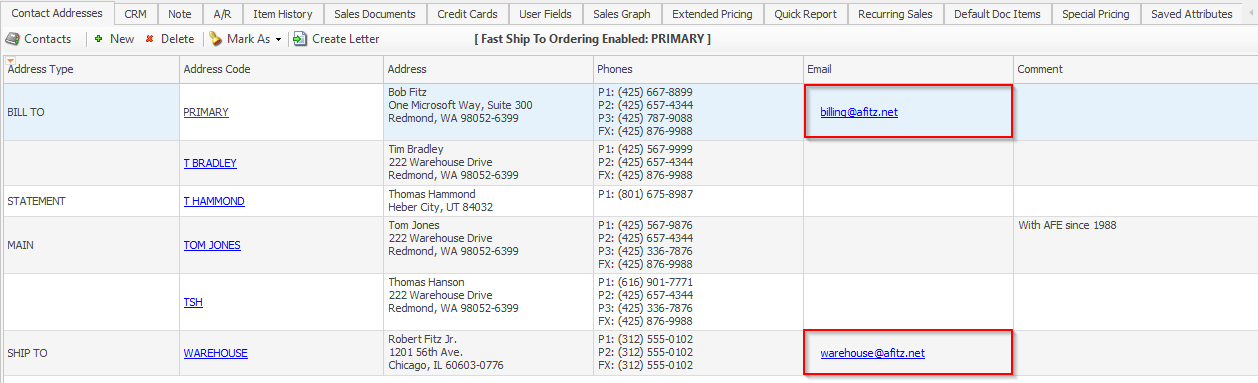
When a sales document is created, it will use the BILL and SHIP address codes (found on the Contact Addresses tab of the Customer card). If there is an email address associated with these address codes, both of those email address will appear on the sales document. However, you can change the email address on the sales document by clicking the Email dropdown and selecting a different email address.
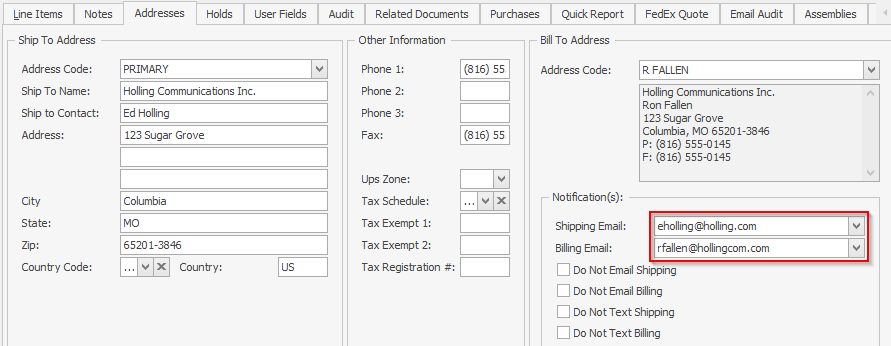
Bill and Ship addresses are visible on the Addresses tab of a sales document. These fields are automatically populated, but alternate email addresses can be entered, if necessary. More than one email address can be selected for either of these fields.
Note: These email fields are only used when emailing from Sales Batch Processing and sales document screen. Mass emailing does not permit the selection of specific email addresses, it only allows the user to choose to email either the Billing or Shipping contact.
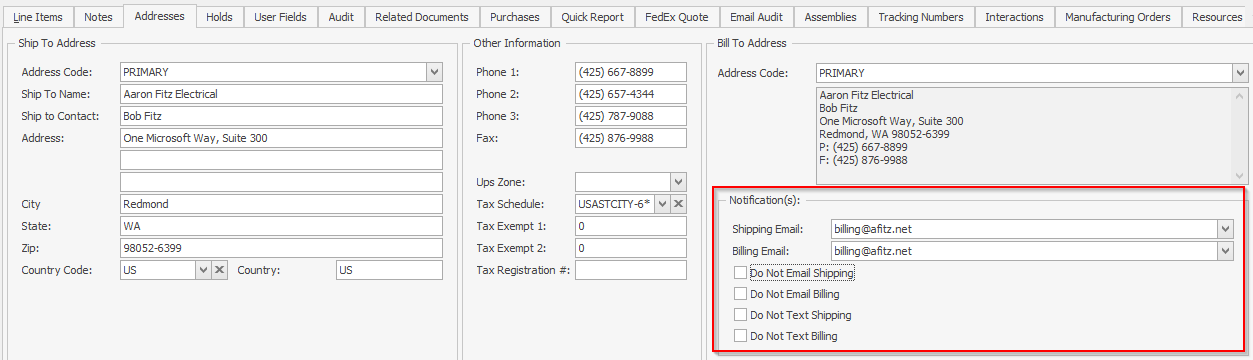
When emailing from Sales Batch Processing, it is recommended to have the Billing and Shippping Email columns visible. These columns show the email addresses found on the Addresses tab of the individual sales documents. If any of the Email fields are incorrect or blank, you will need to open the document and edit them on the Addresses tab before emailing from Sales Batch Processing.
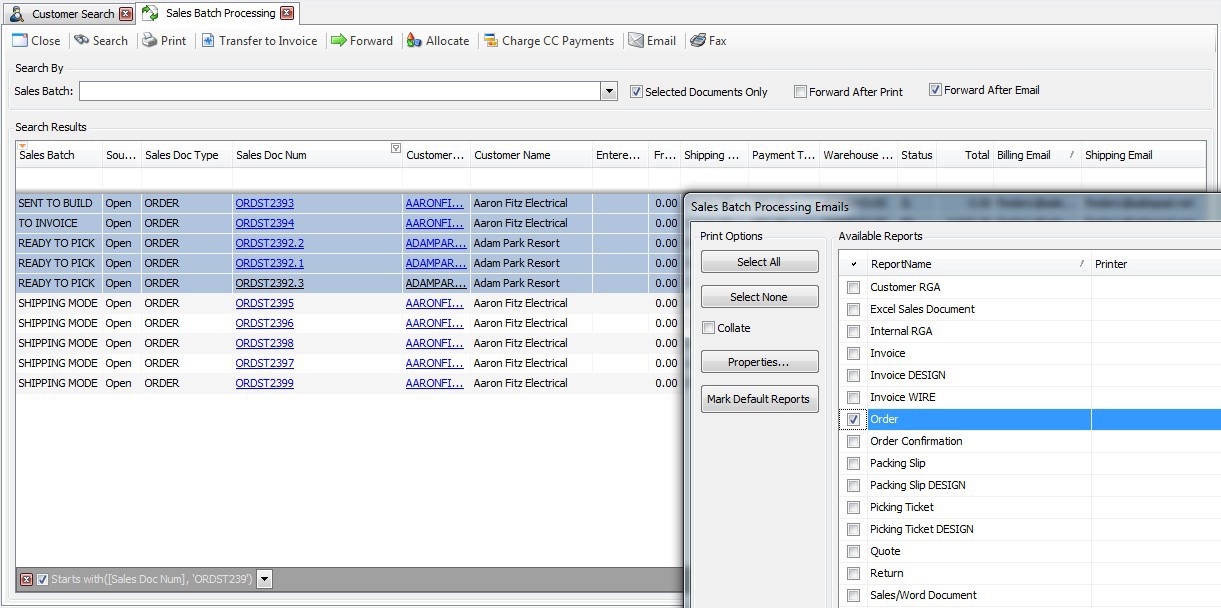
Clicking Email in Sales Batch Processing calls up the following pop-up.
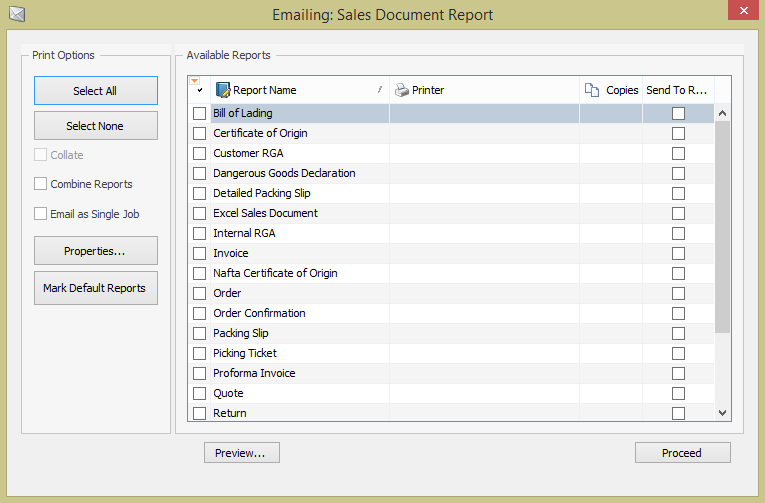
Emailing from Sales Batch Processing differs from emailing directly from a sales document in that you cannot select individual email addresses. Once you select a report from the Sales Document Report pop-up, the following pop-up will appear.
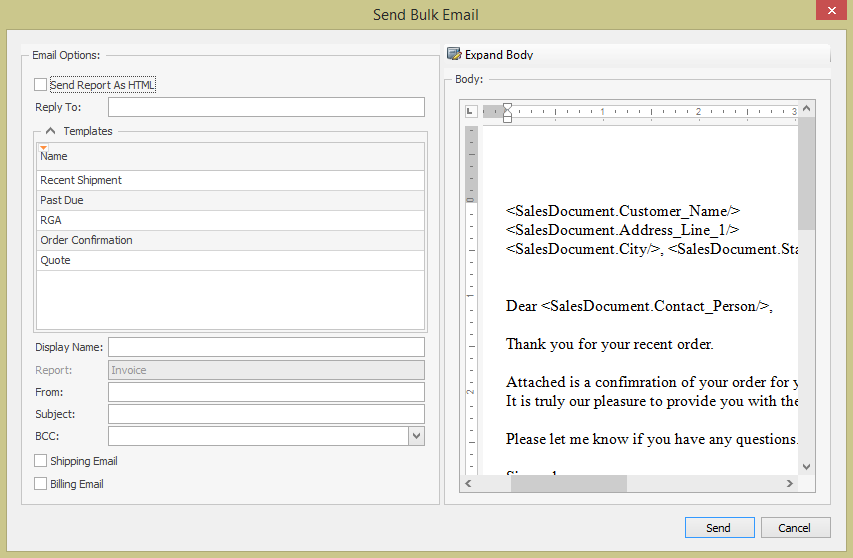
You can check the Shipping Email or Billing Email checkboxes (or both) in the lower left-hand corner, but you cannot choose a specific email address to send the report to. If there is no Shipping or Billing email address, you will receive an error message.
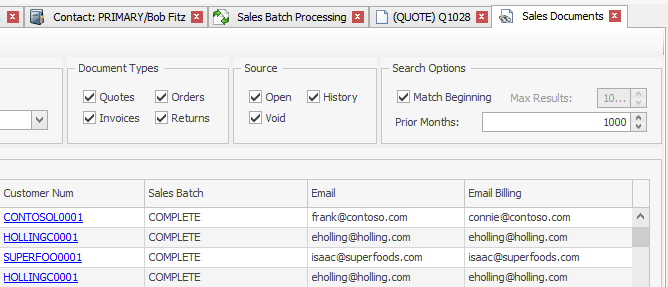
On the Sales Documents screen, there are several email-related columns you can opt to view. You cannot edit these emails directly from the document, because they are historical.
When emailing from a sales document, the Send Email pop-up does not pull information from the email fields on the sales document, but from the Contact card email fields.
Sending Email
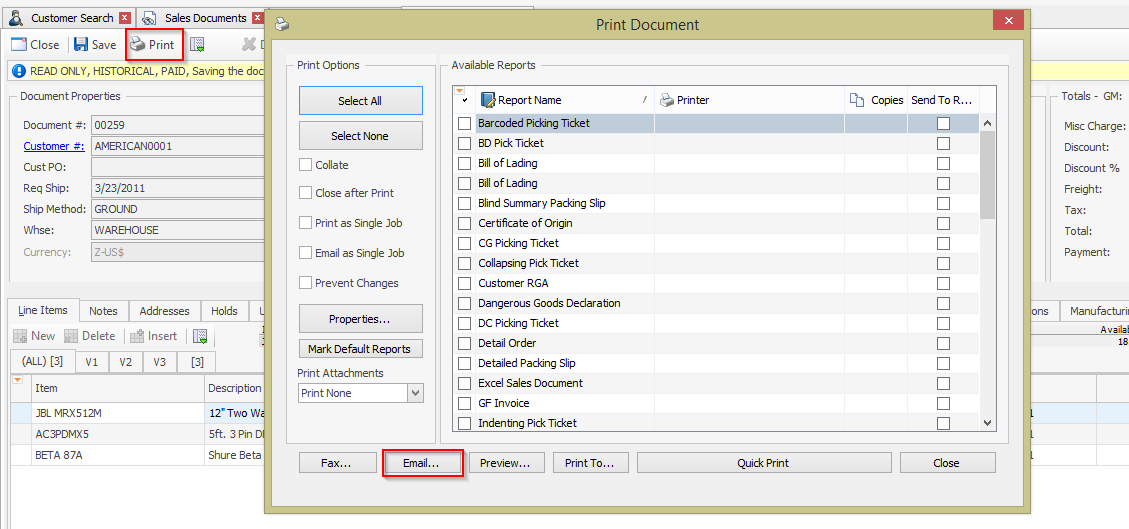
Emails can be sent individually from sales documents or purchase orders, or in batches using Sales Batch Processing (under Sales) via the Send Email screen. Click Print, make the appropriate selections, then click Email).
On the Send Email screen, enter and/or modify the email sending options under Email Options.
Note: The Send To email will default to the customer’s primary email address.The From email address must match the global address pointed to by the company email server set up in the Sales Email Confirmation settings in SalesPad’s Settings module. Click here for more information.
Select the template to use from the right hand column. The body of the email will appear on the right and can be modified similarly to how templates can be created in the Email Template Editor (see instructions under Setup). If no templates have been set up, you can manually type a message in the Body grid.
Note: In a batch mode, the preview will show only the template and not a populated version of the document. Refer to the SalesPad Sales Batch Processing document for more information on Sales Batch Processing.
Click Send. The e-mail will send and the document will send as a .PDF attachment, using the SalesPad Report Writer.
Document Email Indicator
When you email a document from Sales Document Search, Purchase Order Search, or Sales Monitor, an EM code shows up in the status column to indicate that the document has been emailed.
Open the Sales Document search screen (go to Sales Documents and click Search). Notice the EM code in the status column on the far right of the page. This indicates the document has been emailed.
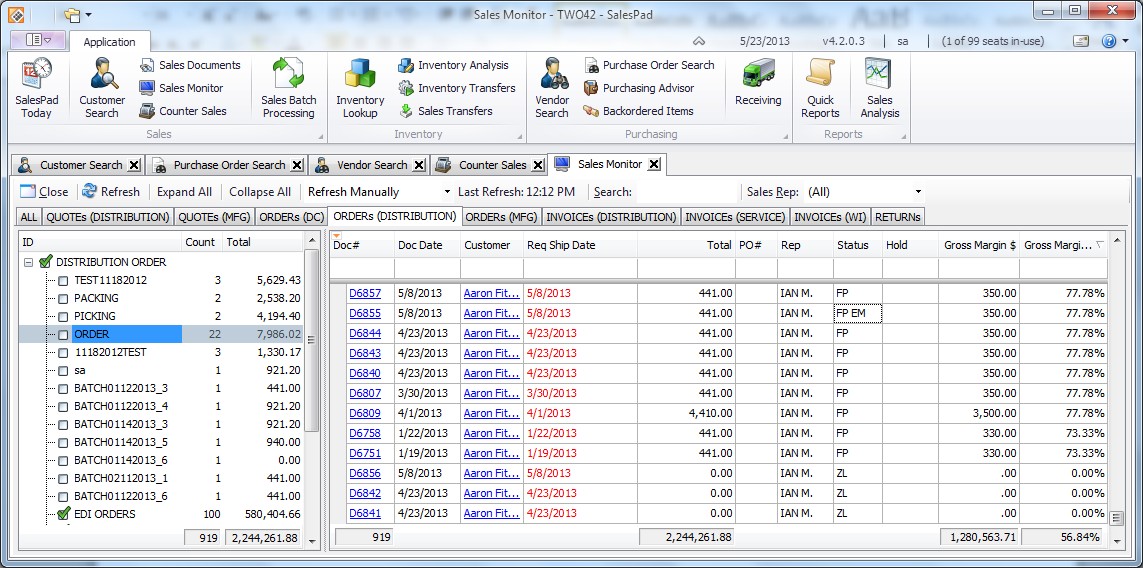
You can also view the EM code from the "Sales Monitor" screen. Click Sales Monitor and Refresh. You will notice the EM in the status column for order # D 6855.
Emailing and Printing as a Single Job
Users can send multiple documents for the same customer in a single email, fax, or print job, from modules that permit bulk faxing or emailing (Sales Batch Processing, Sales Batch Line Processing, Sales Document Search). If documents for more than one customer are selected for print/fax/email, one email will be sent to each customer with only the customer’s documents attached.
In Sales Batch Processing, you can select multiple sales documents and click on the Print button in the header. This brings up the Printing Sales Document Report screen.
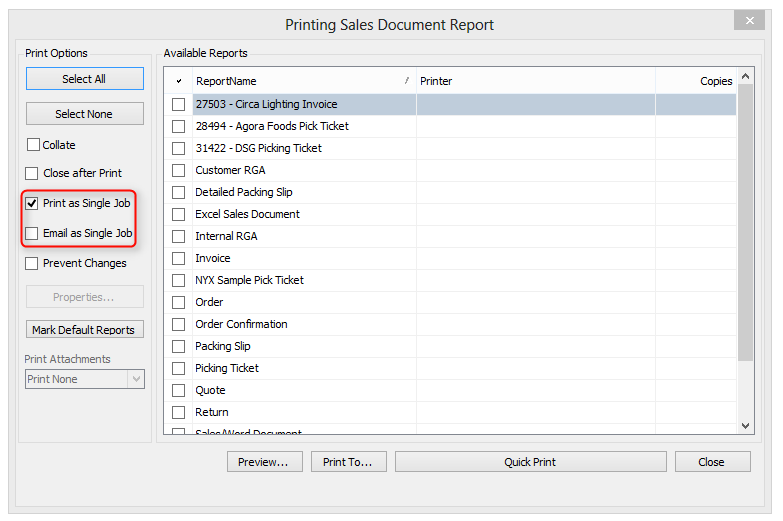
You can check the box marked Print as a Single Job to send all the selected documents to a chosen printer. Check the Email as Single Job box to email all the selected documents as one job.
In this example, five sales documents for two different customers are selected.
If Email (or Fax) is clicked and the appropriate report is selected:
If Email As Single Job and Print As Single Job are both checked, SalesPad will send 2 emails, one for each customer, with one customer’s documents together as one attachment.
If Email As Single Job is checked, but Print As Single Job is not, SalesPad will send both customers a separate email with each of their documents attached separately.
If Email As Single Job is not selected, each document will be sent to the corresponding customer in a separate email, regardless of the Print As Single Job check box.
If Print is clicked and the appropriate report is selected:
If Print As Single Job is selected, one print job will be created, and all documents will print together (regardless of the Email As Single Job check box).
If Print As Single Job is not checked, each selected document will print separately (regardless of the Email As Single Job check box).
Emailing Attachments from the Sales Document
The Print manual option in SalesPad GP allows users to select attachments or images that are associated with the sales document or sales line item and email them along with a printed report.
Create either an attachment or image user field on either the sales document or sales line item/item master. Then, create a sales document and pull in any file for an attachment or an image file for image user field. You can do the same for a sales line item.
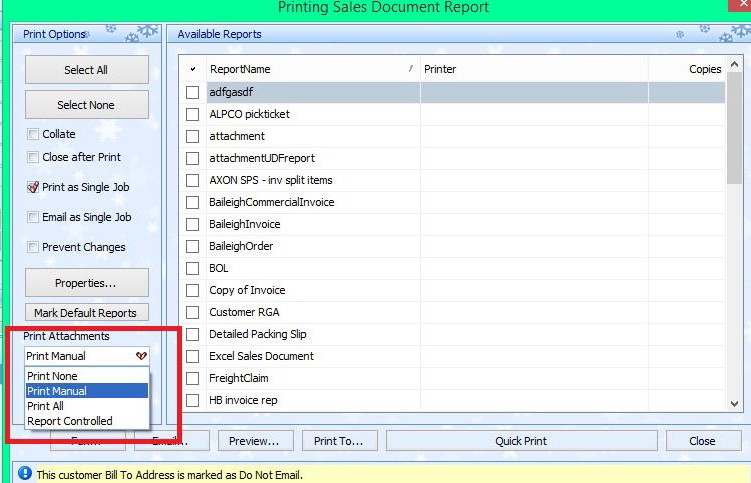
Save the document and click Print to open the Print/Email/Fax window. In the Print Attachments field, select Print Manual.
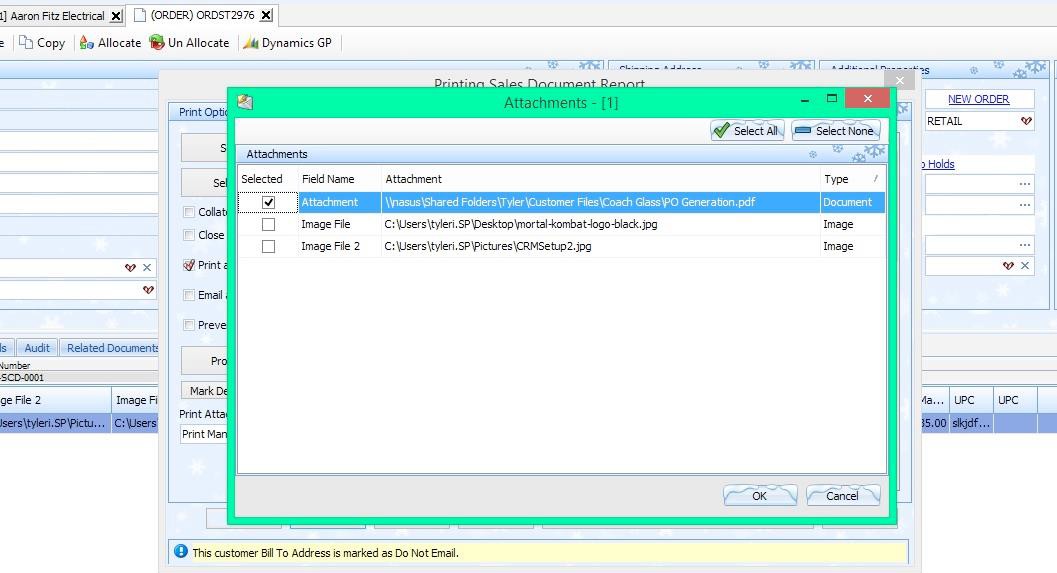
Select Email or Fax and a pop-up will appear, allowing you to select any of those attachments/images that are on the document or line level. The selected file attachments will be sent along with the printed form PDF.
Printing and Emailing PDF Attachments
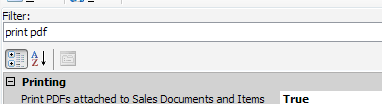
To allow for printing attached PDF documents when printing reports, navigate to Modules > Settings.
Filter to “print pdf” and set Print PDFs attached to Sales Documents and Items to True.
PRINTING
To print a document in SalesPad with PDF attachments, first create a user defined field with a PDF attachment.
Note: You should have a user defined field on Item Master and Sales Line Item with the same name (example: uf_ItemAttachment). Refer to the SalesPad User Defined Fields document for instructions on creating user defined fields.
Create a sales document and click the Print button on the sales document. The Print Sales Document Report menu appears.
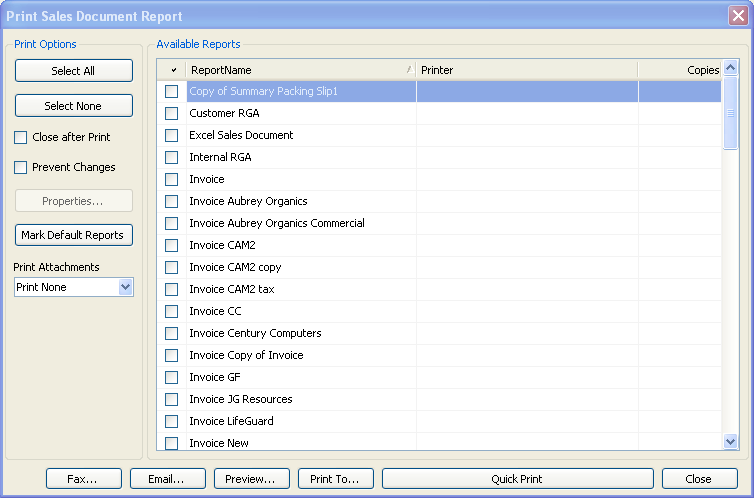
In the Print Options column, select the appropriate option from the Print Attachments dropdown:
- Print All – Prints all attached PDFs
- Print None – Will not print any attached PDFs
- Report Controlled – Prints only the PDFs referenced in a custom script within the designed report
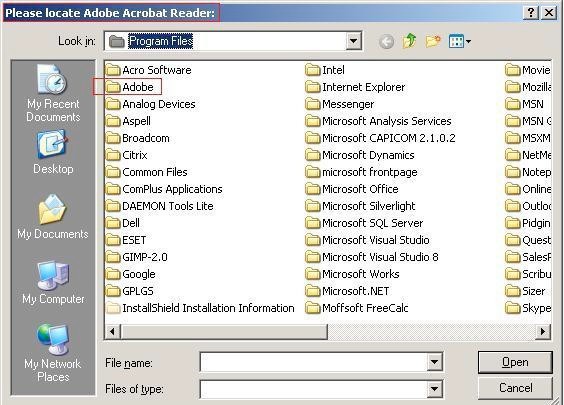
Click the Quick Print button. The first time you set up the PDF attachment print functionality, you must locate the installation .exe for Adobe™ Acrobat Reader on the screen that appears. Select this file and click Open.
The sales document and attached PDFs will print.
Note: After the initial path for Adobe™ Acrobat Reader is set, it cannot be changed, except by changing the system registry.
Note: To store a PDF on the item master and have it automatically transfer to new sales document line items, create identical File Attachment user fields on both the item master and sales line item business objects. Refer to the SalesPad User Defined Fields document for instructions on creating user defined fields.
EMAILING
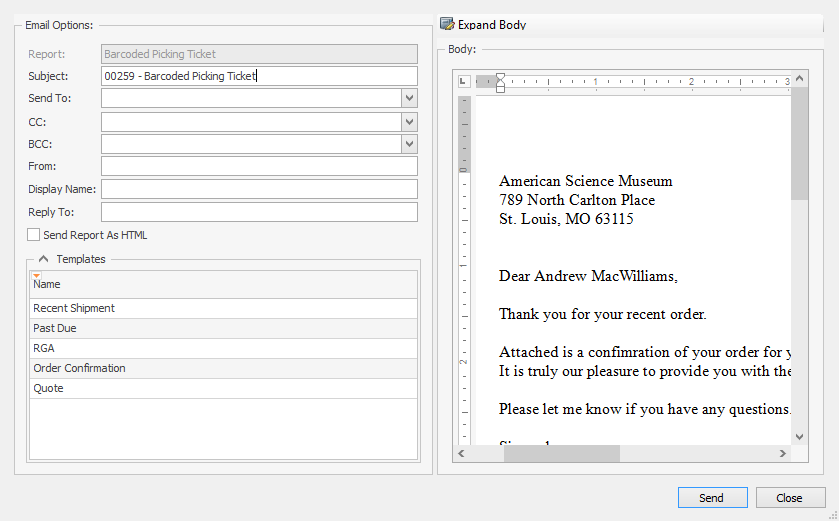
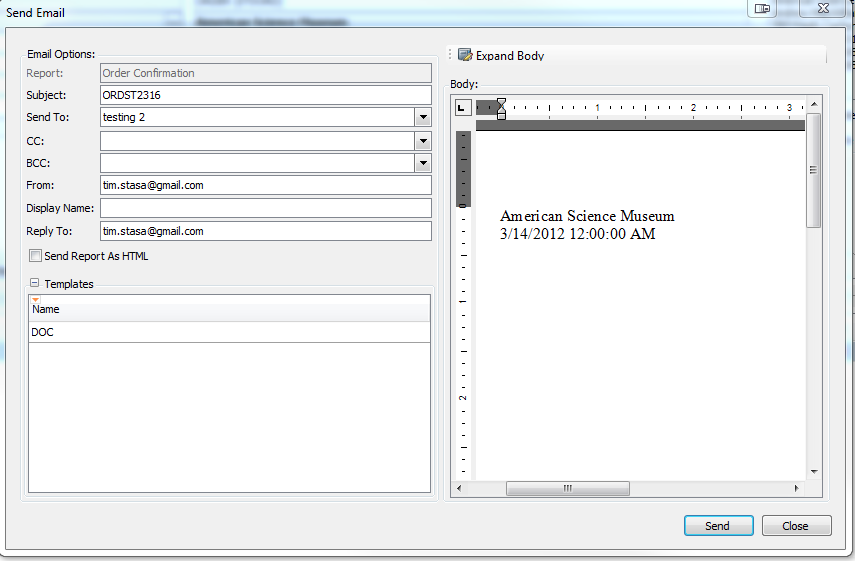
To email a document in SalesPad with PDF attachments (email configuration required), open the Print Sales Document Report window, select a report and whether attachments will be sent, and click the Email button. The Send Email screen appears.
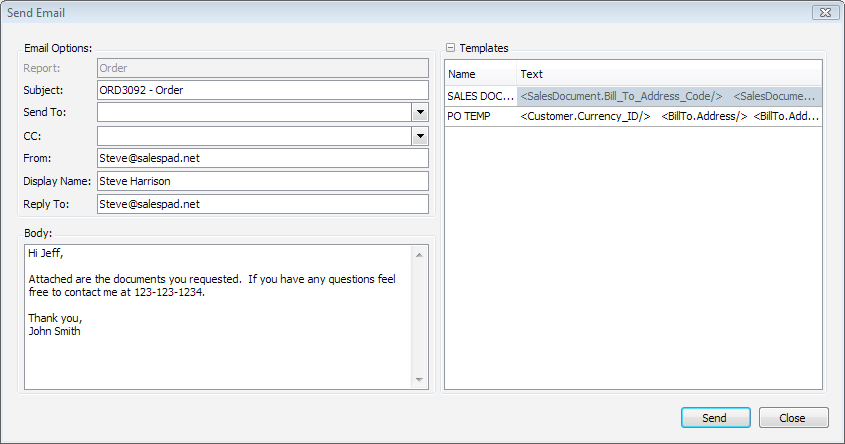
On the Send Email screen, enter the email sending options. The Subject line defaults to the document number and document type. You can change this manually. The Send To and CC fields pull email addresses listed on the customer/vendor cards. Enter the From email address, Display Name, and Reply To fields. This information will persist after the first time.
Select the template to use from the right hand column or manually enter the body. Click the Send button to send the email with PDF attachments.
Note: The From email address must match the global address pointed to by the company email server set up in the Sales Email Confirmation settings in SalesPad’s Settings module.
Setting On-Load Email Script
The On Load Email Script setting allows you to run a script that can be used to specify which email addresses to use when emailing from a Sales Document or Purchase Order in SalesPad. When the script is run, it populates the default email addresses that you have provided in Dynamics GP under Ship To or Bill To.
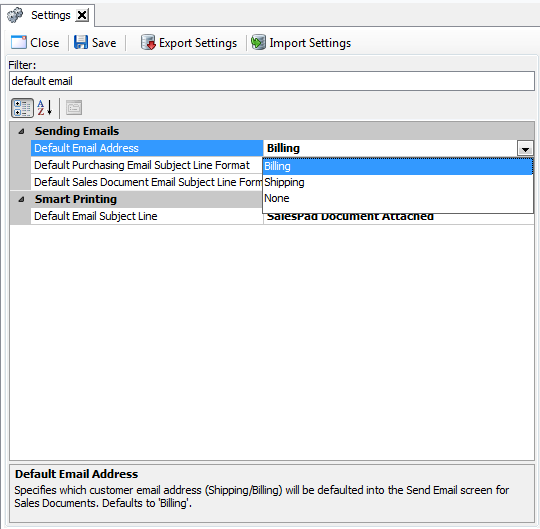
Under Settings, filter to “default email” and select Default Email Address. This specifies which customer email address (Shipping/Billing) will be defaulted to in the Send Email screen for sales documents.
Also under Settings, filter to “On Load Email Script.” Copy the attached script into the dropdown field.
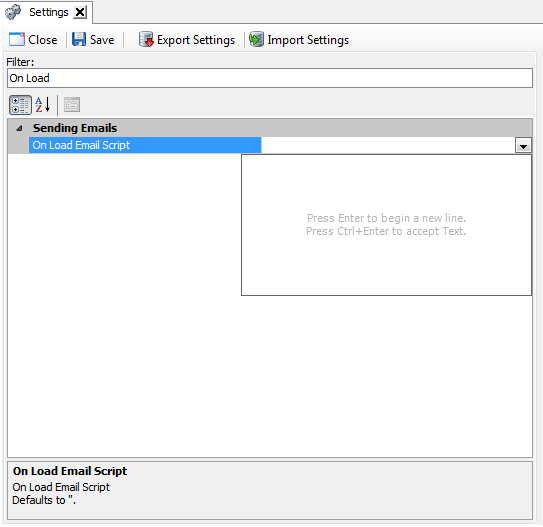
Click Save and log off, and then log back on.
When sending an email, the form defaults to “testing 2” as the Send To email address.
This maps to the same email address already set up in Dynamics GP.
Email Templates
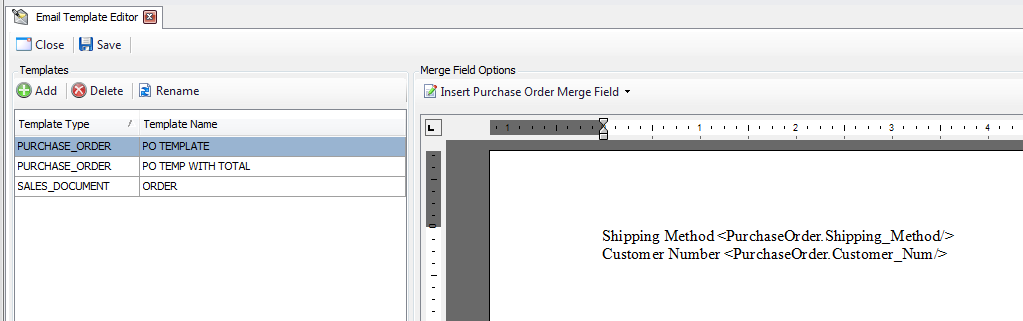
To set up a template, go to the Email Template Editor (under Setup/Utilities). In the templates column, click Add to create a new template (you may also click on an existing template to edit it). The New Email Template window will appear.
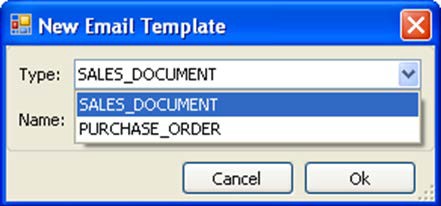
Select the type and enter a name for the email template.
Note: Sales document templates will be available when emailing from a sales document and purchase order templates will be available when emailing from a PO.
Click OK. On the right side of the screen, enter any text to include in the email template. You can also add Merge Fields, which will insert predefined information, such as shipping method, to the email.
To add a Merge Field, click the place in the text where the information should appear, then click the Insert Merge Field button. The button will read either “Insert Purchase Order Merge Field” or “Insert Sales Document Merge field”, depending on the template type. A dropdown list will appear.
Select the Merge Field you would like to include. For example, in the image below, <PurchaseOrder.Shipping_Method/> will automatically include the shipping method of the specific purchase order being emailed.
Repeat to add as many Merge Fields as needed. To add an image, open the folder location where the image is located (Note: The image must be a .gif, .jpg, .tif, or .png), click the image, and drag it into the Email Template Editor to make other changes.
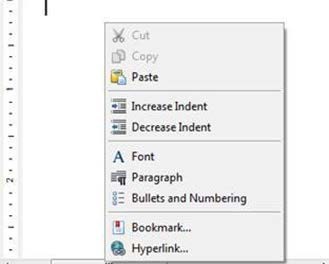
Users can right-click in the editor grid and select from the dropdown list to make changes such as Increase/Decrease Indent, Font, Paragraph, Bullets and Numbering. Users can add a Bookmark or Hyperlink (highlight text first) or paste copied information.
When finished with your changes, Save and Close the Email Template Editor.
Sample Email Templates with Merge Fields
A Word file containing example email templates with merge fields can be downloaded at the end of this document.
The examples included are for emailing the following:
- PO
- RGA
- Past Due
- Order Confirmation
- Quote
See also: Emailing and Email Templates (for version 4.0 and higher)
EmailTo, EmailCC, and EmailBCC on Customer and Vendor Address Cards
In the Customer and Vendor Cards in Sales Pad, there are now separate Email To, Email CC, and Email Blind CC (BCC) fields. These fields correspond to the Email Addresses fields found in the Internet Information window in Microsoft Dynamics GP.
Click on Customer Search and open a Customer Card. Click on the Contact Addresses tab to display contact information for all contacts at that customer. The following fields are then displayed.
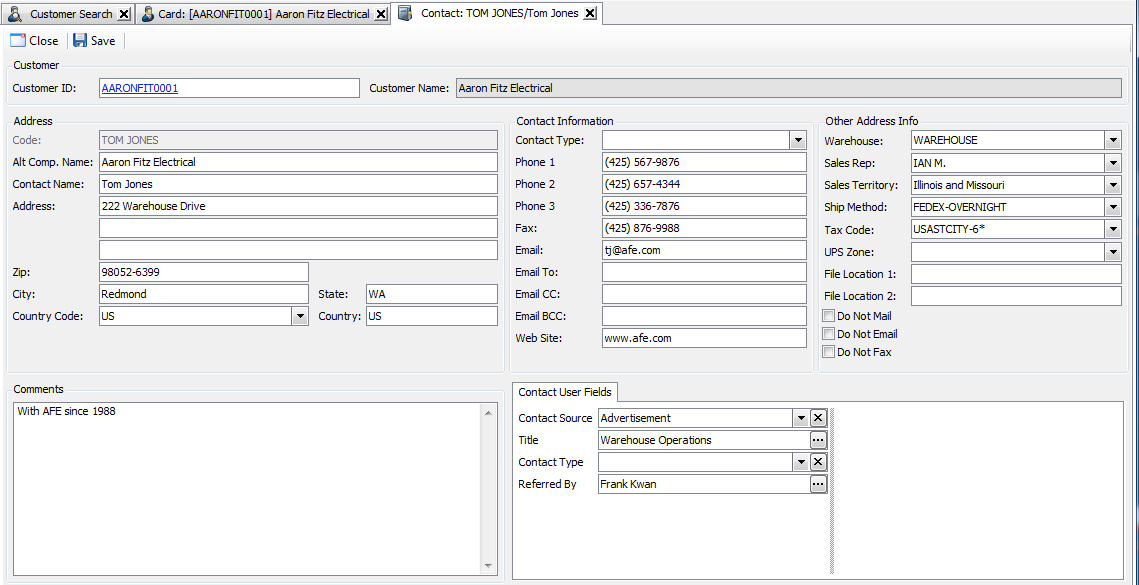
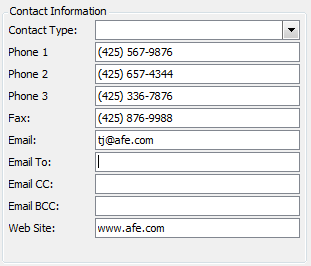
The Email To, Email CC, and Email BCC fields are all displayed under Contact Information.
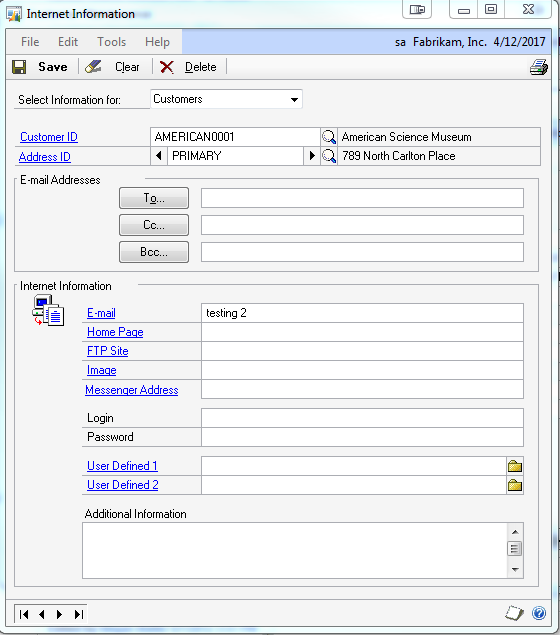
These fields map to the Email Addresses fields in the Internet Information window found on the Address ID Contact Record in Dynamics GP.
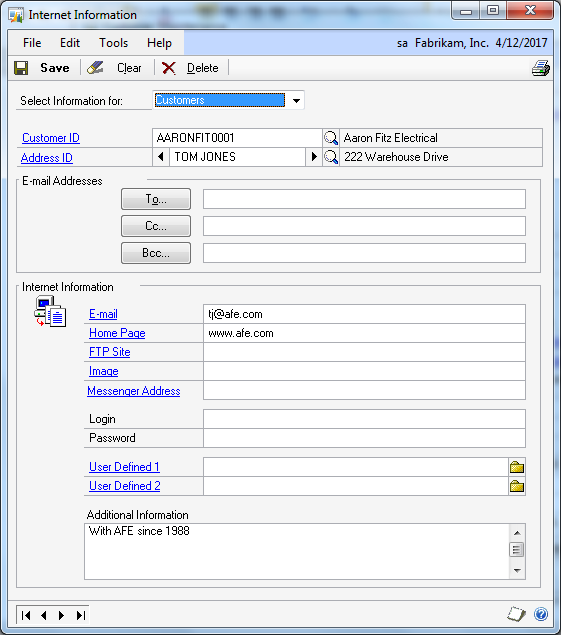
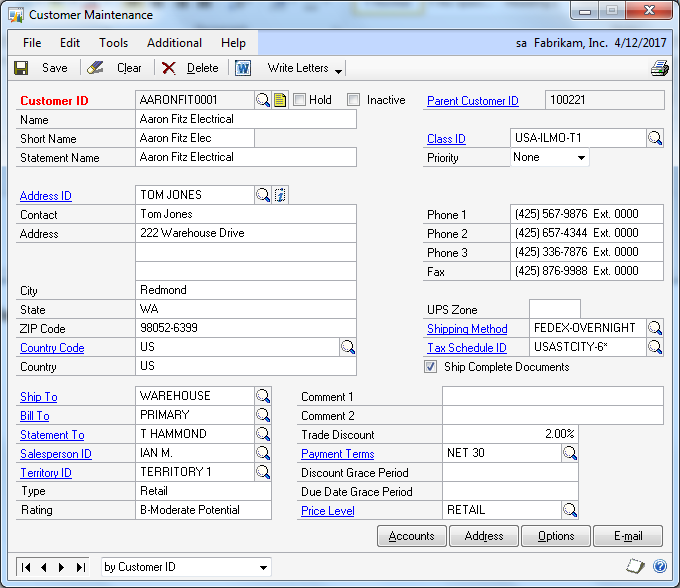
The Address ID Contact Record can be found in the Customer Maintenance window in Dynamics GP.
Email Audit Tabs
There are now Email Audit Tabs in the Customer Card, Sales Document, Vendor Card, and Purchase Order forms in Sales Pad. The addition of these forms makes it more efficient for you to aggregate and retrieve emails and to flag business objects in various search windows if they have an associated email.
This functionality is also available in Dynamics GP 2013.
Click on Customer Search and open a Customer Card. Click on the Email Audit tab to see a list of emails associated with that customer. The window shows the date sent, the document associated with the email, who sent the email, who it was sent to, and the email subject header.
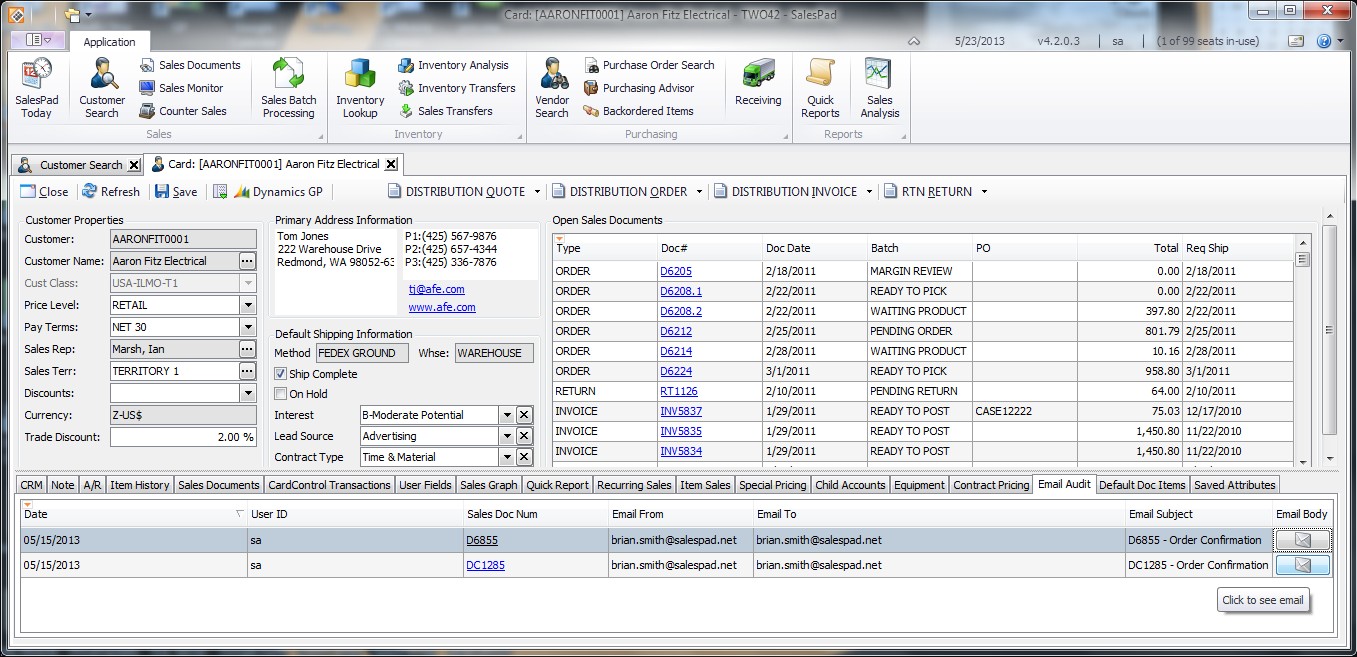
You can then click on the envelope icon in the Email Body column to open the email.
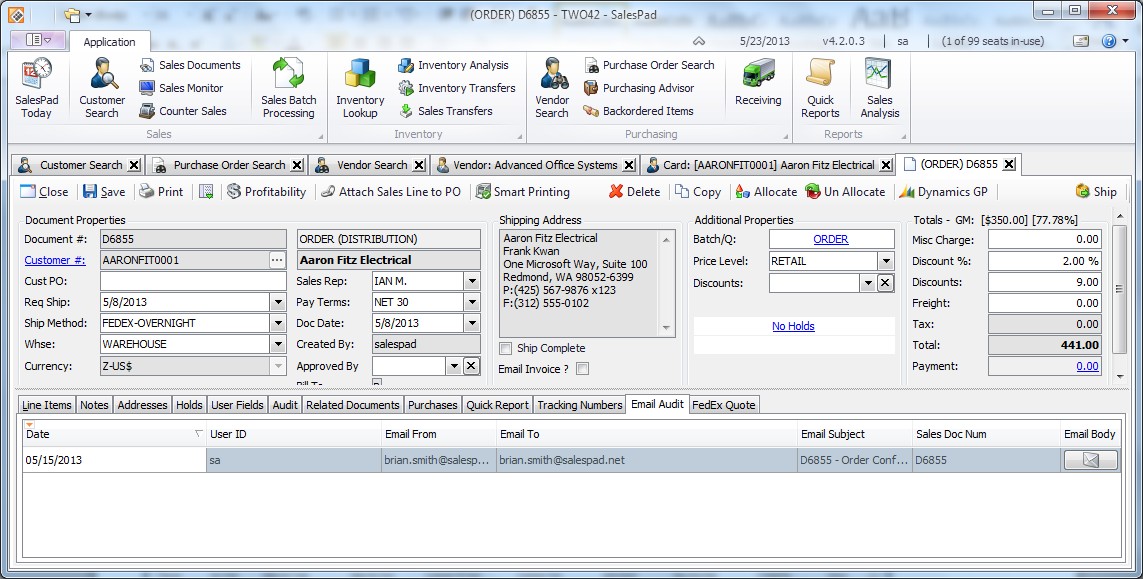
To use the Email Audit tab for sales documents, go to Sales Documents and click on a document in the Sales Doc Num column. Click the Email Audit tab to see the emails related to that document.
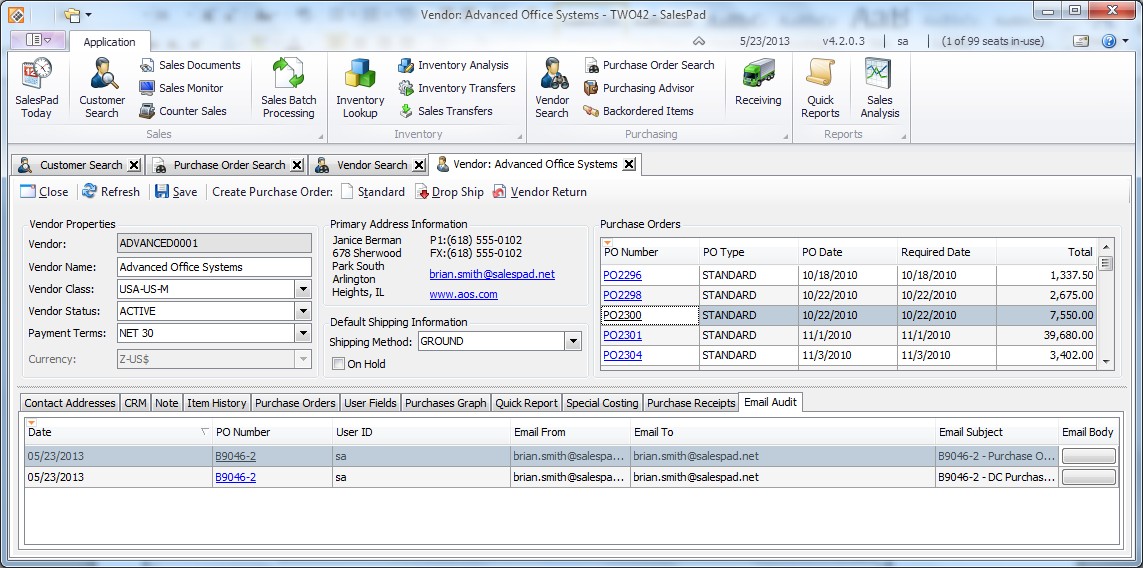
To use the Email Audit tab on the Vendor Card, go to Vendor Search and open the Vendor Card for the vendor you are interested in. Again, click on the Email Audit tab to view and open emails related to that vendor.
Note: You can click on the Email to open the message in the Email Body column.
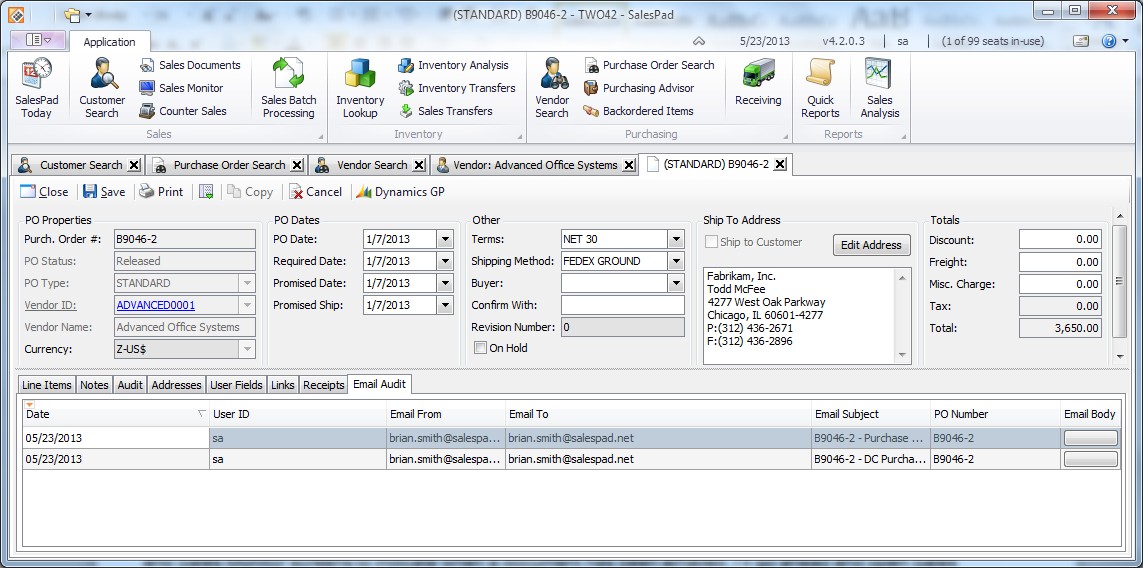
To use the Email Audit tab from the "Purchase Order" screen, click on Purchase Order Search and use the Purch. Order # field to search for a PO. Open the document and select the Email Audit tab to view and open emails related to that PO,
Security
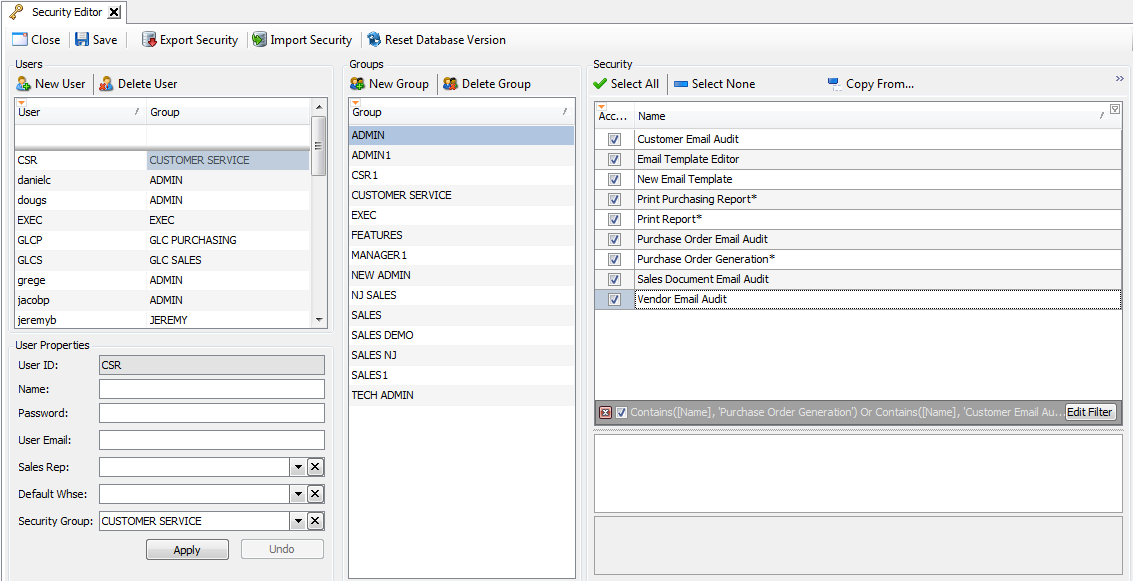
In the Security Editor, search for “email.” Enable the items Vendor Email Audit, Sales Document Email Audit, Purchase Order Email Audit, and Customer Email Audit.
Send Emails must also be enabled in the Security Editor to allow email sending.
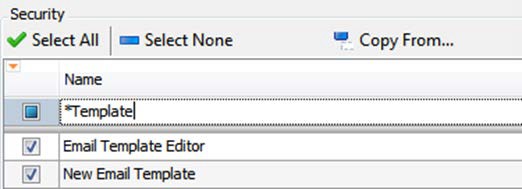
To allow email template editing, both Email Template Editor and New Email Template should be checked in the Security Editor.
Note: You must save any changes, log out, and log back in for security changes to take effect.
Settings
In order to send emails through SalesPad, email account settings must be initially configured in the Settings module. To configure Email settings, filter to "email" and fill in the applicable settings under Sales Email Confirmation.
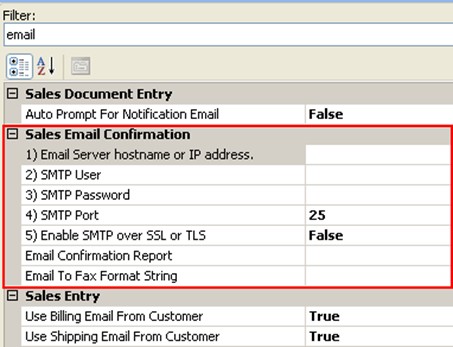
Email Server hostname or IP address - The Exchange/Email Server IP address.
SMTP User - The global email user address used to send emails to external contacts. It is recommended that a global generic account is assigned.
SMTP Password - Password to the global email account.
SMTP Port - The port number used for the SMTP connection (Default value is 25).
Enable SMTP over SSL or TLS - Allows product to work with web-based email systems that require SSL or TLS encryption. Set to True.
Email Confirmation Report - Names the Email Report.
Email To Fax Format String - String format convention; controls how to format the Send To email address when faxing with a mail-to-fax gateway. For example, when using GFI Faxmaker in a default configuration, enter '{0}@faxmaker.com'.
Default Email Subject Line Format - Sets a default subject line format for emails (to automatically include the Report Name, Document Number, or both), specify the format in this setting (4.1+ versions only). Ex: Enter “ReportName – DocumentNumber” to pull that information from the report into the subject line. Note: There is also a Default Email Subject Line setting for Smart Printing.
Fast Ship To Ordering Enabled - Allows you to double-click on the contact name in customer search results. This highlights the contact on the Customer card and auto-sets the Ship To contact for new sales documents to use the highlighted address code. Set to False.
Default Email Address Billing - Specifies which customer email address (Shipping/Billing) will be defaulted into the Send Email screen when emailing directly from a sales document.
Use Billing Email from Customer - Writes the Billing email from the Contact card to the sales document's Billing Email field. Set to True.
Use Shipping Email from Customer - Writes the Shipping email from the Contact card to the sales document's Shipping Email field. Set to True.
SalesPad Support
Comments