Overview
The Dispatch modules of SalesPad Desktop allows end users to create, assign, and track routes and stops for their drivers and vehicles, plus create and manage those drivers and vehicles. Routes and their stops can be created manually from the Route Entry screen, created from a sales document, or generated from a batch of documents leveraging one of our supported route optimization integrations.
A Route is comprised of Route Stops. Each stop can have a calendar appointment tied to it via the assigned driver(s) and the assigned vehicle. Appointments can be made for drivers and vehicles that are independent from any Route or Stop in order to track personal time off or non-route-related appointments.
In this document, you will learn how to create and manage appointments, vehicles, drivers, and how to utilize the Dispatch Board to optimize multiple schedules. Before proceeding, please visit the Security Settings and Application Settings sections of this document to ensure that you won’t run into difficulties.
Table of Contents
- Overview
- Dispatch Configuration
- Vehicles
- Drivers
- Routes
- Additional Dispatch Information
- Dispatch Board
- Security Settings
- Application Settings
- Appendix
Dispatch Configuration
To get started, open the Dispatch Configuration module.
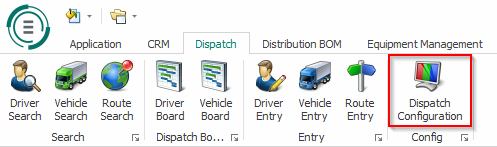
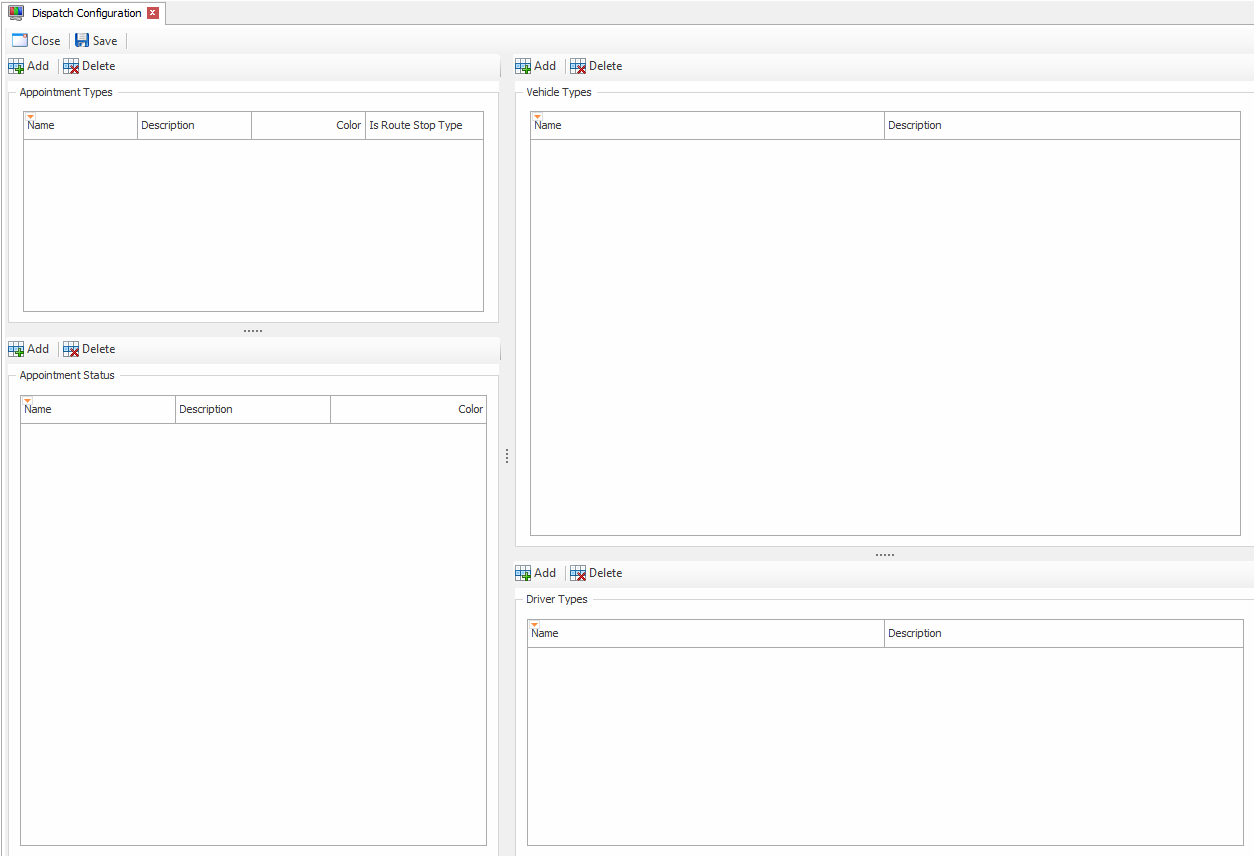
Dispatch Configuration allows you to establish Appointment Types, Appointment Statuses, Vehicle Types, and Driver Types for use in other Dispatch modules.
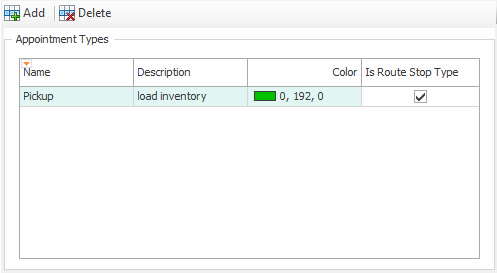
To create a new Appointment Type, click the Add button in the Appointment Types field. Give the Appointment Type a name, enter a brief description, and assign it a color. The “Is Route Stop Type” checkbox allows this Appointment Type to appear within the Route Entry screen.
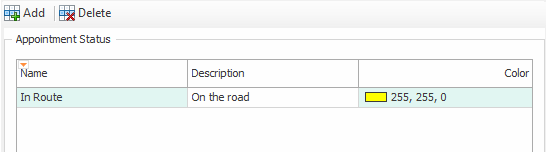
To create a new Appointment Status, click the Add button in the Appointment Status field. Give the Appointment Status a name, enter a brief description, and assign it a color.
To create a new Vehicle Type, click the Add button in the Vehicle Types field. Give the Vehicle Type a name and enter a brief description.

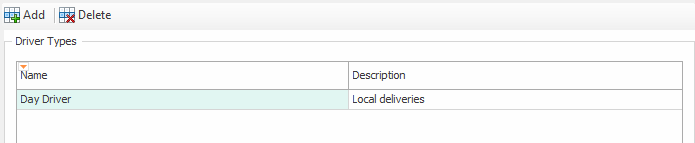
To create a new Driver Type, click the Add button in the Driver Types field. Give the Driver Type a name and enter a brief description.
Remember to click Save when you are finished making your changes.
Vehicles
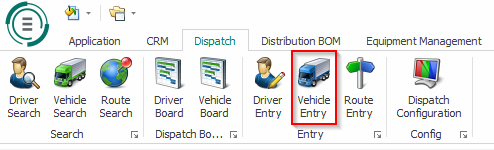
To create and manage Vehicles for use within the Dispatch modules, click Vehicle Entry.
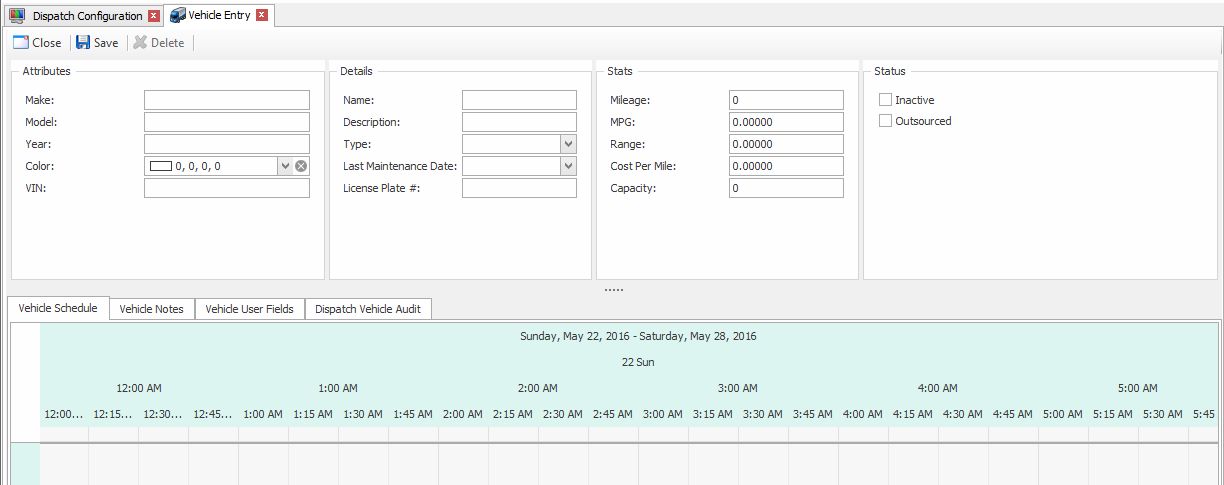
Enter information about your vehicle in the information fields.
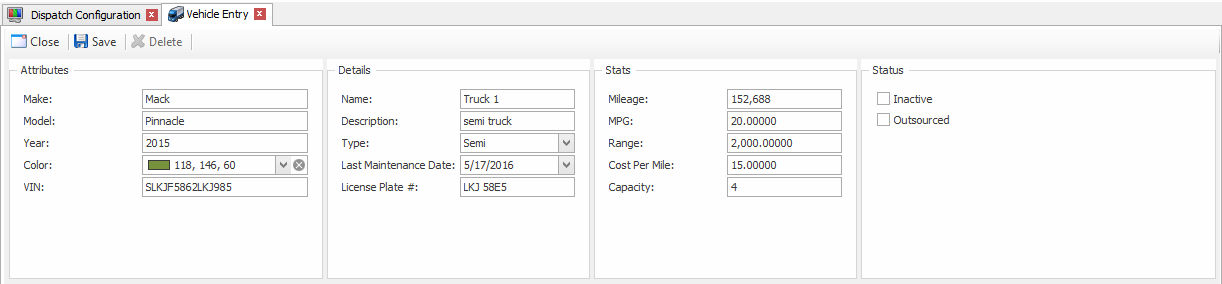
Click Save when you are finished making your changes.
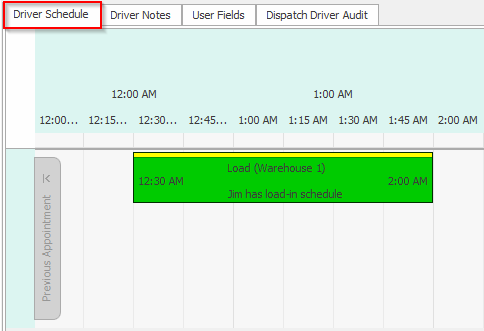
The Vehicle Schedule tab at the bottom of the screen allows you to create vehicle-related appointments.
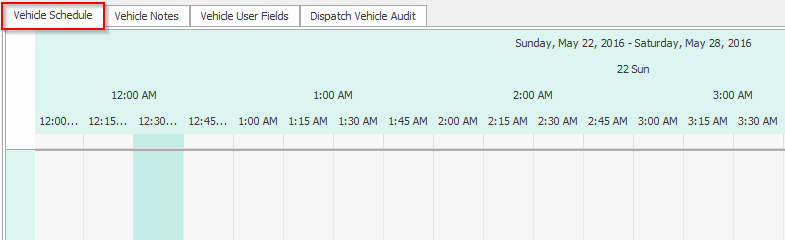
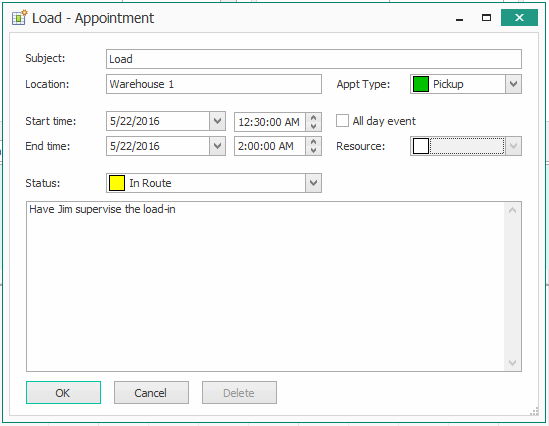
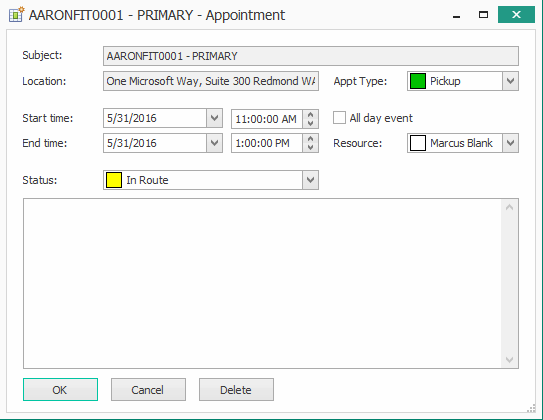
To create an appointment, double-click in the approximate calendar area in which you wish to create the appointment, or right-click and select New Appointment. An Appointment window will appear. Fill in details about your appointment and click OK when you are finished.
Your appointment now appears in the Vehicle Schedule tab.

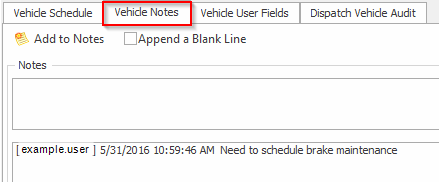
The Vehicle Notes tab allows you to record notes associated with this vehicle.
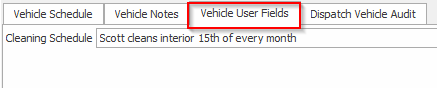
The Vehicle User Fields tab allows you to create User Defined Fields for this module. To review our documentation on how to create a UDF, click here.
Drivers
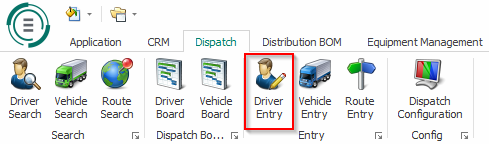
To create and manage Drivers for use within Dispatch modules, click Driver Entry.
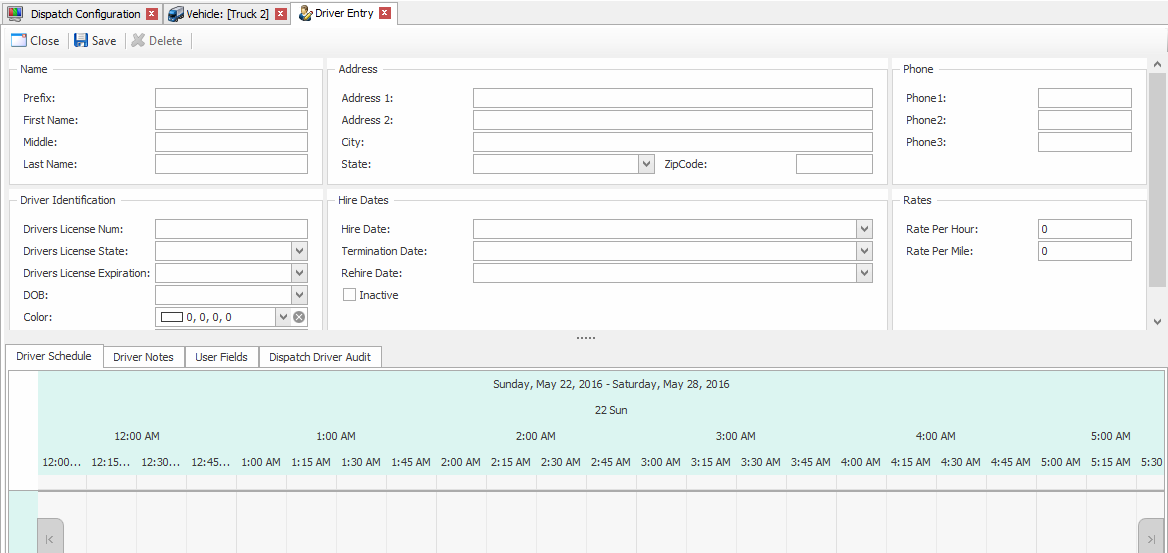
Enter information about your driver into the information fields.
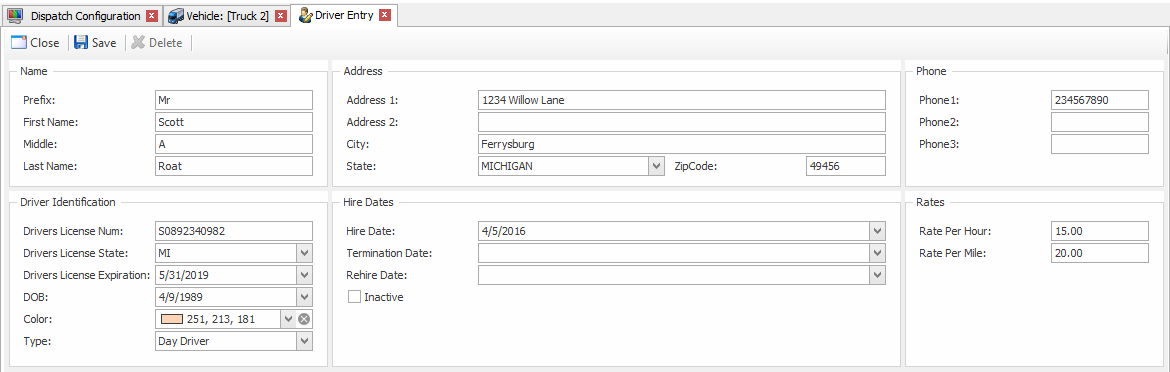
Click Save when you are finished making your changes.
The Driver Schedule tab allows you to manage your driver’s schedule the same way you manage vehicle schedules.
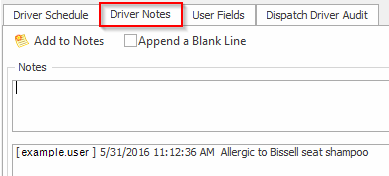
The Driver Notes tab allows you to record notes associated with this driver.
The User Fields tab allows you to create User Defined Fields for this module. To review our documentation on how to create a UDF, click here.

Routes
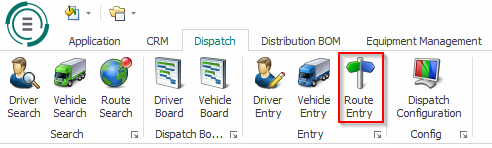
To create and manage Routes and Stops for use within Dispatch modules, click Route Entry.
Create a new Route by filling in the information fields on the top half of the screen.
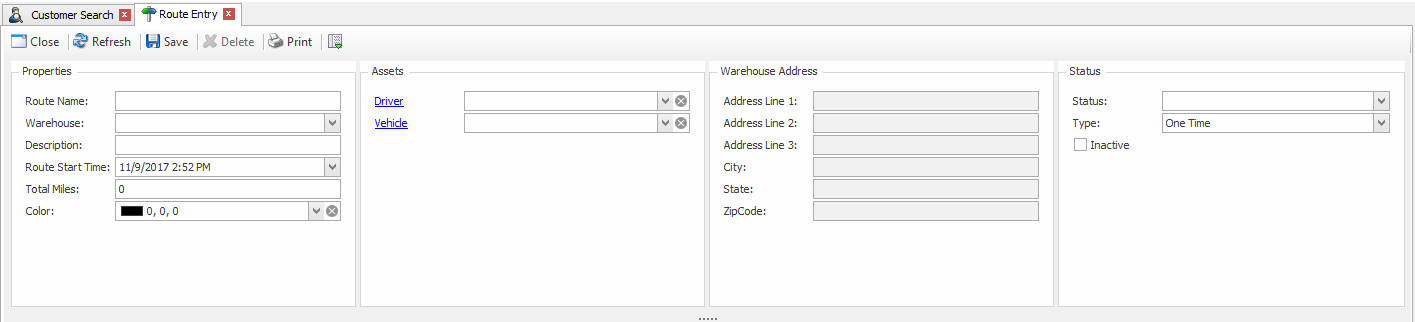
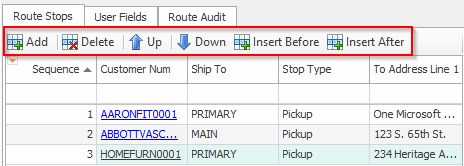
To schedule stops in your new route, click the Add button in the Route Stops tab on the bottom left half of the screen. Add as many stops as you need to your route, and rearrange them using the buttons in the Route Stops tab.
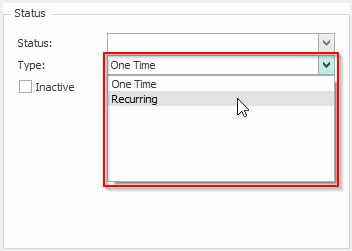
To create a recurring or "static" route, select Recurring from the Type dropdown in the Status section.
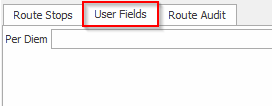
The User Fields tab allows you to add Route UDF’s.
Edit the Stop Properties of your route in the Stop Properties tab on the bottom right half of the screen.

The Stop Properties field of the Stop Properties tab gives general information about the stop. The Stop Times field indicates the schedule for this stop.
Note: Depending your Route Stop Time Roll Option settings, adjusting one information field in the Stop Times field will automatically adjust the other fields.
The From Destination field gives the address of the previous stop, and the Stop Destination field gives the address of this scheduled stop. Add any notes in the Notes field, and update the status of the stop in the Stop Status field.
The Sales Doc Links tab shows sales documents linked to this route. Highlight the stop associated with the sales document in the Route Stops tab, and click the document link in the Sales Doc Links tab to view the document.

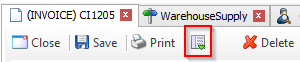
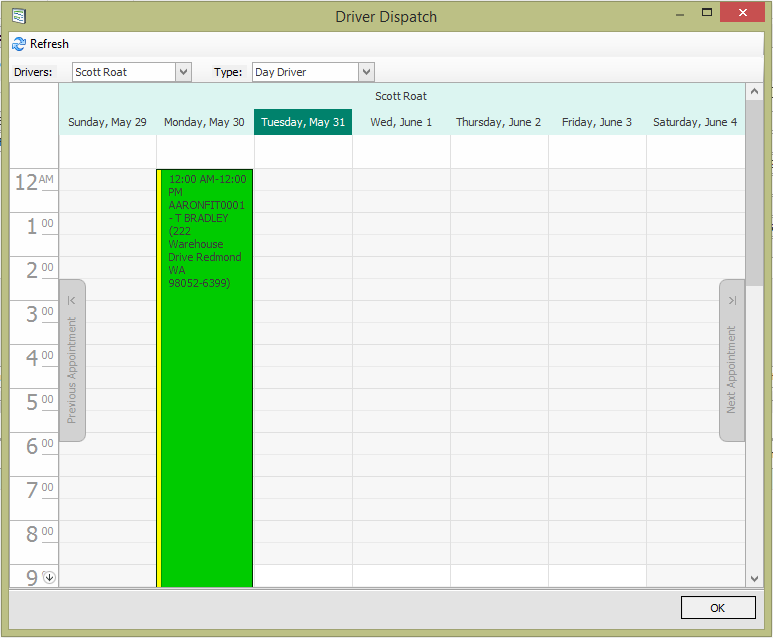
To link a sales document to a route, open the sales document and select either Schedule Driver or Schedule Vehicle from the dropdown at the top right-hand side of the document.
This opens the Dispatch window (either Driver or Vehicle, depending on which you selected; this document uses Driver Dispatch to illustrate). Assign an appointment for your sales document like you did when you assigned appointments for your vehicles and drivers.
When a route is saved, a calendar appointment is made for both the driver(s) and the vehicle. This helps prevent double-booking when scheduling additional routes. Saved routes can be found in the Route Search screen.
Additional Dispatch Information
Shipping Weight
Shipping weight is automatically calculated based on the line item information found in linked sales documents. To view shipping weight information, click the dropdown at the top of the Route window.
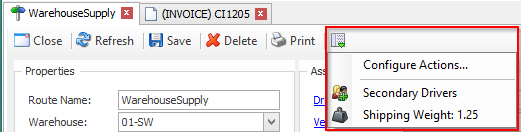
Secondary Drivers
To assign a secondary driver to a route, click Secondary Drivers from the dropdown at the top of the Route window. Select your secondary driver from the window that appears and click OK.

When a route with multiple drivers is saved, an appointment is created on each of the drivers’ calendars.
Appointment Subject Expressions
The Appointment Subject is set based on the Setting Appointment Subject Expression. The default expression is {Customer_Num} – {Ship_To}. This setting can be modified to leverage any of the Route Stop core fields or UDF’s.
For a complete list of available expressions, please see the Appendix at the end of this document.
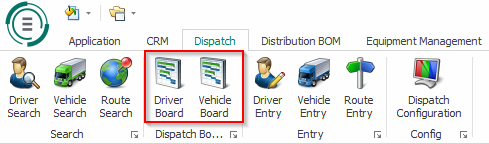
Dispatch Board
To view all driver or truck schedules, click Driver Board or Vehicle Board. In this example, we will open the Driver Board.
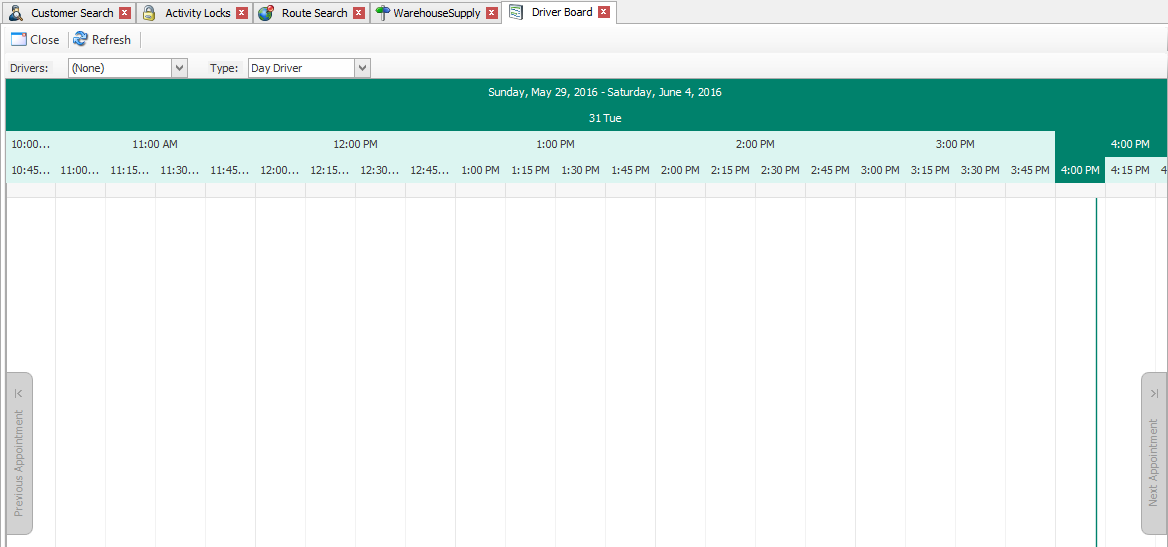
Select the drivers (or vehicles, if you selected Vehicle Board) you wish to view on your board from the Drivers dropdown.
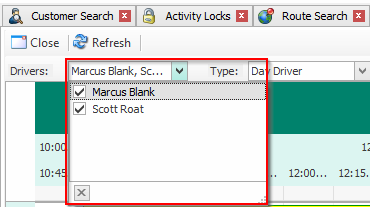
Your drivers’ schedules will appear on the Dispatch Board.
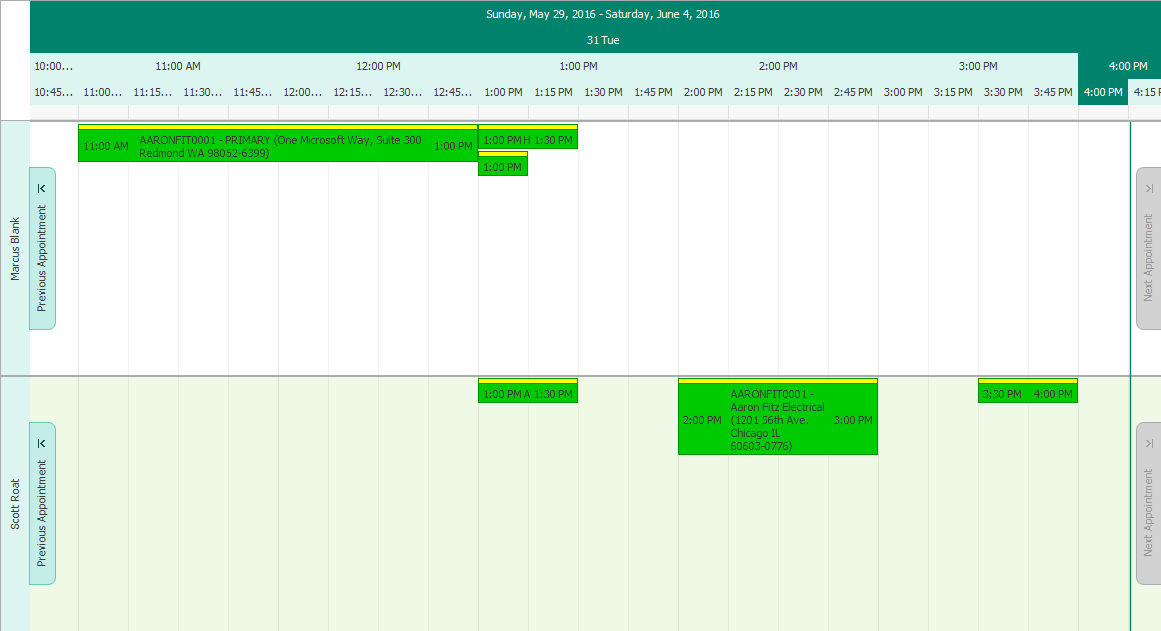
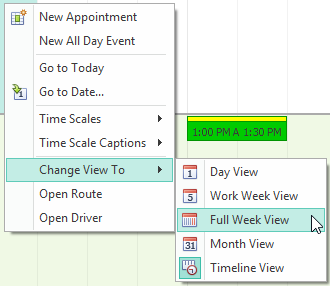
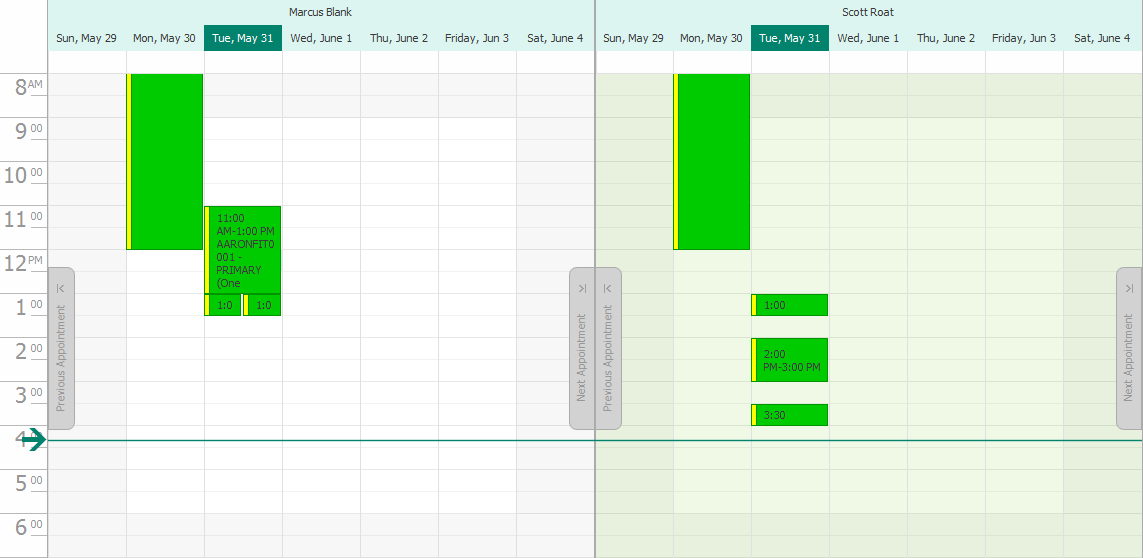
The default view for the Dispatch Board is Timeline (seen above). To choose from other view options, right click on the board and select an option from the Change View To list.
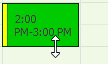
Double-click on an appointment to view and make changes to it.
Another way to edit appointments is to click and drag the edges. This will automatically update the appointment time. If the appointment is tied to a route stop, the time on the route stop will be set to match the appointment, and the route will be re-sequenced if necessary.
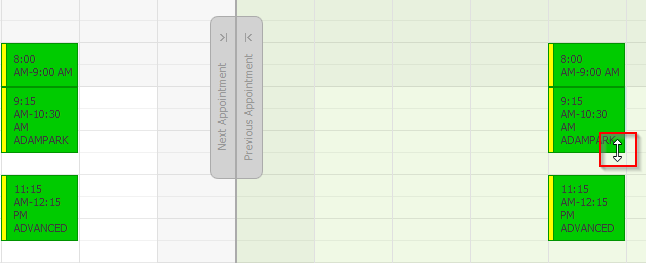
To move an appointment to another time, day, driver, or truck, click and drag the appointment to where you want it to appear on the Dispatch Board.
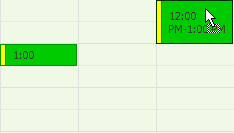
Any changes made as a result of dragging and dropping an appointment (time on route stop, driver, etc.) will be made automatically when you’ve dropped the appointment into its new location.
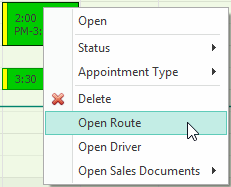
To view the route associated with an appointment, right-click on the appointment and click Open Route.
If a route has multiple drivers, modifying a route stop on one of the drivers’ calendar automatically updates the other driver’s (or drivers’) calendars to match. In this example, dragging the appointment for the driver on the right also modifies the appointment for the driver on the right, since they are assigned to the same route.
Refresh the page to see the change on the other driver’s calendar.
Note: Route Stops that have multiple drivers cannot be dragged onto another driver’s schedule.
Security Settings
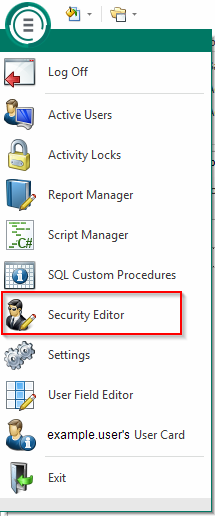
To correctly utilize the Dispatching functionality, you must first configure your security settings.
Open the Security Editor.
Type “dispatch” into the search bar to reveal the related securities.
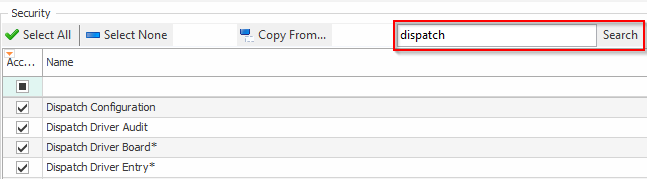
Enable the following securities:
Customer Dispatch Route Stops – View Customer Route Stops from the Customer Card.
Dispatch Configuration – Enable to Set Driver Types, Vehicle Types, Appointment Types, and Statuses.
Dispatch Driver Audit – Enable to view the Dispatch Driver Audit.
Dispatch Driver Board* – View Driver Schedules.
Dispatch Driver Entry* – Create a Dispatch Driver.
Dispatch Driver Note* – Enables the Driver Note Tab.
Dispatch Driver Properties – Enable to view the Dispatch Driver Properties.
Dispatch Driver Schedule* – Enables the Driver Schedule Tab.
Dispatch Driver Search – Enable to Search Dispatch Drivers.
Dispatch Driver User Fields* – Enables the Driver User Field Tab.
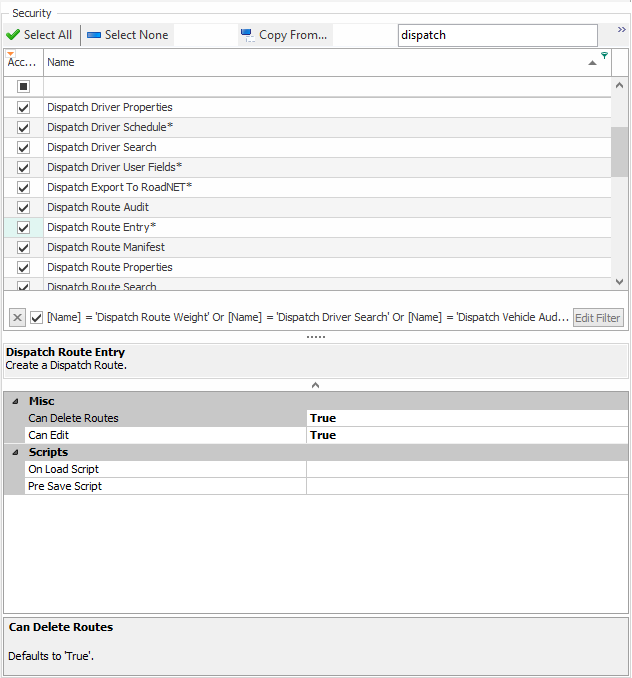
Dispatch Route Audit – Enable to view the Dispatch Route Audit.
Dispatch Route Entry* – Create a Dispatch Route.
Dispatch Route Properties – Enable to view the Dispatch Route Properties.
Dispatch Route Search – Enable to Search Routes.
Dispatch Route Secondary Drivers – Enables Secondary Drivers.
Dispatch Route Stop User Fields* – Enables Route Stop User Fields.
Dispatch Route Stops* – Enables the Route Stop Tab.
Dispatch Route User Fields* – Enables the Route User Field Tab.
Dispatch Route Weight* – Plugin to calculate the Route Weight based on the Sales Links for each Stop.
Dispatch Vehicle Audit – Enable to view the Dispatch Vehicle Audit.
Dispatch Vehicle Board* – View Vehicle Schedules.
Dispatch Vehicle Entry* – Create a Dispatch Vehicle.
Dispatch Vehicle Note* – Create and modify Vehicle Notes.
Dispatch Vehicle Properties – Enable the Properties Tab on the Vehicle Card.
Dispatch Vehicle Schedule* – Enables the Driver Schedule Tab on the Vehicle Card.
Dispatch Vehicle Search – Enables the Vehicle Search Form.
Dispatch Vehicle User Fields* – Enables the Vehicle User Fields Tab.
Sales Document Dispatch Driver* – Enables the Sales Document Plugin to Driver Appointments and Route Stops.
Sales Document Dispatch Vehicle* – Enable to view the Dispatch Vehicle Audit.
Note: Securities with an asterisk (such as Dispatch Route Entry) have sub-securities that are listed in the middle section of the Security field. Sub-security descriptions appear in the bottom section of the field. Review and customize these as desired.
Please refer to SalesPad Security Settings for more information on all of our Security Settings.
Note: You must log out and back in for security changes to take effect.
Application Settings
Make sure you have optimal settings enabled to perform the tasks outlined in this document.
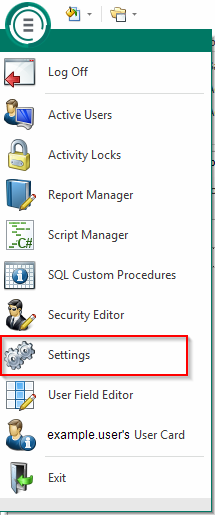
Navigate to Settings.
Type “dispatch” into the search bar.

Adjust your Dispatch settings as desired:
Allow Overlapping Calendar Appointments – When enabled, overlapping Appointments can be created on the Dispatch Calendars.
Calendar Start Time – The Visible Start Time on Dispatch Calendars.
Calendar End Time – The Visible End Time on Dispatch Calendars.
Show Previous/Next Appointment Navigation – When enabled, Previous/Next navigation buttons will be visible on the calendar.
Show Start/End Time on Calendar Appointments – When enabled, the Start/End Time will show on a Calendar Appointment if the Start/End Time does not end on a Visible Time Interval.
Dispatch Driver Fields To Include In Audit – Dispatch Driver Fields that will be audited.
Appointment Subject Expression – When creating a Route Stop Appointment from a Sales Document, the subject will be set with fields from the Sales Document using this expression.
Appointment Subject Expression From Route Stop – When creating a Route Stop Appointment from Route Entry, the subject will be set with fields from the Route Stop using this expression.
Dispatch Route Stop Columns To Include In Audit - Route Stop Columns that will be audited.
Route Stop Time Roll Option – How to handle subsequent Route Stop Times to account for changes to a previous Route Stop Time.
Route Item Weight UDF – Allows the use of an Item Weight defined in the selected UDF, rather than the standard GP Shipping Weight field.
Routing Service Provider – Service provider used to route Sales Documents.
Dispatch Vehicle Fields To Include In Audit – Dispatch Vehicle Fields that will be audited.
Number Of Days To Check For Conflicting Schedules – Restricts the duplicate schedule validation to +/- number of days from the current date.
Appendix
Appointment Subject Expressions from Route Stop Fields
(User Fields from Dispatch Route Stop are included)
Example: {Customer_Num} - {Ship_To}
- Stop_ID
- Dispatch_ID
- Driver_ID
- Vehicle_ID
- Customer_Num
- Ship_To
- From_Address_Line_1
- From_Address_Line_2
- From_Address_Line_3
- From_City
- From_State
- From_ZipCode
To_Address_Line_1 - To_Address_Line_2
- To_Address_Line_3
- To_City
- To_State
- To_ZipCode
- Description
- Delivery_Date
- Departure_Time
- Arrival_Time
- Dwell_Time
- Stop_Type
- Note
- Status
- Sequence
- Longitude
- Latitude
- Inactive
- Cust_Name
- Alt_Company_Name
Appointment Subject Expression Fields
(User Fields from the Sales Document are included)
Example: {Customer_Num} - {Ship_To}
- Sales_Doc_Type
- Sales_Doc_Num
- Sales_Doc_ID
- Doc_Date
- Actual_Ship_Date
- Fulfillment_Date
- Source
- Sales_Batch
- Customer_Num
- Customer_Name
- Bill_To_Address_Code
- Ship_To_Address_Code
- Ship_To_Name
- Contact_Person
- Address_Line_1
- Address_Line_2
- Address_Line_3
- City
- STATE
- Zip
- Country
- Country_Code
- Phone_1
- Phone_2
- Phone_3
- Fax
- Price_Level
- Customer_PO_Num
- Status
- Req_Ship_Date
- Subtotal
- Freight
- Tax
- Misc_Charge
- Discount
- Trade_Discount_Pct
- Total
- On_Account
- Deposits
- Shipping_Method
- Tax_Exempt_1
- Tax_Exempt_2
- Tax_Registration_Num
- Tax_Schedule
- Warehouse_Code
- Sales_Person_ID
- Sales_Territory
- Payment_Terms
- Master_Num
- Comments
- Notes
- User_Def_Date1
- User_Def_Date2
- User_Def_List1
- User_Def_List2
- User_Def_List3
- User_Def_1
- User_Def_2
- User_Def_3
- User_Def_4
- User_Def_4
- User_Def_5
- Prev_Sales_Doc_Type
- Prev_Sales_Doc_Num
- Quote_Num
- Invoice_Num
- Currency_ID
- Pickticket_Num
- Packingslip_Num
- Ship_Complete
- Auto_Calc_Freight
- Currency_Dec
- Created_On
- Created_By
- EnteredBatch
- BatchHours
- BatchDays
- Alert
- CC_ID
- ReadOnly
- Forwardable
- MESSAGE
- Comment_ID
- USRDAT01
- USRDAT02
- USRTAB01
- USRTAB09
- USRTAB03
- USERDEF1
- USERDEF2
- USRDEF03
- USRDEF04
- USRDEF05
- UPS_Zone
- Email_Billing
- Quote_Expiration_Date
- Address_Validated
- Order_Date
- Due_Date
- Opportunity_ID
- Quote_Date
- DEX_ROW_TS
- Exchange_Rate
- Exchange_Date
- Rate_Calc_Method
- Times_Printed
- Equipment_Item_Number
- Equipment_Description
- Equipment_Serial_Num
- Equipment_Third_Party_Billing
- Allocate_By
- Promotions_Applied_Sales_Doc
- Funct_Discount
- Funct_Subtotal
- Funct_Total
- Funct_On_Account
- Funct_Misc_Charge
- Funct_Tax
- Funct_Freight
- Store_Name
- Drawer_Name
- EDI_Type
- Copy_From_Type
- Copy_From_Number
- Dont_Email_Shipping
- Dont_Email_Billing
- Dont_Text_Shipping
- Dont_Text_Billing
- Successful_Emails
- Successful_Texts
SalesPad Support
Comments