Overview
Dispatch Mobile makes use of the Dispatch module in SalesPad Desktop, giving mobile users the ability to see the routes and route stops for drivers and vehicles while on-the-go. SalesPad Desktop is required to create and manage appointments, drivers, and vehicles through the Dispatch Board.
Usage
Server Setup
Before a user on the mobile device will be able successfully access Dispatch information, the Mobile Server must be set up to be able to access the Dispatch Route data.
- The Dispatch Enabled security must be set to True for the desired security group to enable the functionality on SalesPad Mobile.
- If the appointment statuses are expected to be updated when a SalesPad Mobile user checks in or checks out, then those securities must also be filled out. Selecting the dropdown for those securities will show all of the available appointment statuses, as configured in SalesPad Desktop.
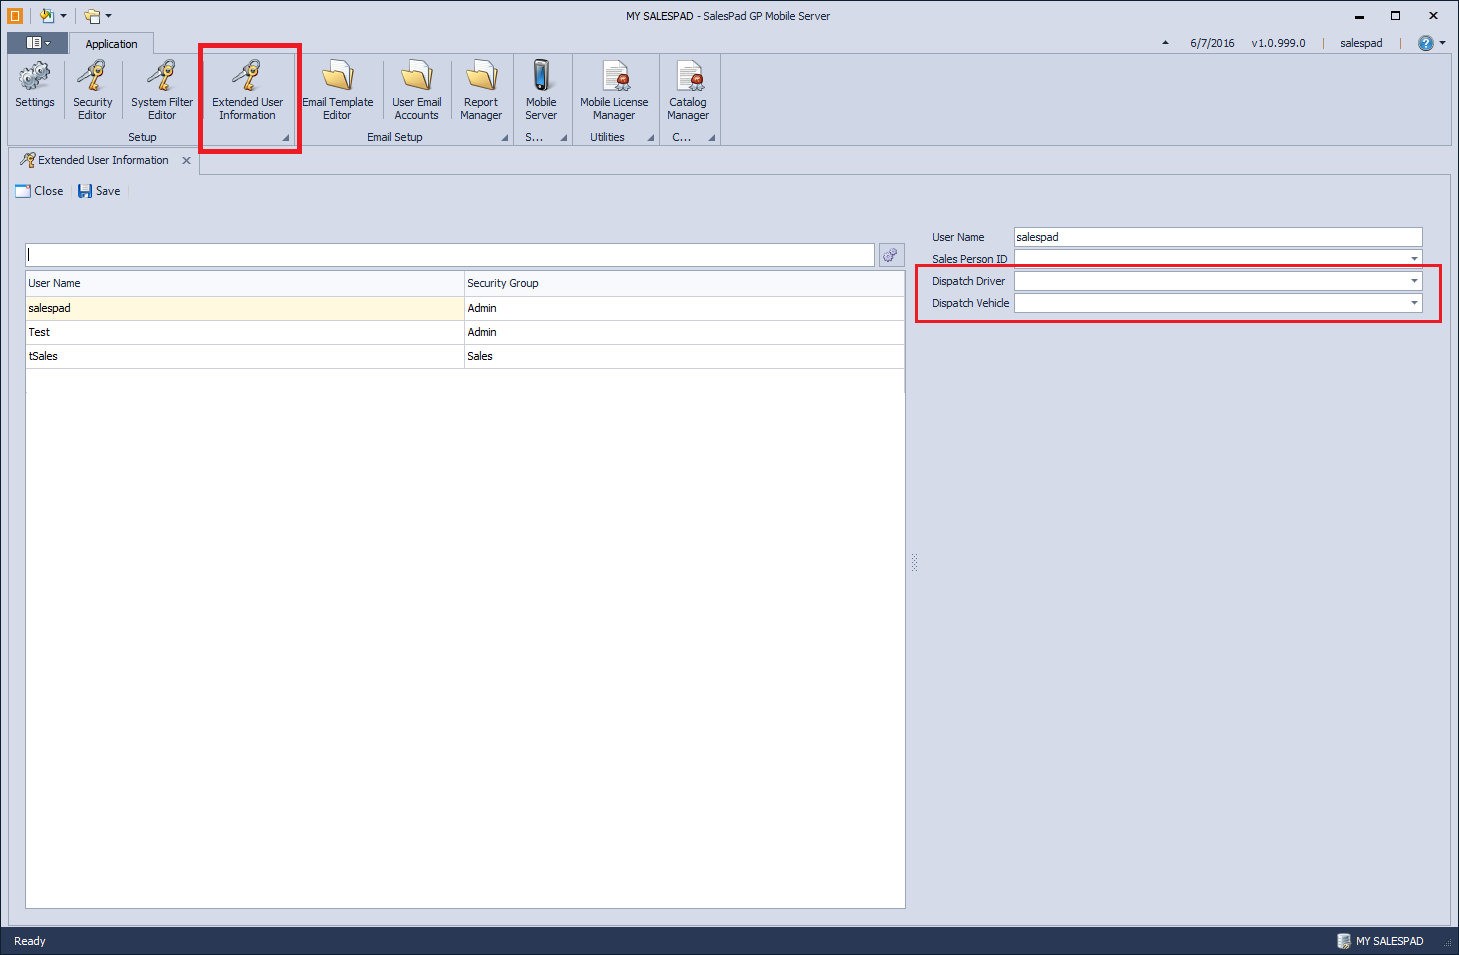
- In the Extended User Information module, each SalesPad Mobile user that will need access to the Dispatch Route information must be linked to either a Dispatch driver or a Dispatch vehicle. Using the dropdown for either setting will show the entries available to link to. Once selected, make sure to click Save to commit the change. Only one of the settings needs to be completed; if both Dispatch Driver and Dispatch Vehicle are filled out, then the Dispatch Driver link will be used.
Mobile Device
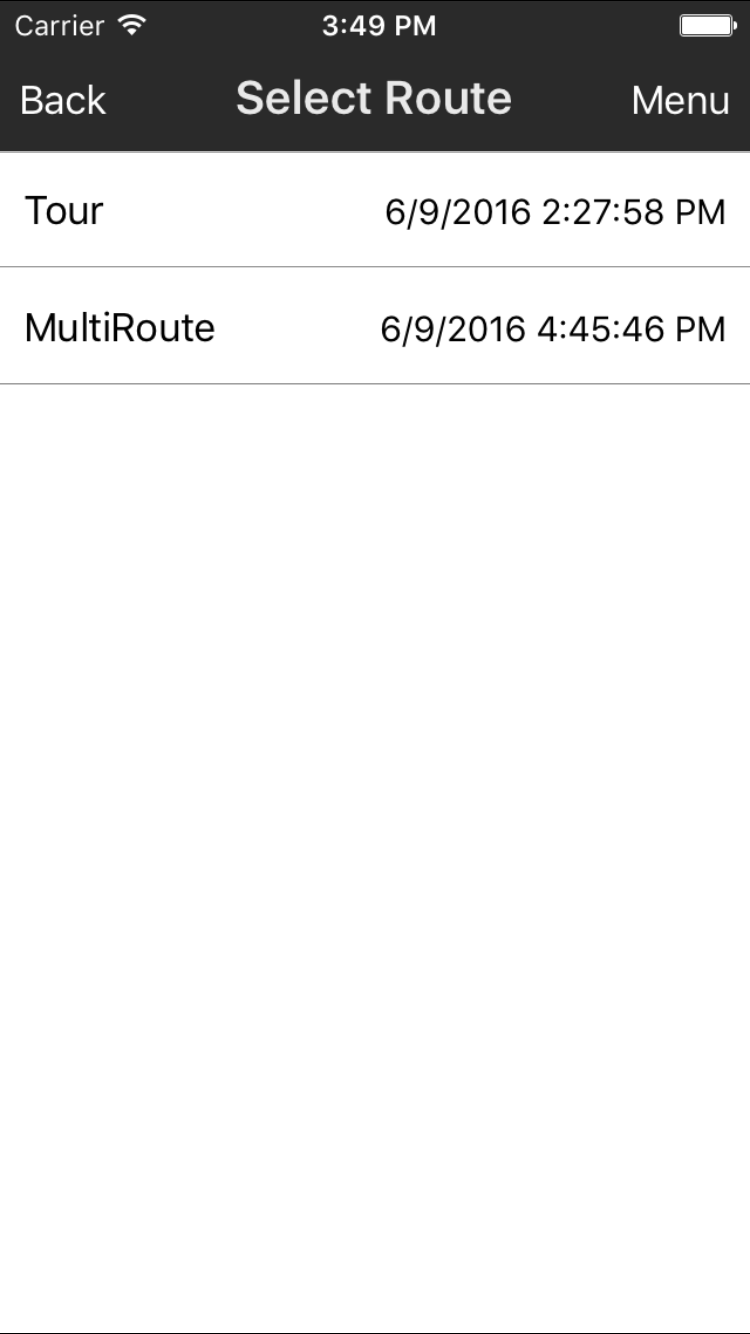
Once a user logs in on SalesPad Mobile, the Dispatch module can be accessed from the main screen or the slide menu. When accessing the Dispatch module, a list of Dispatch routes will be displayed for the Dispatch driver or Dispatch vehicle linked to the SalesPad Mobile user in the Extended User Information module on the Mobile Server. Selecting a Dispatch route will show all of the active route stops for that route.
Only Dispatch routes within the specified range of the current date will be shown. This range is controlled by the Dispatch Route Range Future and Dispatch Route Range Past securities, which are able to show Dispatch routes as far back or as far forward as desired. If only one Dispatch route is found, then the Route Selection screen will be skipped and the application will instead go straight to the Dispatch routes connected to that route.
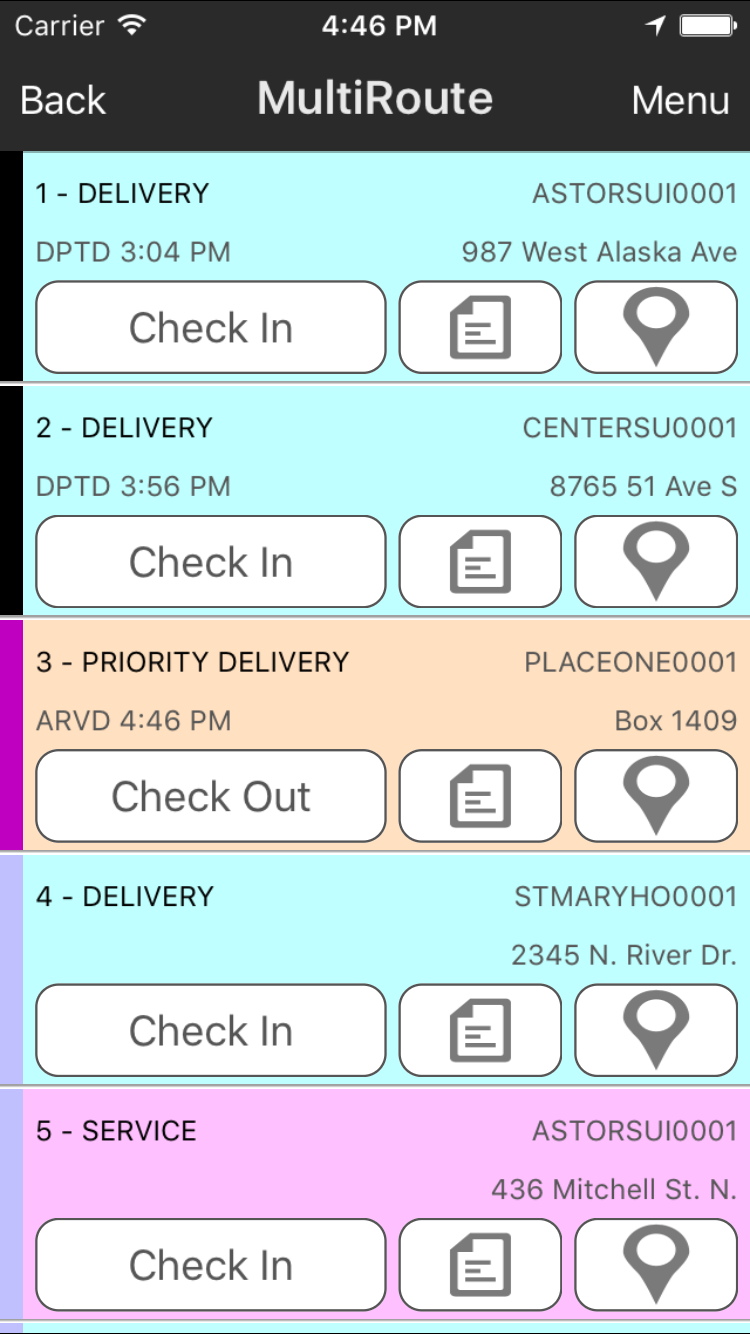
The Dispatch Routes screen will show all of the active route stops for the selected Dispatch route. They will be shown in order of their sequence. As each route stop has a set Appointment Type, the background color of the stop will match the color of the Appointment Type set in the Dispatch Configuration module.
To the far left of the stop is the Status Bar, which matches the color of the appointment status that the route stop is currently set to. If the server securities for updating the status when checking in or out were set on the Mobile Server, the color of the Status Bar will change to match the updated status.
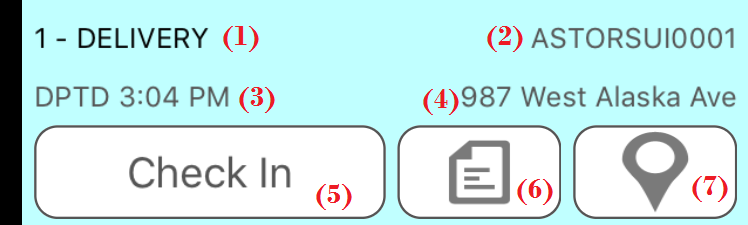
Parts of the route stop:
- Shows the sequence number and the Appointment Type.
- Shows the customer number.
- If checked in, shows the arrived (ARVD) time. When checked out, shows the departed (DPTD) time.
- Shows the simple street address.
- Selecting Check In will update the arrival time for the stop to the current time and update the Appointment Status to the value set in the Appointment Status for Checkin security. If already checked in, this button will instead be labeled Check Out. Selecting it in this mode will update the departure time to the current time and update the Appointment Status to the value set in the Appointment Status for Checkout security. You can only be checked in to one route stop at a time.
- If a sales document has been linked to the route stop, then clicking this will open that sales document on the device, enabling the SalesPad Mobile user, based on settings and securities, to edit the document, accept signatures, process credit card payments, or print a receipt.
- Selecting this field will load a map on the To Address location of the route stop. From the map, it is possible to get turn-by-turn directions to the location from the SalesPad Mobile device's current location.
Securities
There are several securities on the Mobile Server that must be configured in order to properly tie into Dispatch module.
Appointment Status for Checkin – Sets the appointment status for a route stop when a user checks in on the mobile device.
Appointment Status for Checkout – Sets the appointment status for a route stop when a user checks out on the mobile device.
Dispatch Enabled – If True, users are able to access the Dispatch screen to view Dispatch route information. SalesPad Desktop with the Dispatch module must be installed in order for the Dispatch functionality to be enabled.
Dispatch Only Mode – If True and if Dispatch Enabled is True, when logging in, the user will be sent directly to the Dispatch screen and will have limited navigation options from the menu.
Dispatch Route Range Future – Sets how many days forward to look when searching for Dispatch routes.
Dispatch Route Range Past – Sets how many days back to look when searching for Dispatch routes.
SalesPad Support
Comments