Overview
Smart Printing, a rules-based printing engine designed to work in conjunction with SalesPad workflow, is used to automatically print or email specified reports to a customer or printer connected to your computer. Using Smart Printing assures the exact report is printed/emailed at a specific step in the workflow and guarantees that the process is not being skipped or altered in any way.
Note: At this time, only customized reports can be configured with Smart Printing.
Setup
Smart Printing Maintenance
For versions after 4.3, go to Setup/Utilities and then click Smart Printing Maintenance to access Smart Printing.

This will open the Smart Printing Maintenance window, as shown here.
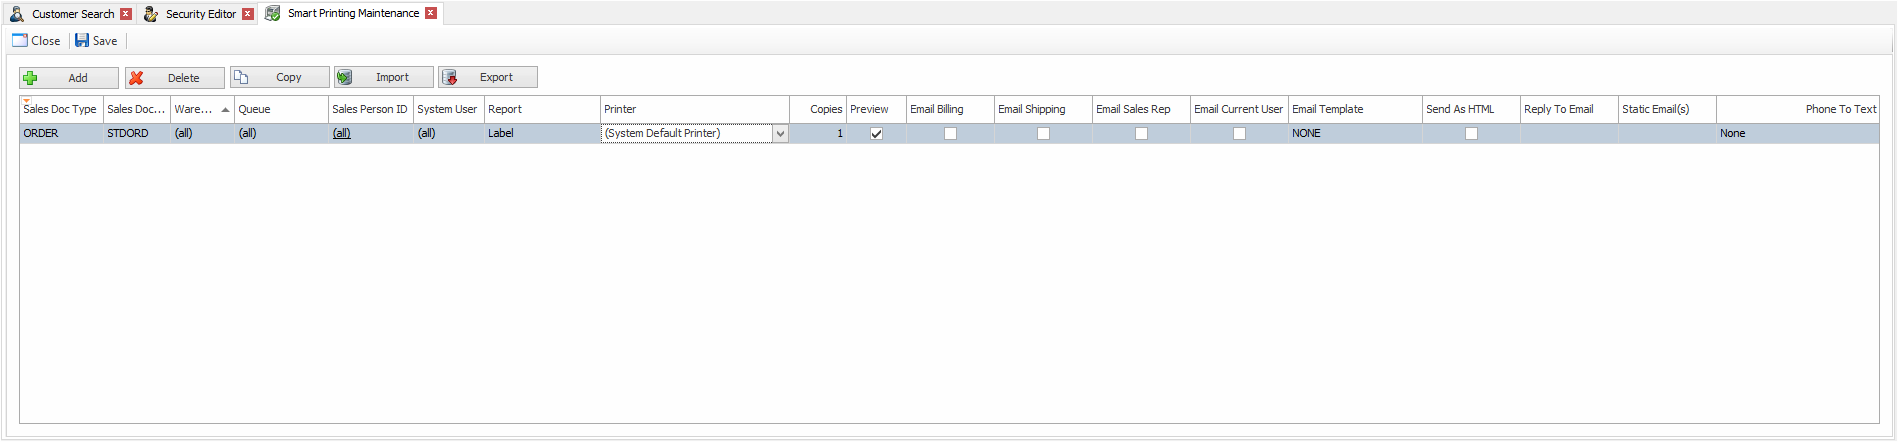
Each row in this screen is a Smart Printing rule. Rules are set up to affect certain Sales Doc Types and IDs at a given point in the workflow. For example, this rule is configured to print a Label report for the STDORD Doc ID when it is forwarded from the NEW queue.

The Sales Doc Type, Sales Doc ID, Warehouse, Queue, Sales Person ID, System User, Printer, and Report fields are required for every rule.
Note: Smart Printing rules can be used to either print or email a report, but not both at the same time. If you want a report to print and email, two separate rules will need to be created.
Printing with Smart Printing
In order to print with Smart Printing, set up the rule using the required fields, then select the report you would like to print. Currently, only customized reports can be used with Smart Printing. For more information on how to customize reports, please refer to our Report Manager tutorial.
After the report has been selected, you will need to choose which printer to use.
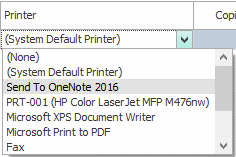
This list is determined using the printers available from Windows, so you will need to add any printers you want to use to the Printers window in the Control Panel.
When finished, the rule should look something like this:

Emailing with Smart Printing
In order to email with Smart Printing, you will need to set up the rule using the require fields, then select the report you would like to email. Currently, only customized reports can be used with Smart Printing. For more information on how to customize reports, please refer to our Report Manager tutorial.
After the report has been selected, set the Printer to “None”, then select which email address you would like to send the document to. The Email Billing option will send the report to the Billing Notification email for the document, while the Email Shipping option will send the report to the Shipping Notification email for the document. Both of these addresses can be found on the Address tab for the sales document.

You can also have the email sent to the Sales Rep or the Current User. These emails are set in the Sales Person Card and System User Card, respectively. The last email option is the Static Email, which you can use to send a copy of the email to a specific email address when the Smart Printing rule is User. This is frequently used to inform managers of activity in the workflow so that they are up-to-date on the goings on of individual documents.
Once the email address has been chosen, you will need to select which email template you would like to use. These templates allow you to pull relevant information from either a sales document or a purchase order. Please refer to our Emailing and Email Templates documentation for information on how to set these up. Once this has been done, your Email workflow rule is all set. Your Email rule should look something like this:

Workflow
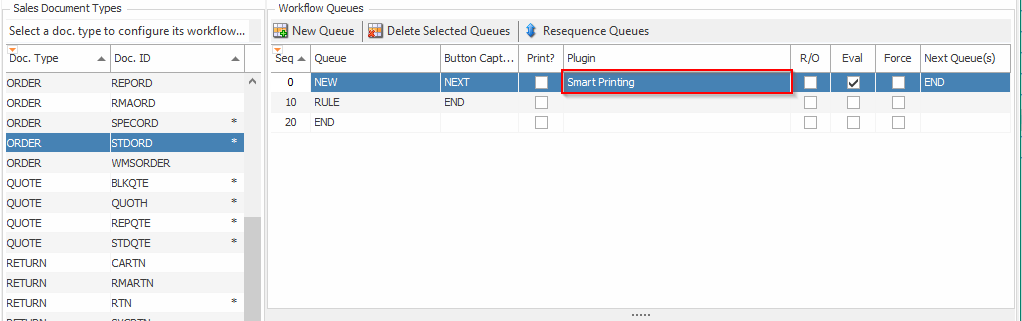
Once a Smart Printing rule has been set up for a workflow queue, you need to set the Smart Printing plugin to be used for that workflow queue. To do this, go into the Workflow Setup module, then select the document on the left side of the screen. This will bring up the workflow for that document. Once you can see the workflow, modify the plugin so that it is using Smart Printing, as shown below. For further information regarding the Workflow Setup screen, please refer to our Workflow documentation.
Security and Application Settings
Security Settings
Smart Printing* – Allows the use of the Smart Printing Plugin within workflow, and allows Smart Printing to occur when forwarding documents through workflow.
Smart Printing Maintenance* – Allows the security group to access the Smart Printing Maintenance window to modify and add Smart Printing rules.
Note: Securities with an asterisk have sub-securities that are listed in the middle section of the Security field. Sub-security descriptions appear in the bottom section of the field. Review and customize these as desired.
Application Settings
Allow Background Smart Printing – Sets the printing process to run in the background, allowing users to continue using SalesPad while printing documents through Smart Printing. Defaults to “True”.
Default Email Subject Line – Allows users to select the subject line that will appear in emails by default. Defaults to “SalesPad Auto Confirmation”.
SalesPad Support
Comments