Overview
Some situations require that a sales document not be printable until further action has been taken. There are three ways to restrict document printing in SalesPad and Dynamics GP:
- Configuring workflow to disable printing
- Restricting printing via the Security Editor
- Creating a conditional watermark (when a document does not move through the workflow) Using a script, you can also hide specific details on a report, or the entire report, if conditions are met.
Disable Printing in Workflow
To disable printing using workflow, complete the following steps in GP and SalesPad:
IN GP:
Disable printing from the Sales Process Holds Setup card in GP:
- Go to Microsoft Dynamics GP menu > Tools > Setup > Sales > Process Holds
- Click the Lookup button (
 ) to search for and select your Process Hold ID
 - Check the Printing Documents box under Apply Hold to.
- Click Save
IN SALESPAD:
- Go to Modules > Settings
- Filter to Use GP
- Set Use GP Process Hold Print Setting to True.
As the last step in the move from one queue to another, this rule is evaluated and applied.
Restrict Printing via Batch/Queue
To stop a user from printing when a document is in a specific queue or batch in SalesPad.
Security
- Select the Security group to place the restriction on
- Find the Sales Document Entry security setting
- In the sub-setting Print Queue Access List, select the queues/batches the security group should be allowed access to. “*” allows access to all batches
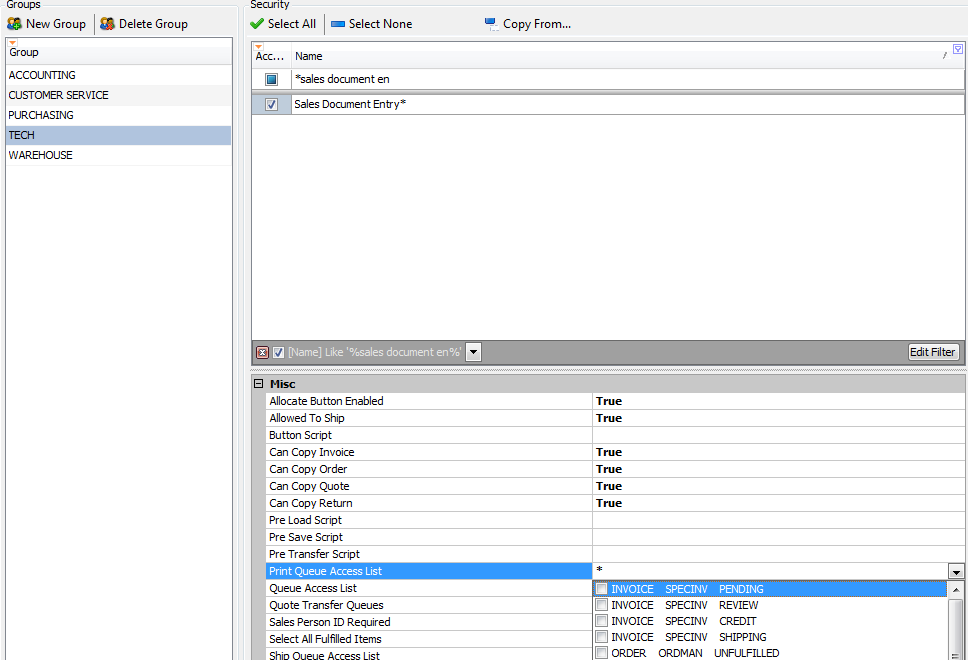
Upon saving, the group will only be allowed to print from the selected batches.
Creating a Watermark
To create the watermark, find the OnBeforePrint event within the Report Designer (Modules > Report Manager > (select report) > Design):
- Click on the band at the top of the report (GroupHeader1 in most cases)
- Expand the Property Grid section
- Find the Scripts node and click the + to expand
- Select OnBeforePrint
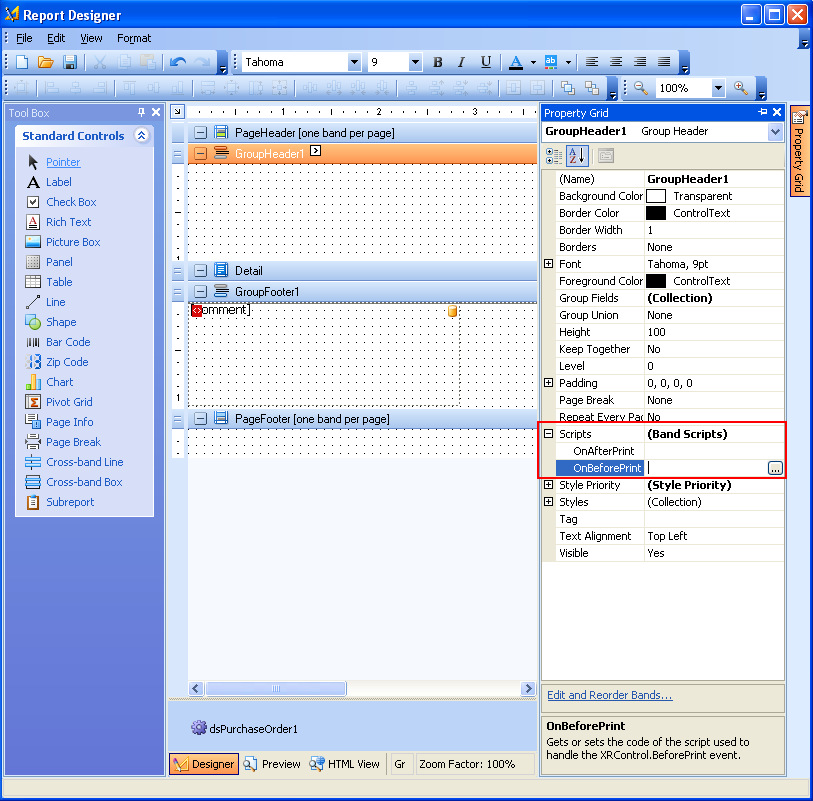
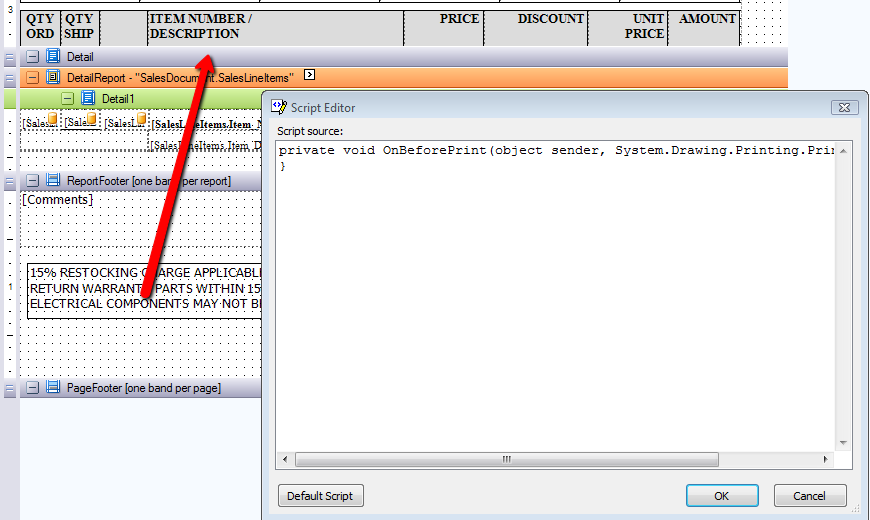
- Click the ellipsis (…). The Script Editor appears
- Paste the following script into the Script Editor (Change the report and batch name to match your environment):
using System.Data;
private void OnBeforePrint(object sender, System.Drawing.Printing.PrintEventArgs e) {
string batch = ""; DataTable sd =
((DataSet)this.rptOrder1.DataSource).Tables["SalesDocument"];
batch = sd.Rows[0]["Sales_Batch"].ToString(); if (batch == "NEW ORDER")
rptOrder1.Watermark.Text = "NOT APPROVED";
else
rptOrder1.Watermark.Text = "";
The watermark will appear on the selected report.
Hiding Details using a Script
To hide a specific band or detail of a report based on a condition, use the following script in the Report Designer. The script can be applied to each band of the report to stop the entire report from being shown if conditions are met.
using System.Data;
private void OnBeforePrint(object sender, System.Drawing.Printing.PrintEventArgs e) {
string batch = "";
DataTable sd = ((DataSet)this.rptOrder1.DataSource).Tables["SalesDocument"]; batch = sd.Rows[0]["Sales_Batch"].ToString();
if (batch == "NEW ORDERS")
{
e.Cancel = true;
}
}
Refer to the SalesPad Reports document for more information on configuring reports.
SalesPad Support
Comments