Overview
The Configurator is a tool that allows the user to create items that can be configured to customer specifications (i.e. computers, custom t-shirts, furniture, etc.) by selecting the available options (i.e. monitor, hard-drive, color, etc.) when entering an order. Upon order entry, options will be selected and the customer-specified selection will be saved to the relative line item in the form of a string code. The configured items can have items (components) attached to them.
This documents explains advanced set up and usage for the following components:
- Status and Versioning
- Adding Existing Options
- Configured Items (Components)
- Pricing
- Restrictions
- Value Mapping
- Default Selection
- Nested Configurations
- Excel Import
Please refer to Configurator documentation for a basic description of the tool and examples of configurations.
Contents
- Overview
- Status and Versioning
- Adding Existing Options
- Configured Items (Components)
- Pricing
- Restrictions
- Value Mapping
Status and Versioning
The Configurator allows users to have different versions of the same configuration, helping them keeping track of the changes made over time. In order to turn on versioning, set the Save Configuration As New Version in Security to True.”
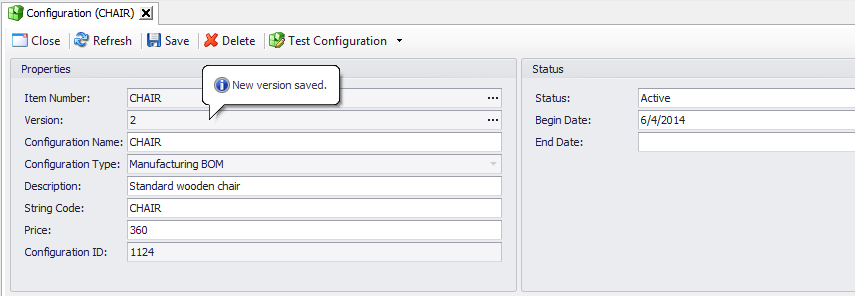
With versioning enabled, a new version is created the first time a user make and save changes on an existing configuration.
Note: Any subsequent save (on the open configuration) will keep the same version number, until the user closes and reopens the configuration.
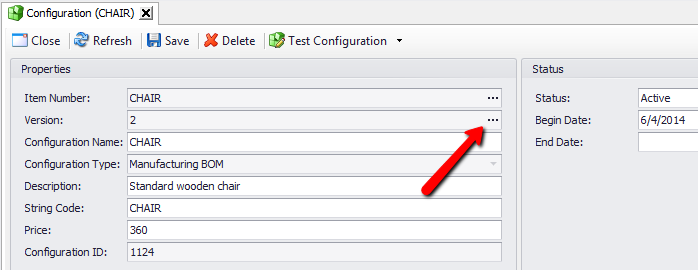
Users can load older versions by click the ellipsis in the field Version.
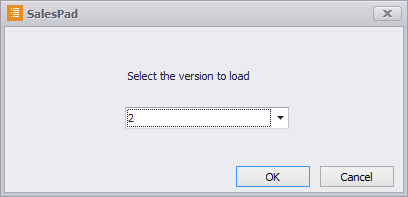
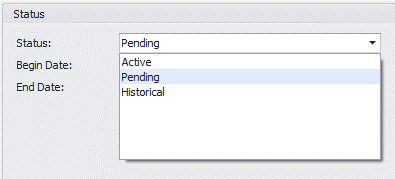
An input box with a drop down allows users to select the version to load:
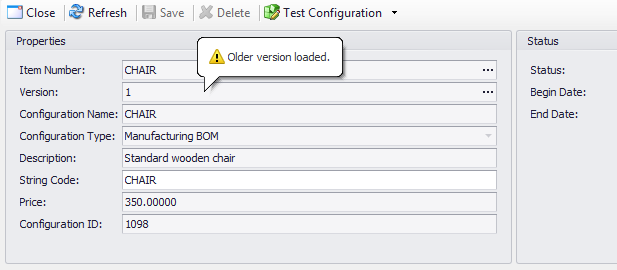
Note: Older configurations are all marked as Historical (only the current version can be Active). Notice that all the buttons are disabled, since this configuration is read only. The user can still launch the Test Configuration plugin to check what the previous configuration was like.
Users can resume older version by changing their Status and saving the configuration. In order to do that, you will have to turn on the Security setting Can Resume Historical Configurations.

Status
A configuration can have one of the following statuses:
- Historical – Older versions; they cannot be used in a sales document. The configuration is read-only.
-
Active – The current version that can be used in a sales document.
- Note: There can only be one active configuration for the same item.
- Pending – Future version; not active yet; therefore, it cannot be used in a sales document.
The status of a configuration works in conjunction with versioning. The user can manually change it depending on the use case. These are some examples of use cases:
1. From “Historical” to “Active” – This will copy the current (older) configuration into a new version (which will be marked as “Active”), and it will change the status of the latest Active configuration into Historical. This requires the Security setting Can Resume Historical Configurations in the plugin Configurator to be set to True.
Example (version 1 to be changed):
| Version | Status |
| 1 | Historical |
| 2 | Historical |
| 3 | Active |
Result:
| Version | Status |
| 1 | Historical |
| 2 | Historical |
| 3 | Historical |
| 4 | Active |
2. From “Historical” to “Pending” – This will copy the current (older) configuration into a new version (which will be marked as Pending), and it will preserve the status of the latest Active configuration. This requires the Security setting Can Resume Historical Configurations in the plugin Configurator to be set to True.
Example (version 1 to be changed):
| Version | Status |
| 1 | Historical |
| 2 | Historical |
| 3 | Active |
Result:
| Version | Status |
| 1 | Historical |
| 2 | Historical |
| 3 | Active |
| 4 | Pending |
From “Active” to “Active” – Making any changes to an Active configuration will save a new version of it and mark the previous configuration as Historical. This requires the Security setting Save Configuration As New Version to be set to True.
Example (version 3 to be changed):
| Version | Status |
| 1 | Historical |
| 2 | Historical |
| 3 | Active |
Result:
| Version | Status |
| 1 | Historical |
| 2 | Historical |
| 3 | Historical |
| 4 | Active |
Note: Any subsequent changes to the configuration will not trigger a new version until the configuration is closed and reopened.
4. From “Pending” to “Active” – Pending configuration can be switched to Active. This will make the previous (active) configuration Historical. This will not create a new version.
Example (version 4 to be changed):
| Version | Status |
| 1 | Historical |
| 2 | Historical |
| 3 | Active |
| 4 | Pending |
Result:
| Version | Status |
| 1 | Historical |
| 2 | Historical |
| 3 | Historical |
| 4 | Active |
5. From “Active” to “Historical” – You can make the Active configuration Historical by changing its status.
Example (version 4 to be changed):
| Version | Status |
| 1 | Historical |
| 2 | Historical |
| 3 | Historical |
| 4 | Active |
Result:
| Version | Status |
| 1 | Historical |
| 2 | Historical |
| 3 | Historical |
| 4 | Historical |
6. From "Pending" to "Historical" – You can make the Pending configuration Historical by changing its status. This will make the current Active configuration Historical as well.
Example (version 4 to be changed):
| Version | Status |
| 1 | Historical |
| 2 | Historical |
| 3 | Active |
| 4 | Pending |
Result:
| Version | Status |
| 1 | Historical |
| 2 | Historical |
| 3 | Historical |
| 4 | Historical |
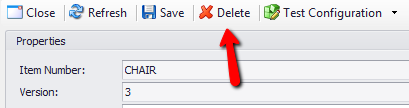
Note: Users can make a configuration Historical by just deleting it: clicking the Delete button does not remove the record from the database but it simply changes its status to Historical.
Adding Existing Options
Configurator allows users to easily add existing options from the current or other configurations. This functionality is designed for different configurations that have similar (or the same) set of options.
Steps:
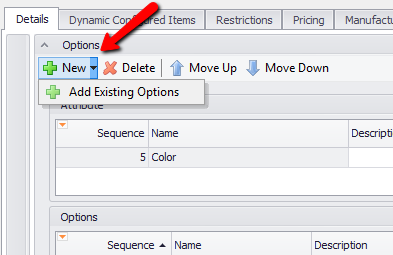
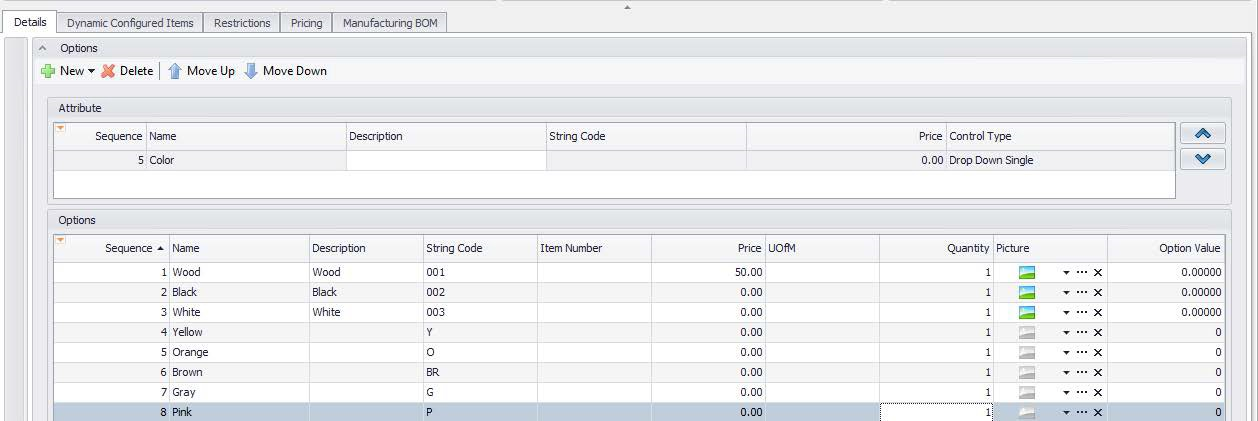
1. Open the configuration CHAIR screen and select the Options page for the attribute Color (see CHAIR example in Configurator documentation).
2. Click the little triangle next to the New button and select the Add Existing Options from the menu.
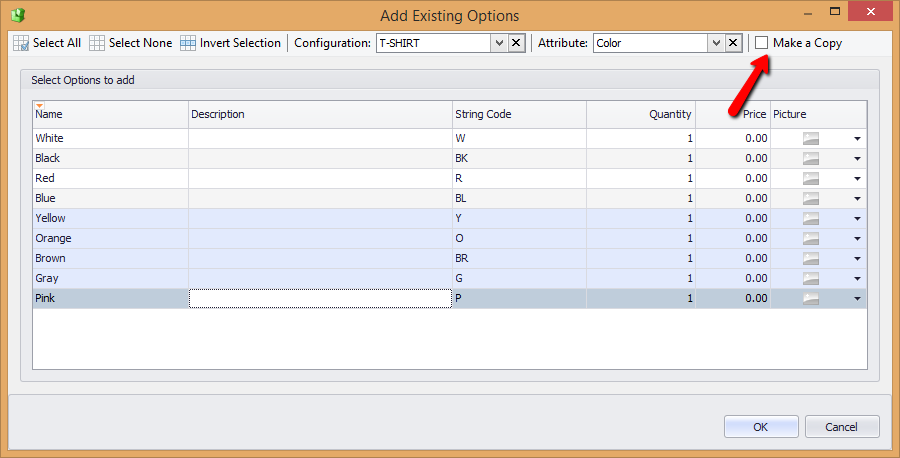
3. In Add Existing Options screen, choose the desired configuration and the Attribute from which you want to copy the Options from (in this example T-SHIRT):
a. Make sure the option Make a Copy (top right corner) is checked.
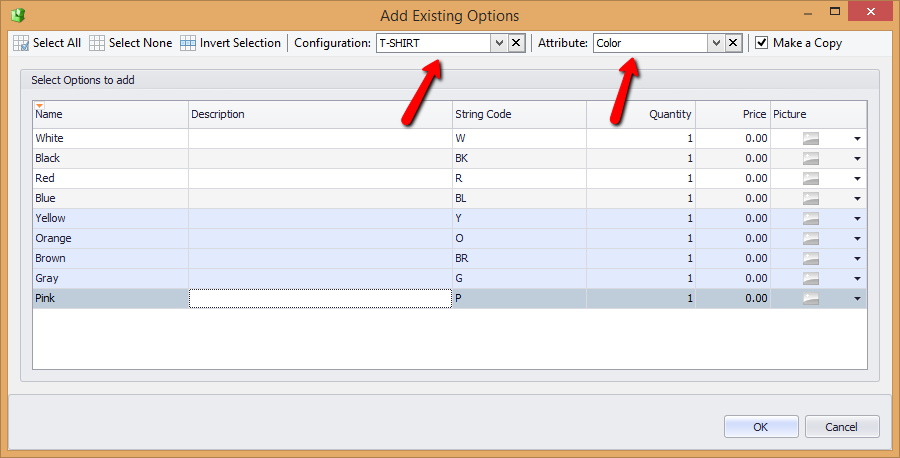
4. Select the Options to copy and click OK: the options are now copied from the configuration T-SHIRT into the CHAIR.
Note: These new options are a hard copy of the ones from T-SHIRT, which means that any change made inside the configuration CHAIR does not affect the values in configuration T-SHIRT.
Options can be copied as a link instead of hard copy, meaning that one or more configurations can share the same values for the options. In order to do that, simply uncheck the box Make a Copy before copying the options.
Options that are linked (or shared) with other configurations are denoted by the blue foreground.
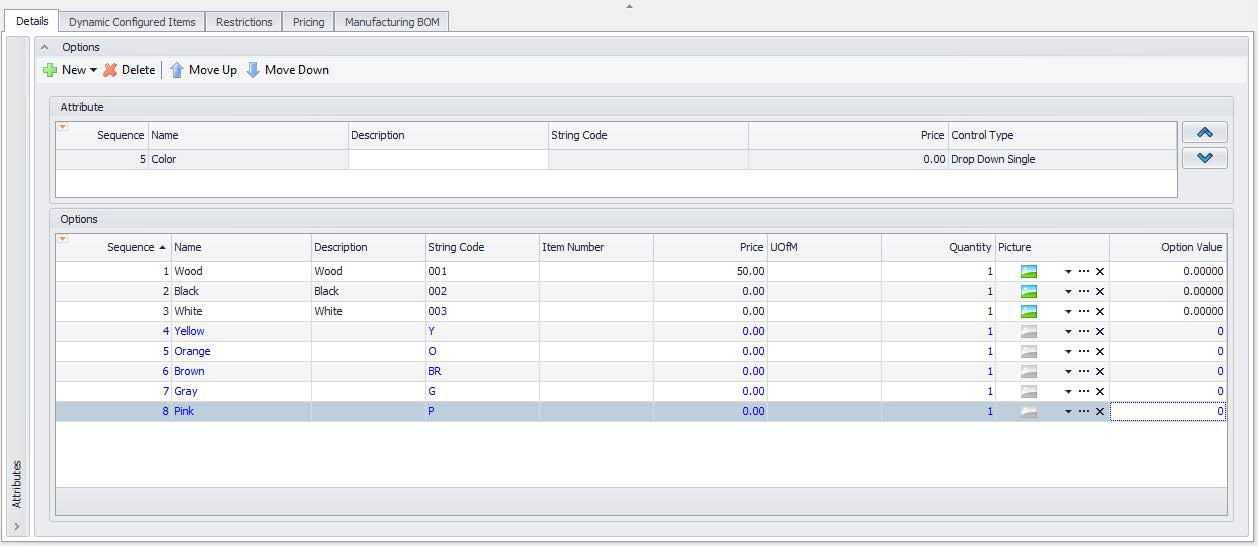
This solution is particularly useful if the users want to keep a single set of options that is the same across several configurations; this simplifies the maintenance because changes will not have to be made on each configuration, but only in one of them.
Note: Any change made to an option that is linked will affect all the configurations that share the option.
Configured Items (Components)
Dynamic Configured Items (Simple)
This sections shows how to create dynamic configured items. The example of the COMPUTER (see Configurator documentation) showed a 1-to-1 relationship between the option and the configured item (each option corresponds to one configured item):
| Option Selected | Configured Item |
| 15" | M1500 |
| 17" | M1700 |
| 21" | M2100 |
| 20 GB | HD-200 |
| 40 GB | HD-40 |
| 60 GB | HD-60 |
| 80 GB | HD-80 |
| 1 GHz | 1GPROC |
| 2 GHz | 2GPROC |
| Inkjet | 3-D2094A |
| Laserjet | 4-E2094A |
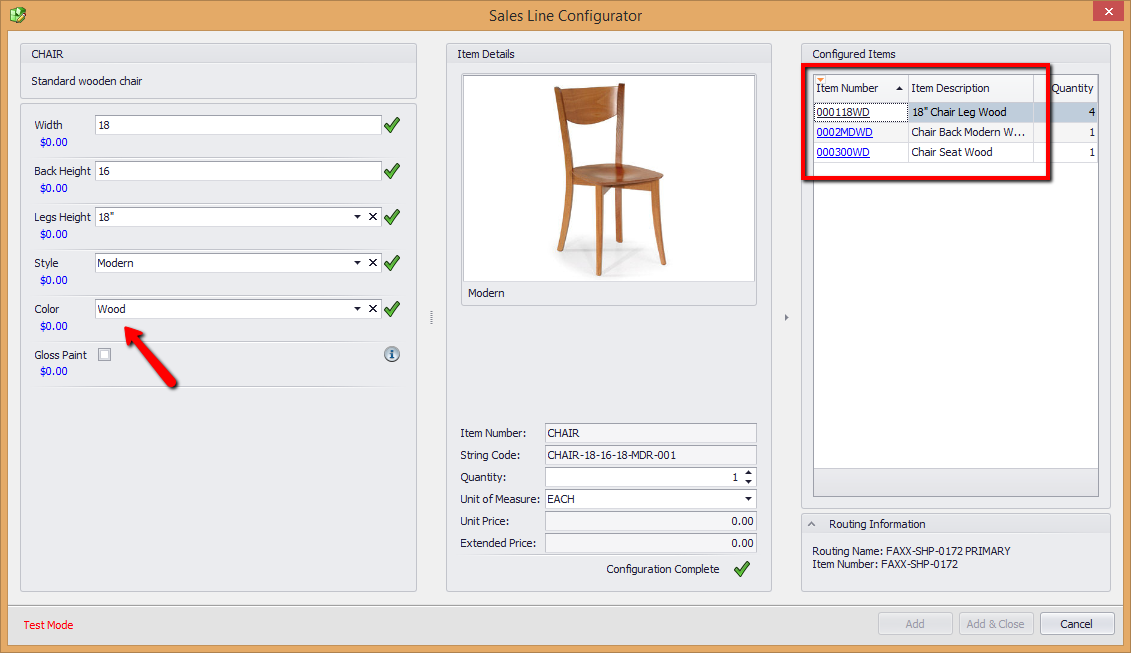
There are case in which the list of items depends on the selection of more than just one option. For instance, assume that the configuration CHAIR has only three items (or components), and each component can be one of the following item numbers:
Leg component:
| Option Selected | Configured Item | |
| Legs Height | Color | |
| 16" leg | Wood Black White |
000116WD 000116BLK 000116WHI |
| 17" leg | Wood Black White |
000117WD 000117BLK 000117WHI |
| 18" leg | Wood Black White |
000118WD 000118BLK 000118WHI |
Back component:
| Option Selected | Configured Item | |
| Legs Height | Color | |
| Classic style | Wood Black White |
0002CLWD 0002CLBLK 0002CLWHI |
| Modern style | Wood Black White |
0002MDWD 0002MDBLK 0002MDWHI |
Seat component:
| Option Selected "Color | Configured Item |
| Wood Black White |
000300WD 000300BLK 000300WHI |
Instead of listing each one of the items shown above, users can use the Dynamic Configured Items to define masks and treat the items as smart part numbers. For instance, the items “000300WD,” “000300BLK,” and “000300WHI” can all be combined into “000300{COLOR.1}” (the string “{COLOR.1}” will be automatically replaced with the color code upon the selection of that option).
Note: The configurator generates the numbers; it does not create the items in Great Plains. Each item must be an existing inventory item in GP.
Steps to create dynamic configured items:
1. Determine which attributes play a role in the configured item numbers. From the tables above, we can see that Legs Height, Style, and Color are used to define the items.
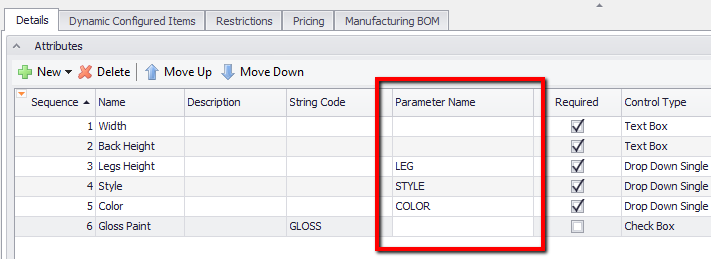
2. In the Details tab, Attributes page, find the column Parameter Name and add the values as shown below:
a. They are the parameter (or variable) names that will be used in the masks.
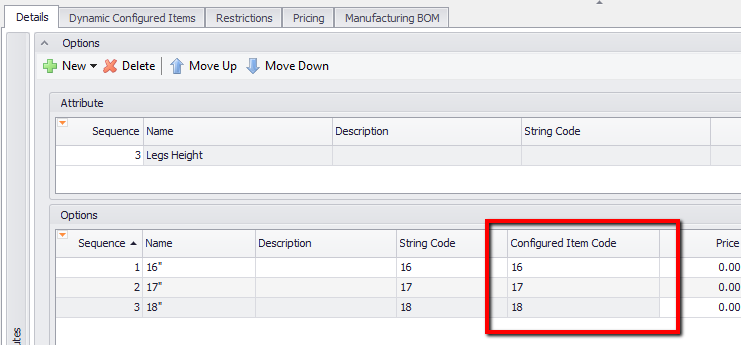
3. Select the Attribute, Legs Height, and move to the Option page. Make the column Configured Item Code visible (if not already visible) and add the values as shown below:
a. These values represent the partial code that will create the final configured item (i.e. the digits “17” in the item 000117BLK)
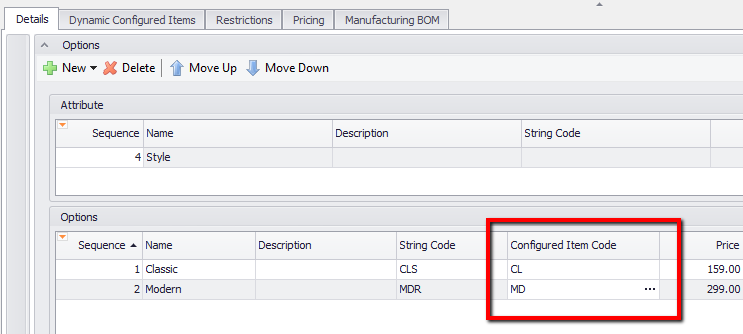
4. Move to the Attribute, Style and add the following codes:
a. They will represent, for instance, the string CL in the item 0002CLBLK
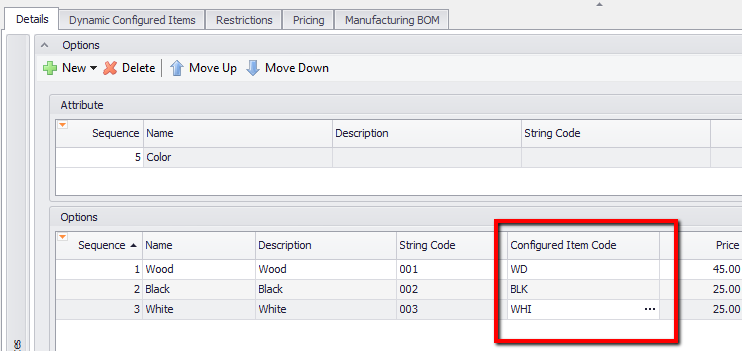
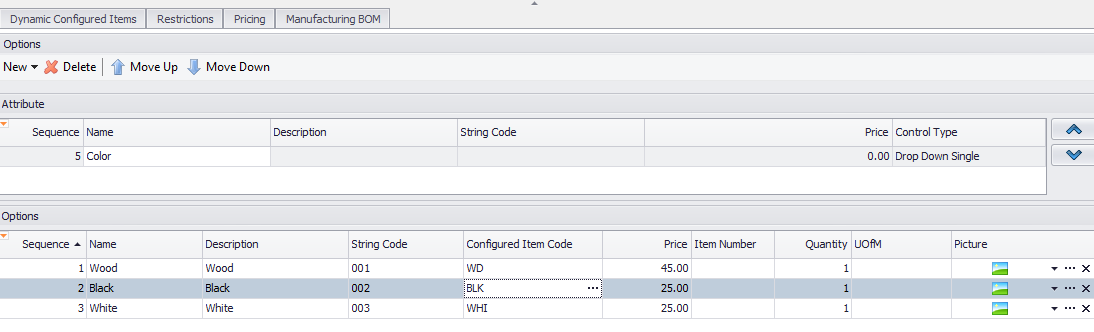
5. Do the same for Color:
a. In this case they will represent, for instance, the string BLK in the item 0002CLBLK
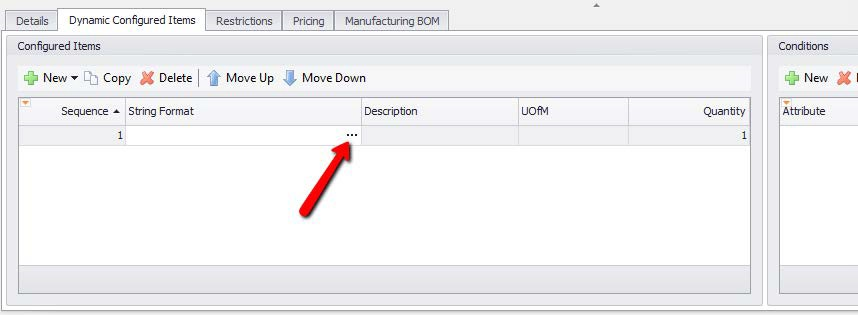
6. Now that the parameters and the partial codes are defined, we can create the actual masks. Move to the Dynamic Configured Items tab and click New to add a new row.
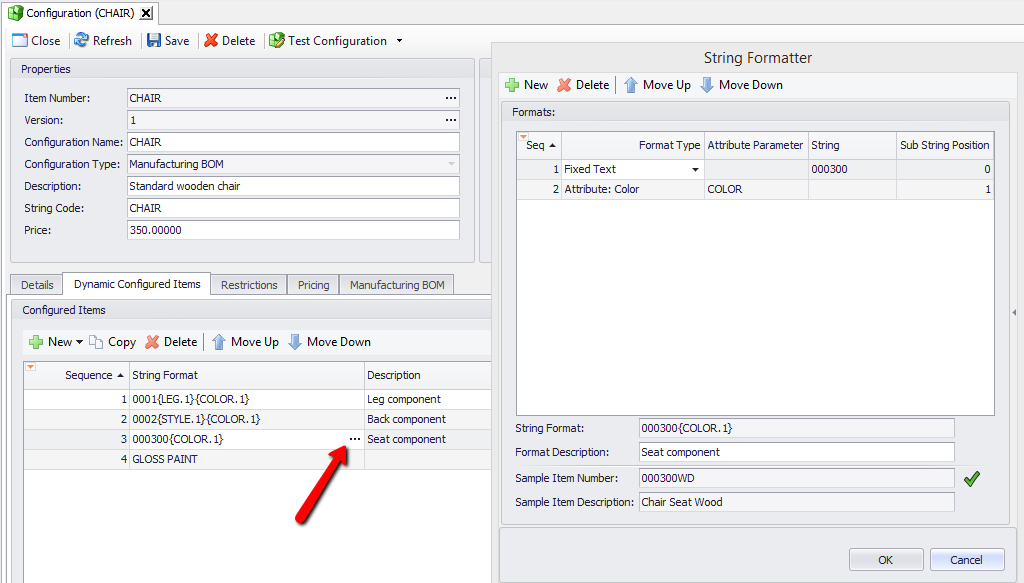
a. This row represents the first item (leg component).
b. Click on the ellipsis to open up the String Formatter helper screen.
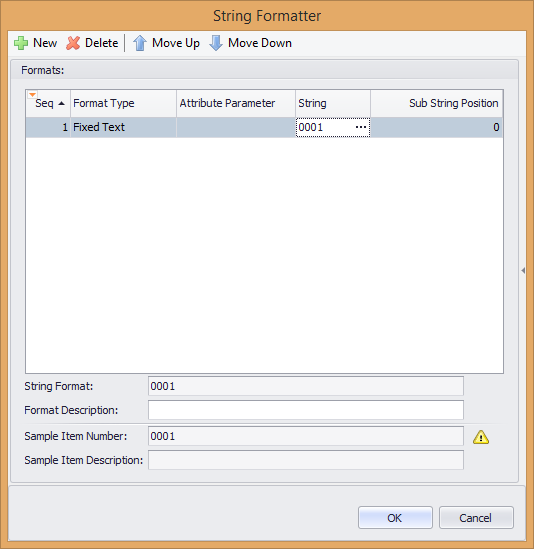
7. String Formatter is a tool that allows users to define the mask that will generate the configured item (in this case the leg component) based on the selection.
Look at the possible items for the leg component again: notice that all the items start with 0001, followed by 2 digits that represent the legs height, and some text that defines the color. This will be translated into a mask with the String Formatter.
| Option Selected | Configured Item | |
| Legs Height | Color | |
| 16" leg | Wood Black White |
000116WD 000116BLK 000116WHI |
| 17" leg | Wood Black White |
000117WD 000117BLK 000117WHI |
| 18" leg | Wood Black White |
000118WD 000118BLK 000118WHI |
8. Click New, leave the Format Type to Fixed Text and add 0001 under String.
9. Click New again to add the second part of the item (the 2-digit code that represents the legs height).
a. Under Format Type select Attribute: Legs Height. You will notice that the Attribute Parameter will automatically be filled in with LEG, which is the value we added before in the Attribute under Parameter Name.
10. Add the third part (for Color). This is the final mask:
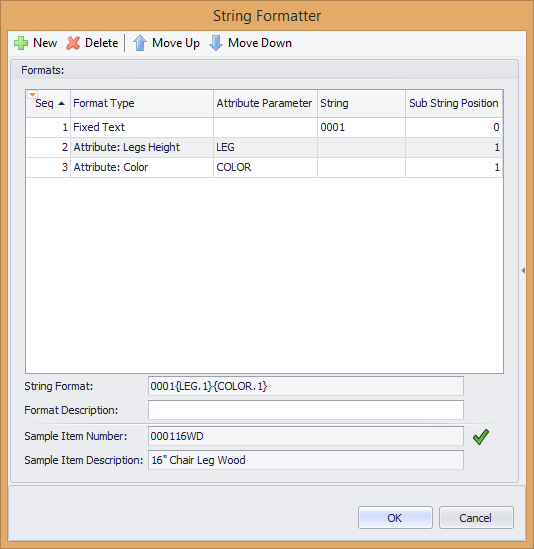
The mask “0001{LEG.1}{COLOR.1}” represents all the possible items for the leg component. In the Sample Item Number you can see the item number that would be generated when selecting the first options for Legs Height and Color.
11. Click OK to return to the main form. Under the column “Description” you can put “Leg component” as a note to yourself.
12. Add the appropriate UOfM (in this case EACH), and include the Quantity (in this case there are four legs):

Note: String Formatter is just a tool to help users create the masks. Users do not have to use this tool, as they can simply paste the string (in the example above “001{LEG.1}{COLOR.1}”) in the field String Format.
13. Add the second item (Back Component).
a. This items is composed of the fixed text “0002,” followed by two characters that represent the Style, and the text for Color.
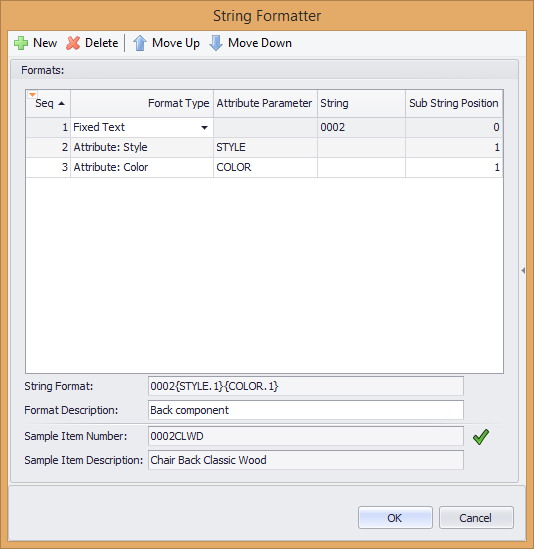
14. The third one (Seat Component) is simpler because it only has the fixed text “000300” with the text for Color at the end. You should end up with a definition like this:

As you can see, all the possible items/components (9 for the leg component + 6 for the back + 3 for the seat) can be grouped in these three masks.
15. Run the plugin from the configuration screen (button Test Configuration at the top). Select some random options and test that the Configured Items return the expected list.
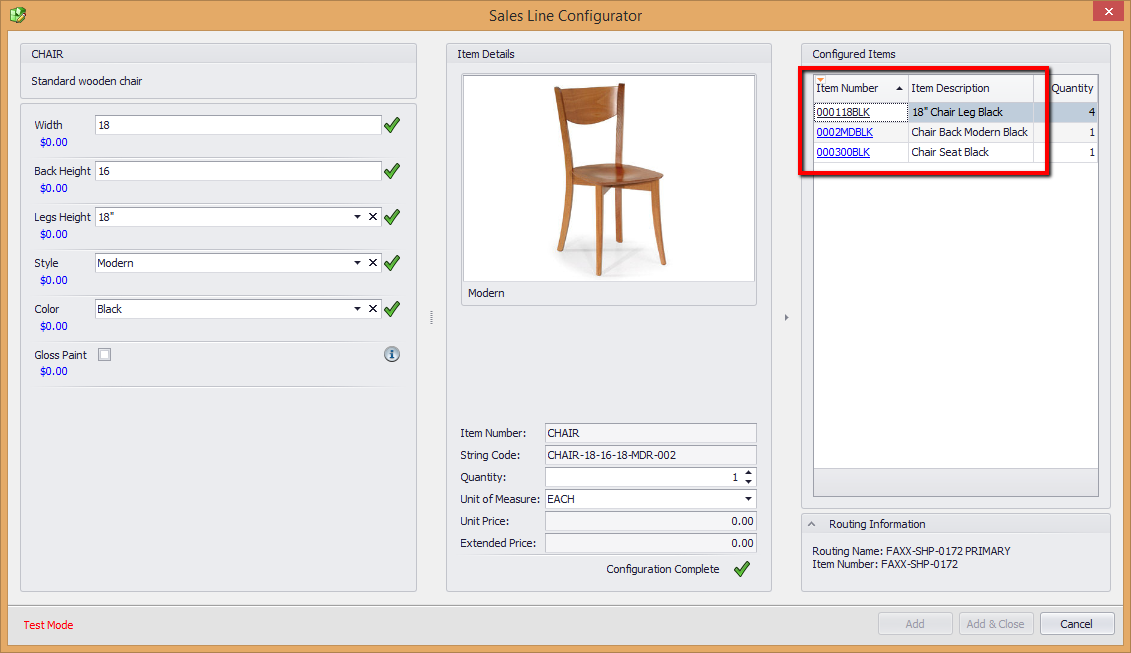
In this example, making a change on one attribute (for instance Color) will return a completely different set of items, while some attributes (i.e. Width) do not play any role as far as building the list of items:
Dynamic Configured Items can also be used without masks.
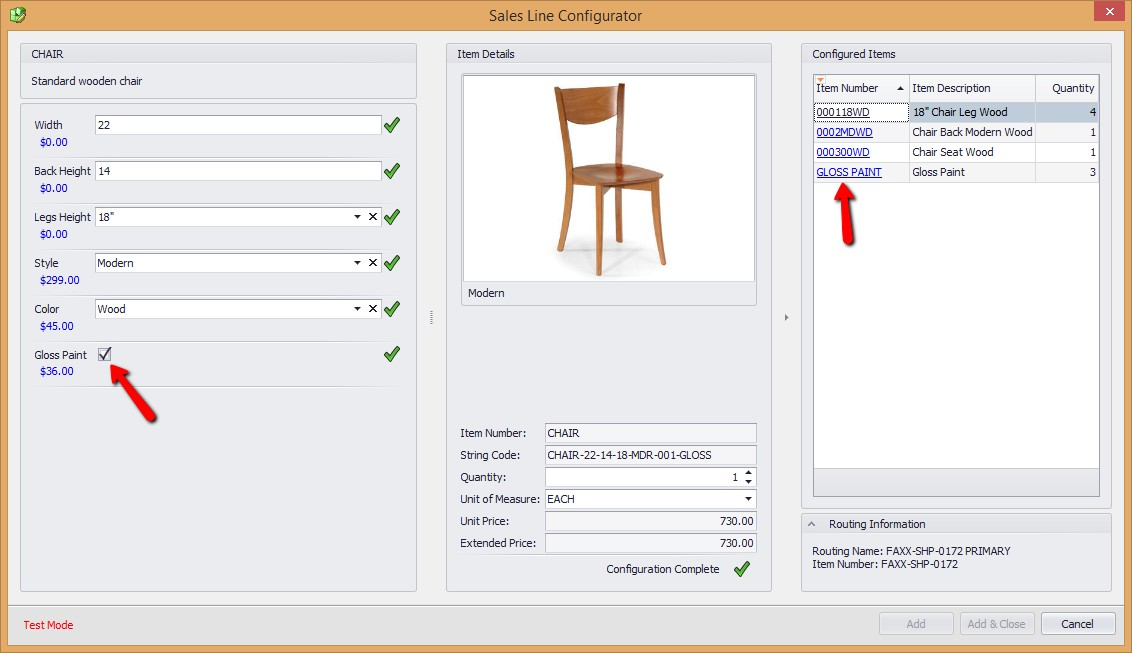
16. Add the item for the Gloss Paint if the user flags the check box, the item GLOSS PAINT will be added to the list of configured items.
In this case, we cannot use the Configured Item Code like before because this attribute does not have any option. Instead of using the string format, we will use the “Conditions”.
17. Click Add to add the item, and under String Format type GLOSS PAINT (notice that this time there is no mask: this is the actual item number). Fill in the appropriate values for UOfM and Quantity.

18. With GLOSS PAINT line selected, move to the right hand panel to Conditions and click New to add a condition:

This condition is satisfied when the Attribute Gloss Paint is equal to True. This means that the item GLOSS PAINT will be added only when this option is checked.
Dynamic Configured Items (Advanced)
In the example before we assumed that the same option would generate the same item code. For instance, the color selection would produce the suffix -WD, -BLK, or –WHI for all the three components (leg, back, and seat). This may not be always the case.
Assume that the color codes for leg and back component are alphanumeric (what we saw before), but for the seat component these codes are numeric (“-001,” “-002,” and “-003”):
| Option Selected "Color | Configured Item |
| Wood Black White |
000300001 000300002 000300003 |
In order to make this to work we need to make few adjustments to the dynamic configured items and the masks we created before.
Steps:
1. First thing to do is add the additional suffixes to the existing ones. Go to the option page for Color.
a. The Configured Item Code column currently has the alphanumeric code.
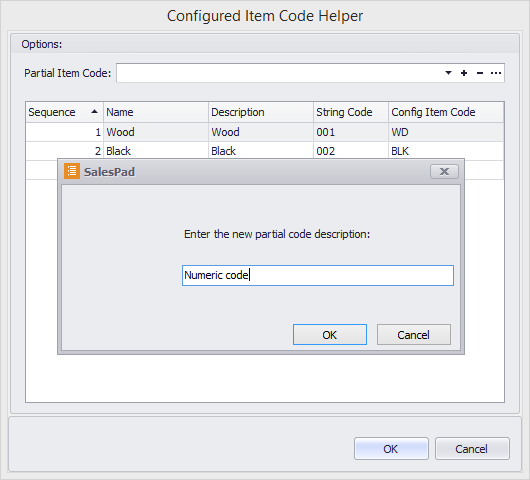
2. Select any row and click the ellipsis in the field Configured Item Code. This will pop up the Configured Item Code Helper.
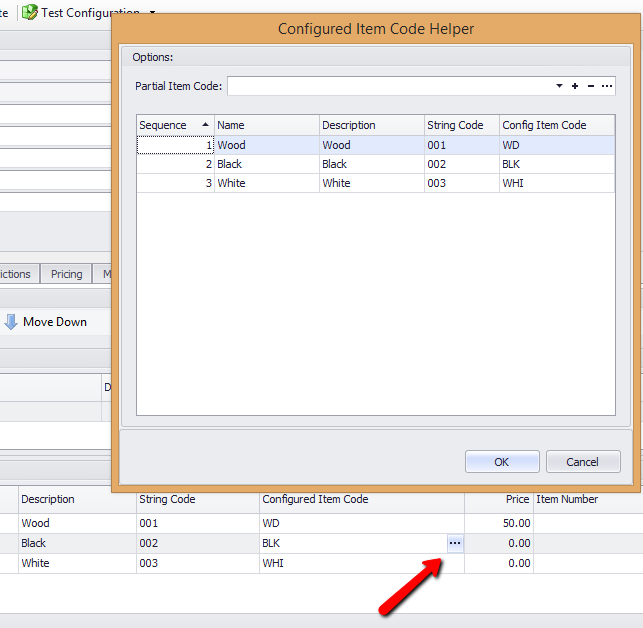
3. In this helper screen you can the first set of codes (-WD, -BLK, or -WHI). You can add a new one by clicking the  button on the top field.
a. In the input box that appears after, simply type a description of the codes that you are about to add (this will be just a note to yourself).
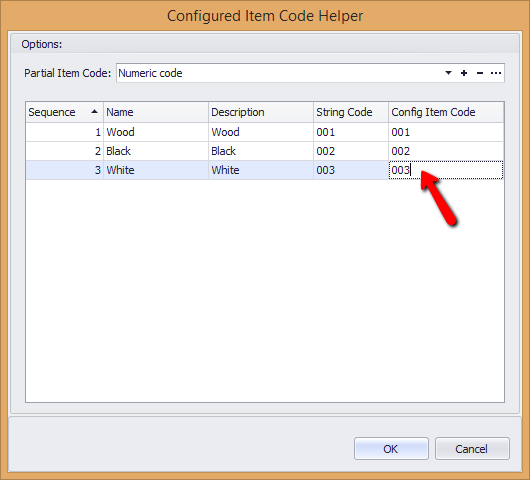
4. Click OK. You will see that the column Config Item Code is now blank. Here you will type the new (numeric) codes (“-001,” “-002,” and “-003”).
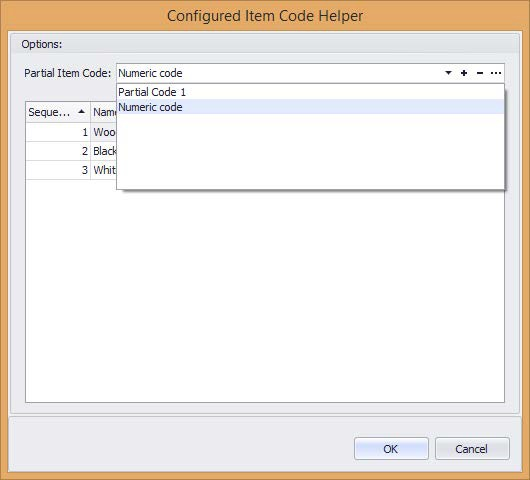
The helper screen allows you to quickly navigate through all your set of codes using the drop down at the top.
From here you can also edit the name of the code by clicking the ellipsis button (  ). You can also delete an entire set with the delete button (
  ).
).
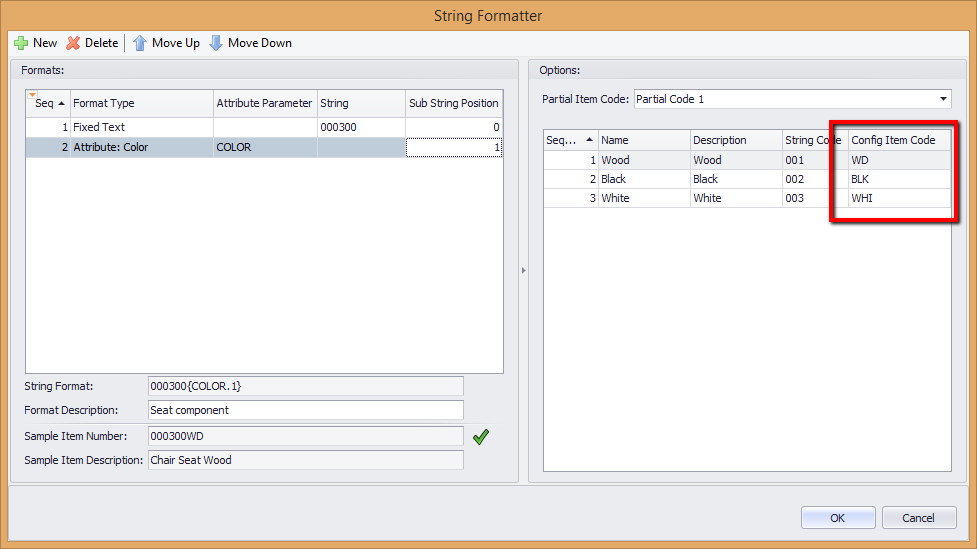
5. Click OK to close the helper screen. You will see that Configured Item Code now has to sets of codes, separated by a comma.
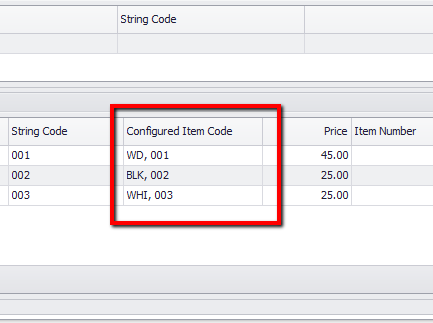
Note: Since this case is a simple one (as there are only three options and two sets of code), you could have simply added the new values directly in the grid view, by separating them with other ones with a comma.
6. Go to the Dynamics Configured Items, select the row with the seat component, and click the ellipsis on the String Format column
In the String Formatter screen, click the little triangle on the right border of the form
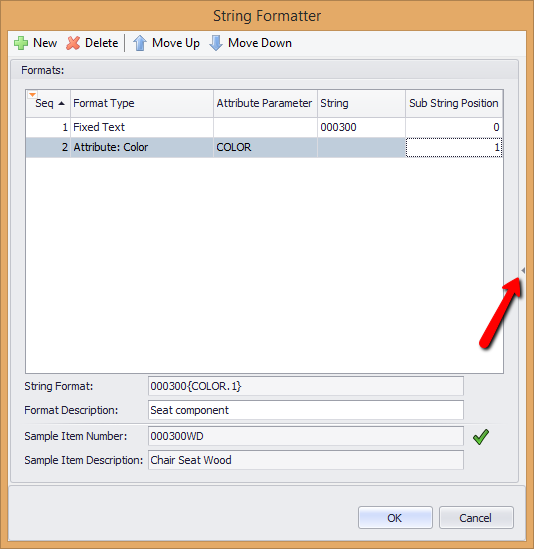
This will expand the screen, showing some information from the Options page.
As you can see, this mask curren
SalesPad Support
Comments