Overview
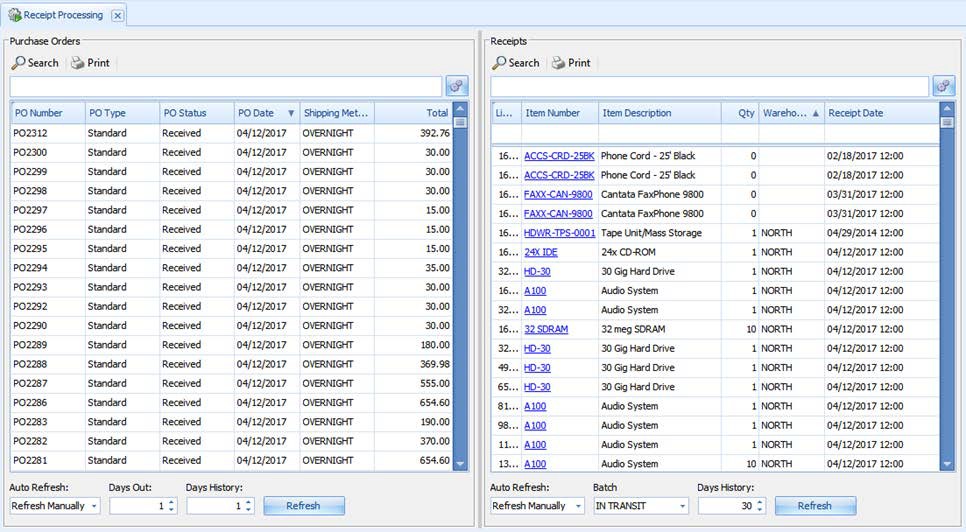
The Receipt Processing module is divided into two sections. The left side of the screen allows users to search for Open and Historical purchase orders and print them. The right side of the screen enables users to search and print labels for receipt items.
Usage
Print Purchase Orders
- Using the left pane in the Receipt Processing screen, search for and select one or more purchase orders from the search results grid.
- Click the Print button. The Print Purchase Order screen appears.
- Select a printer and a layout format.
- Click the OK button.
- If the Preview box is checked, the Print Preview screen will appear. From this screen, the purchase order can be emailed, printed, or exported to another document format. If the Preview box is not checked, the purchase order(s) will be sent directly to the selected printer.
Print Receipt Labels
- Search for and select a receipt or receipts from the Receipts grid on the right of the Receipt Processing screen.
- Click the Print button.
- The Label Printing screen appears.
- Make your selections and click the OK button.
- If the Preview box is checked, the Print Preview screen will appear. From this screen, the receipt labels can be emailed, printed, or exported to another document format. If the Preview box is not checked, the receipt labels will be sent directly to the selected printer.
Security
Receipt Processing - Grants access to the Receipt Processing screen.
Settings
Filter Out Closed and Canceled Orders - If True, purchase orders with a status of Closed and Canceled will be filtered out of the search results and will not be displayed in the data grid.
Filter Out Non Standard Orders - If True, purchase orders with a type other than Standard will be filtered out of the search results and will not be displayed in the data grid.
Pre Print Script - A C# script that will execute when the OK button on the Print dialog is clicked, before the document prints.
Receipt Label Put Away UOfMs - Allows user to change the Unit of Measure that will be used to print the receipt labels .
Sticky User Data Fields - Enter the user fields that will not be reset after printing the report. Data entered in these fields will remain for the next report and will not need to be re-entered.
User Data Fields - Enter user data fields here. User data fields allow users to manually enter data during print setup to be added to the report being printed.

Will Miedema
Comments