Notes
For purposes of this demonstration, the SalesPad WebAPI is installed locally on port 5501. This means that all example requests shown will start with http://localhost:5501. If following along with this documentation, replace this with the server name and port number for your particular installation.
References to the API Help Page are referring the help page which can be found at your installation location/Help (in our case, http://localhost:5510/Help).
SalesPad WebAPI supports JavaScript Object Notation (JSON). For more information on JSON, check out http://www.json.org/.
Postman Rest Client
SalesPad developers have found a tool named Postman to be indispensable in testing and developing the SalesPad WebAPI. Postman is a Chrome App, but can be run as a desktop application as well. You can download the Packaged App here.
You may use any tools / code of your choice to send requests to the SalesPad WebAPI, but for the purposes of this demonstration we will be using Postman.
Creating a Session / Logging In
NOTE: You must create a session before attempting to request anything from the API. If you do not send a valid Session- ID with subsequent requests, your requests will be denied. (It is also assumed that you will use a user account that has admin (or all) permissions for all request types.)
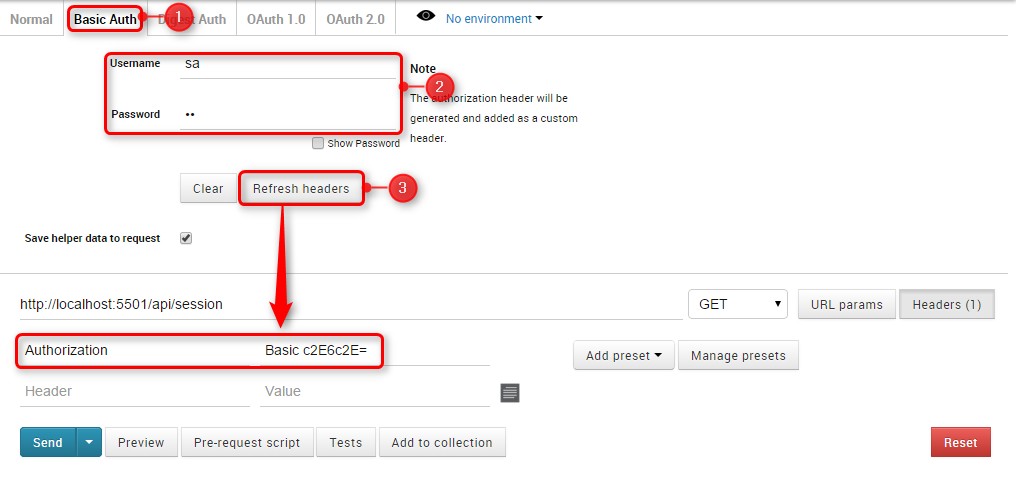
To create a session, you must send a request to GET api/Session. This request must contain an Authorization header for Basic Authentication (as specified on the API help page): Username and password should be in the format of username:password, using the colon as separator, prefixed with the keyword Basic and encoded in Base64.
In Postman, this is a simple process, as a Basic Auth tab is provided which will prompt you for Username and Password, and do the rest for you. Enter your user information, then click Refresh headers. This will create an Authorization header with the appropriate value:
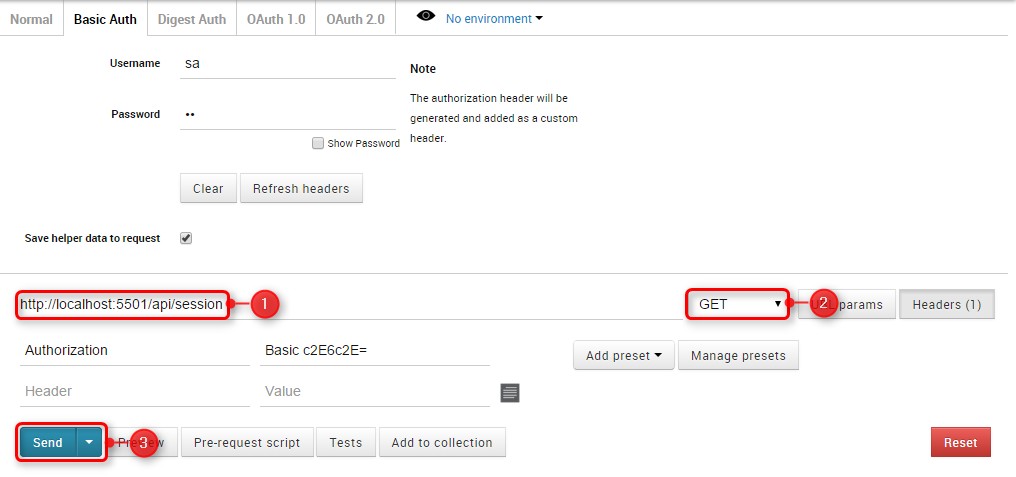
Next, enter your server name, port, and api/session (in our case, http://localhost:5501/api/session), make sure the Http Request Method is GET, and click Send:
The response should pop up below, and look something like this (If it doesn’t look as nice, make sure the Pretty tab is selected):
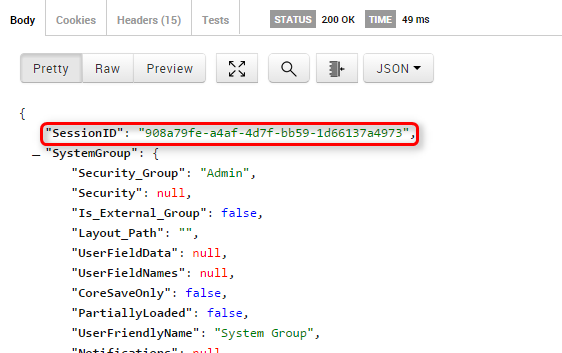
The response will contain information about the user, such as the Security Group it belongs to, Object and Property Permissions, Group Permissions, and any User-Customer associations. However, in our case, all we really care about is the SessionID value given, as this is our ticket to make further requests. This value must be used with a Session-ID header for all following requests:
Retrieve a Customer
To retrieve Customer information, we can send a GET request to api/Customer endpoint. The API Help Page shows us that there are two kinds of GET requests we can make – one using OData, and one using the Primary Keys of the Object (in this case, the Customer_Num):
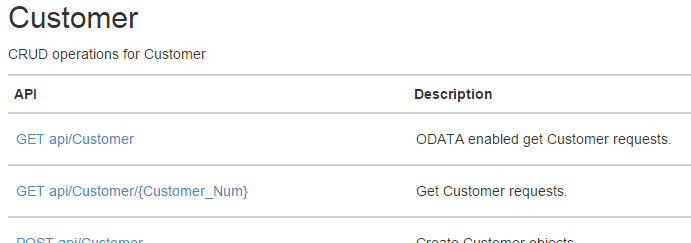
For our example, we will retrieve Customer Aaron Fitz Electrical, from the Sample Company setup provided by Dynamics GP.
We can do this using either endpoint:
- GET api/Customer/AARONFIT0001
OR
- GET api/customer?$filter=Customer_Num eq 'AARONFIT0001'
For the OData enabled endpoint, we simply filter to customers where the Customer_Num is AARONFIT0001, and we end up with the same results. (See the API GettingStarted page for more information on OData).
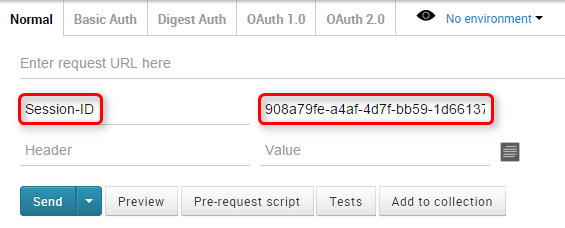
For this request, you can use the Normal tab in Postman, as we don’t need the Basic Authentication anymore. Begin by copying the SessionID value provided by the GET api/Session request, and paste it as the value for a Session-ID header (as shown previously). Then enter the URL you wish to use:
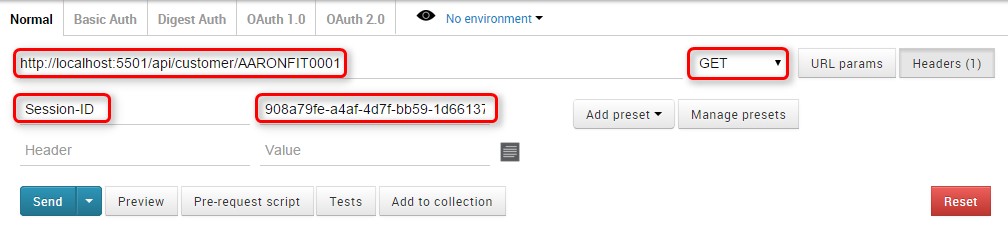
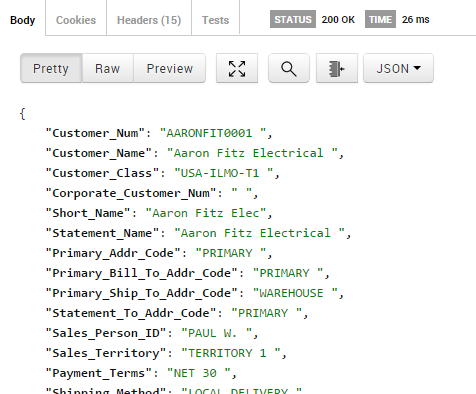
Again, make sure the Http Request Method is GET, and click Send. A successful response should look like the following:
All other GET requests should be made in a similar manner, using the SessionID created by the initial GET api/Session request. See the API Help Page for all available endpoints.
Create a Customer
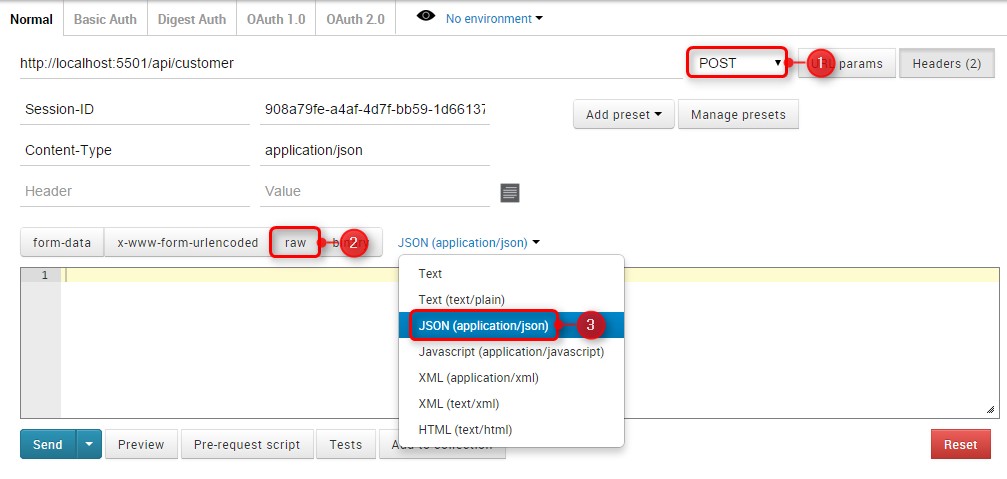
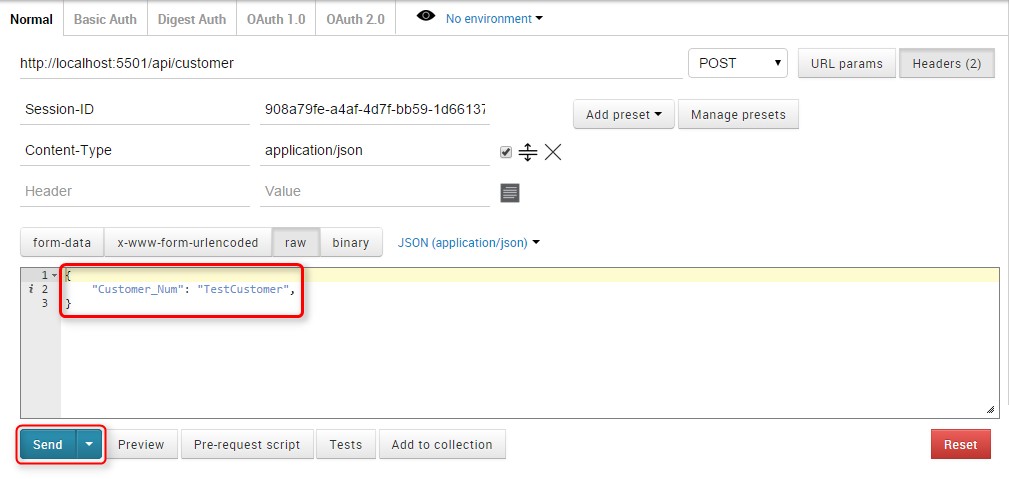
To create a new Customer, we will use the POST Http Request Method. When you change this in Postman, an additional area for sending content with the request will pop up. We want to use the raw type, and it looks best when formatted as JSON.
(When you select JSON, you may notice that Postman will add an additional Content-Type header of application/json. Feel free to delete it or leave it as you see fit. This is normally what would describe the request body type, but since SalesPad WebAPI only supports JSON, it is not necessary (but also does not hurt anything).)
NOTE: Generally, a SalesPad Object can be created with as little as the Primary Key(s). However, we encourage you to provide as much information as possible for better accuracy and fewer errors.
For example, we can create a Customer by only giving the Customer Number we wish to use:
{
"Customer_Num": "TestCustomer",
}
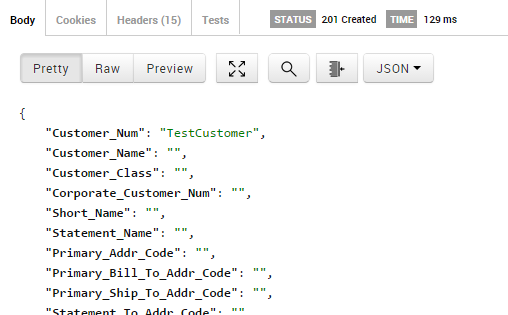
However, this Customer will only have a few default properties filled out; you will likely not be able to do anything useful with this Customer until you have updated it with more information.
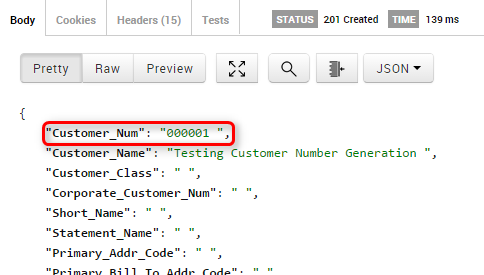
NOTE: For Customers, SalesDocuments, and SalesLineItems, auto-numbering can be accomplished by not providing the Primary Key you wish to be created for you. For example, we can POST a customer with just a name, and we will see that the Primary Key (Customer_Num) property is automatically generated:
{
"Customer_Name": "Testing Customer Number Generation",
}
A successful response should look similar to the following:
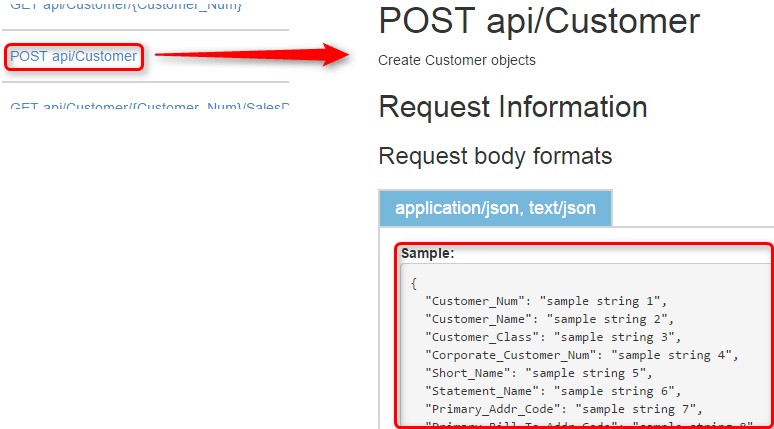
See the API Help Page for JSON samples which include all available properties for POSTing each Object type:
Create a Sales Document
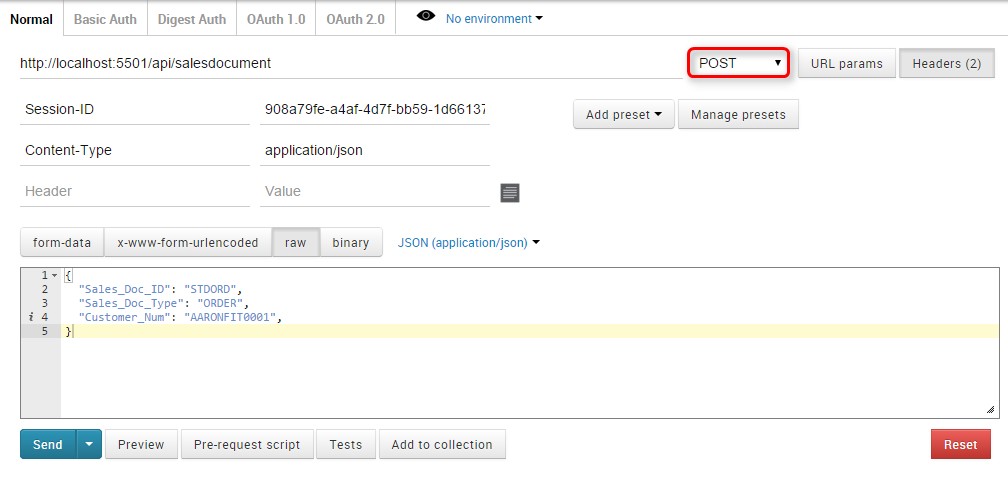
Creating a Sales Document is similar to creating a Customer. The minimum required properties are Sales_Doc_ID, Sales_Doc_Type, and Customer_Num. (You may provide your own Sales_Doc_Num, or else it will be automatically generated for you.)
{
"Sales_Doc_ID": "STDORD",
"Sales_Doc_Type": "ORDER",
"Customer_Num": "AARONFIT0001",
}
Make sure that the Http Request Method is set to POST:
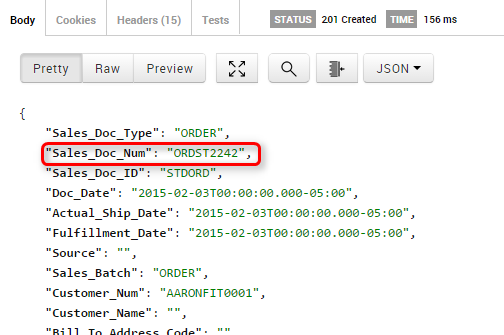
As you can see, since we have not supplied a Sales_Doc_Num value, the response shows that the Sales Document Number has been automatically generated for us:
Create a Sales Line Item
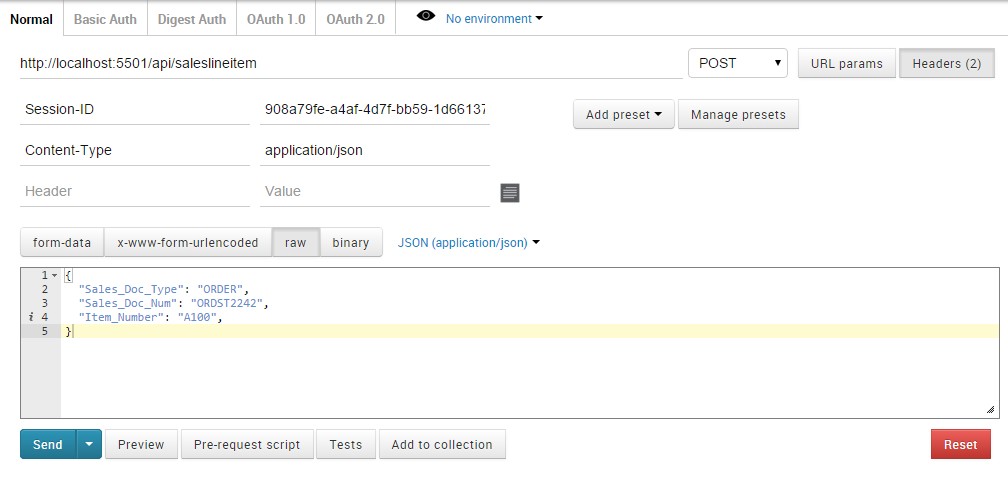
When creating a Sales Line Item, minimum required properties are Sales_Doc_Type, Sales_Doc_Num, and Item_Number. Line_Num and Component_Seq_Num can be provided, otherwise they will be automatically generated:
Add them to the LineItems property in Sales Document when POSTing the document (each Line Item Object in the LineItems array should at least contain the minimum required properties listed in the following point):
{
"Sales_Doc_Type": "ORDER",
"Sales_Doc_Num": "ORDST2242",
"Item_Number": "A100",
}
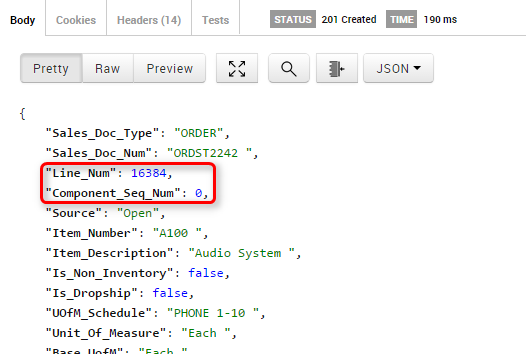
The document and line items will be automatically updated with price, etc.
Updating a Sales Document
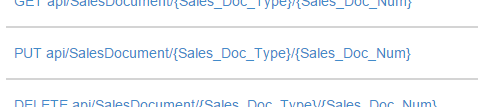
Updating Sales Document (or any other Object) properties is straight-forward. Simply look up the Object you wish to update, and send a PUT request to the specified URL with the properties you wish to update and their new values.
For example, to update a Sales Document, we can look up the PUT request URL format in the API Help Page:
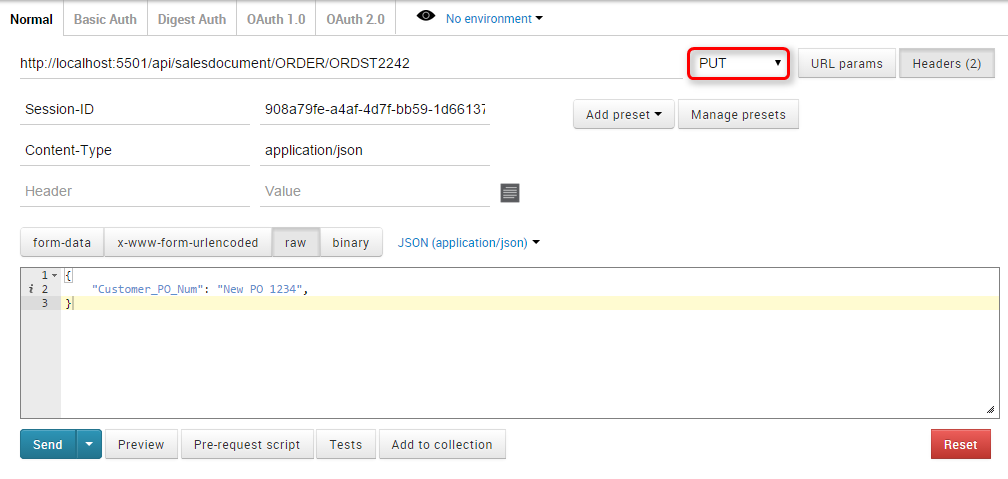
We can see that we have to send the Sales_Doc_Type and Sales_Doc_Num Primary Keys so that the API knows which object to update. In Postman, change the Http Request Method to PUT, fill in the URL, and supply the properties you wish to update. In our example, we will update the Customer_PO_Num:
{
"Customer_PO_Num": "New PO 1234",
}
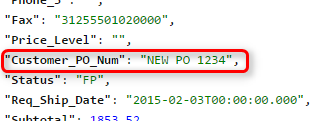
In the response, you can see that the Customer_PO_Num has been updated:
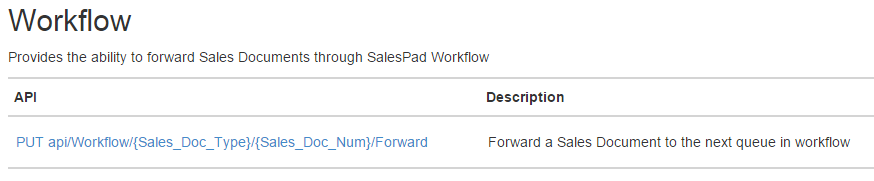
Forwarding a Sales Document
Provided that you have workflow set up in SalesPad, it is easy to forward documents, as shown in the API Help Page:
In Postman, make sure the Http Request Method is set to PUT, and fill in the URL with the document you wish to forward (Note that no body is required in this request):

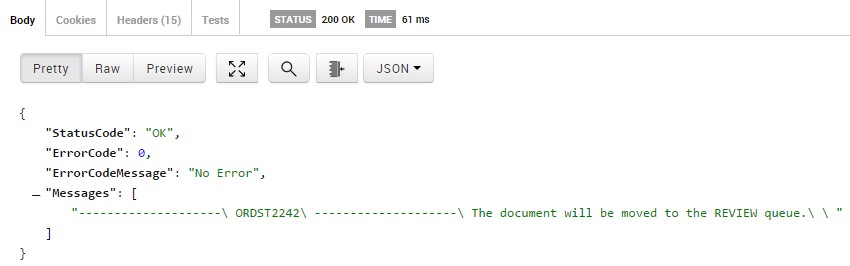
If successful, you will see a response similar to the following:
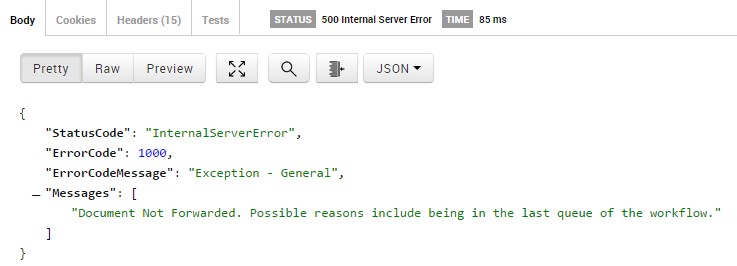
If the document is already in the last queue, you will likely get a message similar to the following:
Deleting a Sales Document
Deleting a Sales Document (or any other Object) is also straight-forward. Simply use the API Help Page to look up the Object you wish to delete, and send a DELETE request to the specified URL.

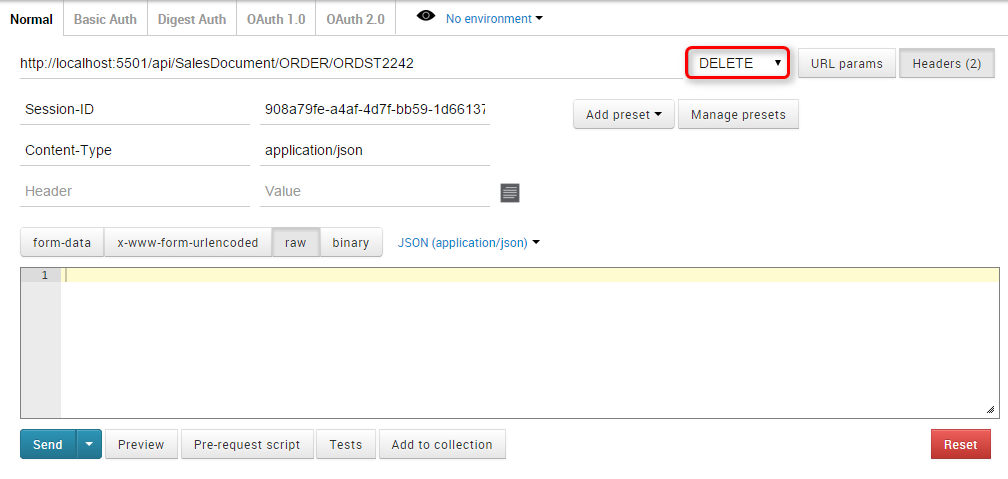
In Postman, flip the Http Request Method to DELETE, and fill in the URL with the Object you wish to delete (Note that no body is required in this request):
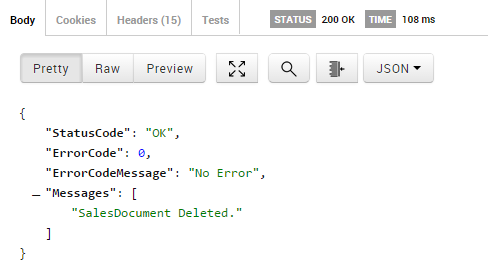
If successful, the response message should look like the following:
Deleting a Session / Logging Out
It is a good idea to delete your session when finished making requests. SalesPad WebAPI will automatically delete sessions older than 15 minutes, but during that time period you will still be logged in, and consuming a seat of SalesPad. Deleting your session will also delete any document locks you may have acquired during your session.
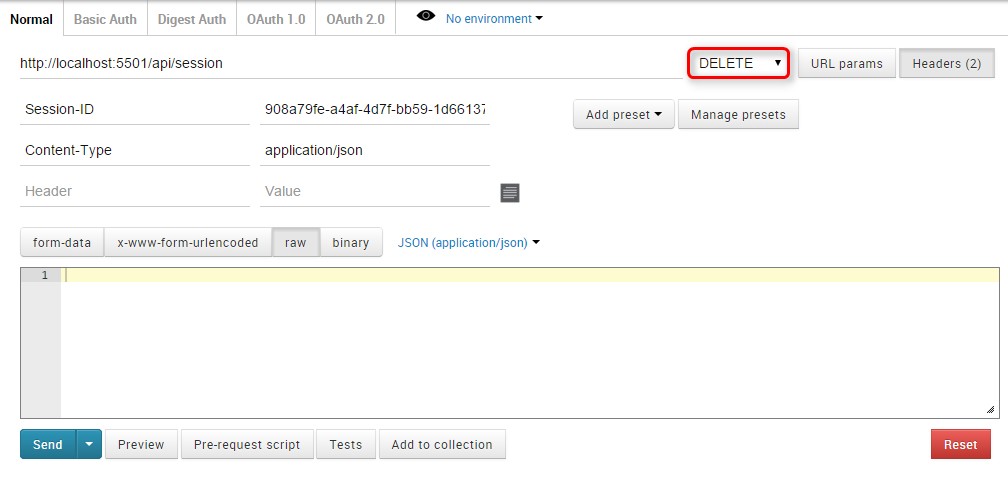
To delete your session, simply make a request to DELETE api/Session, with the Session-ID header as usual (again, no body is required):
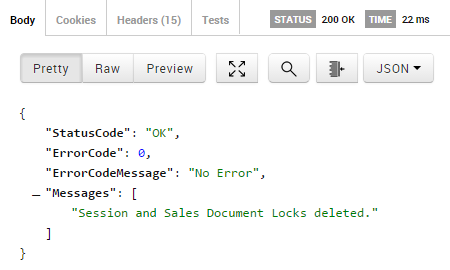
If successful, you should get a response similar to the following:
SalesPad Support
Comments