Overview
SalesPad Web API and SalesPad Customer Portal (fka WebPortal) provide SalesPad users with an online version of SalesPad! The website allows users to create, view, update and delete Customers, Sales Documents, Inventory, and more. Permissions can be tightened all the way down to the property level of each object for each user group.
Since the same database is used for the desktop SalesPad application and the SalesPad Customer Portal (fka WebPortal) , all SalesPad users can log into the Customer Portal (fka WebPortal) with their SalesPad credentials. However, permissions on the Customer Portal (fka WebPortal) are completely unconnected from security in SalesPad client, and must be configured separately.
There are two types of Customer Portal (fka WebPortal) users: Internal and External users. Both are stored in the database as SalesPad users, however the SalesPad group they belong to can be specified as Internal or External. Users belonging to an Internal group are treated the same as a SalesPad client user, and take up one seat of SalesPad. Users belonging to an External group are licensed separately and take up an External seat of SalesPad. External seats can be purchased in tiers; contact your Sales Representative for more information.
Business Rules and SalesPad Filter Scripts are honored in SalesPad Customer Portal (fka WebPortal). Additionally, users can be tied to a specific Customer (and even further down to the ShipToAddress level), and all objects with customer information will be filtered down to show only information tied directly to that Customer. For example, if a user is tied to “AaronFitz”, he/she will only be able to pull up AaronFitz in the customer search, and will only see AaronFitz’s documents in the document search.
The following documentation demonstrates in detail the typical installation process for the SalesPad WebAPI and SalesPad Customer Portal (fka WebPortal). If you have any questions about the installation process, please contact your Account Manager to discuss a quote to assist with implementation.
Requirements
Software Requirements
- Latest build of SalesPad Desktop
- Windows Server 2012 R2, or Windows 8 (or above)
- .NET Framework 4.7.2 (or newer)
- SQL Server 2008 R2 (or newer)
- Microsoft Dynamics GP 2010 (or newer)
- IIS 7.5 or above
Note: If this is your first time setting up IIS, we strongly recommend that you consult a qualified IT professional during your initial setup
- URL Rewrite (needed only for Customer Portal (fka WebPortal))
Hardware Requirements
- Processor: Dual Core processor or better
- Disk Space: Minimum 100 MB of free disk space
- Memory: Minimum of 4 GB of RAM
Note: While SalesPad Web API and WebPortal may work with different versions/configurations outside of the above requirements, it has not been fully tested, and there is a possibility that you will run into issues
SalesPad Web API Installation
Windows Features
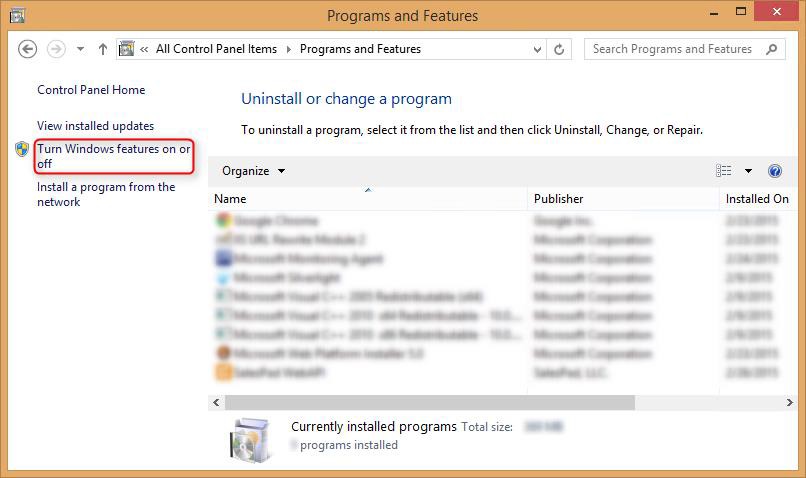
Begin by looking over the list of requirements above and installing anything that your system is missing. Next, open Control Panel > Programs and Features and select Turn Windows features on or off:
Click here for Windows 8 setup.
In Server 2012 R2, the Server Manager and Add Roles and Features Wizard should pop up (you can ignore the Server Manager):
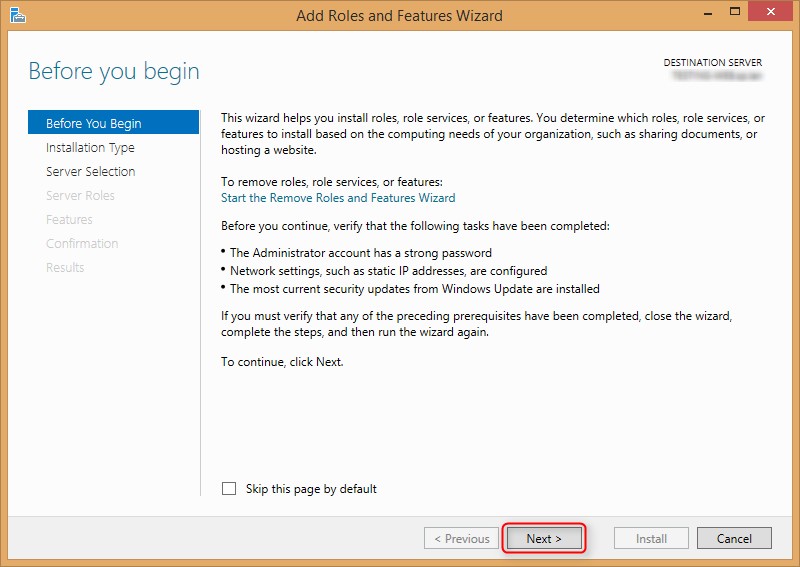
Click Next, and make sure the Role-based or feature-based installation is selected:
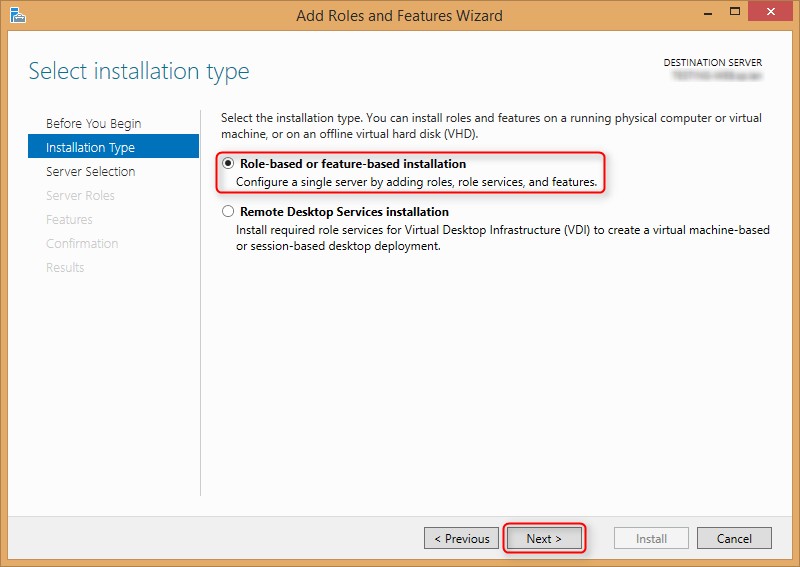
Click Next, and then select the relevant server:

Select Web Server (IIS):
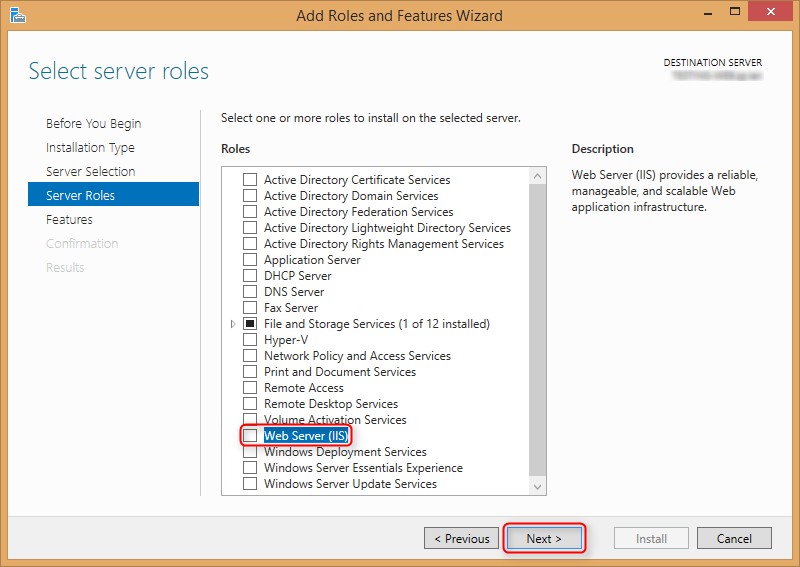
A window should pop up asking if you would like to install the IIS Management Console:
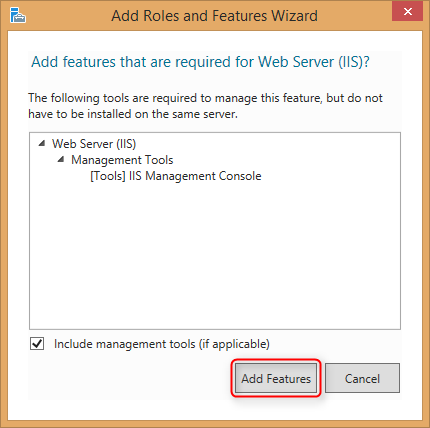
Select Add Features, and then click Next on the previous window:
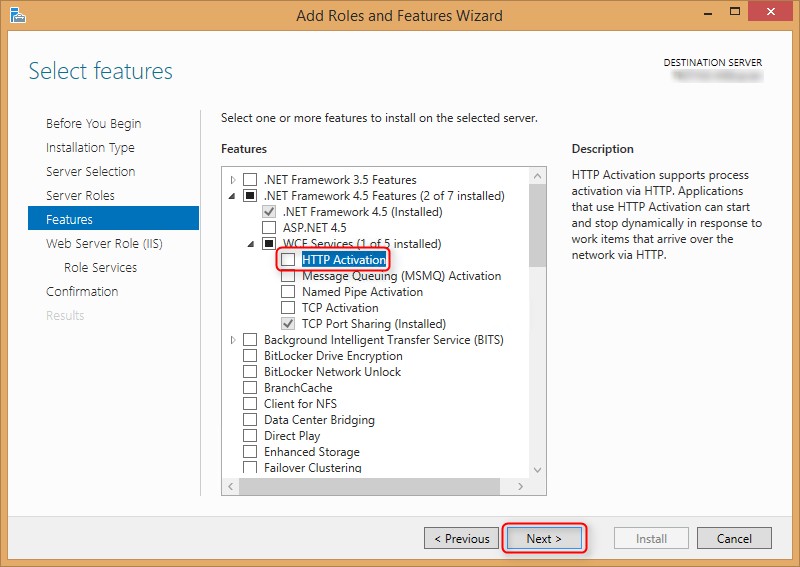
Select .NET Framework 4.5 Features > WCF Services > Http Activation.
(HTTP Activation is required in order to run HTTP Windows Communication Foundation (WCF) services.)
A window should pop up notifying you that additional features are required:
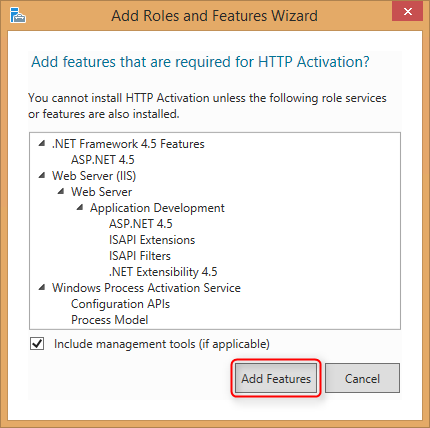
Select Add Features, and then click Next on the previous window. Then click Next through the Web Server Role (IIS) pages, and click Install on the Confirmation page:
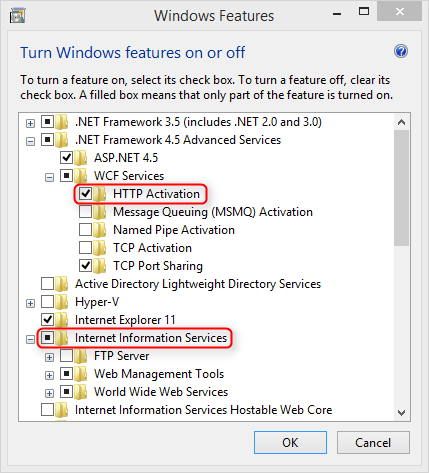
For Windows 8, turn on Internet Information Services, as well as .NET Framework 4.5 Advanced Services > WCF Services > HTTP Activation (if they are not already enabled):
(HTTP Activation is required in order to run HTTP Windows Communication Foundation (WCF) services.)
SalesPad Web API
Your contact at SalesPad should have provided you with a Windows Installer file named SalesPad.GP.RESTv3.Setup.XXXX.msi. Please double-click this file to begin the installation process:
Click Next, then read and accept the terms of the License Agreement:

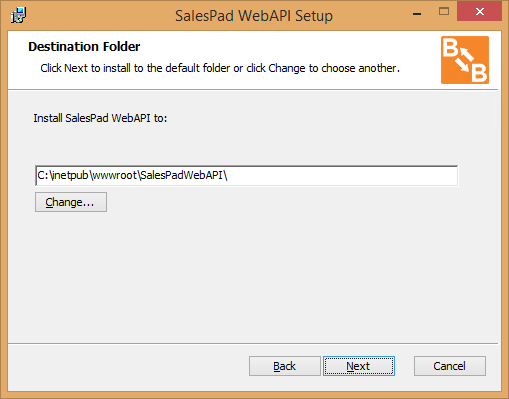
Click Next, and select the folder that you wish to install SalesPad Web API to: (use the default location, unless you have good reason to do otherwise.)
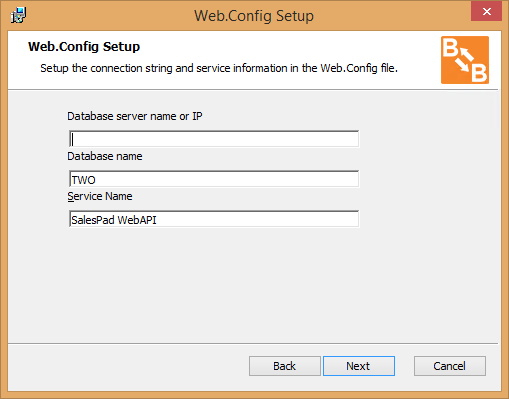
Click Next, and fill in the database information and service name:
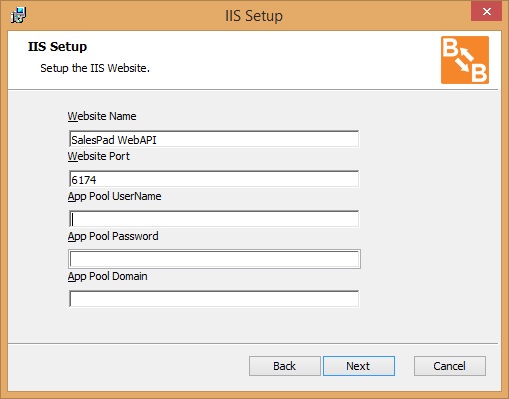
Click Next, then confirm the Website Name and Port. Provide a domain account for the Application Pool to run under.
Note: The domain account must be Windows Authenticated with SQL Server. These credentials will be used to create a secure connection with the database without displaying plain text username and password in the web.config.
Note: If you plan to host the SalesPad WebPortal on the same server as the API, you will want to reserve the default port 80 for the WebPortal (unless the API is located in a subdirectory).
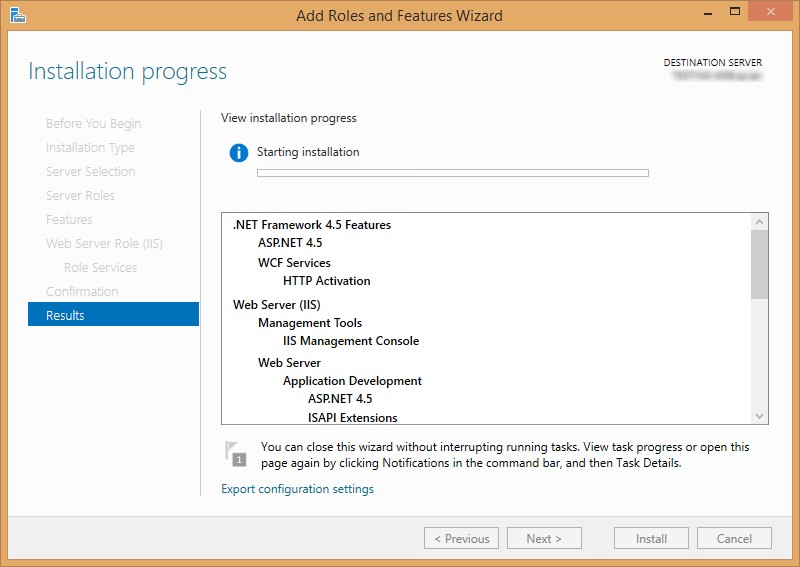
Click Next. Now you are ready to begin installation:
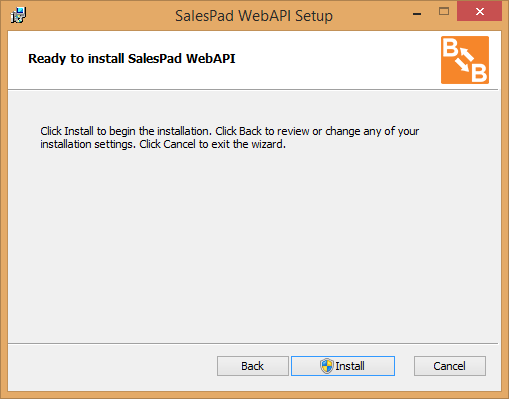
Click Install when ready, and SalesPad WebAPI will begin installing. During the installation, you may be presented with a User Account Control screen similar to the following:
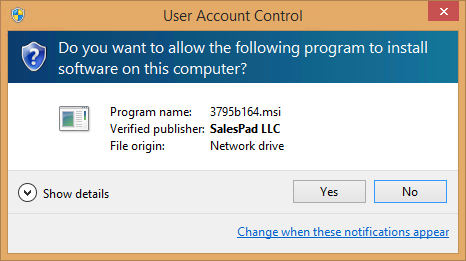
Click Yes to continue with the installation, then click Finish.
Database Update
Open Internet Information Services Manager (IIS); you should see the SalesPad WebAPI site installed as shown below.
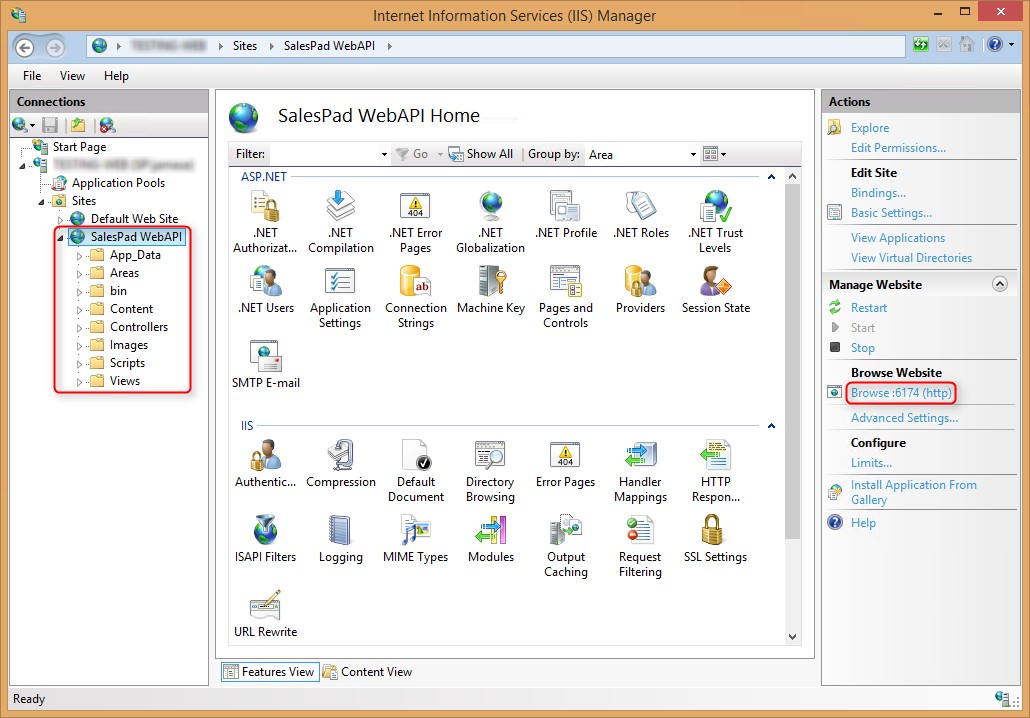
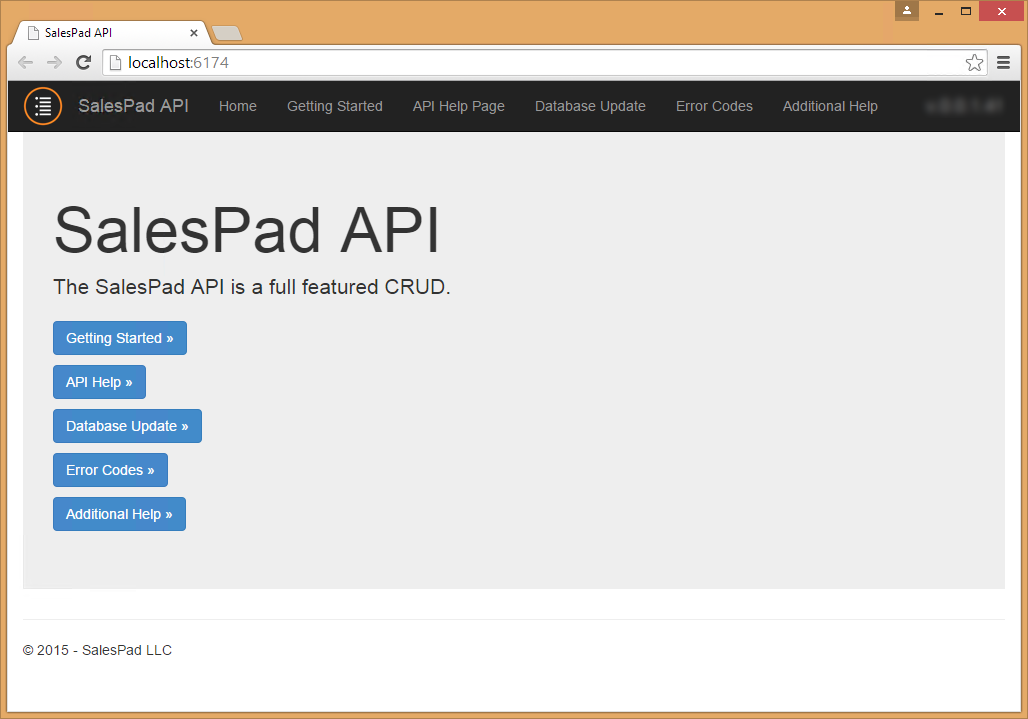
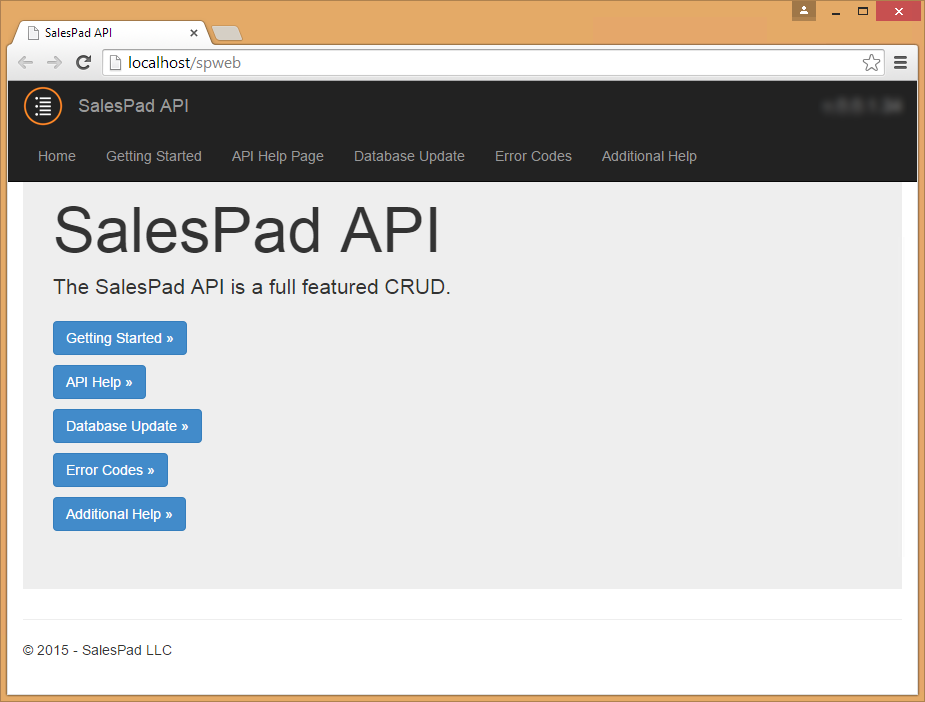
With SalesPad WebAPI selected, click on the Browse:6174 (http) link to pull up the homepage for the Web API:
(If you get 503 Service Unavailable, try performing the steps listed in the troubleshooting section for 503 Errors.)
Click on the Database Update link:
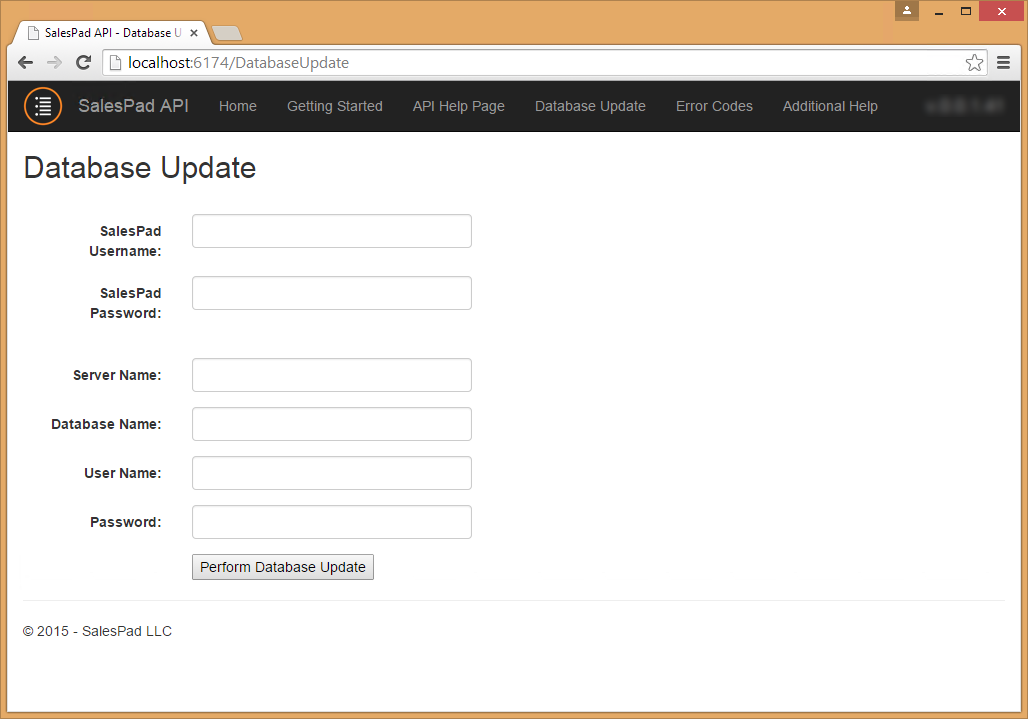
Fill in your information, and click Perform Database Update.
Note: As part of the first-time database update, Administrator permissions will be granted to the User Group of the SalesPad user whose credentials are provided. (The database information given should typically be the same as what you provided during the installation process, unless you have reason to do otherwise.)
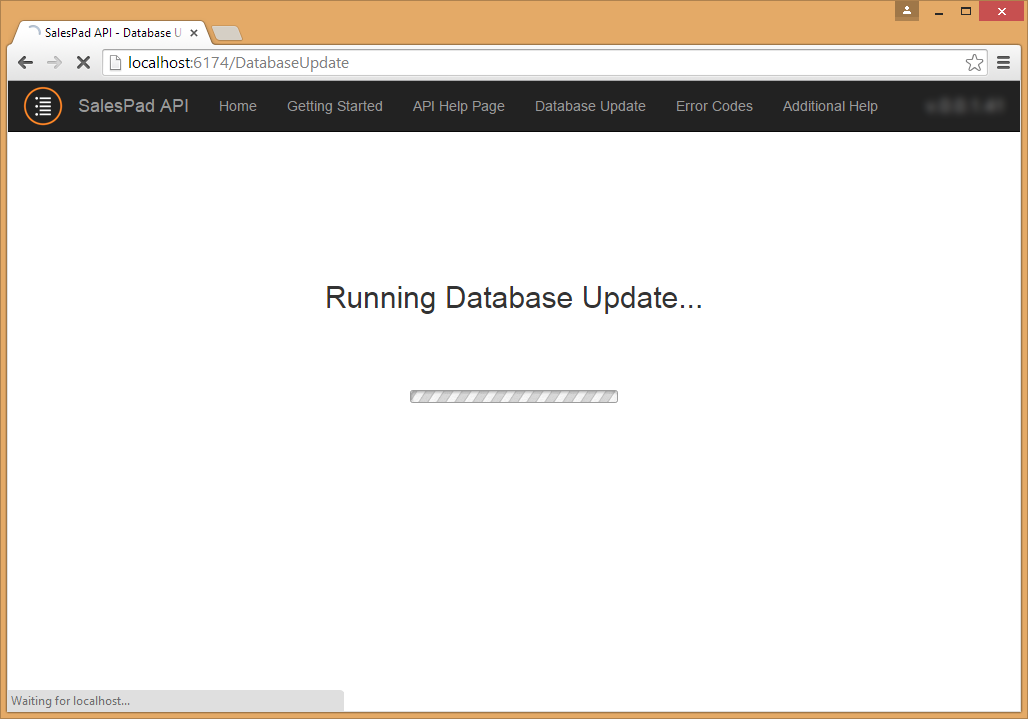
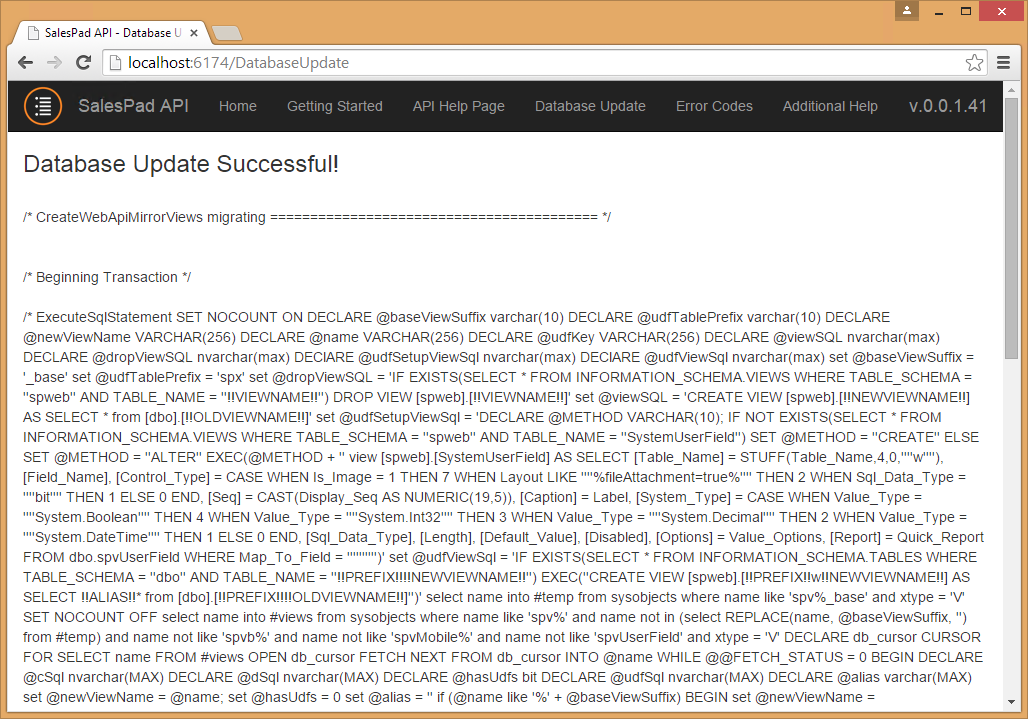
When finished, you should see a “Database Update Successful!” message similar to the following:
Web API Custom/Extended Modules
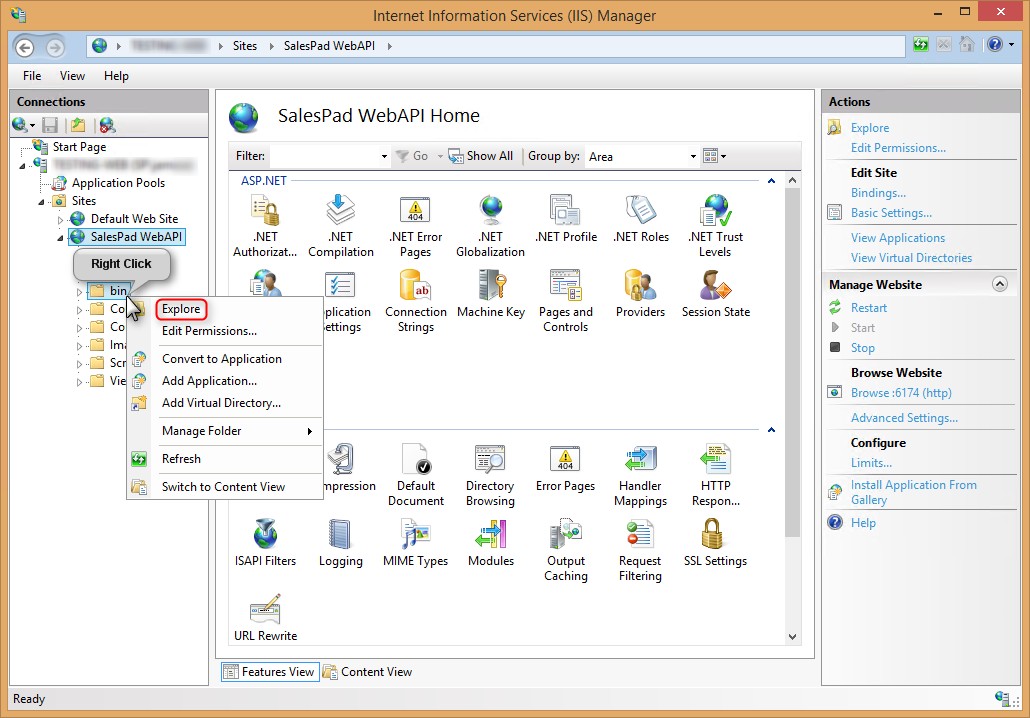
If your SalesPad contact has provided you with Custom or Extended modules, you will need to install these modules by copying the .dll files into the \bin folder of the Web API site. If you were provided with .zip files, begin by extracting the files. (Each .zip should contain one .dll file.)
In IIS, right click on the bin folder of the SalesPad WebAPI site, and select Explore:
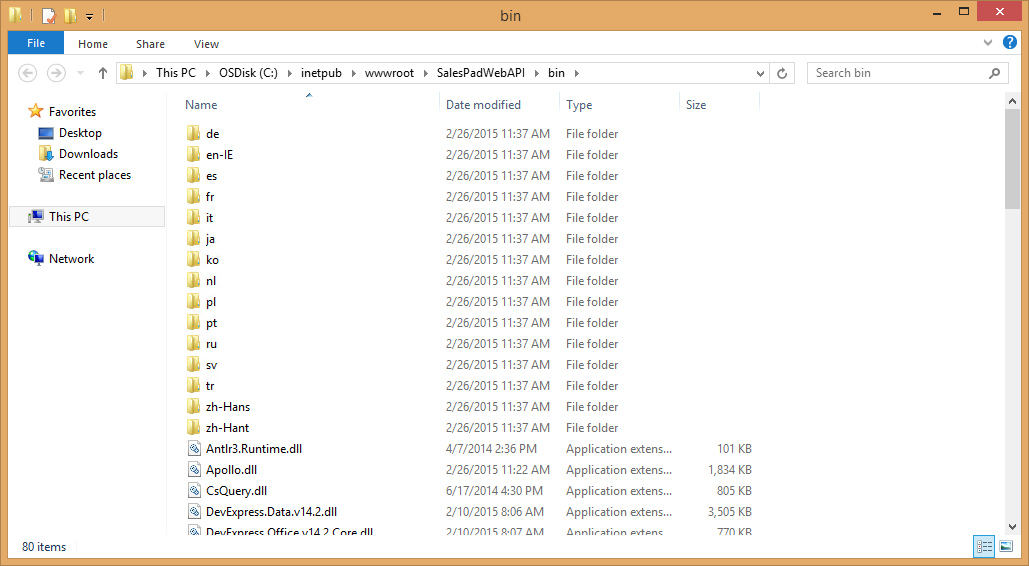
This will bring up a file explorer opened to the \bin directory. Paste the .dll file(s) provided into this directory:
Lastly, restart the site in IIS:
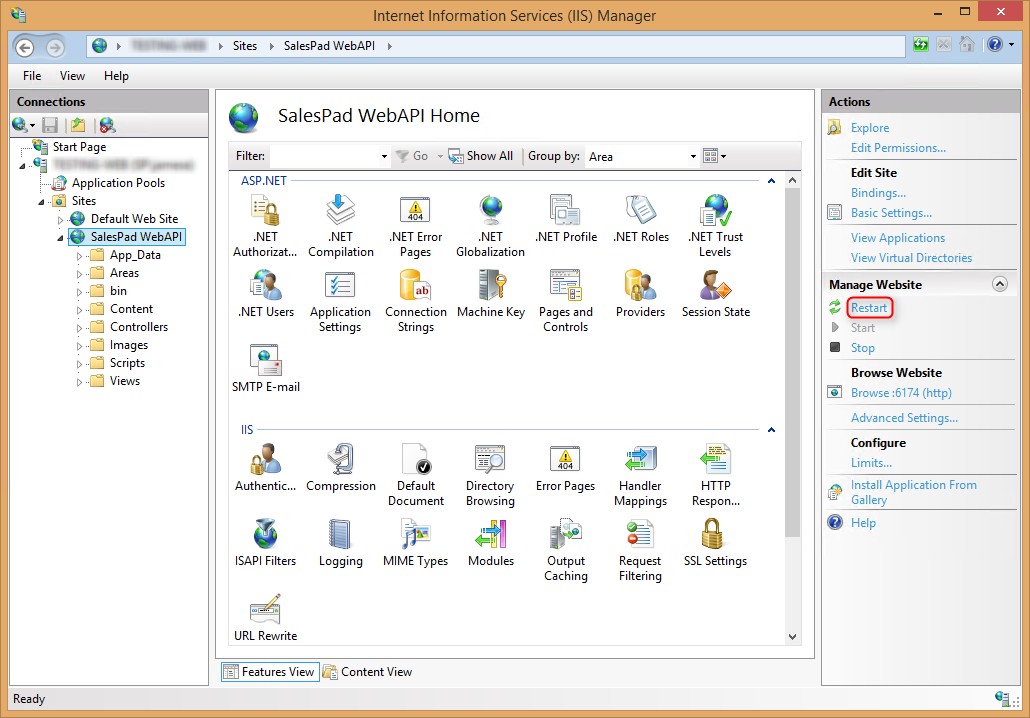
The SalesPad WebAPI should be fully functional at this point. If doing custom development against the SalesPad WebAPI, visit the “Getting Started” and “API Help Page” links, as well as WebAPI Example Usage Documentation for more information. Otherwise, continue reading this document for instructions on how to install the SalesPad WebPortal.
SalesPad Customer Portal (fka WebPortal) Installation
SalesPad is working on an installer for the Customer Portal (fka WebPortal), but for the time being it is a manual process.
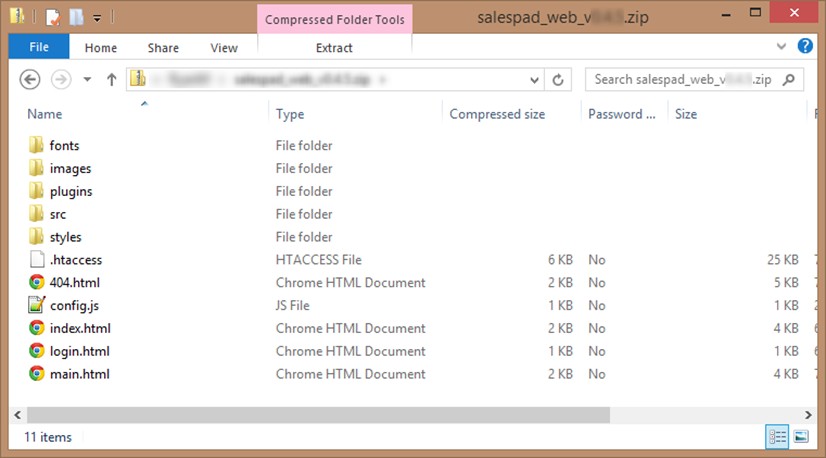
Your SalesPad contact should have provided you with a .zip file containing the Customer Portal (fka WebPortal) files. Please extract the .zip file into C:\inetpub\wwwroot\SalesPadWebPortal (create the SalesPadWebPortal directory as needed).
Open the file editor of your choice in Administrator mode, then browse to and open config.js:
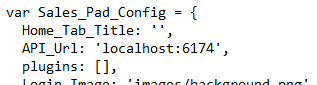
Set the API_Url to the location of the SalesPad WebAPI previously installed. In our case, it would be localhost:6174.
So the entire line should look like this: 
At this point, you may also edit the Login_Image (the home-page background image) to one of your choice. (If you do so, don’t forget to add the image file to the appropriate directory! A relative filepath is used.)
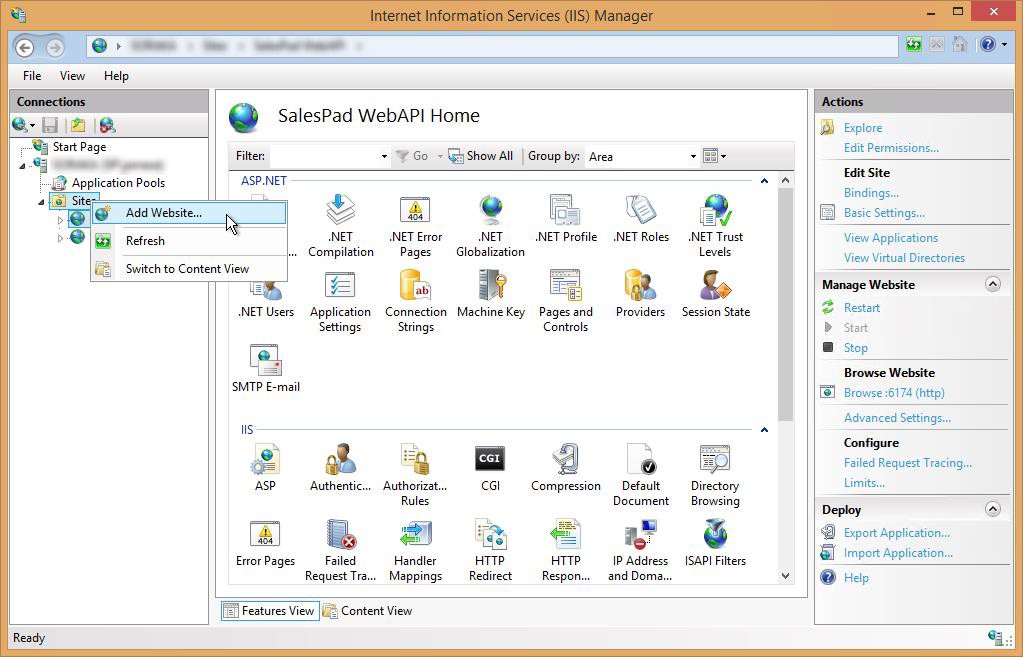
The site files are now in place, and we need to create the site in IIS next. In IIS, right click on Sites and select Add Website…
In the Add Website dialog that pops up, enter the following information: Site name: SalesPad WebPortal
Physical path: %SystemDrive%\inetpub\wwwroot\SalesPadWebPortal
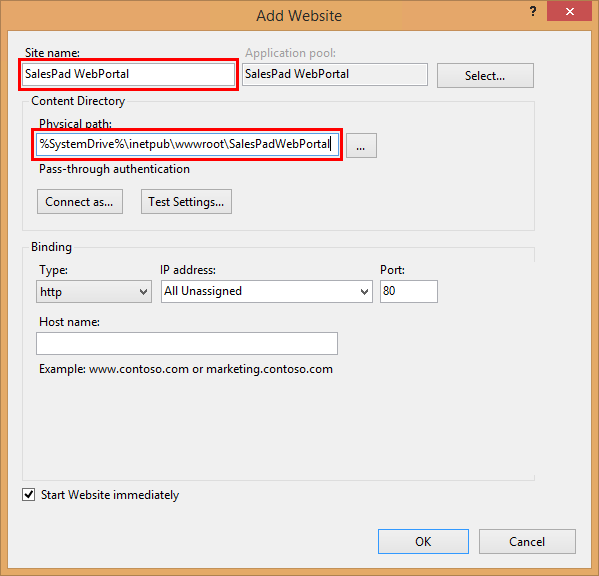
Click OK. You should see the following popup:
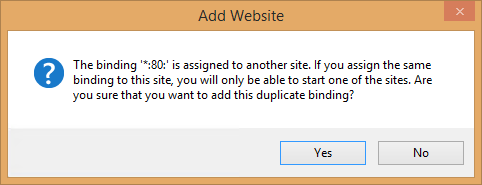
Since the Default Web Site is already running on port 80, it will conflict with our new site. (Port 80 is the default http port, meaning that when you type in an http web address, you don’t have to specify port, since it will default to port 80. The default https port is 443, so once your SSL certificate is installed, we will want to reserve this port instead.)
We have two options (and recommend the first):
- Click Yes, then change the Default Web Site by one of the following methods:
- Stopping the site (recommended)
- Deleting the site
- Changing the site binding to something other than port 80.
- Click No, then change the Port number for Web Portal to an unused port number. This will require you to specify port number when typing in the site.
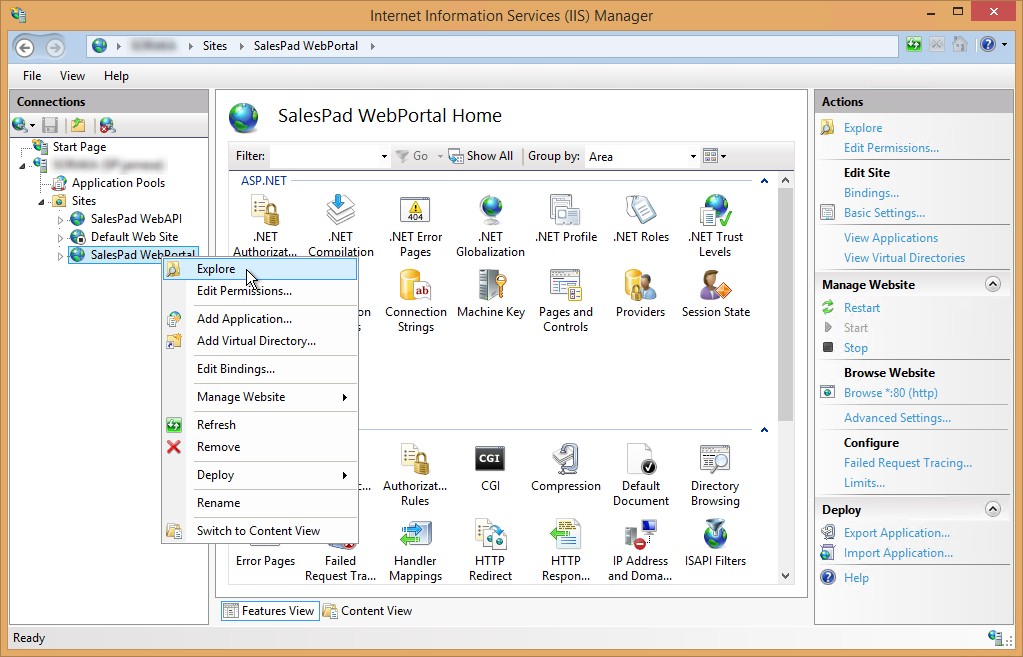
After selecting and completing an above option, right-click on the SalesPad WebPortal site, and select Explore:
A file explorer should pop up, opened to your created directory (C:\inetpub\wwwroot\SalesPadWebPortal). If instead you see the following error:
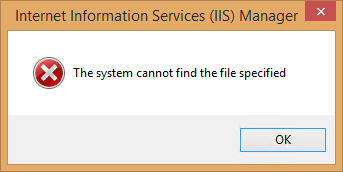
a filepath is incorrect in your setup. Please double check and confirm file paths. You can delete the site and start over, or edit its Physical Path in Advanced Settings.
Close the file explorer as needed.
URL Rewrite
If you have not already downloaded and installed the URL Rewrite 2.0 Extension for IIS, please do so now: http://www.iis.net/downloads/microsoft/url-rewrite
(URL Rewrite is required because the SalesPad WebPortal uses HTML5 routing. This enables the application to serve multiple pages from the same file – essentially, every link is redirected to the home page, and then uses JavaScript to load the appropriate forms.)
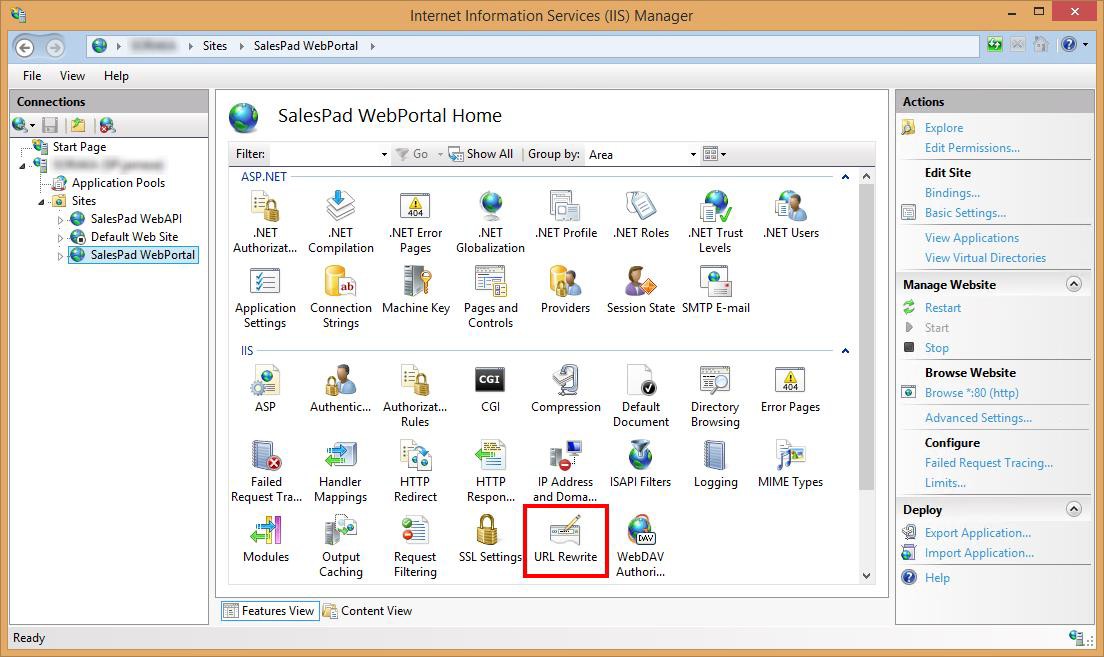
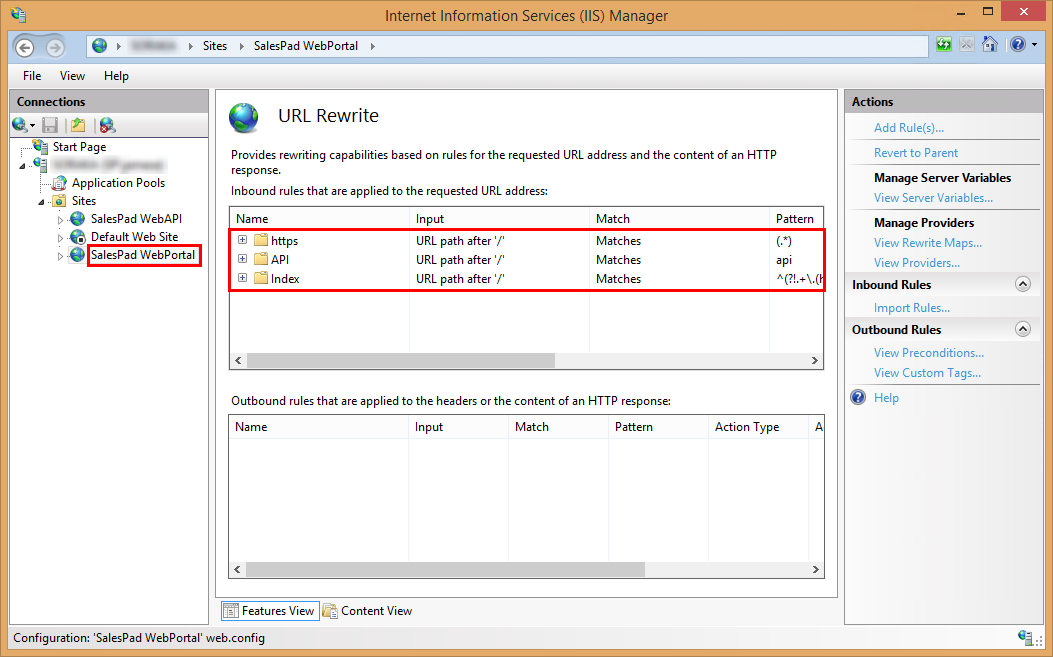
Close and reopen IIS, then you should be able to see the URL Rewrite Extension as shown below:
SalesPad Web Portal uses three URL Rewrite Rules:
- https – this rule redirects any http requests to use https.
- API – this rule allows all requests to the API to bypass the Index rule.
- Index – this handles the routing for the different pages in the application.
Making sure that you have the SalesPad WebPortal selected, double-click on the URL Rewrite Extension. You should see the following three rules:
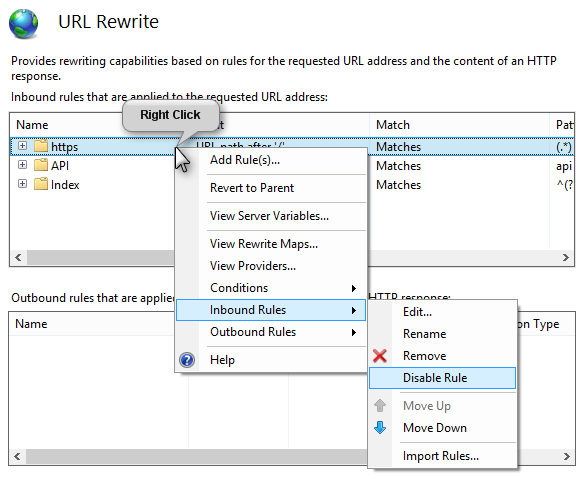
If you do not want to run over SSL you may disable the ‘https’ rule. This is not recommended, but may be useful for testing if you do not have your SSL certificate yet.
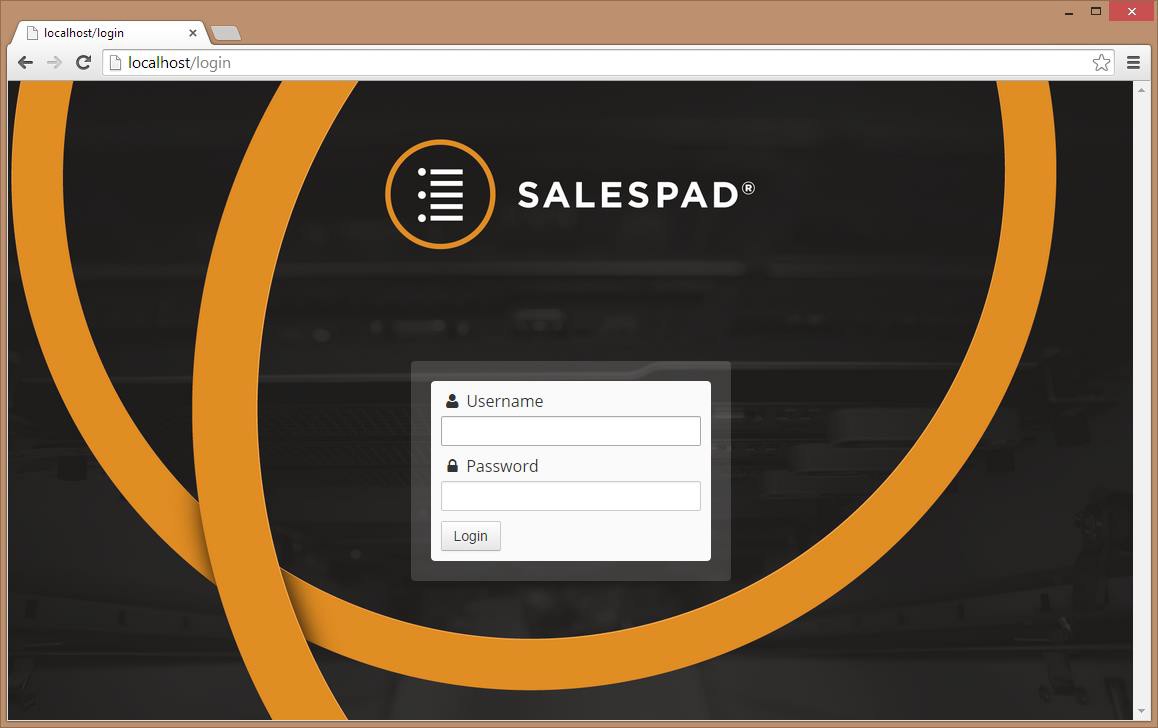
In IIS, with SalesPad WebPortal selected, select Restart, then browse *:80 (http).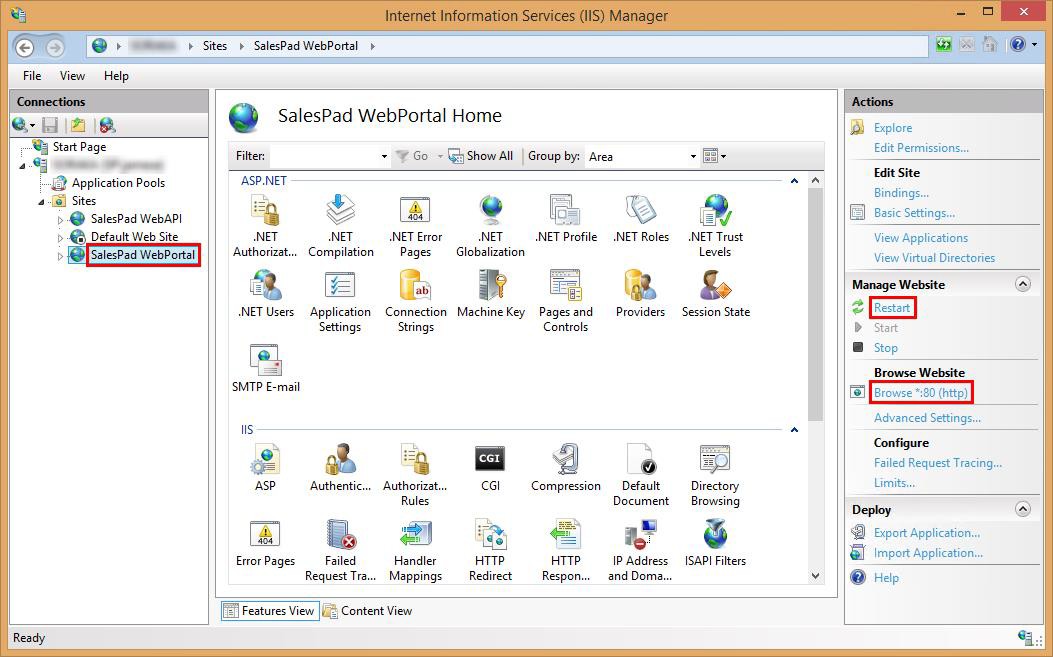
Congratulations! You’ve just installed the SalesPad Web API and the SalesPad WebPortal. You may now log in with SalesPad credentials from the SalesPad group that the Web API database updated was performed for. (All other groups will not have any permissions set up yet – see Permissions Setup for more information on this.)
SalesPad WebPortal Permissions
Groups
Permissions
As mentioned in the Overview, SalesPad Web API and Portal allow permissions to be set all the way down to the object’s properties level.
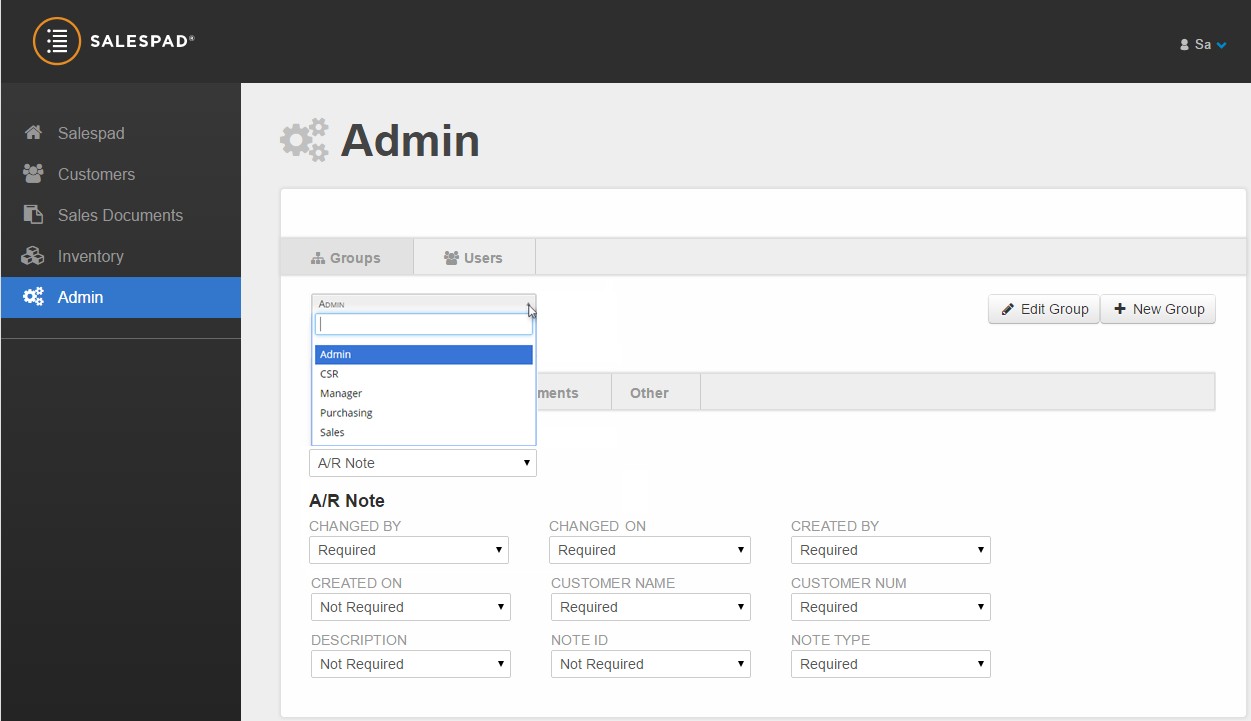
After logging in, select the Admin tab from the left, then select the group that you would like to configure permissions for:
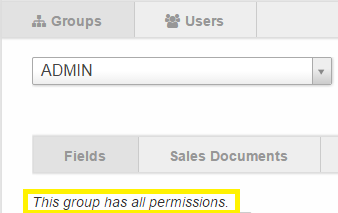
If you are in a group that has Administrator privileges, you will notice that under the permissions tab, there is a message stating that this group has all permissions.
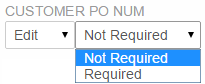
Note that for Sales Documents only, you may mark properties as required, by selecting the Not Required / Required dropdowns options as following. Marking properties Required means that you may not transfer a document before entering information into those fields. (It does not stop the document from saving)
For groups without admin permissions, there is a dropdown under the Fields tab which allows you to select the object to configure permissions for:
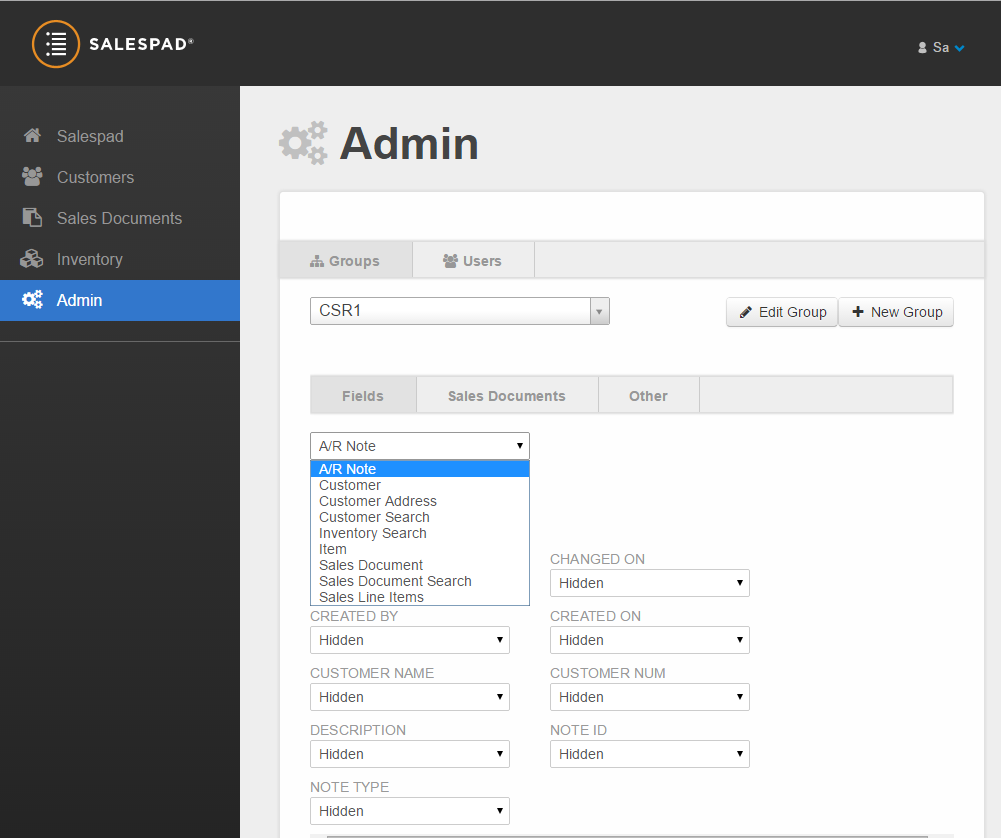
Most properties will have three levels of security: Hidden, View, and Edit:
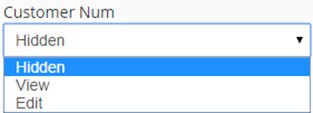
These security levels behave exactly as one would expect:
- Hidden: Users belonging to the selected group will not be able to see the property at all.
- View: Users belonging to the selected group will be able to view (but not update) the property.
- Edit: Users belonging to the selected group will be able to view and update the property.
(When a Sales Document property is marked Edit, the Required / Not Required options will be available, as previously shown.)
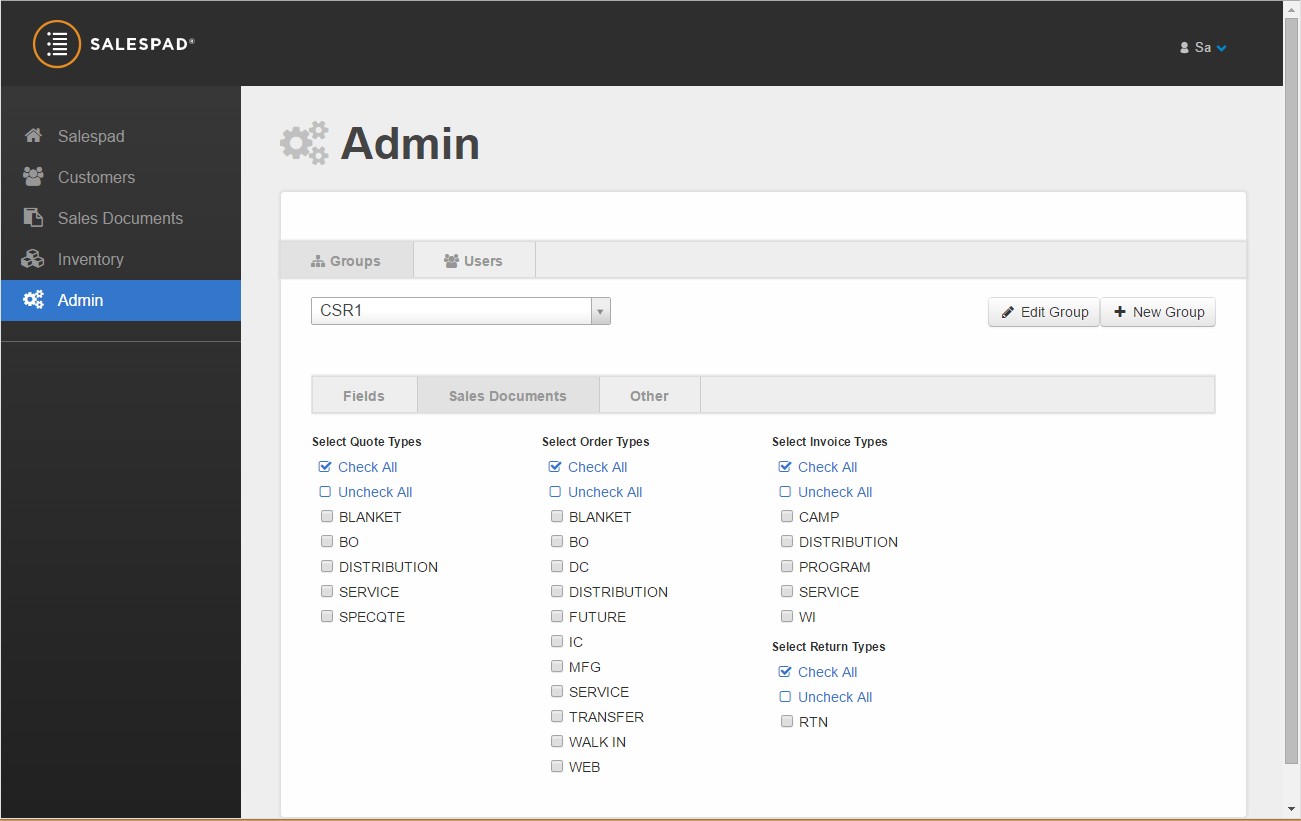
Sales Documents
The Sales Documents tab configures what types of documents are available per security group. Simply check the types of documents that you wish to be available for the selected security group.
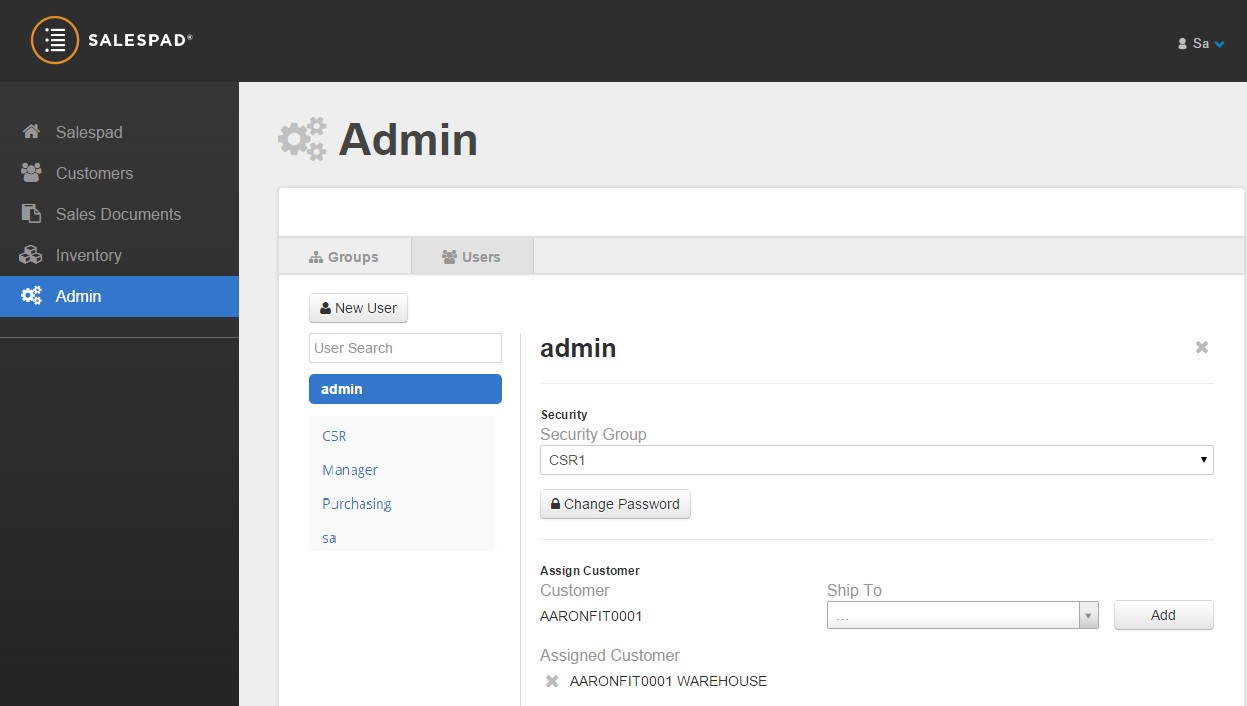
Users
Under the Users tab, you can:
- Create new users
- Change security group of users
- Change user passwords
- Assign specific Customer/ShipTo address combinations to users
SalesPad WebPortal Skinning
Open a file explorer and navigate to C:\inetpub\wwwroot\SalesPadWebPortal\styles\custom-theme.css
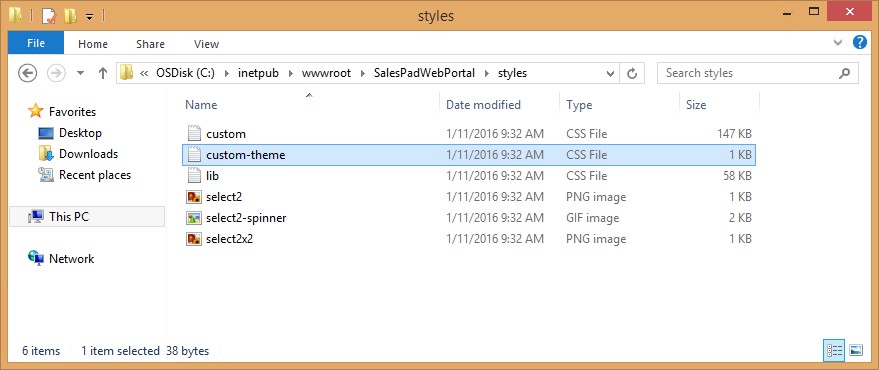 Open the custom-theme.css file in an editor of your choice. Here you can add CSS to modify the look and feel of the site. Any CSS that you place in this file will override anything in the main custom.css file.
Note: Do not edit the custom.css file! If this is too advanced for you, please get in touch with your SalesPad contact to have custom CSS created for you.
SalesPad WebAPI Troubleshooting
403 Forbidden
If instead of the API homepage, you get a 403 Forbidden:

This likely means that you are not on the machine that the API was installed to. The API webpages are only available to local requests. Note that API requests may still be passed through; only the viewable help pages are disabled.
503 Service Unavailable
If instead of the API homepage, you get a 503 Service Unavailable:
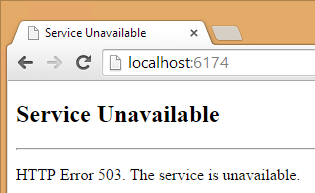
Confirm that the Application Pool for the site is started. If it is not, attempt to start it manually. Browse to the site again. If you still are receiving a 503 error, try confirming that the Application Pool Identity is correct:
- Right-click on the Application Pool > Advanced Settings.
- Under Process Model > Identity, click on the ellipsis next to the Identity Name. Confirm that Custom Account is selected, then click the Set button.
- Enter your domain\username and password, then click OK. (This screen will confirm that your credentials are correct, where the installer does not. Invalid credentials can cause the Application Pool to crash.)
Making SalesPad WebPortal Available Externally
Note: Setting up domain names, port-forwards, firewall changes, etc. are the client responsibility, and will not be performed by SalesPad.
To reduce the load on your server, the SalesPad WebPortal is designed to offload some processing to the client machine. To accomplish this, the WebAPI needs to be available externally to respond to requests coming from the client. We can open two ports for both the Front End and the WebAPI, but it can be advantageous to only require one port be opened. We can accomplish this by using a virtual directory for the WebAPI so that both services can be accessed through the same port.
Note: At the end of these steps, make sure to update the API_URL in WebPortal config.js to point to the correct location.
If you have used ‘localhost’ as in this demo, you will need to change this to the IP Address / Name of the server the SalesPad WebAPI is installed on.
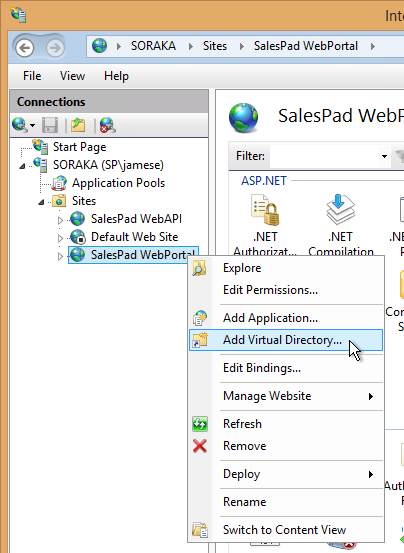
To use a single port for both services, right-click on the Default Web Site and select Add Virtual Directory:
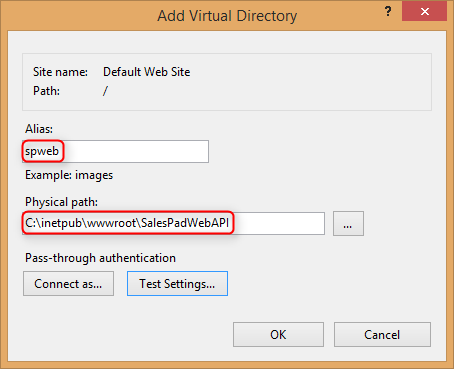
Give the virtual directory an alias. For our example, we are using spweb, but you can use whatever you wish. In our case, this means that the SalesPad WebAPI will be available at localhost/spweb, and requests should be sent to localhost/spweb/api/xxxx.
Select the Physical path by browsing to the root directory of the WebAPI installation:
After selecting OK, right-click on the virtual directory that was just created, and select Convert to Application:
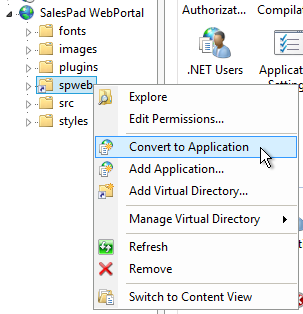
For the Application pool, select the SalesPad WebAPI application pool that was created from the WebAPI installation:
After this, the SalesPad WebAPI should be available from localhost/spweb on port 80, which means you only have to open port 80 in order to make the WebPortal available externally, and also allow API requests to go through. (Note that no changes are needed in order to run over https – see below for more details.)
Again, make sure to update API_URL in config.js to point to the appropriate API location.
Https / SSL
Note: Obtaining and maintaining an SSL Certificate is the responsibility of the client. SalesPad does not recommend any specific SSL provider, and is not responsible for the legitimacy of the SSL Certificate.
Note: You will need to open port 443 in order to allow external access over SSL.
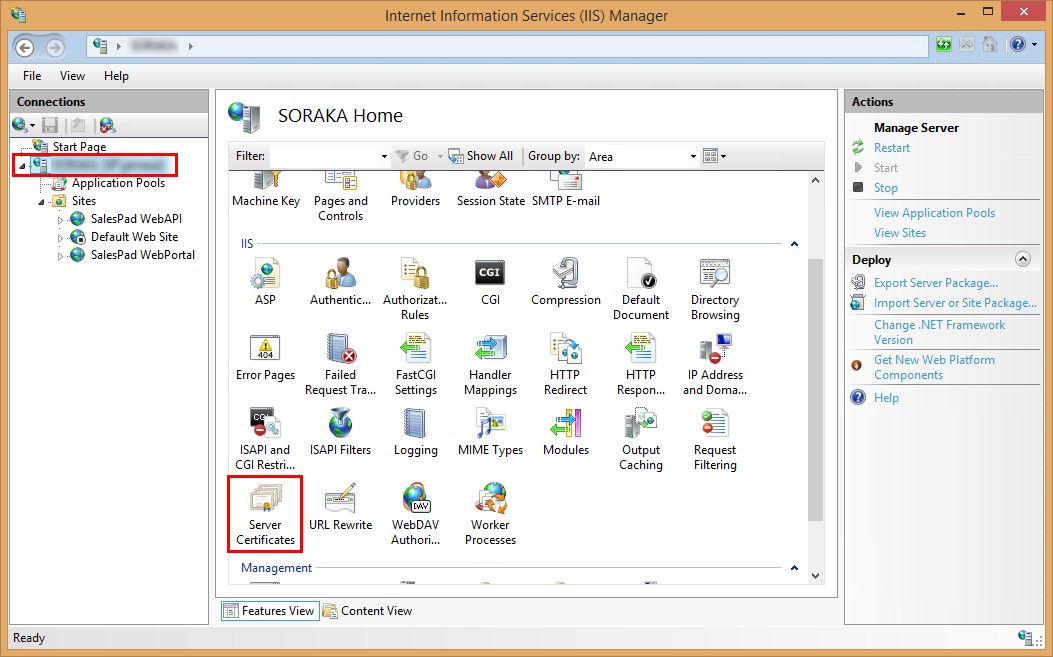
Make sure your SSL certificate is installed in IIS: (see Import a Server Certificate for help)
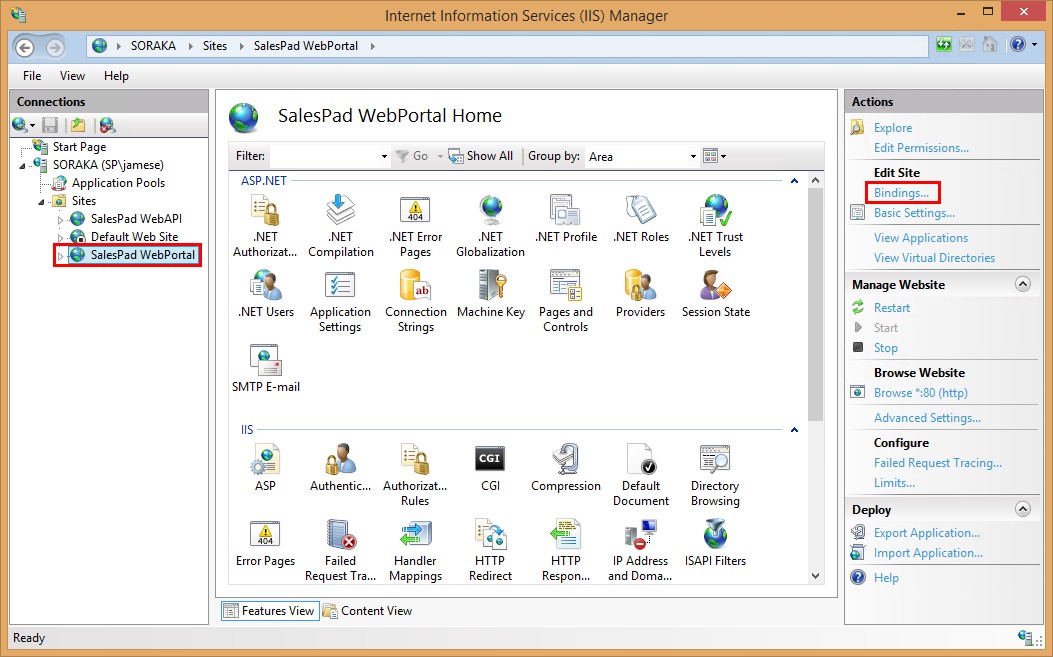
Next, click on SalesPad WebPortal, then click Bindings…
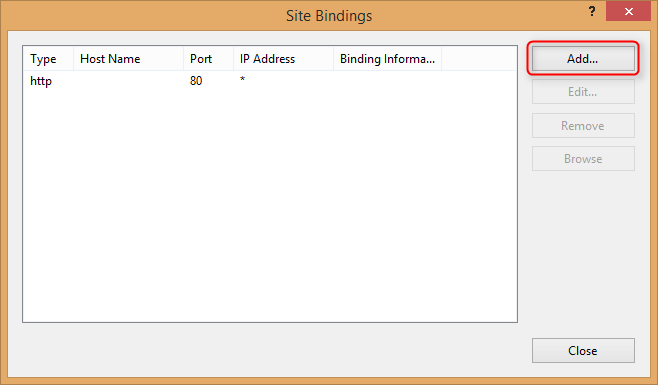
Click Add…
Click on the Type dropdown, and select https:
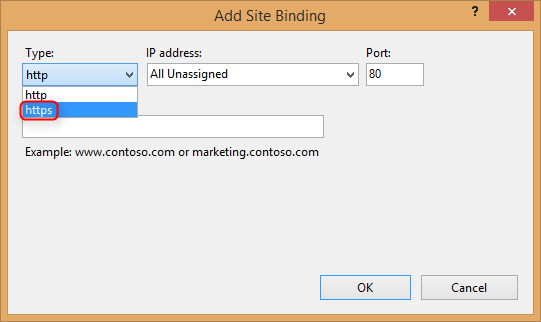
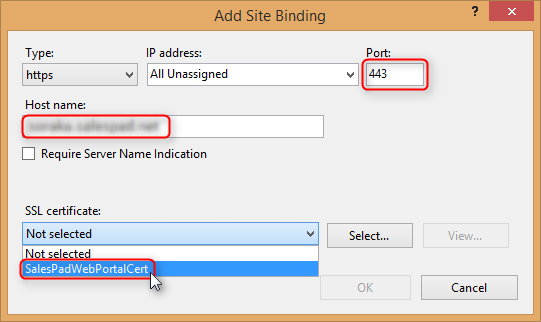
Selecting https should automatically set the Port to 443. Type in your Host name, and select your SSL certificate from the dropdown:
If you have disabled the ‘https’ rule in URL Rewrite, re-enable the rule now.
Restart the Default Web Site.
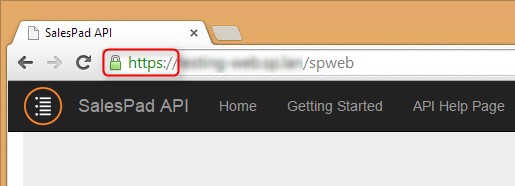
Now when you browse to the site (the actual site name, not localhost), you should see the lock symbol signifying that your website is trusted, secured, and running over SSL:

Since the SalesPad API is now running as a subdirectory of the main site, it will inherit the bindings of the main site and will also be running over SSL:
If the site is running over SSL, it will automatically make API requests with https; no further changes should be necessary.
SalesPad Support
Comments