Initially created for SalesPad Desktop, Sales Entry Quick Pick is a module that provides the user with a faster and more customizable way to add items to a Sales Document. This article will cover the steps required in order to add ‘Quick Pick’ functionality to CustomerPortal (formerly Web Portal).
For installation in CustomerPortal, you will need the following 3 files. To access these files, please submit a support ticket to support@cavallo.com with your CustomerPortal version number.
- SalesPad.GP.Restv3.QuickPick
- SalesPad.GP.Restv3.QuickPick.Bus
- Item_Catalog.zip
-
Before beginning, Quick Pick must first be configured in SalesPad Desktop. Here is documentation covering the initial setup in Desktop.
-
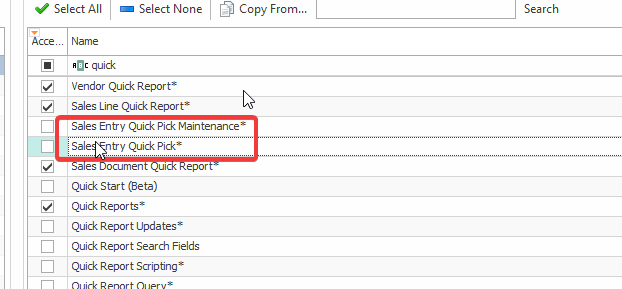
You’ll need to enable Sales Entry Quick Pick and Sales Entry Quick Pick Maintenance in Security Editor.
-
-
To begin the installation in Customer Portal, extract the 2 Quick Pick dll files, and add them to the /bin folder for the Customer Portal website running in IIS.
-
The Web API Custom/Extended Modules section of our WebPortal documentation here explains how to add them to the /bin folder.
-
- Next, it's time to install the Item_Catalog.zip folder.
- Extract the folder and place it into the plugin folder of the IIS site, typically found in this path: SalesPad WebPortal\plugins
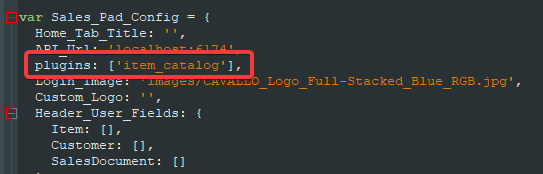
- In the root folder of the site, the Web.config file must be edited to include the newly added plugin as seen below.
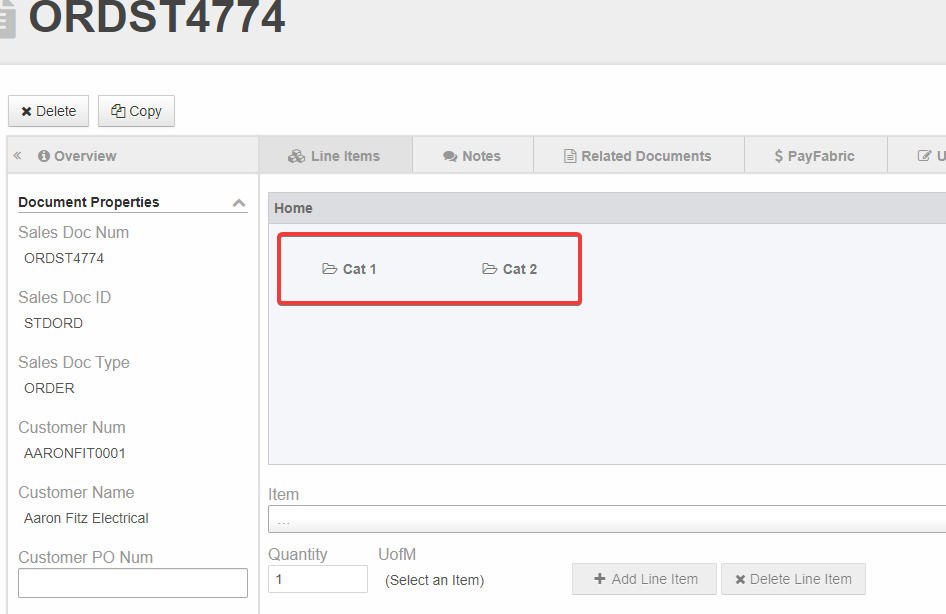
4. Once saved, recycle the application pool in IIS and restart the CustomerPortal site. Users must clear their web browser's cache in order to see the new plugin in CustomerPortal. If it worked, users will see the quick pick folders they configured in Desktop.
Jacob Beimers
Comments