Overview
This guide is intended to provide details on configuring SalesPad users and groups, and configuring Dynamics™ GP to work properly with SalesPad.
Users and groups are set up in SalesPad in the Security Editor module. Security access and many SalesPad options are defined at a group level. Individual users are then assigned to groups. (SalesPad also allows administrators to set system--wide defaults that apply to all users, in the Settings module. Refer to the SalesPad Settings Guide for details.)
To access the Security Editor, go to Modules > Security Editor from the SalesPad toolbar.
Adding a User Group
Permissions within SalesPad are specified at a group level. No groups exist in SalesPad by default; they must be created. Once a group is created, it may be copied and modified to create additional groups.
Examples of groups:
- Sales
- Customer Service
- Management
- Tech/Admin (usually given access to all the entire system for tech--support purposes)
To add a new group:
- Click the New Group button in the Groups column
- Enter a Group Name in the screen that appears
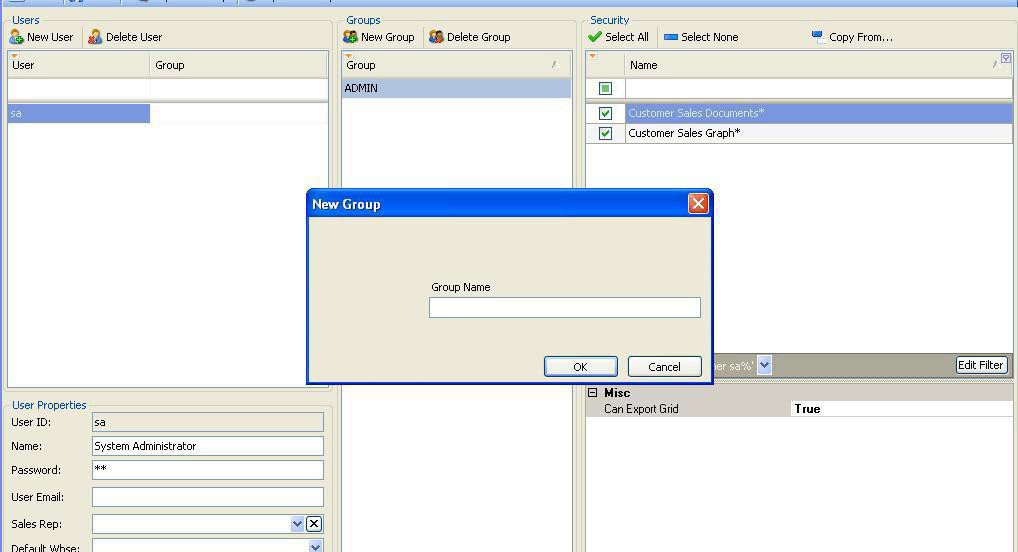
- Click OK
After the group is created, it will be visible in the Groups column.
With a group selected, you can select individual items in the Security column (right side of the Security Editor) and enable or disable them using the check boxes. If they have child options, you can modify those settings on the lower part of the column. For example, to hide cost on the Customer Card screen, select that item in the list of screens, and then set the Show Cost option to False. To grant access to all areas of SalesPad, click the Select All button in the Security column.
Adding Users
After groups have been defined, specific users can be created and assigned to the appropriate group.
To create a user:
- Click the New User button in the Users column on the left
- Enter a User Name in the screen that appears
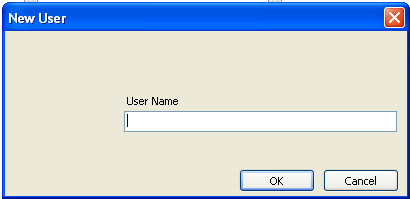
- Click OK. The User Name will be visible in the Users column
Note: If using the Use Windows Credentials option when logging into SalesPad, SalesPad will assume the SalesPad User ID to be the same as the Windows login name, and will attempt to log into SalesPad using that User ID and no password. (See “Adding Users with Windows Authentication for Login” below)
- Fill out the Name and Password fields in User Properties, on the lower part of the Users column
- Select the Security Group for the new user
- Click the Apply button to save changes
Note: The Sales Rep and Default Warehouse fields are used to set default values when creating new sales documents, and are not required.
Click Save on the header to save all security changes that have been made. If you don’t, you will be prompted to save your changes when the screen is closed. You can now log into SalesPad using any of the user accounts just created.
Adding Users with Windows Authentication for Login
To set up a SalesPad user to utilize Windows Authentication for login, you can create a new user with the same User ID as their Windows User ID, without any domain information. For example, SPLLC\natea would simply be “natea.” Otherwise, the setup process is identical to that described above.
SalesPad requires certain options to be properly configured in Dynamics™ GP in order to be fully functional. The following are some specific GP options that relate to SalesPad.
Functional Currency
SalesPad is designed to work with a functional currency from Dynamics™ GP. If the functional currency is not set in GP, SalesPad will not be able to properly save sales documents.
Dynamics™ GP Extender
The SalesPad User Field Editor allows the creation of user defined fields that can be mapped to the standard user defined fields in Dynamics™ GP. However, SalesPad does not support mapping user defined fields to custom fields created with Dynamics™ GP Extender. Mapping SalesPad user fields to fields created with Extender requires customization.
Sales Order Processing Setup Considerations
- (Microsoft Dynamics GP menu > Tools > Setup > Sales > Sales Order Processing)
BACK ORDER BALANCE
Data Entry Defaults > Quantity Shortage > Back Order Balance
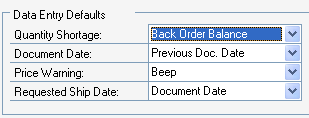
SalesPad is designed to work with backordered quantities on line items. Though not required, SalesPad recommends that Back Order Balance be enabled in Dynamics™ GP.
REQUESTED SHIP DATE
- Data Entry Defaults > Requested Ship Date
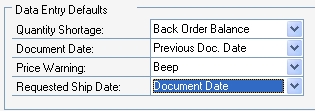
SalesPad does not respect the Requested Ship Date data entry default. Depending on the selected setting in SalesPad, the Requested Ship Date in SalesPad Sales Document Entry defaults to the Document Date or leaves the Requested Ship Date field blank.
BACK ORDER DOCUMENT TYPE
- Sales Document Setup button > Back Order
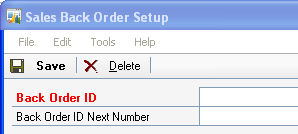
While SalesPad does not support the Sales Back Order Document Type, eConnect does require that a Back Order Document Type be created and configured in Sales Document Setup. This Document Type ID will not be used in SalesPad.
ALLOCATE BY LINE
- Sales Document Setup button > Order > Allocate by:
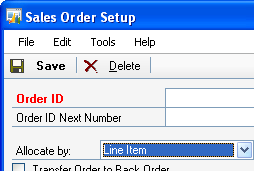
SalesPad only supports allocation by Line Item, and it should be used for all Order and Invoice Document Type IDs.
TRACK MASTER NUMBERS
- Preferences > Track Master Numbers
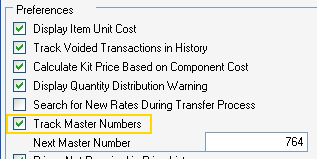
To take advantage of the SalesPad Sales Document Related Documents function, SalesPad requires that Track Master Numbers be enabled.
SALES PROCESS HOLDS
- Sales Document Setup > (any) > Holds button > Selected Process Holds
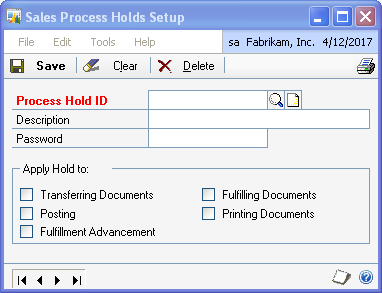
SalesPad Workflow Setup allows users to create Workflow Rules that take advantage of Sales Process Holds created in Dynamics™ GP. SalesPad respects the Printing Documents and Transferring Documents flags for Process Holds but does not respect the following flags: Fulfilling Documents, Posting, and Fulfillment Advancement.
SalesPad Support
Comments