Overview
The Purchasing Advisor allows users to view demand throughout the system, create purchase plans, and generate purchase orders. Demand can be viewed either from backordered items on sales documents (Sales Demand) or from inventory items with quantity below a set reorder point (Reorder Point Demand).
Note: Purchasing Advisor will not show backordered items if you are using Back Order Docs setup in Dynamics GP. You must use backorder balance on sales orders.
Note: Items must have a default unit of measure set in Dynamics GP Purchasing. To set a unit of measure, open Item Maintenance in GP (Cards > Inventory > Item), then click Go To () and select Purchasing. Select a unit of measure from the Default Purchasing U of M field:

Table of Contents
Usage
Demand Summary
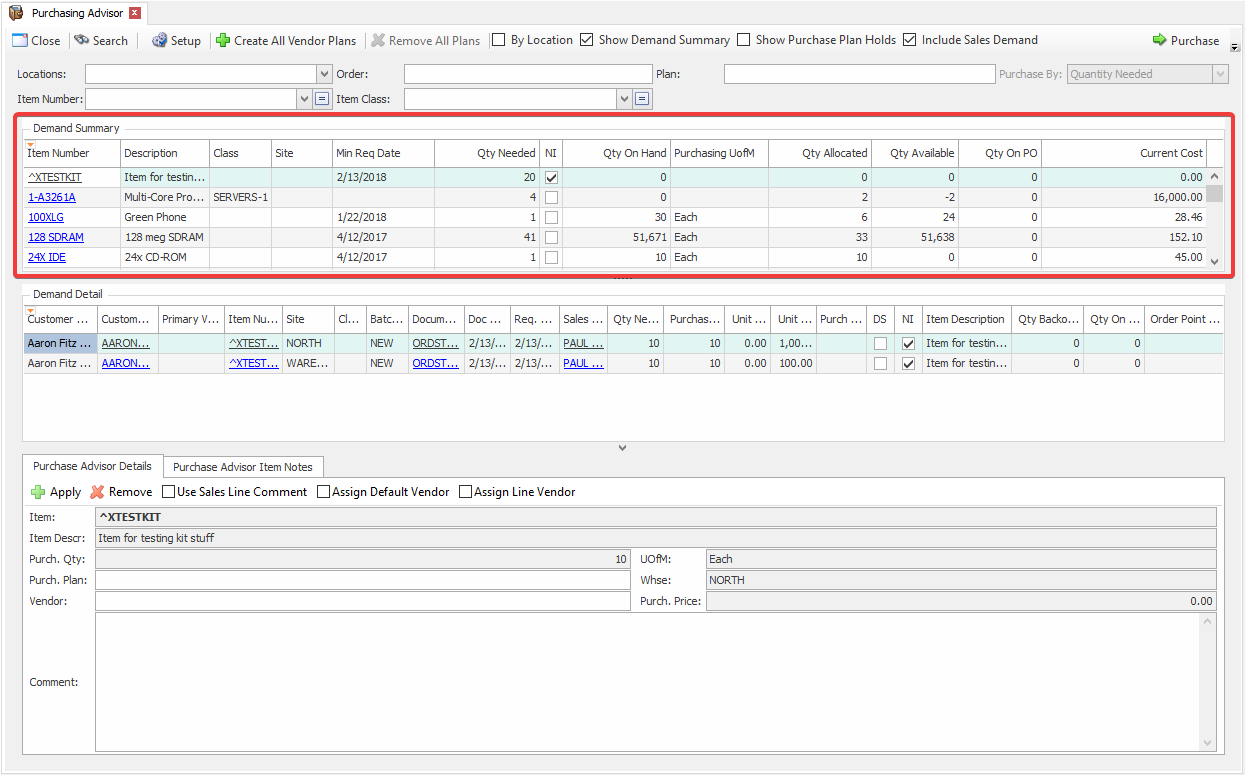
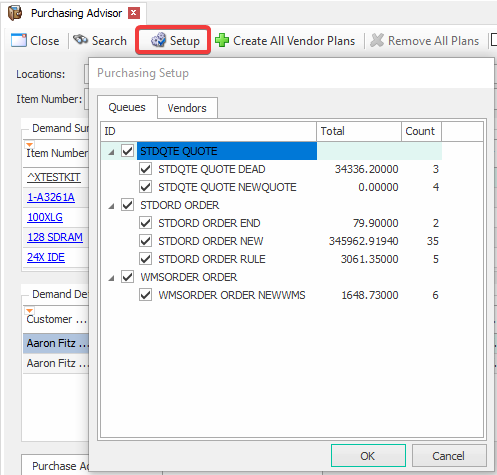
The Demand Summary grid displays items with purchasing demand. Select an item and its details will appear in the Demand Detail grid (if Show Demand Summary is selected). If items you are looking for do not appear on the grid, check that you have the required queue selected in Setup.
You can also select the options that you would like to display on the grid along the top of the Purchasing Advisor.

If you use Include Reorder Pt Demand, select By Location as well, to ensure that items available for multiple warehouses are displayed. Since documents are not relevant for Reorder Point Demand, the Document # column will display Reorder Pt when this option is selected. In this view, Qty Needed is determined by the quantity of an item that would need to be purchased in order to reach the set reorder point (not the Order To level at this time). An item’s reorder point is set on the Item Properties tab in Inventory Lookup.
Include Sales Demand will show items currently on backorder that are not already linked to a purchase order.
Show Demand Summary will display a second grid showing which orders and reorder points are linked to the highlighted item in the Demand Summary.
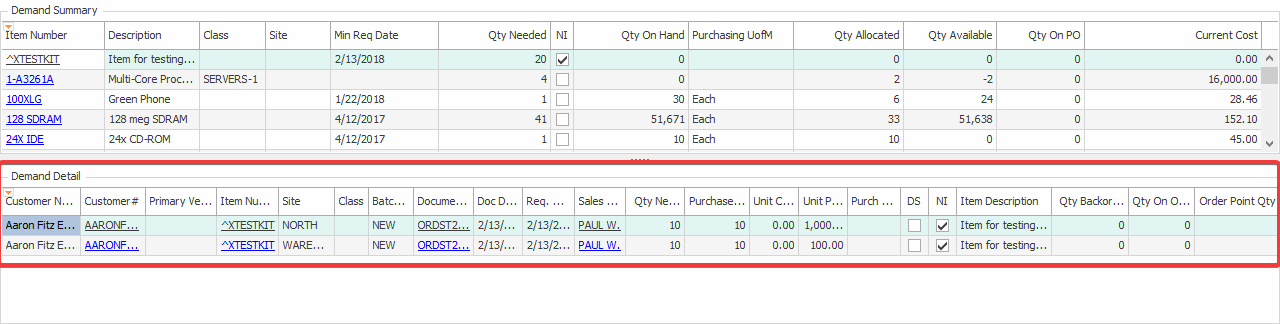
If Show Demand Summary is not selected, the Demand Detail grid will display all items individually, on all orders, without summarizing.
Note: The AMD (Average Monthly Demand in Purchase Unit of Measure) column displays a calculation of 6 months' worth of quantity sold of an item (from posted invoices), divided by 6 months. Newer versions also have an AMD In Base UofM column.
Purchase Advisor Details
The Purchase Advisor Details section (formerly known as the Purchase Planner) allows you to select multiple items to be purchased at one time.
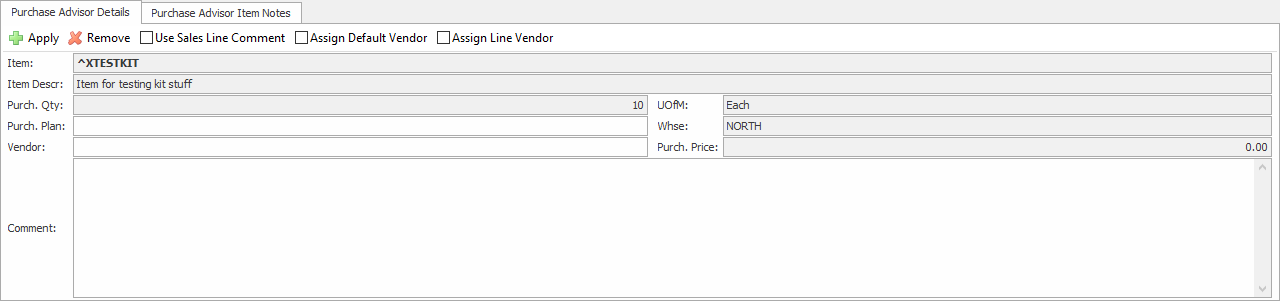
To purchase, you must add items to a purchase plan. First, select all the items to be purchased on the plan. One way to do this is to add the Auto-Filter Row to the grid by selecting it from the orange triangle dropdown on the Demand Detail. Filter by item number and select all so that all needed quantities of the same items are purchased on one plan. To assign different items to different purchase plans, enter the plan name/number in the Purch. Plan field. Purchase Advisor pulls as much information as possible into the Purchase Advisor Details area by accessing item defaults. If the item has a default vendor, purchase price, comments, etc., these will be populated automatically (some can be turned off and on with the Purchase Advisor Details check boxes), but you may make any changes as needed.
You can add notes on an item by switching to the Purchase Advisor Item Notes. Item Notes made here can be seen on the Item Notes tab in Inventory Lookup.
Note: You must click Apply for the Purchase Plan to be assigned. The newly applied purchase plan will appear in the Purch Plan column on the data grid. To remove items from a plan, highlight the item, erase the name from the Purch Plan field in the Purchase Advisor Details section, and click Remove.
Once all purchase selections or item planning is complete, click the Purchase button in the upper right corner. This will open the Choose Purchase Plan Items screen, where all available purchase plans are displayed.
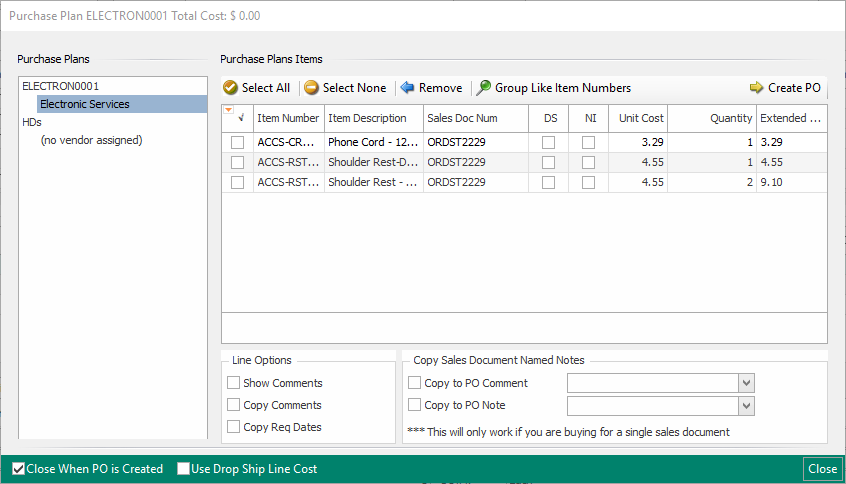
For our example, we will purchase all items under the ELECTRON0001 purchase plan. To do this, highlight the plan named PC on the left, the click Select All under Purchase Plans Items. When all options we want have been set, click Create PO, and the items are then created on a new purchase order document.
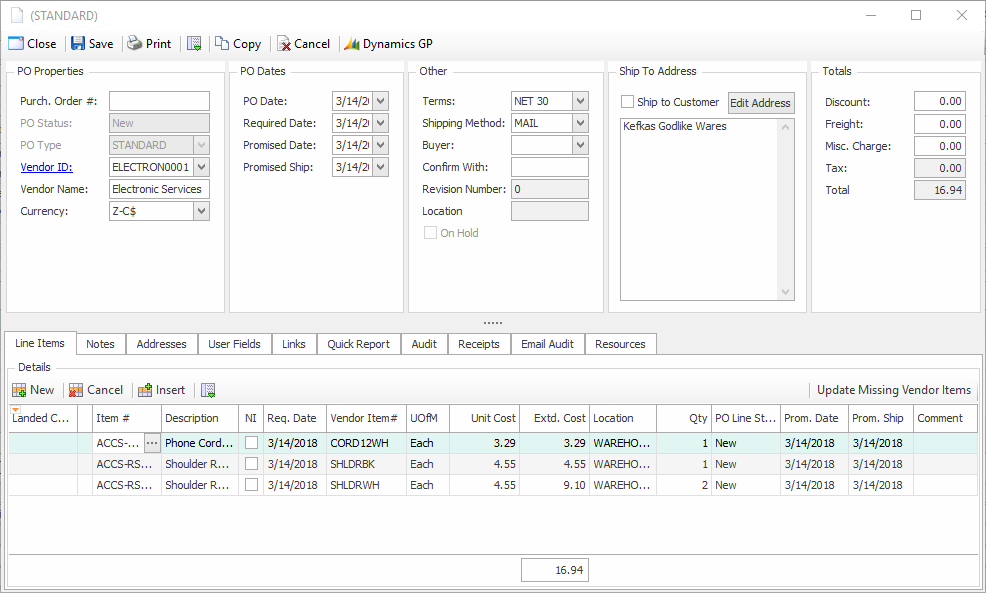
The PO has been created with a Standard Purchase Order doc type. Make any needed changes, then click Save. After the document is created, saved, and closed, you will be brought back to the Purchasing Advisor main window. The associated orders will be linked to each sales document.
Security and Application Settings
Purchasing Advisor – General Security to allow access to the Purchasing Advisor Module.
Choose Purchase Plan* - Security to allow users to access the Choose Purchase Plan window.
Purchasing Setup – Security to allow users to select which workflow queues to pull sales demand information from. Enabling will allow for purchasing in the Purchasing Advisor and creating the SOP to POP link.
Note: Securities with an asterisk (such as Choose Purchase Plan) have sub-securities that are listed in the middle section of the Security field. Sub-security descriptions appear in the bottom section of the field. Review and customize these as desired.
SalesPad Support
Comments