Settings and Security
The Intrastat Entry window must be enabled for each security group that needs access. Check the box next to Sales Line Intrastat Entry to enable for each security group that will be entering orders.

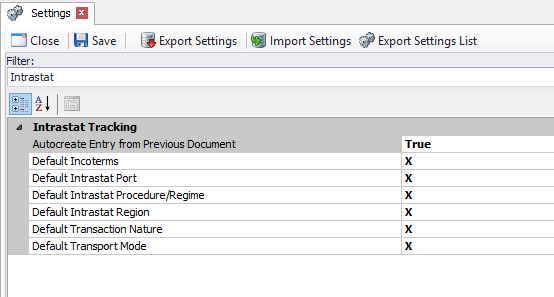
The Settings for Intrastat Entry can be found using Intrastat as the filter. These settings can be used to set default values for certain fields when the plugin starts, to facilitate quicker entry.
Autocreate Entry from Previous Document - controls whether the entry window will pop up when a new Intrastat entry is created for a document that has entries on the previous document; If True, an updated entry will be created with the values from the last document and no window will appear
To use the plugin during workflow, a Sales Document Entry Post Transfer Script must be used. An example of that script can be found at the end of this document.
Usage
An Intrastat Entry must be created for each line on a new invoice. When the Post Transfer script is used, the Intrastat Entry form will appear for each line item.
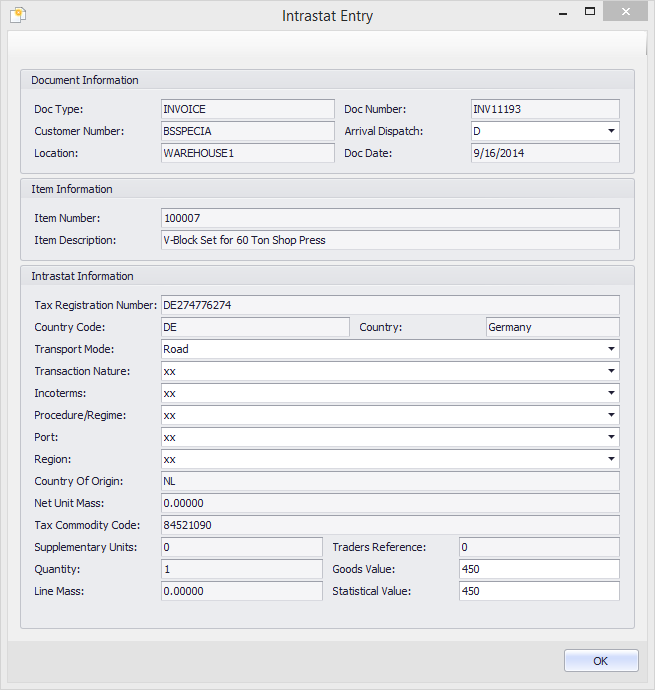
Most information will be prepopulated, either based on the Settings described before or by information from the line item. Make any adjustments needed then save the entry by clicking OK.
Post Transfer Script
foreach (var sli in sd.LineItems)
{
var args = new SalesPad.Args.SalesLineItemArgs(sd, sli); try
{
SalesPad.Module.IntrastatTracking.ppIntrastat pp = new SalesPad.Module.IntrastatTracking.ppIntrastat(args);
var f = new Form();
f.StartPosition = FormStartPosition.CenterParent; int widthOffset = f.Size.Width - f.ClientSize.Width; int heightOffset = f.Size.Height - f.ClientSize.Height;
pp.ConfigureParentForm(Framework.Controller.MainForm, f);
f.Size = new System.Drawing.Size(pp.Width + widthOffset, pp.Height + heightOffset); f.Controls.Add(pp);
f.ShowDialog();
}
catch (PluginAbortCreateException) {}
}
return String.Empty;
SalesPad Support
Comments