OVERVIEW
The Customers module allows users to search for and select a specific customer, and view the customer’s general information along with access to their sales documents, addresses, AR, and notes.
LOOKUP
The Customer Lookup screen is used to search for and select specific customers. Once a customer has been selected, the user is forwarded to the Customer Card, which contains general information about the customer, accessed through tabs at the bottom of the screen.
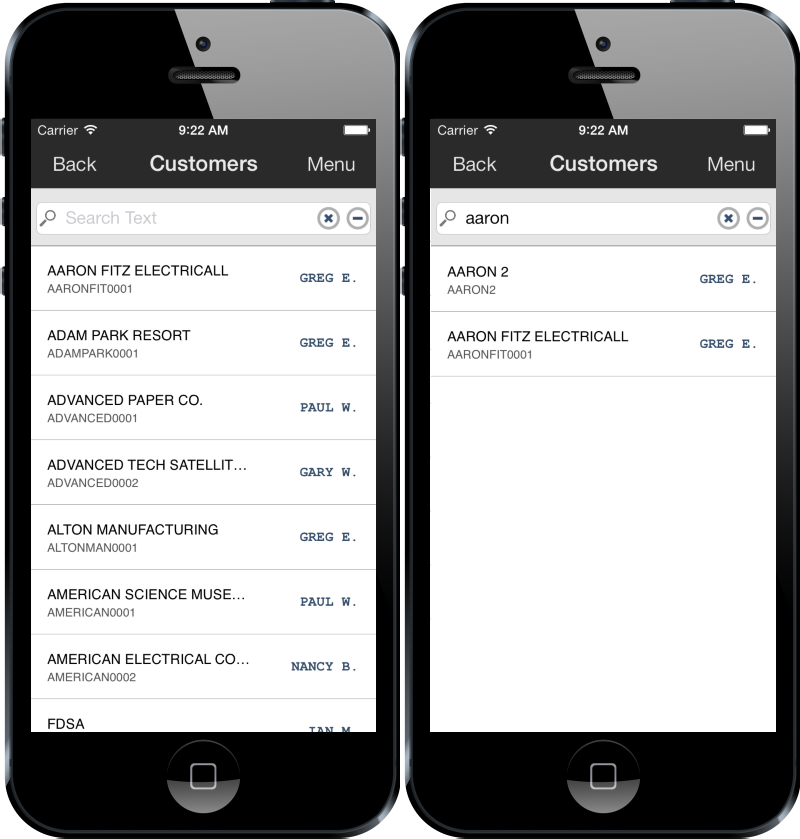
Customer Lookup
CUSTOMER CARD
The Customer Card contains general information about the customer, and consists of several tabs (defined below).
The Cust tab displays detailed information about the currently selected customer. Displayed information includes the Primary Bill To and Ship To addresses for the customer, along with various fields such as Customer Num, Customer Class, and Sales Rep ID.
MENU
The Customer Card contains a number of unique slide menu actions, detailed below.
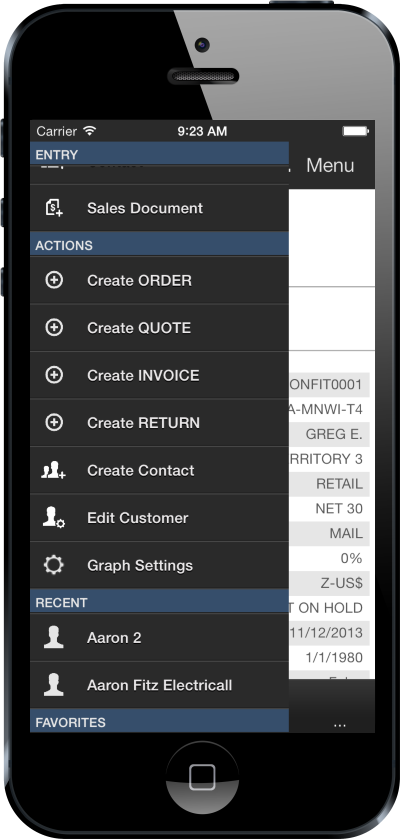
Tapping Create ORDER, Create QUOTE, Create INVOICE, or Create RETURN will create the corresponding type of Sales Document with the current customer as its customer.
Tapping Create Contact will create a new Contact for this Customer.
Tapping Edit Customer will make the Customer Card editable, which is described in more detail below.
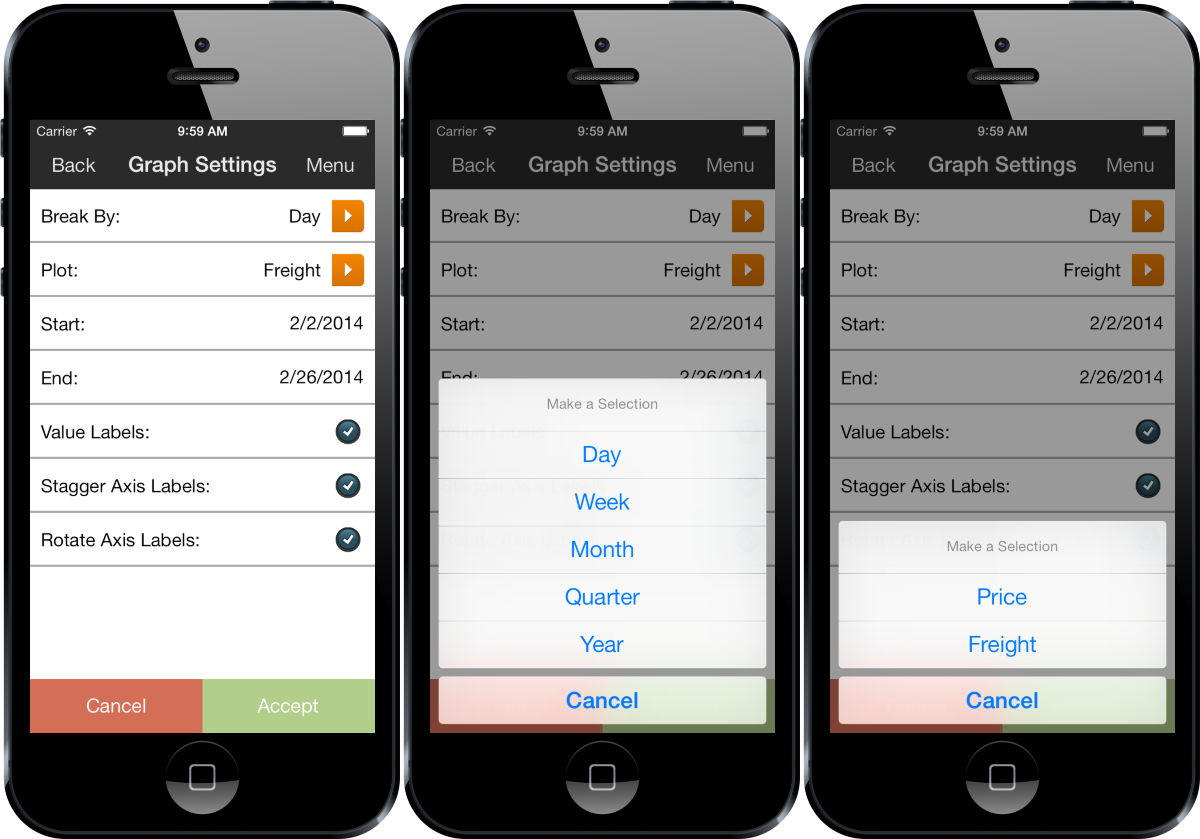
Tapping Graph Settings will open the Graph Settings screen, allowing customization for the Graph tab. This is described in more detail below.
DOCS
The Docs tab consists of a lookup list of the customer’s sales documents. Depending on licensing, tapping a document in the list will take you to the Document Card for the selected document.

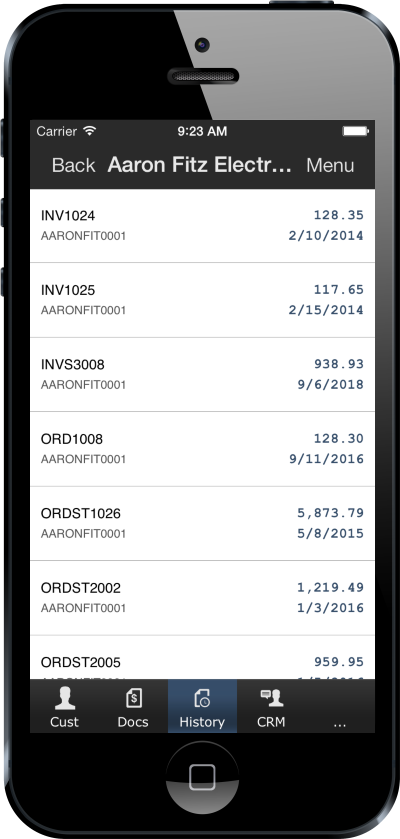
HISTORICAL
The History tab will show this customer’s historical sales documents. This tab functions the same as the docs tab.
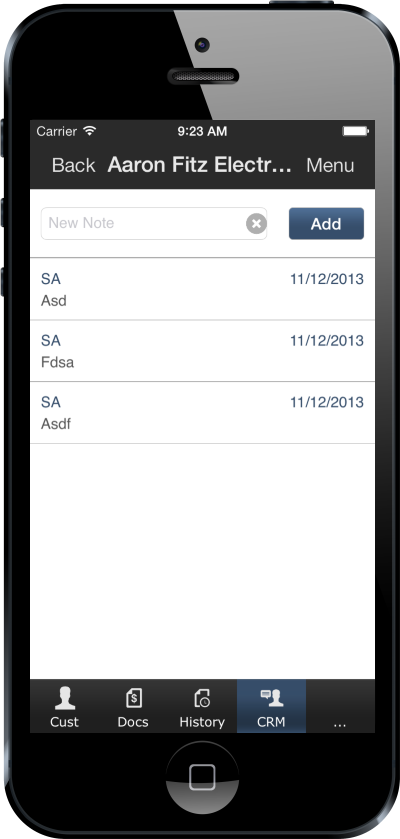
CRM
The CRM tab displays any CRM notes associated with the customer, and allows the user to add a new CRM note.
ADDRS
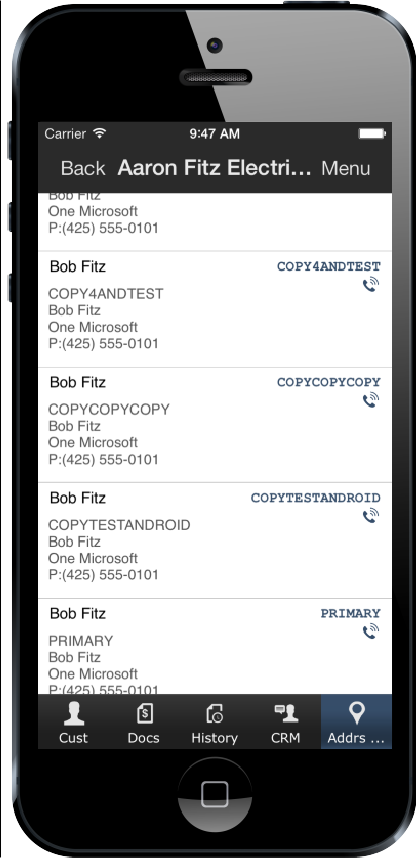
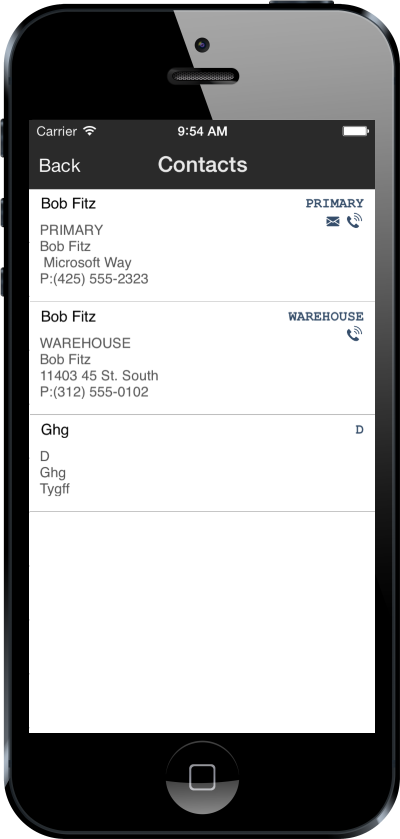
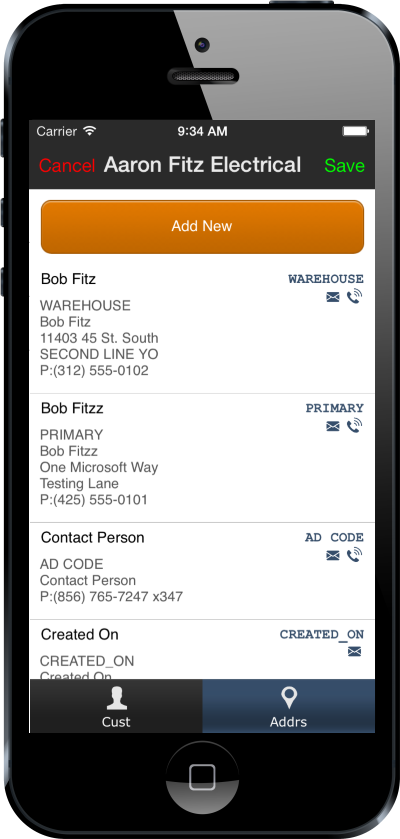
The Addrs tab displays the addresses associated with the customer’s account.
NOTES
The Notes tab can be used to both view and add notes to the customer.
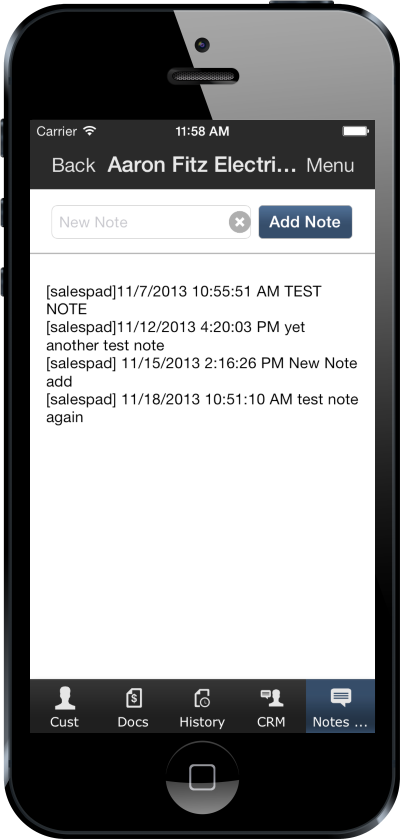
Tapping the note field will display the keyboard for note entry. Entering the desired data and tapping Add Note will add the note to the database.
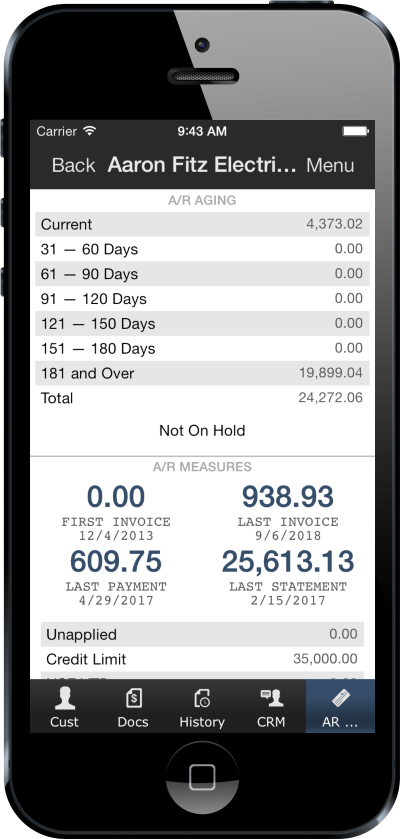
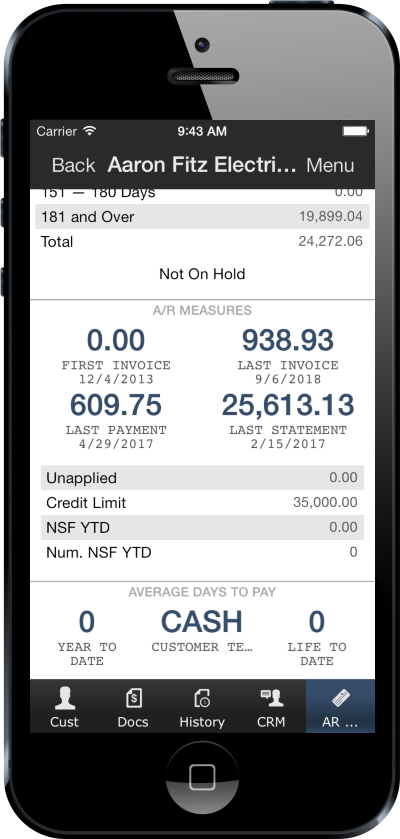
AR
The AR tab consists of two screens. The Customer Aging screen displays initially and lists the balance held by the customer and different aging periods (current, 31-60 days, 61-90 days, etc.)
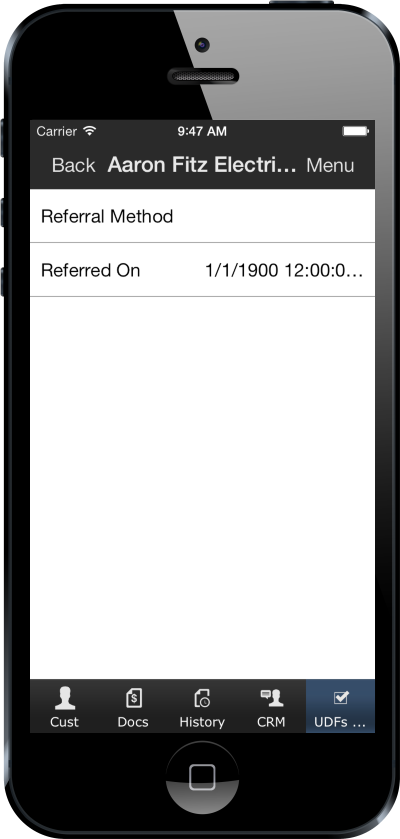
UDFS
For users of the SalesPad desktop application, if there are any user defined fields declared for customers, they can be viewed on this tab.
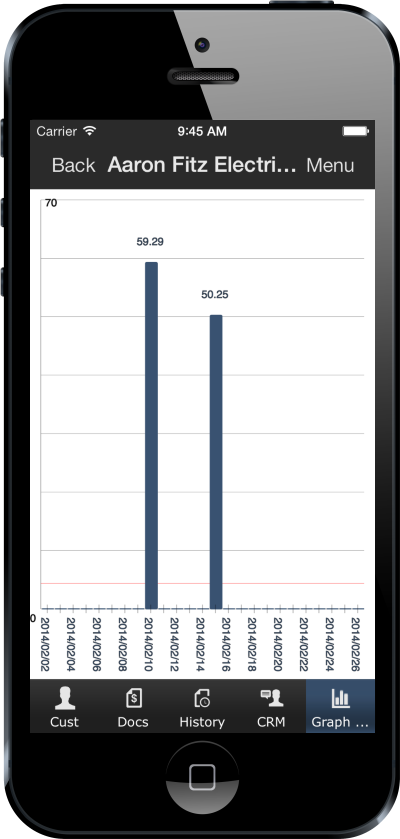
GRAPH
The Graph tab allows the user to view a graph of Freights or Prices for the last Day, Week, Month, Quarter, or Year. The graph is customizable from the Graph Settings row of the Customer Slide Menu.
GRAPH SETTINGS
Tapping Graph Settings from the Slide Menu allows the user to customize the Graph tab. When tapped, the Break By field will open a new dialog box prompting the user for the time interval desired on the X-Axis of the graph. When tapped, the Plot field will open a new dialog box prompting the user for the type of Y-Axis scale desired, either Price or Freight count.
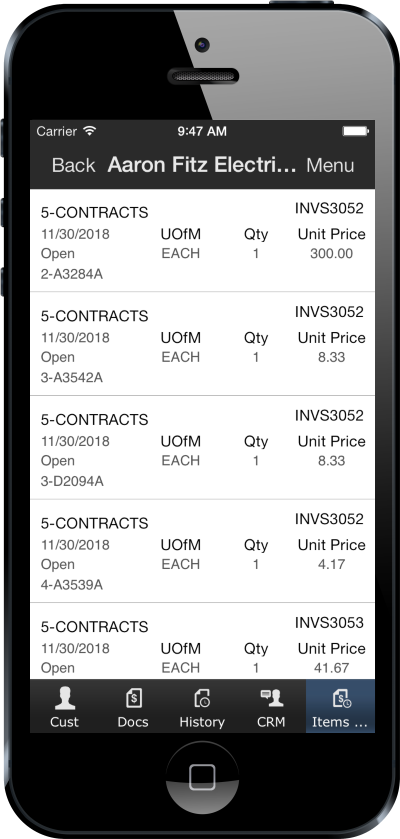
ITEMS
The Items tab displays items that have been sold to this customer in the past. Each row represents a Sales Line Item on a Document associated with this customer. The results shown on this screen can be filtered with the Doc Types For Items Tab and Historical Doc Types For Items Tab security settings, located under Access Security > Customers. Only documents that fall into the correct Doc Type/Source will be shown.
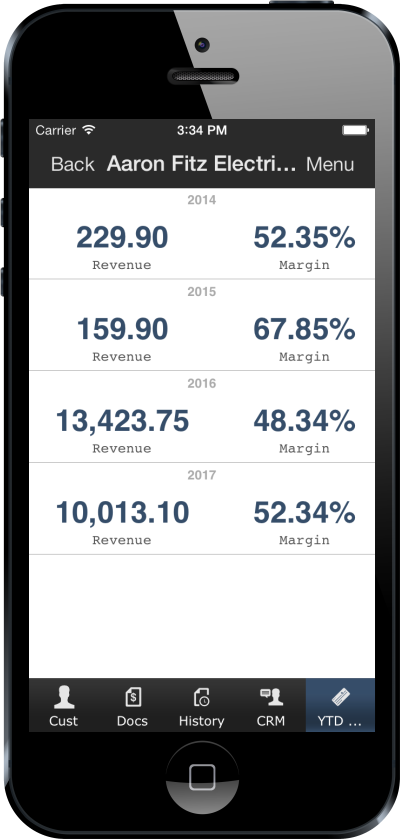
YTD
The YTD tab displays sales summary information of the sales to this customer on a year-by-year basis. The fields displayed are the total revenue and gross margin from this customer in each year.
Note: This tab depends on the Datawarehouse tables built by the SalesPad Desktop application. These tables can be populated with the sppUpdateDW Stored Procedure. More details can be found in the SalesPad Sales Analysis documentation.
Customer Entry
OVERVIEW
Users can enter new Customers by selecting the Customer item from the Entry category in the Slide Menu. This item can be secured in the server under Access Security > Customer > Can Create Customers.
CUSTOMER FIELDS
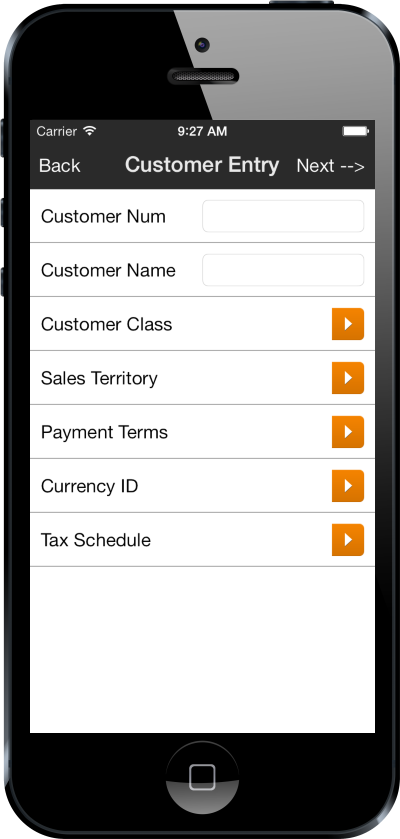
The first screen that is shown upon selecting Customer Entry is a Customer Edit List. The Customer Name field is required. If the Customer Num field is left empty, one will be generated. The fields that appear in this list can be configured via the Access Security > Customer > Available Customer Columns for Edit.
CONTACT ENTRY
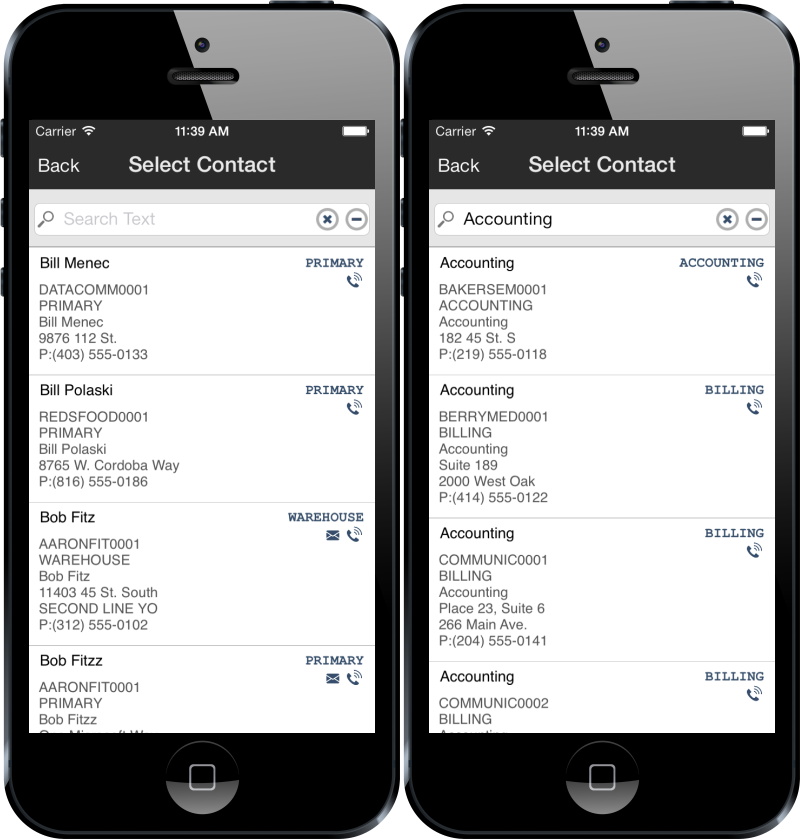
The next screen is a prompt asking the user how they would like to enter a contact for this customer. Selecting Skip will create a blank contact with the Addr Code PRIMARY. This can be adjusted later. Selecting Copy Existing will open a Contact Search screen. Selecting Enter New will present a Contact Edit List. No matter which option is chosen, the selected contact will be assigned as the Customer's Default Bill To and Ship To address.

CONTACT SEARCH
Selecting the Copy Existing option from the Contact Select page will open a Contact Search. Selecting one of the entries on this screen will create a copy of that contact with the address code PRIMARY and set it as the primary bill to and ship to address for the new customer.
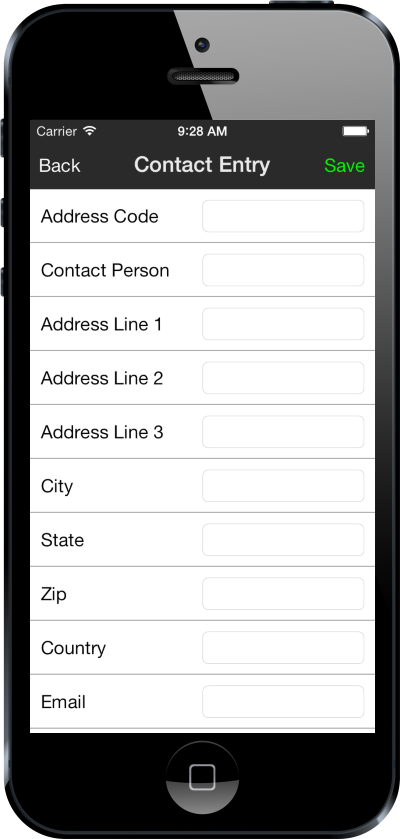
CONTACT ENTRY
Selecting Add New from the Contact Select page will open a Contact Edit List. The Addr Code field is required. The fields which appear in this list can be configured via the Available Customer Contact Columns For Edit option under Access Security > Contacts.
Customer Editing
CUST TAB
To edit a customer, select the Edit Customer option from the slide menu of a Customer card. The Customer card appears similar to the read-only card, but has orange gear icons to indicate sections that can be edited.
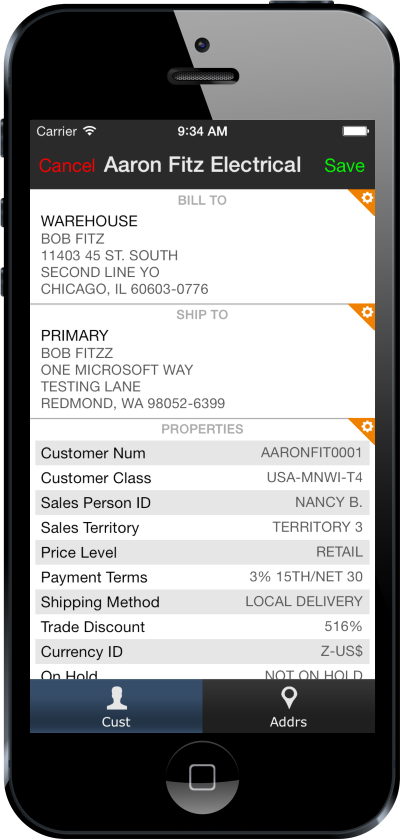
Tapping anywhere in the Bill To or Ship To blocks will allow the user to change the billing address or shipping address of the Customer to one of the customer's contacts, respectively.
Tapping anywhere in the Properties block will open the properties editor, where users can change the customer's properties.

ADDRS TAB
Tapping the Addrs tab in Edit Mode allows the user to view all contact addresses associated with the customer and allows for the creation of a new contact.
SalesPad Support
Comments