Overview
SalesPad allows users to print sales documents to a Microsoft Word template using the Sales/Word Document report in the Print dialog.
Security
Sales/Word Document must be enabled in the Security Editor.
Print Report must be enabled in the Security Editor.
- If the sub-settings Invoice Reports, Order Reports, Quote Reports, or Return Reports are not blank (enabling all), the new report, after it is created, must be added to the list of reports that can be used under the applicable sub-setting(s).
- Admin Mode must be set to True to allow configuring the report.
- Show Customized Reports Only must be set to False while configuring the report in SalesPad. Once the report is configured, this sub-setting can be set to True if desired.
Setup
CREATE THE TEMPLATE IN WORD
First create a document template in Microsoft Word, much like you would create a template for a Printed Report. This template can include the company logo and standard wording that will apply to all printed documents using this template. It must contain merge fields that will pull information specific to each sales document onto the report.
Merge fields should be placed into the Word document where the associated information from the sales document should display. The following list shows example merge fields that may be used:
|
<Address_Line_2/> <User_Def_List3/> <Sales_Person_ID/> <Misc_Charge/> <Address_Validated/> <Currency_Dec/> <Address/> <Customer_Num/> <AddressShort/> <BatchHours/> <Tax_Schedule/> <Contact_Person/> <User_Def_3/> <User_Def_4/> <Customer_PO_Num/> <Comment_ID/> <City/> <Message/> <State/> <Tax_Registration_Num/> <Email_Billing/> <ReadOnly/> <Ship_To_Name/> <UPS_Zone/> <Sales_Doc_Num/> <Tax_Exempt_1/> <Phone_1/> <On_Account/> <User_Def_Date2/> <Total/> <Deposits/> <Packingslip_Num/> <USERDEF1/> <Warehouse_Code/> <USERDEF2/> |
|
<Fax/> <USRDAT01/> <Ship_To_Address_Code/> <Country/> <Created_On/> <USRTAB01/> <USRDAT02/> <Phone_2/> <USRTAB03/> <USRDEF04/> <Quote_Num/> <User_Def_5/> <Invoice_Num/> <Zip/> <Auto_Calc_Freight/> <Alert/> <Notes/> <Forwardable/> <Quote_Expiration_Date/> <Req_Ship_Date/> <Tax_Exempt_2/> <Created_By/> <Address_Line_1/> <Sales_Doc_Type/> <Tax/> <Fulfillment_Date/> <USRTAB09/> <Status/> <Blind_Ship/> <User_Def_List1/> <User_Def_List2/> <Pickticket_Num/> <Address_Line_3/> <Subtotal/> <Freight/> |
|
<Email/> <Actual_Ship_Date/> <Country_Code/> <Payment_Terms/> <Currency_ID/> <User_Def_1/> <Comments/> <User_Def_2/> <Shipping_Method/> <EnteredBatch/> <Price_Level/> <Source/> <Bill_To_Address_Code/> <Prev_Sales_Doc_Num/> <Trade_Discount_Pct/> <Sales_Batch/> <Doc_Date/> <Discount/> <USRDEF05/> <USRDEF03/> <Sales_Territory/> <Customer_Name/> <Phone_3/> <User_Def_Date1/> <Changed_Trade_Discount/> <Master_Num/> <Sales_Doc_ID/> <Prev_Sales_Doc_Type/> <Ship_Complete/> <User_Name/> <Password/> <Sales_Person_ID/> <Location/> <Display_Name/> <Email/> |
For help with merge fields, or identifying custom merge fields such as user defined fields, please contact SalesPad Support.
CONFIGURE THE REPORT IN SALESPAD
To configure the report,
- Open a sales document and click Print
- From the Print dialog, select the Sales/Word Document report
- Click Properties... (Admin Mode must be set to True under Print Report in the Security Editor). The "Report Properties" screen will appear:
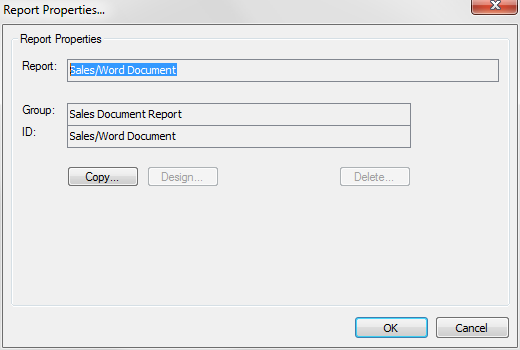
- Click Copy...
- Rename the report on the popup screen and click OK
- You will return to the "Report Properties" screen. The name of the new report will appear in the Report field. Click Design…
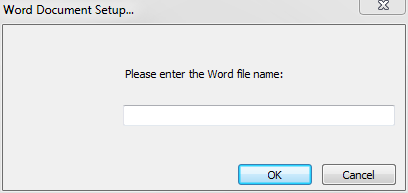
- Enter the source path of the Word file (example: C:\Windows\Desktop\Reports\docreport1.docx) on the popup screen and click OK:
- Click OK on the Report Properties screen
- If a confirmation screen appears, click Yes to save your changes. The report will now appear in the Print dialog box and will pick up the associated documents values
- If the Print Report sub-settings in the Security Editor are not set to enable all reports, enable the new report as appropriate (see Security section)
Use
To print a sales document to Word,
- Open the sales document
- Click Print
- Select the name of the report configured for Sales/Word Document and click Print
SalesPad Support
Comments