Overview
In-Transit Transfers (also known as Service Transfers) are another method of transferring inventory from one warehouse to another, potentially with stops in between. This document details the setup and use of the In-Transit Transfers functionality of SalesPad Desktop. Any relevant settings and securities will be described at the end of the document.
Note: SalesPad can only generate In-Transit Transfers, it cannot ship or receive them. Shipping and receiving need to be completed within Dynamics GP.
Usage
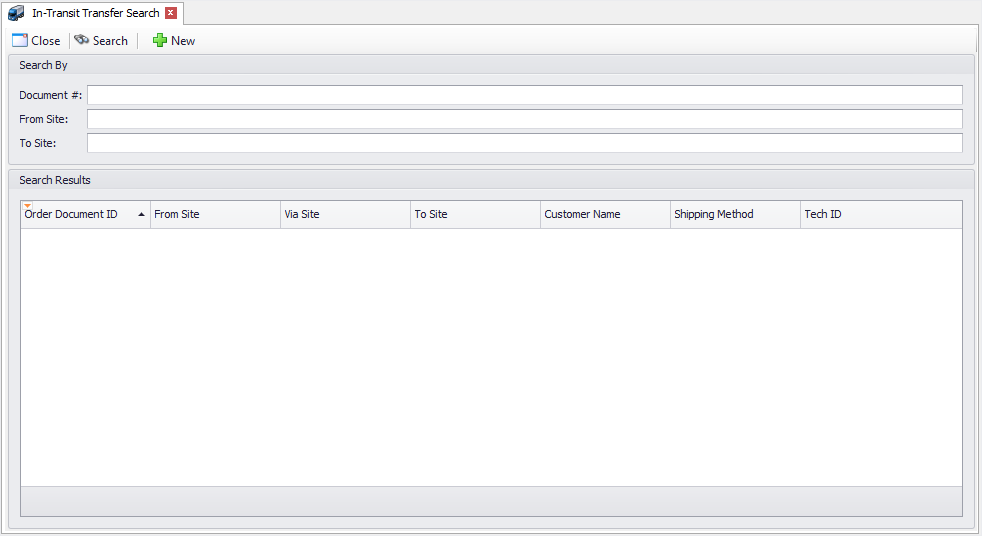
The In-Transit Transfer Search can be found in the Inventory module. This will be needed in order to view, modify or create In-Transit Transfers. The search screen is similar to other document search screens in SalesPad Desktop, and it supports features like Auto-Filter Row and Column Chooser. The layout can be changed with Customize Layout. These changes will be preserved as a custom layout.
Click the New button to create a new transfer. You will see the following screen.
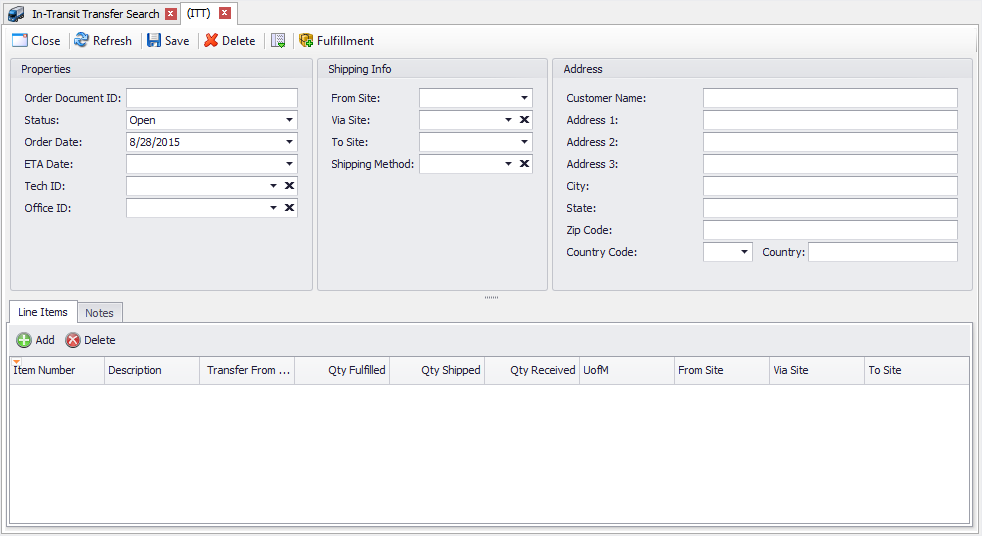
The From Site and To Site dropdown fields are required, but everything else in the header is optional. It is recommended that these be filled in before adding items as the selections will then be copied to the line automatically. The Order Document ID can be entered manually, but if left blank will use the next value from Dynamics GP.
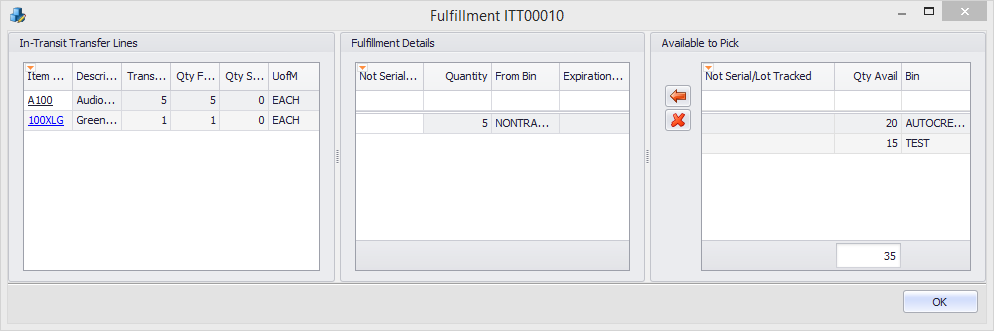
After supplying all information and saving, your screen will look like the following screen. You’re now ready to fulfill the items using the Fulfillment plugin. You might have to use the Action menu dropdown to locate the button. By Configuring Actions, you can place the button on the toolbar like below.

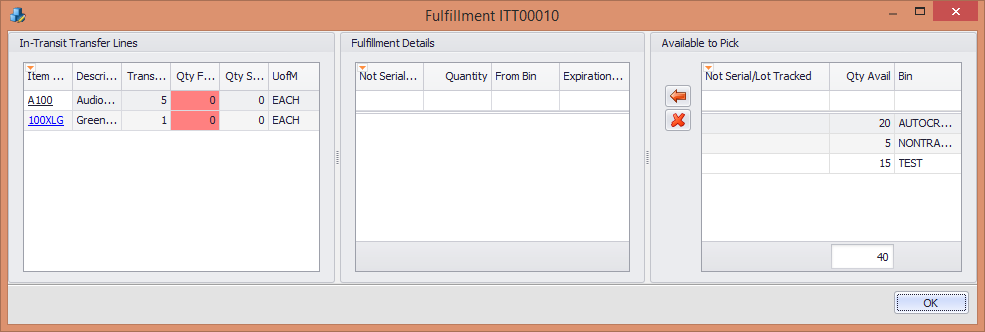
First, click the item to fulfill in the In-Transit Transfer Lines section. Then, click the red arrow to apply the fulfillment.
Note: All fulfillment changes take place immediately, NOT after saving.
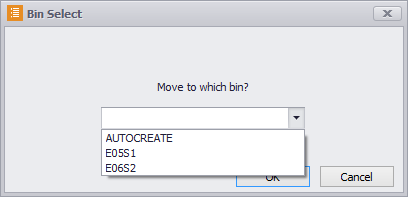
When you select a source for the fulfillment, you will be prompted to select a bin to move the items to in the site listed as the To Site on the line. This information must be supplied in order to fulfill. The message box will have a list of existing bins from the new site available in a dropdown menu.
Once you have selected a fulfillment, the grid showing the line information will update with the new fulfilled quantity. Once the quantity fulfilled matches the transfer quantity, the highlighting will disappear indicating that the process is complete.
Security
In-Transit Transfer Audit – Allows users to see the Audit tab in the In-Transit Transfer window
In-Transit Transfer Entry* - Allows users to enter new In-Transit Transfers
In-Transit Transfer Fulfillment – Allows users to fulfill In-Transit Transfers
In-Transit Transfer Generation* - Allows users to generate an In-Transit Transfer from a Sales Document
In-Transit Transfer Line Items* - Allows users to see and edit Line Items on the In-Transit Transfer
In-Transit Transfer Links* - Allows users to see the Links tab on an In-Transit Transfer
In-Transit Transfer Notes – Allows users to see the Notes tab on an In-Transit Transfer
In-Transit Transfer Properties* - Allows users to see the properties for an In-Transit Transfer
In-Transit Transfer Search – Allows users to use the In-Transit Transfer Search module
In-Transit Transfer User Fields* - Allows users to see the User Fields tab on the In-Transit Transfer
Note: Securities with an asterisk (such as In-Transit Transfer Entry) have sub-securities that are listed in the middle section of the Security field. Sub-security descriptions appear in the bottom section of the field. Review and customize these as desired.
SalesPad Support
Comments